Enviar mensajes de WhatsApp únicos
Para enviar un mensaje de WhatsApp único en Pushwoosh, navegue a la sección Campañas, seleccione Mensajes únicos y haga clic en Enviar mensaje > WhatsApp.
Seleccionar contenido de WhatsApp
Anchor link toEn el paso de Contenido, elija una plantilla de WhatsApp aprobada del menú desplegable, o seleccione Mensaje personalizado en la parte superior de la lista para escribir su propio texto. La vista previa a la derecha muestra el mensaje tal como lo ve el destinatario.

Para cambiar el orden de las plantillas en el menú desplegable, haga clic en el botón de ordenación situado encima. El menú desplegable se ordena por Nombre A→Z hasta que elija otro orden, y Pushwoosh recuerda el orden que elija y lo usa en todos los menús desplegables de plantillas de WhatsApp, tanto en los mensajes únicos como en los journeys.
Escribir un mensaje personalizado
Anchor link toUn mensaje personalizado es un texto de formato libre que usted escribe en la propia campaña, sin plantilla. WhatsApp entrega texto de formato libre solo dentro de la ventana de atención al cliente de 24 horas abierta por el último mensaje entrante del usuario, por lo que un mensaje personalizado solo llega a los contactos cuya ventana sigue abierta.
Para escribir un mensaje personalizado:
- En el menú desplegable de plantillas, seleccione Mensaje personalizado.
- Introduzca el texto en Texto del mensaje. Puede personalizarlo con datos del usuario y añadir emojis. El texto puede tener hasta 4096 caracteres.
- Opcionalmente, añada un adjunto en URL del adjunto. Introduzca un enlace https público o haga clic en el icono de adjunto para elegir una imagen de su Almacén de medios.
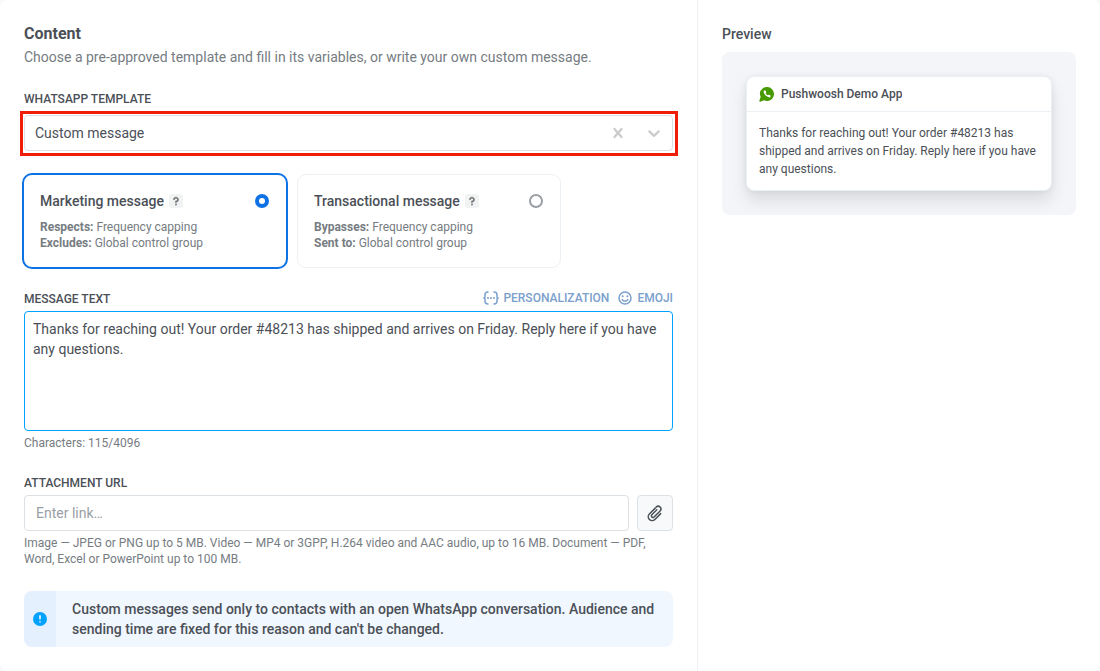
Con un adjunto, el texto se envía como su pie y puede tener hasta 1024 caracteres. El enlace debe terminar con una extensión compatible:
- Imagen: JPEG o PNG, hasta 5 MB. El Almacén de medios solo ofrece imágenes y rechaza los archivos de más de 5 MB.
- Vídeo: MP4 o 3GPP, hasta 16 MB.
- Documento: PDF, Word, Excel, PowerPoint o TXT, hasta 100 MB.
WhatsApp descarga el archivo desde el propio enlace. Si el enlace no es de acceso público o el archivo no cumple estos requisitos, el mensaje no se entrega.
Cuando selecciona Mensaje personalizado, la audiencia y la hora de envío son fijas. La campaña se envía a la audiencia WhatsApp: 24h window open y se envía de inmediato. Consulte Seleccionar la audiencia y Programar mensaje de WhatsApp.
Configurar variables de plantilla
Anchor link toSi la plantilla seleccionada contiene marcadores de posición en el encabezado, el cuerpo o la URL de un botón, configure un valor para cada uno antes de poder continuar.
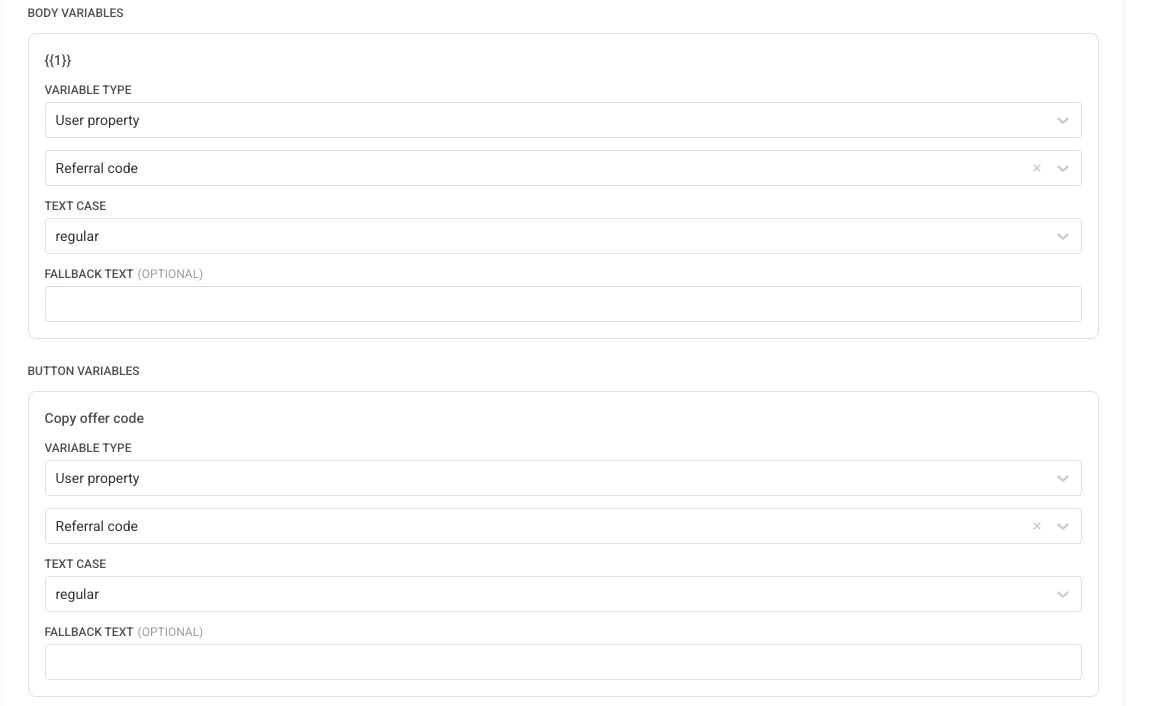
Para cada marcador de posición, elija el Tipo de variable:
- Etiqueta: valor de una etiqueta de usuario (p. ej.,
first_name). Seleccione la etiqueta, un modificador de mayúsculas/minúsculas y un texto de respaldo opcional que se usará cuando la etiqueta esté vacía. Los modificadores disponibles dependen del tipo de etiqueta. Las etiquetas de cadena de texto ofrecen CapitalizeFirst, CapitalizeAllFirst, UPPERCASE, lowercase y regular. Las etiquetas de tipo Entero, Precio y Fecha ofrecen formatos de moneda y fecha en su lugar. Consulte Cómo personalizar un push para ver la lista completa de modificadores por tipo de etiqueta. - Texto personalizado: un valor fijo introducido manualmente.
Seleccionar tipo de mensaje
Anchor link toElija cómo se tratará este mensaje de WhatsApp para las reglas de suscripción y entrega:
- Mensaje de marketing: Respeta el límite de frecuencia. No se envía a los usuarios del grupo de control.
- Mensaje transaccional: Se envía a todos los usuarios independientemente de su estado de suscripción. Omite el límite de frecuencia. Se entrega a los usuarios del grupo de control.
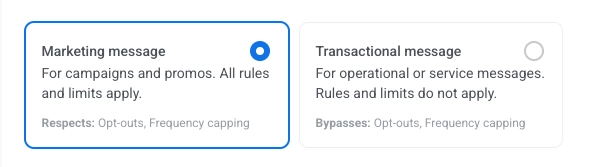
Aprenda cómo el tipo de mensaje afecta la entrega.
Seleccionar la audiencia para su campaña de WhatsApp
Anchor link toEn el paso de Audiencia, defina quién recibirá su mensaje de WhatsApp.
Para un mensaje personalizado, este paso está bloqueado. La audiencia es WhatsApp: 24h window open, es decir, todos los contactos cuya ventana de atención al cliente de 24 horas está abierta en este momento, y el paso muestra cuántos destinatarios tiene. Si nadie tiene una ventana abierta, no podrá enviar el mensaje. El recuento se vuelve a comprobar al hacer clic en Enviar ahora, porque las ventanas se siguen cerrando mientras el formulario está abierto.
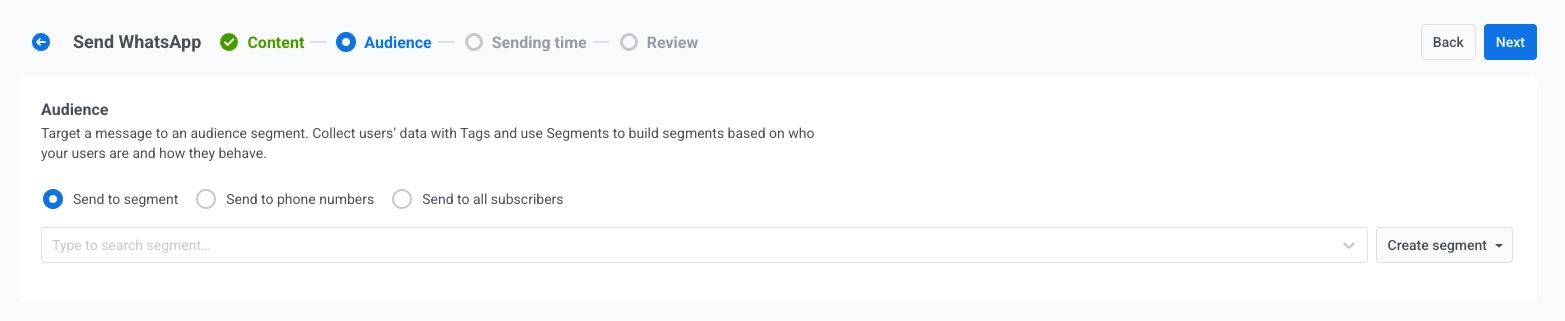
Enviar a segmento
Anchor link toDiríjase a un segmento predefinido de su audiencia basado en etiquetas, eventos o comportamiento. Seleccione un segmento del menú desplegable, o haga clic en Crear segmento para construir o importar uno.
Enviar a una lista de números de teléfono
Anchor link toEnvíe el mensaje a una lista específica de números de teléfono introducidos directamente en el formulario. Los números de teléfono que aún no están en su proyecto se registran automáticamente como dispositivos de WhatsApp y se incluyen en el envío.
Enviar a todos los suscriptores
Anchor link toDiríjase a toda su audiencia accesible por WhatsApp.
Una vez que haya configurado su audiencia, haga clic en Siguiente para pasar al paso de programación.
Programar mensaje de WhatsApp
Anchor link toElija cuándo enviar su mensaje de WhatsApp. Un mensaje personalizado siempre se envía de inmediato, por lo que las opciones de programación están bloqueadas para él.
Enviar inmediatamente
Anchor link toEnvíe el mensaje tan pronto como se complete la configuración de la campaña. Esto es ideal para mensajes urgentes o sensibles al tiempo.
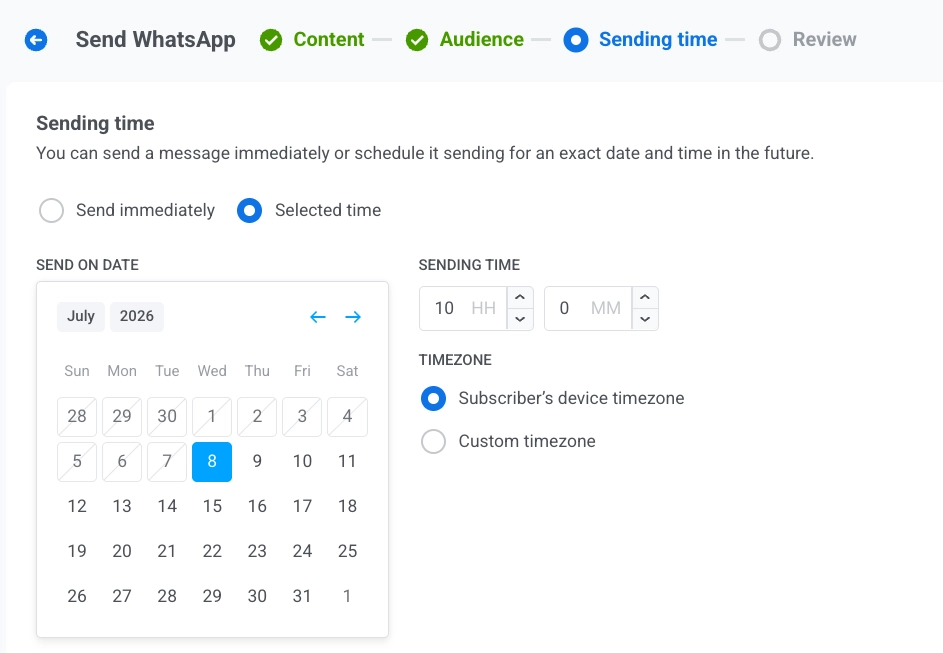
Hora seleccionada
Anchor link toPrograme su mensaje de WhatsApp para una fecha y hora específicas.
- Establecer la fecha y la hora: Utilice el calendario para elegir la fecha, luego especifique la hora en horas y minutos (formato de 24 horas).
- Seleccionar la zona horaria:
- Zona horaria del dispositivo del suscriptor: El mensaje se envía a la hora local especificada para cada destinatario.
- Zona horaria personalizada: El mensaje se envía a la misma hora para todos los destinatarios, útil para dirigirse a una región en particular.
Configurar los ajustes de entrega de mensajes
Anchor link toEstablecer límite de frecuencia
Anchor link toUtilice el Límite de frecuencia para limitar la frecuencia con la que los usuarios reciben mensajes de WhatsApp, evitando el exceso de mensajes y reduciendo las bajas. Elija una de las siguientes opciones:
-
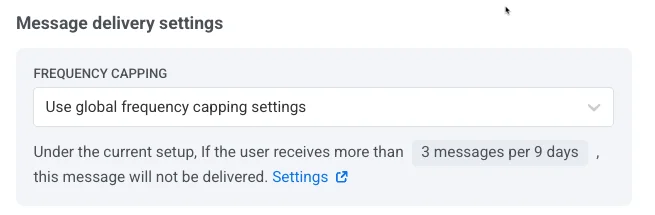
Usar la configuración global de límite de frecuencia
Aplique los límites de todo el proyecto configurados en sus ajustes globales de límite de frecuencia. Por ejemplo, si el límite global es de 3 mensajes en 9 días, los mensajes adicionales que excedan este límite se omitirán.
-
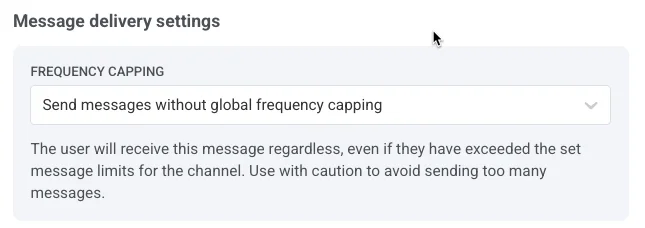
Enviar mensajes sin límite de frecuencia global
El usuario recibe este mensaje incluso si ha excedido los límites de mensajes del canal. Úselo con precaución para evitar el exceso de mensajes.
-
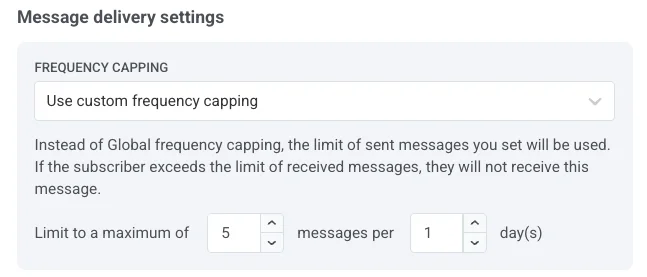
Usar límite de frecuencia personalizado
Establezca un límite de mensajes personalizado para este mensaje. Si el usuario excede este límite personalizado, el mensaje se omite. En Modo de conteo, elija cómo se cuentan los mensajes enviados:
- Ventana móvil: cuenta los mensajes enviados en las últimas N×24 horas antes de cada envío, donde N es el número de días del límite. Por ejemplo, con un límite de 3 mensajes por 2 días, un mensaje enviado el lunes a las 9 AM deja de contar el miércoles a las 9 AM.
- Día de calendario: cuenta los mensajes enviados hoy y en los N-1 días de calendario anteriores, a partir de la medianoche. Con el mismo límite de 3 mensajes por 2 días, el miércoles cuenta cada mensaje enviado desde la medianoche del martes. Justo después de la medianoche, la ventana pasa a miércoles y jueves. Seleccione una Zona horaria del límite para definir cuándo cae la medianoche. Si no selecciona ninguna, los días de calendario se cuentan en UTC.
Establecer límites de velocidad de envío
Anchor link toEl ajuste de Velocidad de envío controla la rapidez con la que se entregan los mensajes a su audiencia. Ajustar la velocidad de envío le ayuda a gestionar la velocidad de entrega, evitar la sobrecarga del backend y mejorar la capacidad de entrega en general.
Elija una de las siguientes opciones:
-
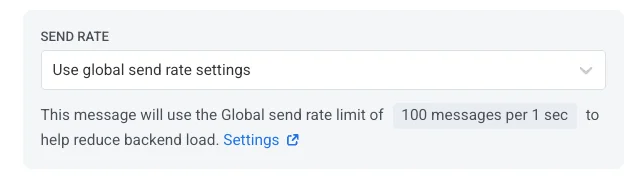
Usar la configuración global de velocidad de envío
Aplica los límites de velocidad de envío configurados en los ajustes de entrega de mensajes de su proyecto. Si no se establecen límites, todos los mensajes se envían inmediatamente. Aprenda más sobre los límites globales de velocidad de envío
-
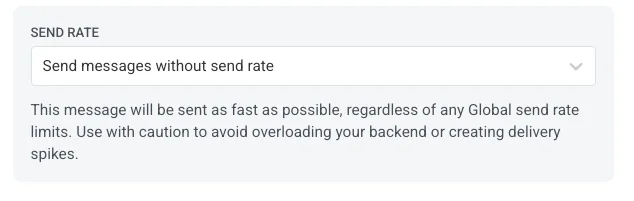
Enviar mensajes sin velocidad de envío global
Envía mensajes lo más rápido posible, ignorando cualquier límite global de velocidad de envío. Úselo con precaución para evitar picos de entrega.
-
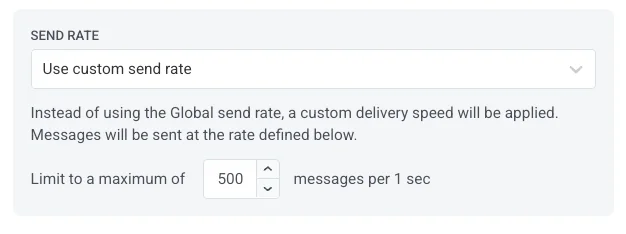
Usar velocidad de envío personalizada
Anula la velocidad de envío global solo para este mensaje. Especifique el número de mensajes enviados por minuto para un control total sobre la velocidad de entrega.
Una vez que haya configurado las opciones, haga clic en Siguiente para pasar al paso de confirmación.
Revisar y enviar
Anchor link toEn Revisar, compruebe la vista previa y los resúmenes de contenido, audiencia y programación. Actualice todo lo que aún necesite cambiar antes de enviar.
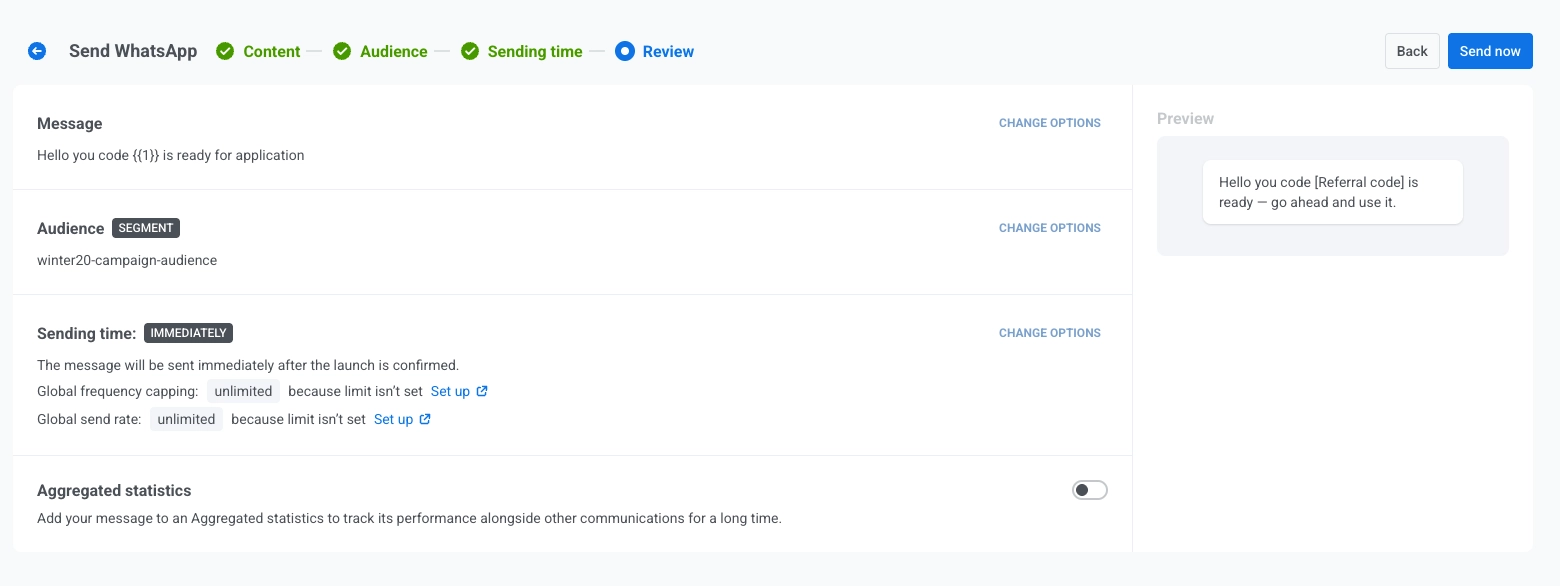
Haga clic en Programar o Enviar ahora para abrir un diálogo Send this WhatsApp message? con un campo Campaign name: una etiqueta de texto libre para este único envío.
Campaign name se precarga con el texto propio de la plantilla seleccionada, o con su texto en el caso de un mensaje personalizado (el texto de varias líneas se precarga como una sola línea). Bórrelo y Message History vuelve a nombrar la fila según la plantilla, igual que antes de que existiera este campo. Manténgalo en 255 caracteres o menos. Escribir más allá del límite trunca el texto sin aviso.
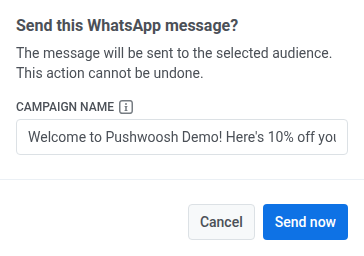
Una vez establecido, el nombre de campaña se convierte en el título en negrita de este mensaje en Message History y su exportación CSV, en lugar del nombre de la plantilla. En la lista de Mensajes únicos, la fila de un mensaje personalizado se titula Custom, la etiqueta corta de la lista para este tipo de mensaje, con su texto debajo. Confirme de nuevo en el diálogo para finalizar, dependiendo de las opciones de programación seleccionadas.
Cancelar o editar un mensaje de WhatsApp programado
Anchor link toPara los mensajes de WhatsApp que están programados y aún no se han enviado (estado PENDIENTE), puede cambiarlos o cancelarlos. Abra la lista de mensajes en Campañas → Mensajes únicos, luego abra el menú de acciones (⋮) para el mensaje:
- Editar mensaje: abre el formulario de WhatsApp con los datos del mensaje cargados. Puede actualizar el contenido, la audiencia, la programación y los ajustes de entrega. En Review, el botón se etiqueta Aplicar cambios en lugar de Programar o Enviar ahora. Haga clic en él y luego confirme de nuevo en el diálogo Send this WhatsApp message? para guardar sus cambios, incluida cualquier edición del nombre de campaña.
- Cambiar nombre: abre un pequeño diálogo para establecer o cambiar el nombre de campaña, sin volver a abrir el formulario de edición completo. Mismo límite de 255 caracteres que el campo Campaign name que establece al enviar. Borre el campo y guarde para eliminar el nombre. La fila vuelve a su título predeterminado anterior.
- Eliminar mensaje: cancela la entrega programada y cambia el estado a Cancelado.
Escenario de ejemplo
Anchor link toImagine que dirige una tienda de comercio electrónico y quiere enviar una alerta de venta relámpago por WhatsApp a los clientes que compraron en los últimos 90 días, programada para la mañana en que comienza la venta.
1. Navegue a Campañas, seleccione Mensajes únicos, haga clic en Enviar mensaje y elija WhatsApp.
2. En el paso de Contenido, seleccione la plantilla Alerta de venta relámpago y rellene sus marcadores de posición. Por ejemplo, asigne la variable {{1}} del cuerpo a la etiqueta discount con un respaldo de 50%.
Mantenga el tipo de mensaje como Marketing para que respete el límite de frecuencia.
3. En el paso de Audiencia, elija Enviar a segmento y seleccione Compradores recientes (90 días).
4. En el paso de Programación, elija Hora seleccionada, establezca la fecha y la hora de inicio de la venta y seleccione Zona horaria del dispositivo del suscriptor para que cada cliente lo reciba a la misma hora local.
5. En Revisar, compruebe la vista previa y los resúmenes de audiencia y programación, luego haga clic en Programar para finalizar la campaña.