Importar contactos
Registra contactos para correo electrónico, SMS, WhatsApp y Viber desde un único archivo CSV. Una sola columna de número de teléfono puede registrar un contacto tanto para SMS como para WhatsApp, así que no necesitas un archivo separado por canal.
Prepara tu archivo CSV
Anchor link toFormato del archivo
Anchor link to- La primera fila debe contener los encabezados de las columnas que describen los datos en cada columna.
- Cada fila subsiguiente representa un único contacto, con valores correspondientes a los encabezados.
- Los valores deben estar separados por comas.
- Guarda el archivo en codificación UTF-8 para asegurar la correcta visualización de los caracteres.
- El tamaño máximo del archivo es de 100 MB.
Columnas de contacto
Anchor link toIncluye al menos una de las siguientes columnas, dependiendo de los canales en los que quieras registrar contactos:
- Email: la dirección de correo electrónico del destinatario.
- Número de teléfono (para SMS, WhatsApp y Viber): en formato internacional, comenzando con
+y el código del país, por ejemplo +120XXXXX234. Introduce el número sin formato, sin el prefijowhatsapp:oviber:. Pushwoosh añade el prefijo cuando asignas la columna a ese canal.
Si un número de teléfono no está en un formato internacional válido, se omite para ese canal. El resto de la fila se importa igualmente.
Columnas opcionales
Anchor link to- User ID: un identificador único para el usuario (p. ej., nombre o correo electrónico). No es obligatorio, pero se recomienda para que los canales del contacto compartan un perfil de usuario en lugar de varios.
- Cualquier otra columna se puede asignar a una etiqueta del sistema para segmentación y personalización, por ejemplo Ubicación, Cumpleaños, Idioma o Tipo de cliente.
Archivo CSV de ejemplo
Anchor link toEmail,Mobile,User ID,Name,Locationjohn.smith@email.com,+120XXXXX234,john.smith@email.com,John Smith,New Yorkjane.smith@email.com,+131XXXXX890,jane.smith@email.com,Jane Smith,Los AngelesSube y asigna el archivo CSV
Anchor link to-
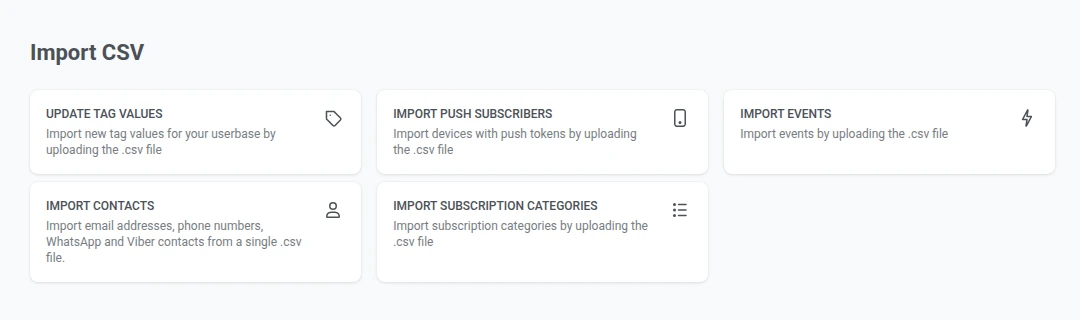
Ve a Audience → Import CSV → Import Contacts.
-
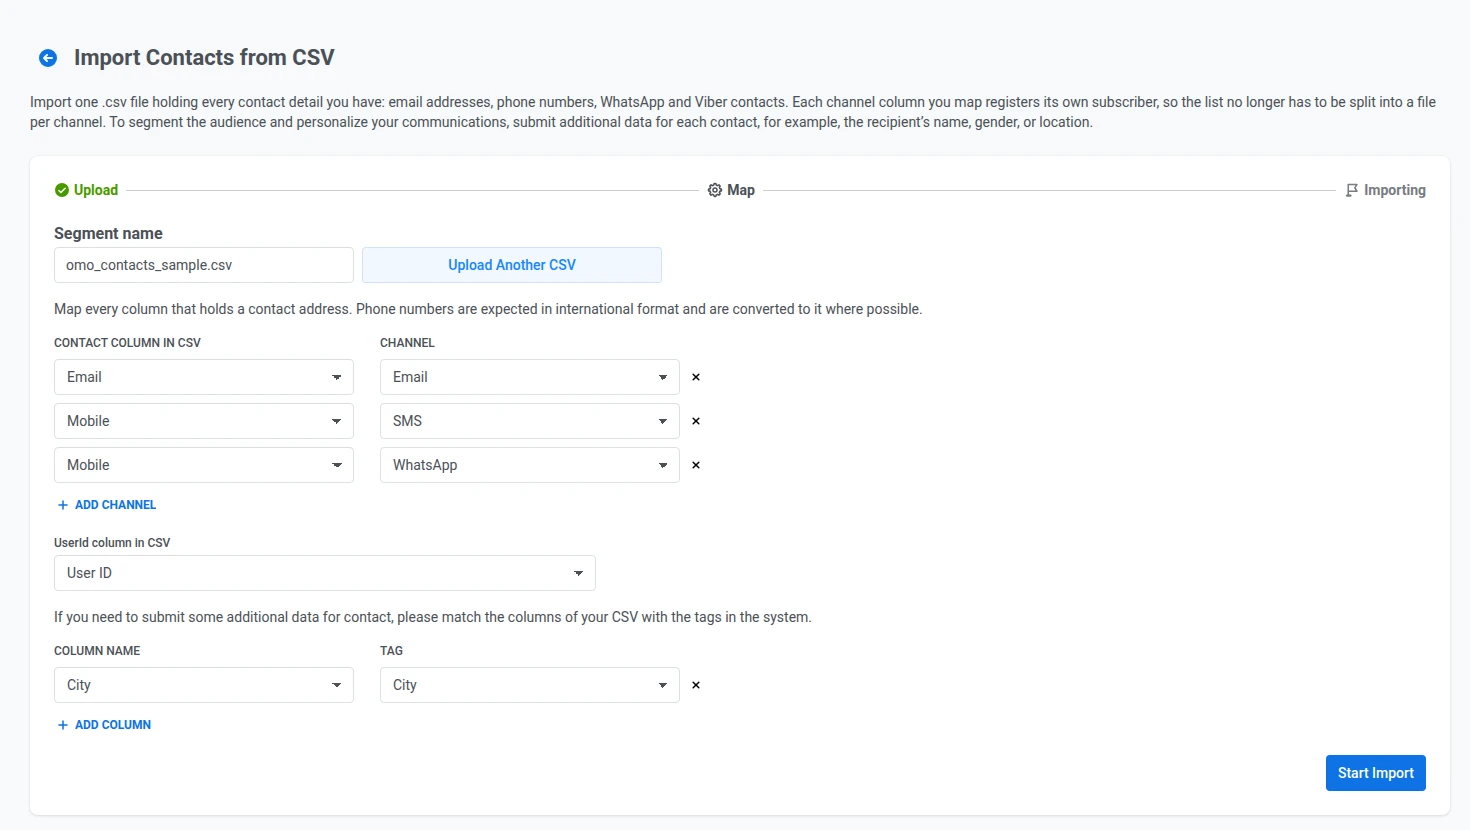
Haz clic en Cargar CSV y selecciona tu archivo. Para reemplazarlo, haz clic en Cargar otro CSV.
-
Introduce un Segment name para los contactos importados.
-
En Contact column in CSV, selecciona una columna y, junto a ella, elige el Channel en el que se registra (Email, SMS, WhatsApp o Viber). Haz clic en + Add channel para asignar otra columna, o para asignar la misma columna a un canal adicional.
-
En UserId column in CSV, selecciona la columna con identificadores de usuario únicos, si tu archivo tiene una.
-
Para incluir datos adicionales para la segmentación, selecciona un Column Name de tu CSV y asígnale una Tag. Haz clic en + Add Column para asignar más atributos.
-
Haz clic en Iniciar importación.
Después de la importación, los contactos están disponibles para campañas en los canales que asignaste. Aparecen como un nuevo segmento en la lista de Segmentos y también se puede acceder a ellos a través del User Explorer.
La pantalla de finalización muestra dos recuentos:
- Created: registros de canal que son nuevos en la app.
- Updated: registros de canal que ya existían, incluso cuando la misma dirección o el mismo número se vuelve a registrar con otro User ID o en otra plataforma de dispositivo.
Ambos cuentan registros de canal, no contactos ni filas del CSV. Un contacto asignado a dos canales, por ejemplo SMS y WhatsApp, suma 2.
En un contacto actualizado, solo cambian las etiquetas asignadas en el paso 6. Sus valores se sobrescriben con los valores del CSV. Las demás etiquetas que ya tenga el contacto se mantienen como están.
Filas omitidas durante la importación
Anchor link toLa pantalla de finalización agrupa las filas omitidas por motivo:
- La dirección de correo electrónico no es válida
- El número de teléfono no es válido
- No hay dirección de contacto en la fila: cada columna asignada estaba vacía
Una fila puede ser importada parcialmente y aun así aparecer en este desglose. Por ejemplo, la columna de correo electrónico tiene éxito, pero la columna de teléfono falla la validación.
Haz clic en Download skipped rows para obtener un CSV solo de esas filas. El archivo añade el motivo de la omisión como una columna extra para que puedas corregir las filas y volver a subirlas.
Filas que la importación no pudo registrar
Anchor link toAlgunas filas parecen correctas en el archivo pero aun así no se procesan. Por ejemplo, una dirección de correo electrónico puede estar escrita correctamente y aun así ser rechazada porque pertenece a un dominio desechable o que ha rebotado. Pushwoosh cuenta filas como esta como Failed, por separado de Created, Updated o Skipped.
Las filas fallidas no se desglosan por motivo y no se incluyen en la descarga de filas omitidas. Para encontrarlas, compara tu CSV de origen con el segmento importado. Corrige las direcciones que faltan (por ejemplo, elimina un dominio desechable o que ha rebotado), luego vuelve a subir solo esas filas en una nueva importación.