Schedule many pushes at once from a file
Este contenido aún no está disponible en su idioma.
Instead of creating pushes one by one, upload your whole content plan at once. Put the pushes in an .xlsx or .csv file, called a push plan. Each row is one push with its own date, time and text. Pushwoosh schedules each push for the time in its row.
Prerequisites
Anchor link to- A project with one or more push platforms configured.
- A push plan file:
- An .xlsx file up to 2 MB, or a CSV UTF-8 file up to 1 MB.
- Up to 200 rows and up to 50 filled columns in a row. A longer file is rejected on upload, so split it into several files.
- A first row with the column names, and one push in every next row.
Prepare the push plan
Anchor link toEach row needs a date, a time and the push text. The other columns are optional:
| Column | Required | What to put in it |
|---|---|---|
| Date | Yes | The send date, for example 12.11.2026, no more than 30 days ahead. DD.MM.YYYY and YYYY-MM-DD are always read correctly. A date like 03/04/2026 is rejected, because it can be read both ways. |
| Time | Yes | The send time in 24-hour format, for example 18:00. 6 pm also works. |
| Text | Yes | The push text. Android shows up to 240 characters. |
| Title | No | The push title. |
| Link | No | The URL or deep link that opens when the user taps the push. |
| Image | No | A web address of the image, starting with http:// or https://. It’s added to iOS, Chrome and Android pushes, including Huawei, Amazon and Baidu devices. |
| Name | No | The campaign name of this push in Message History, up to 255 characters. |
Start from a template
Anchor link toThe template shows what a push plan looks like. To start from it:
- In the form, click Download template. You get an Excel file with these columns and two example rows.
- Replace the example rows with your pushes.
- Save the file and upload it as described below.
Your own file works too: after the upload, you match its columns to the push fields.
Upload the push plan
Anchor link toAdd your file to the one-time push form, match its columns to the push fields, and choose the message type. You do all of this on the Content step.
-
Go to Campaigns → One-time messages and click Send message → Push notification.
-
On the Content step, select the Plan from file tab.
-
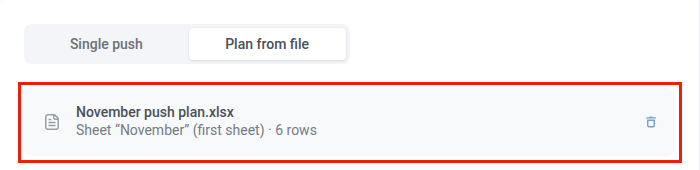
Add the file to Upload your push plan in one of two ways: drag it into the upload area, or click Browse and select it. In an .xlsx file with several sheets, the first sheet with data is read. If the form shows The file could not be read, save the file again as .xlsx and upload it once more.
-
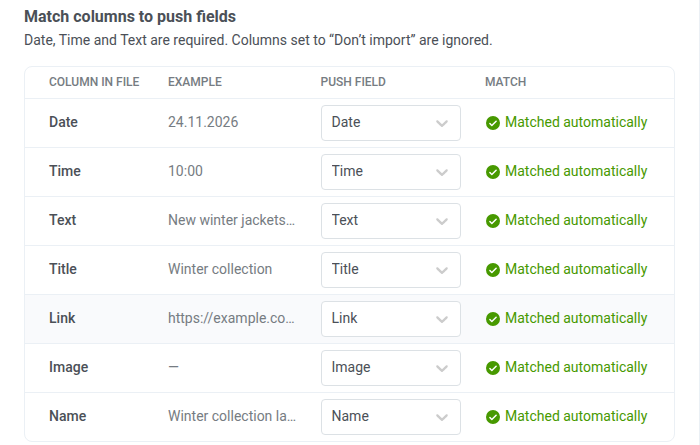
In Match columns to push fields, match every column of the file:
- Check the field in Push field for each column. Columns named like the template are matched automatically.
- Set columns you don’t need to Don’t import.
- Date, Time and Text must be matched. Until they are, the form shows Choose the columns with the date, time and text of the push and doesn’t go to the next step.
-
In Message type, select Marketing or Transactional. Marketing is selected by default, and the type applies to every push in the plan. See Select message type.

-
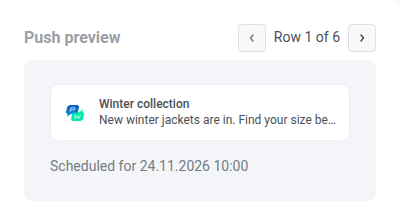
Optionally, page through the preview on the right to check how each row looks as a push.
-
Click Next.
Select the audience
Anchor link toChoose who receives the pushes. The audience applies to every push in the plan, and you can change it for single pushes on the Review step.
- On the Audience step, select who receives the pushes, as for a one-time push:
- Send to segment
- Send to specific users
- Send to all subscribers
- Select the target platforms. Apple Wallet and Google Wallet aren’t available for a push plan.
- Optionally, to send each push only to the device where the user opened the app most recently, turn on Send to last active device. See Send to last active device.
- Click Next.
Set the sending time and options
Anchor link toThe Sending time step sets when each push goes out. The date and time come from the file, and you choose how the times are read.
-
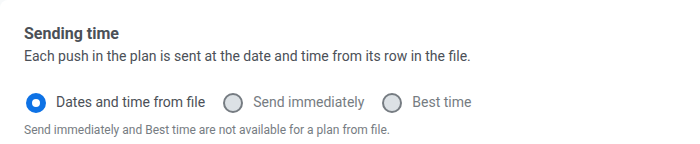
On the Sending time step, keep Dates and time from file selected. It’s the only sending option for a push plan: Send immediately and Best time aren’t available.
-
In Timezone, choose how the times from the file are read:
- Custom timezone: every push goes out at the time from the file in the timezone you select. Your account timezone is selected by default.
- Subscriber’s device timezone: each subscriber gets the push at the time from the file by their own clock. UTC+14 is the first timezone to reach any time. If the time in a row has already passed there, the row is marked Error and isn’t sent, so no subscriber gets the push late.
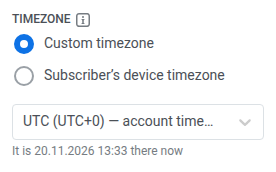
With Custom timezone, if your device is in another timezone, the form warns you. To read the times from the file in your device’s timezone, click Use my timezone:

-
Optionally, set Time to live, frequency capping, send rate and silent hours. They apply to every push in the plan. For a Transactional plan, frequency capping and silent hours aren’t available. The settings work as for a one-time push.
-
Click Next.
Review and schedule the pushes
Anchor link toOn the Review step, check every push of the plan: its date and time, title and text, audience and status. Each row is marked Ready, Warning or Error:
- Error rows are unchecked and are not scheduled. Fix them, or leave them out.
- Warning rows are scheduled unless you clear their checkbox.
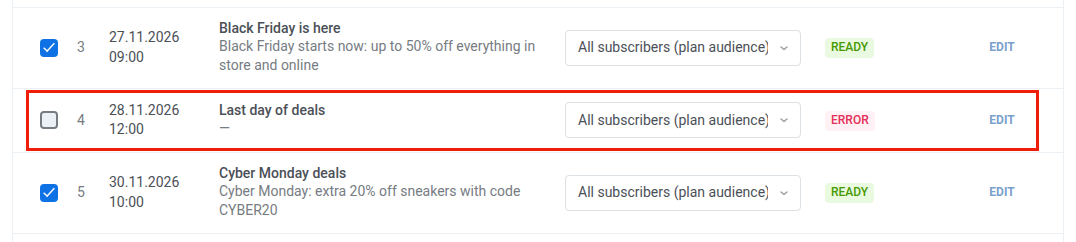
-
To see only the rows that need attention, select Show only issues.
-
To fix a row, click Edit, correct Date, Time, Title or Text, and click Save row.
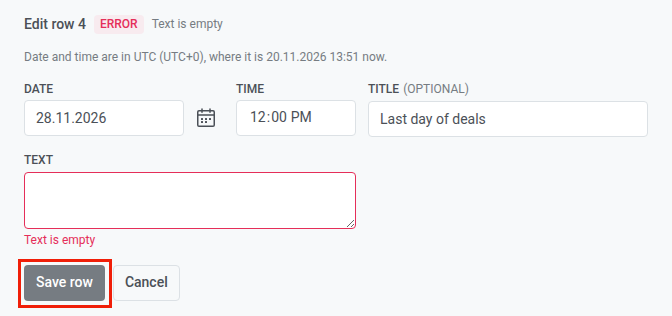
-
Optionally, to send a single push to another segment, select the segment in its Audience column.
-
To leave a push out of the plan, clear its checkbox.
-
Click Schedule N pushes. The Confirm sending dialog opens.
-
Optionally, edit Campaign name. It’s prefilled with the file name. Rows without a name in the Name column get this name with the row number, for example
November push plan · 3.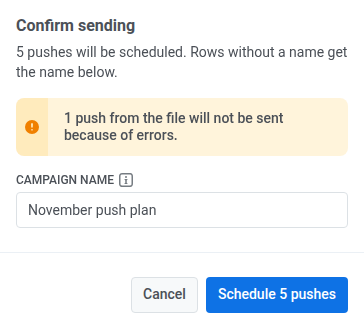
-
Click Schedule N pushes in the dialog.
To fix many rows at once, correct the file and upload it again instead of editing rows one by one.
The Review step shows these errors and warnings:
| Status | Message | What to do |
|---|---|---|
| Error | Date is not readable, Time is not readable | Use DD.MM.YYYY and HH:MM. |
| Error | Unclear date: use DD.MM.YYYY | Write the date with dots, for example 03.04.2026. |
| Error | Already passed in timezone (with Custom timezone) or Will not be sent: the time has already passed in some timezones (with Subscriber’s device timezone) | Move the push to a later date or time. |
| Error | More than 30 days ahead | Move the push into the next 30 days, or schedule it later. |
| Error | Time skipped by the clock change | Pick a time that exists on the day the clocks change. |
| Error | Text is empty, Link is not a valid URL, Image is not an http(s) link | Fix the cell. |
| Warning | Text is longer than Android shows | Shorten the text to 240 characters, or schedule it as is. |
| Warning | Same date and time as row N | Check that both pushes are meant to go out together. |
| Warning | Name is longer than 255 characters | Shorten the name. |
Check the results
Anchor link toAfter you schedule the plan, Message History opens with its pushes.
- Check that the pushes of your plan are in the list. Each one is a regular scheduled message.
- To change a push, edit or delete it like any other, until it’s sent.
- If some pushes weren’t created, the Review step marks them Not created. Click Retry failed (N) to create them again. Pushes that were already scheduled aren’t duplicated.
If scheduling is interrupted
Anchor link toIf scheduling stops halfway, some pushes may already be scheduled. Before you schedule the push plan again, check what was created:
| What you see | What to do |
|---|---|
| A row marked Check history | The push may already be scheduled. Find it in Message History before you schedule the row again, or the subscribers get it twice. |
| The connection broke while scheduling | Click Schedule N pushes again within 4 minutes. Pushes that were already created aren’t duplicated. |
| This plan is being scheduled in another tab | Wait a minute and check Message History. |
| Your session has expired | Nothing was scheduled. Sign in again and upload the file once more. |
| A row marked Time has passed | The push wasn’t scheduled because its time passed while you were working on the plan. Move it later in the file and upload the file again. |
Next steps
Anchor link to- One-time push: send a single push with a push preset, Inbox and an in-app banner on click.
- Message History: track the delivery of every push from the plan.