Upload and manage images
Este contenido aún no está disponible en su idioma.
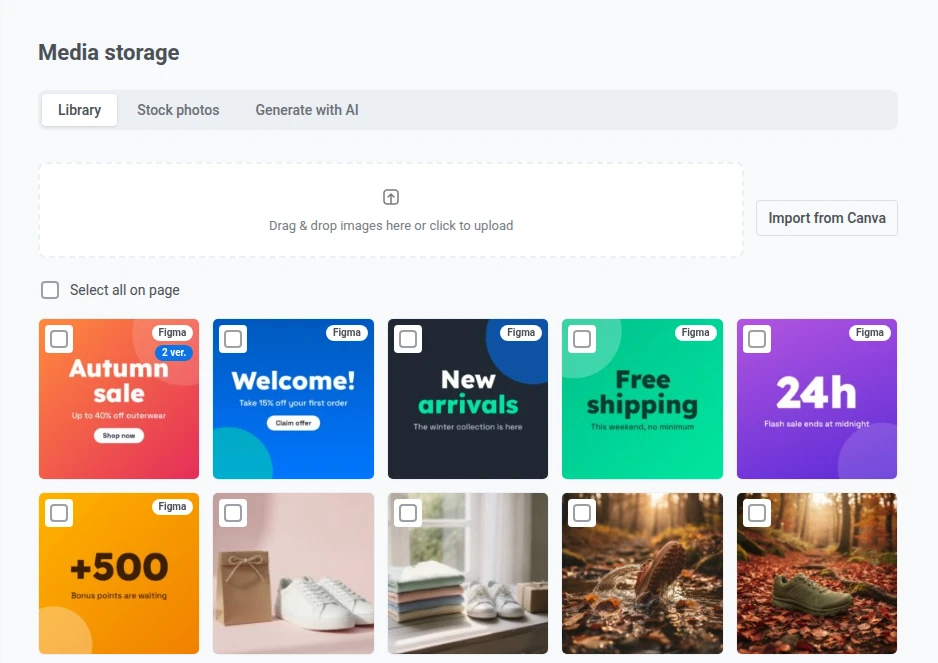
The Media storage is your project’s built-in image library. Upload images, import free stock photos, or generate images with AI. Then reuse them in push notifications, web push, emails, in-app messages, Cloud Pages, and other content, directly in the editor or via a stable URL.
To open the Media storage, go to Content > Media storage in the Pushwoosh Control Panel.
The page has three tabs:
- Library: the images already stored in the project.
- Stock photos: search free photos from Pexels and save them to the library.
- Generate with AI: describe an image and save the result to the library.
Who can add and delete images
Anchor link toTo add images (upload, stock import, AI generation), create crops, or delete images, you need the Modify applications permission for the project. With view-only access you can browse the library and pick images, but not change the library. See Multi-login accounts.
Upload images
Anchor link toTo upload images to the Media storage:
- Drag and drop one or more image files onto the upload area.
- Click the upload area to open the file picker and select images from your device.

When the upload finishes, your images appear in the grid below, the most recent first. To browse older images, click Previous or Next.
Compress PNG images on upload
Anchor link toPNG compression makes PNG images smaller when they are added to the library:
- Pushwoosh reduces the number of colors in the image and keeps transparency.
- The compression is lossy, but the difference is usually not visible.
- It’s turned off by default and is set separately for each project.
To change this setting, you need the Modify applications permission for the project.
To turn on PNG compression:
-
On the Media storage page, click Settings in the upper-right corner, to the right of the page title.
-
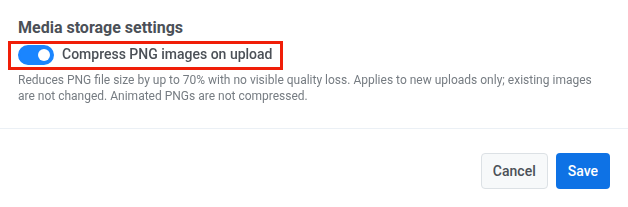
In the Media storage settings window, turn on Compress PNG images on upload.
-
Click Save.
With the setting on, Pushwoosh compresses every new PNG after it passes the size limits. This covers:
- PNG files you upload from your device.
- PNG images sent from Figma and imported from Canva.
- Crops of PNG and WebP images, because those crops are saved as PNG.
Pushwoosh stores JPG, WebP, and GIF files as they are. Animated PNGs and images already in the library stay uncompressed.
If a PNG can’t be compressed, Pushwoosh stores the original file and the upload still succeeds.
After you upload PNGs from your device or in the image picker of an editor, Pushwoosh shows how much space the compression saved. For a batch, the numbers cover only the PNGs that got smaller.
Send images from Figma
Anchor link toTo send frames from a Figma file without exporting them first, use the Pushwoosh plugin for Figma. See Figma integration.
Import designs from Canva
Anchor link toTo import pages of your Canva designs, click Import from Canva next to the upload area. After you connect Canva, you can also open stored images in the Canva editor with Edit in Canva and start new designs with Create in Canva. See Canva integration.
Find an image by file name
Anchor link toEnter part of a file name in the Search by file name field above the grid and press Enter. The search ignores letter case and covers the whole library, not only the current page. Clear the field to show all images again.
Where an image came from
Anchor link toA badge on the tile shows how an image got into the library:
- AI: generated in the Generate with AI tab.
- Pexels: imported from the Stock photos tab.
- Canva: imported or edited with the Canva integration.
- Figma: sent with the Pushwoosh plugin for Figma.
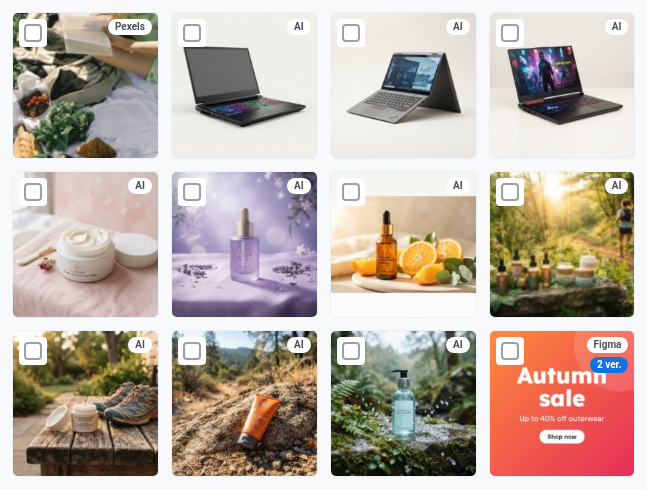
Images uploaded from your device have no badge.
Use an older version of an image
Anchor link toA badge such as 2 ver. on a tile means the image has several versions. They appear when a Figma frame is sent again or the image is edited in Canva. The tile shows the latest version. Content that uses an older version keeps showing it, because each version has its own URL.
To view all versions of an image and pick one of them:
- Click the N ver. badge on the tile. The Versions panel opens with the latest version, marked current, in the preview.
- Under All versions, click the version you want. The list starts with the newest version. The preview shows the selected version with its size in pixels and file size.
- Click Use this version.
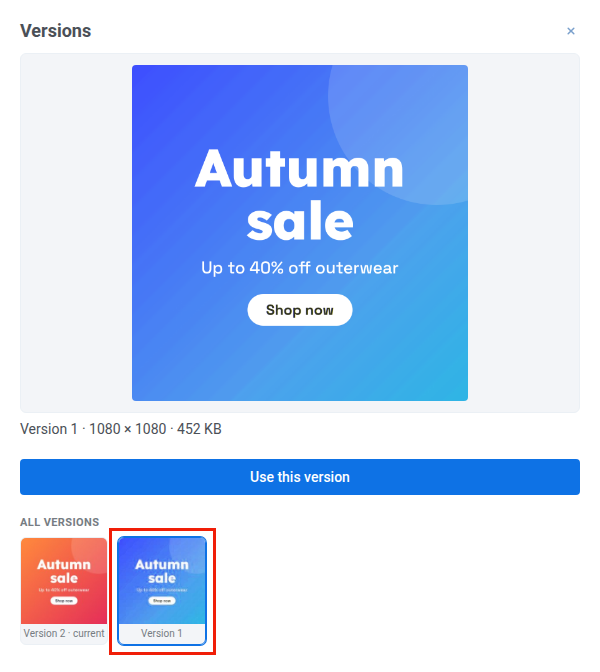
On the Media storage page, Use this version copies the URL of the selected version, the same way as the Select button. In an editor’s image picker, it inserts the selected version into the field.
Add a stock photo from Pexels
Anchor link toThe Stock photos tab searches the free photo library of Pexels. Stock photos don’t count toward the daily AI image limit.
- Open the Stock photos tab.
- Enter what you are looking for, for example
summer sale, and click Search. - Click a photo.
Pushwoosh copies the photo into your library with the Pexels badge.
Under each search result, the photographer’s name links to their Pexels profile, and the tab shows that the photos come from Pexels.
If nothing matches your query, the tab shows Nothing found — try another query.
If your plan doesn’t include AI images, stock photo search is turned off too. See Daily limit for AI images.
Generate an image with AI
Anchor link toThe Generate with AI tab creates an image from a text description and saves it to your library with the AI badge. See Generate images with AI.
Create image crops
Anchor link toTo use the same image in channels or placements with different proportions, crop it to a specific aspect ratio. See Create image crops.
Delete images
Anchor link toYou can delete images you no longer need, either an original together with all of its crops, or a single crop on its own.
Delete an original image
Anchor link to- Hover over the image in the grid and click the Delete icon.
- In the confirmation window, click Delete.
If the image has several versions, only the latest version and the crops of that version are deleted, and the tile shows the previous version. To delete an older version, delete the newer versions first.
You can’t delete an image used in a Wallet pass campaign. Remove the image from the campaign first.
Delete a single crop without removing the original
Anchor link to- Hover over the image and click the Create crops button to open the Create crop panel.
- In Existing crops, find the one you want to remove and click its Delete crop button.
- In the confirmation window, click Delete.
Delete multiple images at once
Anchor link toTo remove several original images in one action:
- Check the checkbox on each image you want to delete, or click Select all on page to select every image on the current page.
- Click Delete selected.
- In the confirmation window, click Delete.
Use images in your content
Anchor link toHow you add a Media storage image depends on the content type.
Select an image in the editor
Anchor link toIn the editors listed below, you can pick, find, or generate an image without leaving the editor. The image picker has the Library, Stock photos, and Generate with AI tabs:
- Push notifications and web push content: Banner URL, Icon, Stories, and inbox images. See Add media content in Push presets.
- SMS presets: MMS attachments. MMS accepts only JPG and GIF, so this picker has Library and Stock photos only.
- Push sending form: the inbox icon and WhatsApp media.
- Customer Journey: images in Viber and WhatsApp elements.
- Native in-app messages, Wallet passes, and email ad creatives.
- AI Email Builder, and the same builder for in-app messages and Cloud Pages: the image gallery.
The tabs of a picker depend on the image formats the field accepts:
- Generate with AI: fields that accept both PNG and JPEG, because a generated image can come in either format.
- Stock photos: fields that accept JPEG.
Copy an image URL
Anchor link toCopy a URL from the Media storage and paste it into your content editor.
To copy the URL:
- Hover over the image you want in the Media storage grid.
- Click the Select button (the checkmark icon) on the image.
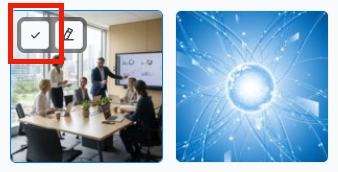
Paste the URL into the editor you are using. Where you paste it depends on the editor:
- Image URL field: Image block of the Drag & drop editor and Cloud Page editor, or in-app editor
- HTML
srcattribute: See Add images in the HTML code editor
Select an original or a crop
Anchor link toTo copy the URL of an original or a crop:
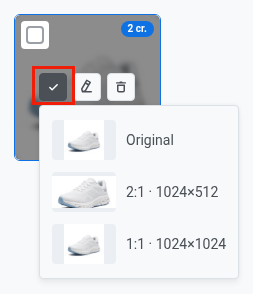
- Hover over the image in the grid. If it has crops, its tile shows a badge with the count (for example, 2 cr.).
- Click the Select button to open the menu. Each item shows a thumbnail of the original or the crop.
- Choose Original to copy the URL of the full-size image, or choose a crop listed by its aspect ratio and size to copy that crop’s URL.