Flight Status-Integration
Informieren Sie Passagiere über Änderungen an ihrem Flug, sobald sie eintreten: ein neues Gate, eine Verspätung, Boarding, Ankunft oder eine Stornierung. Die Flight Status-Integration verbindet Pushwoosh mit AeroDataBox, einem Anbieter von Flugdaten, sodass eine Customer Journey den Flug eines bestimmten Passagiers überwachen und in dem Moment reagieren kann, in dem sich dessen Status ändert.
Integrationsübersicht
Anchor link toIntegrationstyp
Anchor link toQuelle: Sie abonnieren eine Buchung für ihren Flug innerhalb einer Journey. Pushwoosh sendet die Statusänderungen als Ereignis zurück, das Sie später in derselben Journey verwenden.
Voraussetzungen
Anchor link toBevor Sie Flight Status verbinden, stellen Sie sicher, dass Sie Folgendes haben:
- Ein aktives Pushwoosh-Konto mit einer Anwendung im NUE-Rechenzentrum von Pushwoosh. Flight Status ist in anderen Rechenzentren noch nicht verfügbar.
- Ein AeroDataBox-Konto und einen API-Schlüssel. Der Feed wird über Ihr eigenes AeroDataBox-Konto abgerechnet.
- Ein Buchungsereignis, das die Fluggesellschaft, die Flugnummer, das Datum und den Abflughafen des Fluges enthält (siehe Erstellen der Flight Status-Journey).
- Ein dediziertes API Access Token zur Authentifizierung der Journey.
Wie funktioniert die Integration?
Anchor link toDie Verbindung der Integration und die Überwachung eines Fluges sind zwei separate Schritte, die zu unterschiedlichen Zeiten durchgeführt werden:
- Verbinden Sie Ihren AeroDataBox-Schlüssel unter Einstellungen → Drittanbieter-Integrationen.
- Ein Buchungsereignis fügt einen Passagier zu Ihrer Journey hinzu.
- Der Webhook-Schritt der Journey abonniert diese Buchung für ihren Flug über die öffentliche API von Pushwoosh.
- Pushwoosh überwacht den Flug mit AeroDataBox und erkennt Änderungen: Gate, Verspätung, Boarding, Ankunft, Stornierung oder eine Zuweisung des Gepäckbandes.
- Jede Änderung wird als
PW_FlightStatusChanged-Ereignis an die App übermittelt, das durch Auf Trigger warten und Bedingungsaufteilung der Journey an die richtige Nachricht weitergeleitet wird.
Jedes Flugabonnement endet automatisch 36 Stunden nach dem lokalen Abflugdatum. Es kann auch früher enden: sobald der Flug landet oder storniert wird oder sobald ihn nichts mehr überwacht. Pushwoosh kündigt dann das zugehörige AeroDataBox-Abonnement, damit es nicht im Hintergrund weiter abgerechnet wird.
Dieses Zeitfenster wird beim Abonnieren anhand des gebuchten Abflugdatums festgelegt und verschiebt sich nicht, wenn AeroDataBox später eine Verspätung meldet. Eine Verspätung, die den Flug auf den nächsten Kalendertag verschiebt, kann dazu führen, dass das Abonnement vor dem verspäteten tatsächlichen Abflug endet.
Anwendungsfälle
Anchor link toFlight Status deckt vier Arten von Updates ab, die jeweils einzeln oder in einer Journey kombiniert verwendet werden können:
- Benachrichtigungen bei Gate-Änderungen: Benachrichtigen Sie Passagiere in dem Moment, in dem sich ihr Abflug-Gate ändert.
- Benachrichtigungen bei Verspätungen: Benachrichtigen Sie Passagiere, sobald die Verspätung eines Fluges einige Minuten überschreitet, damit sie ihre Pläne anpassen können.
- Updates zu Boarding und Ankunft: Informieren Sie Passagiere, wenn das Boarding beginnt oder ihr Flug landet.
- Gepäckausgabe: Senden Sie die Nummer des Gepäckbandes, sobald sie zugewiesen ist.
Einrichtung der Integration
Anchor link toFlight Status mit Pushwoosh verbinden
Anchor link toVerbinden Sie Ihren AeroDataBox-Schlüssel einmal pro Anwendung:
- Öffnen Sie Ihre Anwendung und gehen Sie zu Einstellungen → Drittanbieter-Integrationen.
- Suchen Sie unter Verfügbare Dienste die Karte Flight Status und klicken Sie auf Konfigurieren.
- Fügen Sie Ihren AeroDataBox-Schlüssel in API-Schlüssel ein und klicken Sie auf Verbinden.
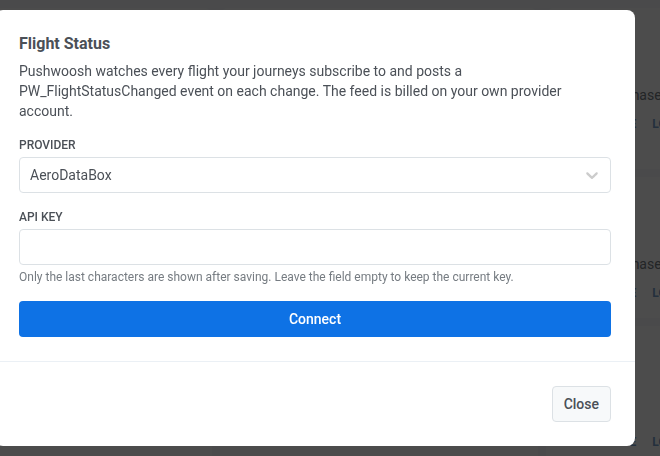
Nachdem Sie auf Verbinden geklickt haben, wird die Karte zu Verbundene Dienste verschoben.
Wenn der Schlüssel abgelehnt wird
Anchor link toPushwoosh überprüft den Schlüssel im Hintergrund. Wenn etwas nicht stimmt, zeigt die Karte eine dieser Nachrichten an:
| Nachricht | Ursache |
|---|---|
provider rejected the API key | Der Schlüssel ist ungültig oder wurde in AeroDataBox widerrufen |
provider account is out of credits | Ihr AeroDataBox-Plan hat kein Guthaben mehr |
provider rate limit reached | AeroDataBox drosselt Anfragen, dies klärt sich von selbst |
provider is unavailable | AeroDataBox konnte aufgrund eines Netzwerkproblems oder eines Ausfalls auf einer der beiden Seiten nicht erreicht werden |
provider refused the request | AeroDataBox hat einen Fehler zurückgegeben, den Pushwoosh sonst nicht erkennt |
Schlüssel ersetzen
Anchor link toÖffnen Sie die Karte Flight Status unter Verbundene Dienste erneut, zum Beispiel nachdem der Schlüssel abgelehnt wurde:
- Schlüssel ersetzen: Fügen Sie einen neuen in API-Schlüssel ein.
- Aktuellen Schlüssel beibehalten: Lassen Sie API-Schlüssel leer. Das Feld zeigt nur die letzten paar Zeichen des gespeicherten Schlüssels an.
Integration trennen
Anchor link to- Öffnen Sie die Karte Flight Status unter Verbundene Dienste.
- Entfernen Sie den Schlüssel.
Nach dem Trennen:
- Es werden keine neuen Abonnements mehr erstellt.
- Flüge, die Journeys bereits überwachen, behalten ihre Abonnements, bis diese von selbst enden oder Sie sie aus der Journey löschen.
- Die Anzahl der aktiven Abonnements auf der Karte schließt diese Abonnements ein, bis sie enden.
Erstellen der Flight Status-Journey
Anchor link toBevor Sie die Journey erstellen
Anchor link toStellen Sie sicher, dass Sie Folgendes haben:
- Ein Buchungsereignis, das die Fluggesellschaft, die Flugnummer, das Datum (
JJJJ-MM-TT) und den Abflughafen des Fluges enthält, sowie ein Attribut, das den Flugschlüssel im Format<Fluggesellschaft><Flugnummer>/<Datum>/<Abflughafen>enthält, zum BeispielLH400/2026-09-20/MUC. Dies wird für den Sitzungsabgleich während der gesamten Journey verwendet. - Ein dediziertes API Access Token. Die Abonnement-Methode akzeptiert jedes Token aus Ihrem Konto, ohne dass Berechtigungen erteilt werden müssen. Erstellen Sie ein spezielles Token für diese Journey, damit Sie es später widerrufen können, ohne andere Elemente zu beeinträchtigen.
- Der öffentliche API-Host Ihres Rechenzentrums. Für NUE-Konten ist dies
rpc-api.svc-nue.pushwoosh.com. - Das Kampagnen-Eintrittslimit der Journey, ausgeschaltet. Das Kampagnen-Eintrittslimit verfolgt nur Eintritte pro Benutzer. Es kennt den unten eingerichteten Sitzungsidentifikator nicht, sodass es den zweiten Flug eines Passagiers blockieren würde, bis der Limitzeitraum abgelaufen ist.
Starten der Journey aus einem Buchungsereignis
Anchor link to- Fügen Sie einen Trigger-basierten Eintritt hinzu und wählen Sie Ihr Buchungsereignis aus, zum Beispiel
flight_booked. - Wählen Sie unter Steuern, wie viele Sitzungen ein Benutzer gleichzeitig haben kann die Option Mehrere aktive Sitzungen pro Benutzer.
- Wählen Sie das Flugschlüssel-Attribut als Sitzungsidentifikator. Dadurch kann derselbe Passagier mehr als einen Flug gleichzeitig verfolgen, jeden in seiner eigenen Sitzung.
Abonnieren der Buchung mit einem Webhook-Schritt
Anchor link toFügen Sie direkt nach dem Eintritt einen Webhook-Schritt hinzu. Sein Anfragekörper entnimmt die Flugfelder aus dem Eintrittsereignis, daher muss der Schritt direkt nach dem Eintritt platziert werden, um sie verwenden zu können.
- Setzen Sie ANFRAGETYP auf
POST. - Setzen Sie die URL auf
https://rpc-api.svc-nue.pushwoosh.com/api/integrations/flight-status/subscriptions. - Behalten Sie in HEADERS
Content-Type: application/jsonbei. - Fügen Sie einen Header
Authorization: Token <Ihr API-Token>hinzu. Pushwoosh maskiert diesen Wert nach dem Speichern, da jeder Header mit dem NamenAuthorizationautomatisch als geheim behandelt wird. Siehe Markieren eines Header-Wertes als geheim für weitere Informationen zur Bearbeitung und zum Versionsverlauf. - Geben Sie in DATEN den unten stehenden Anfragekörper ein und tippen Sie Ihren eigenen Anwendungscode direkt ein:
{ "application": "<your application code>", "user_id": "{{device:user_id}}", "source": "journey", "flight": { "carrier": "", "flight_number": "", "flight_date": "", "departure_airport": "" }}- Öffnen Sie für jeden der vier leeren
flight-Werte den DATEN-BUILDER. - Wählen Sie die Kategorie Ereignis.
- Wählen Sie das passende Attribut aus Ihrem Buchungsereignis (Fluggesellschaft, Flugnummer, Flugdatum, Abflughafen).
- Kopieren Sie das von Pushwoosh generierte Makro und fügen Sie es als Wert für dieses Feld ein. Wiederholen Sie dies für die verbleibenden drei Werte.
Aus der Antwort müssen Sie nichts zuordnen. Sie gibt flight_key zurück, das sich bereits in Ihrem Buchungsereignis befindet.
Warten auf ein Status-Update
Anchor link toFügen Sie nach dem Webhook-Schritt einen Auf Trigger warten-Schritt hinzu.
- Fügen Sie einen Zweig hinzu und setzen Sie dessen Ereignis auf
PW_FlightStatusChanged. - Wählen Sie unter dem Attributabgleich für mehrere Sitzungen dasselbe Flugschlüssel-Attribut, das Sie beim Eintritt verwendet haben. Dadurch wird sichergestellt, dass ein Status-Update nur den Passagier aufweckt, dessen Flug es tatsächlich betrifft.
- Stellen Sie die Wartezeit so ein, dass sie den Flug bequem abdeckt. 48 Stunden sind für die meisten Reiserouten ausreichend.
- Lassen Sie den Nicht ausgelöst-Zweig ohne nächsten Schritt oder fügen Sie eine Fallback-Nachricht hinzu. Passagiere, deren Flug vor Ablauf der Wartezeit kein Update hat, verlassen die Journey hier, und das ist so vorgesehen.
Verzweigung nach Ereignistyp
Anchor link toFügen Sie nach dem Schritt „Auf Trigger warten“ eine Bedingungsaufteilung hinzu.
- Wählen Sie Ereignis als Bedingungstyp.
- Wählen Sie in Ereignis aus Journey
PW_FlightStatusChanged. - Wählen Sie unter Attribut
event_type. - Setzen Sie die Bedingung auf ist.
- Fügen Sie einen Zweig mit dem Wert
gate_changehinzu. - Klicken Sie auf Speichern. Dadurch werden zwei Zweige erstellt: der von Ihnen benannte für eine Gate-Änderung und Alle anderen Benutzer für jeden anderen Ereignistyp.
Wiederholen Sie dieses Element oder fügen Sie weitere Zweige hinzu, um auf die anderen event_type-Werte zu reagieren: delay, boarding, departed, arrived, cancelled und baggage_ready funktionieren alle auf die gleiche Weise.
Benachrichtigen des Passagiers
Anchor link toFügen Sie im Zweig für die Gate-Änderung ein Push-Element hinzu.
- Wählen oder erstellen Sie eine Push-Voreinstellung.
- Setzen Sie den Nachrichtentyp auf Transaktionsnachricht, da eine Flugstatus-Benachrichtigung eine Servicemitteilung und keine Werbeaktion ist. Frequency Capping findet keine Anwendung, und sie erreicht weiterhin Passagiere in einer Kontrollgruppe.
- Aktivieren Sie die Personalisierung mit Ereignisattributen.
- Wählen Sie
PW_FlightStatusChangedals Quellereignis. - Füllen Sie die Platzhalter Ihrer Voreinstellung mit
flight_numberundgate_new.
Stattdessen eine Live Activity-Karte anzeigen
Anchor link toFügen Sie anstelle von Push oder zusätzlich dazu drei Live Activity-Elemente hinzu:
- Start: direkt nach dem Webhook-Schritt, nicht direkt nach dem Eintritt. Der Eintritt ist nur mit einem nächsten Schritt verbunden, daher können Webhook und Start nicht beide direkt darauf folgen.
- Update: im Gate-Änderungs-Zweig.
- End: sobald die Journey den Flug nicht mehr verfolgen muss, zum Beispiel nach der Ankunft oder Stornierung.
Fügen Sie im Start-Element unter Card attributes alle sechs Felder hinzu, die der ActivityAttributes-Typ der Karte benötigt. Card attributes ist eine freie Liste von Namen und Werten, und die Oberfläche prüft die Namen nicht, geben Sie also jeden genau wie aufgeführt ein. Fünf davon befinden sich bereits in Ihrem Buchungsereignis:
carrierflight_numberflight_datedeparture_airportflight_keyarrival_airport: Der Abonnement-Aufruf benötigt es nicht, fügen Sie es Ihrem Buchungsereignis also nur hinzu, wenn Sie Live Activity verwenden.
Nur Start setzt Card attributes, und sie bleiben für die gesamte Lebensdauer der Karte gleich. Update und End setzen sie nicht. Die Felder, die sich ändern, etwa Status, Gate und Verspätung, sind Card content und stammen aus dem Widget-Schema, das Sie für diese App veröffentlichen.
PW_FlightStatusChanged Ereignisreferenz
Anchor link toJede von der Integration erkannte Änderung wird als ein PW_FlightStatusChanged-Ereignis übermittelt, wobei alle Attribute immer vorhanden sind: leere werden als leere Werte gesendet und nie weggelassen.
| Attribut | Typ | Beschreibung |
|---|---|---|
event_type | String | Was sich geändert hat (siehe die Werte unten) |
flight_key | String | Derselbe Flugschlüssel, den Sie im Buchungsereignis festgelegt haben |
flight_number | String | Die Flugnummer |
departure_airport | String | Abflughafen-Code |
arrival_airport | String | Ankunftsflughafen-Code |
status | String | Aktueller Flugstatus (siehe die Werte unten) |
gate_old / gate_new | String | Abflug-Gate vor und nach der Änderung |
terminal_old / terminal_new | String | Abflug-Terminal vor und nach der Änderung |
baggage_claim | String | Nummer des Gepäckbandes, sobald zugewiesen |
provider | String | Der Datenanbieter, der die Änderung gemeldet hat (aerodatabox) |
delay_minutes | Integer | Minuten Verspätung gegenüber dem Flugplan, in jedem Ereignis vorhanden |
scheduled_at / estimated_at / actual_at | String | Geplante, aktuell geschätzte und tatsächliche Abflugzeiten im eigenen Format des Anbieters |
arrival_terminal | String | Ankunftsterminal, sobald zugewiesen |
arrival_scheduled_at / arrival_estimated_at / arrival_actual_at | String | Geplante, aktuell geschätzte und tatsächliche Ankunftszeiten im eigenen Format des Anbieters |
scheduled_at_local / estimated_at_local / actual_at_local | String | Die drei oben genannten Abflugzeiten in der Ortszeit des Abflughafens |
arrival_scheduled_at_local / arrival_estimated_at_local / arrival_actual_at_local | String | Die drei oben genannten Ankunftszeiten in der Ortszeit des Ankunftsflughafens |
flight_date / event_time | Date | Das Datum des Fluges und der Zeitpunkt der Änderung |
Attributwerte und Formate
Anchor link toevent_type-Werte:gate_change,delay,boarding,departed,arrived,cancelled,baggage_ready.status-Werte:scheduled,check_in,boarding,departed,delayed,arrived,cancelled,diverted,unknown. Ein AeroDataBox-Status, den Pushwoosh nicht erkennt, wird alsunknowngemeldet.delay_minutes: in jedem Ereignis vorhanden, nicht nur indelay-Ereignissen. 0 bedeutet, dass der Flug pünktlich ist, ein negativer Wert bedeutet, dass er früher dran ist. Eindelay-Ereignis wird gesendet, sobald die Verspätung 5 Minuten erreicht.- Zeitattribute: Alle, einschließlich der
arrival_*- und_local-Attribute, sind String, nicht Date. So wird eine leere Zeit nicht aus dem Ereignis entfernt, und eine Ortszeit behält den UTC-Offset des Flughafens. Verwenden Sie zum Filtern nach Datumflight_dateundevent_time.