Eine In-App vor der Push-Berechtigungsanfrage anzeigen
Eine In-App zur Vorab-Berechtigung ist eine Nachricht, die Sie vor der systemeigenen Push-Berechtigungsanfrage anzeigen. Nutzen Sie sie, um zu erklären, warum Push-Benachrichtigungen nützlich sind, und fragen Sie erst dann um Erlaubnis, wenn der Benutzer in Ihrer In-App zugestimmt hat.
Unter iOS erscheint die Systemanfrage nur einmal pro Installation. Wenn der Benutzer auf Nicht erlauben tippt, kann die App diese Anfrage nicht erneut anzeigen. Push bleibt deaktiviert, bis der Benutzer die Benachrichtigungen in den Einstellungen aktiviert. Wenn Sie zuerst in der App fragen, nutzen Sie diese einmalige Chance nur bei Benutzern, die Ihnen bereits zugestimmt haben.
Verwenden Sie diese Anleitung, wenn Sie eine plattformübergreifende HTML-Anfrage im Control Panel entwerfen und diese per Event sowohl auf iOS als auch auf Android auslösen möchten.
Verwenden Sie eine andere Anleitung, wenn:
- Ihr Team eine reine iOS-Anfrage im App-Code bereitstellt (nicht im Control Panel bearbeitbar, nicht durch ein Journey-Event gestartet): iOS Push-Primer.
- Sie Benutzer erneut ansprechen müssen, die Push bereits deaktiviert oder nie erteilt haben (nur zur Wiederherstellung, nicht die erste Anfrage): Popups zur Wiederherstellung von Opt-outs erstellen.
Bevor Sie beginnen
Anchor link toPushwoosh zeigt den systemeigenen Berechtigungsdialog niemals von sich aus an. Es gibt nichts im Control Panel zu konfigurieren, um ihn zu verzögern. Der Dialog erscheint nur, wenn der Benutzer den Akzeptieren-Button in Ihrer In-App antippt.
Arbeiten Sie mit Ihrem Entwicklungsteam an diesen Voraussetzungen:
- Bestätigen Sie, dass die App die Push-Berechtigung nicht früher anfordert (auch nicht beim ersten Start).
- Einigen Sie sich auf einen benutzerdefinierten Event-Namen und den Zeitpunkt, zu dem er ausgelöst werden soll, zum Beispiel
onboarding_completeddirekt nach dem Onboarding oderlocked_feature_tapped, wenn der Benutzer auf eine Funktion tippt, die Benachrichtigungen erfordert. Ihr Team wirdpostEventmit diesem Namen aufrufen. Erfahren Sie mehr über Events.
Die In-App erstellen
Anchor link to- Gehen Sie zu Inhalt → In-Apps und klicken Sie auf In-App erstellen, um direkt den integrierten Editor zu öffnen.
- Geben Sie einen Vorlagennamen ein.
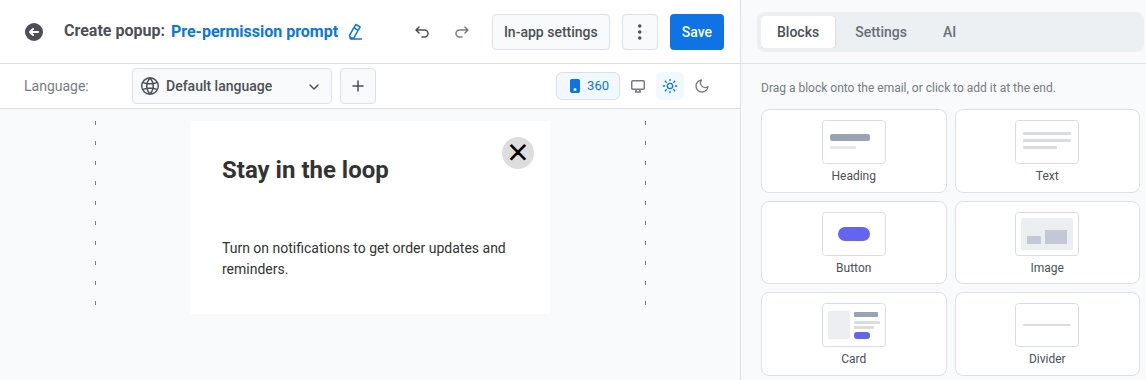
- Öffnen Sie den Tab Blöcke im rechten Bereich und fügen Sie einen Text- oder Überschriftenblock mit Ihrer Argumentation für die Aktivierung von Push-Benachrichtigungen hinzu.
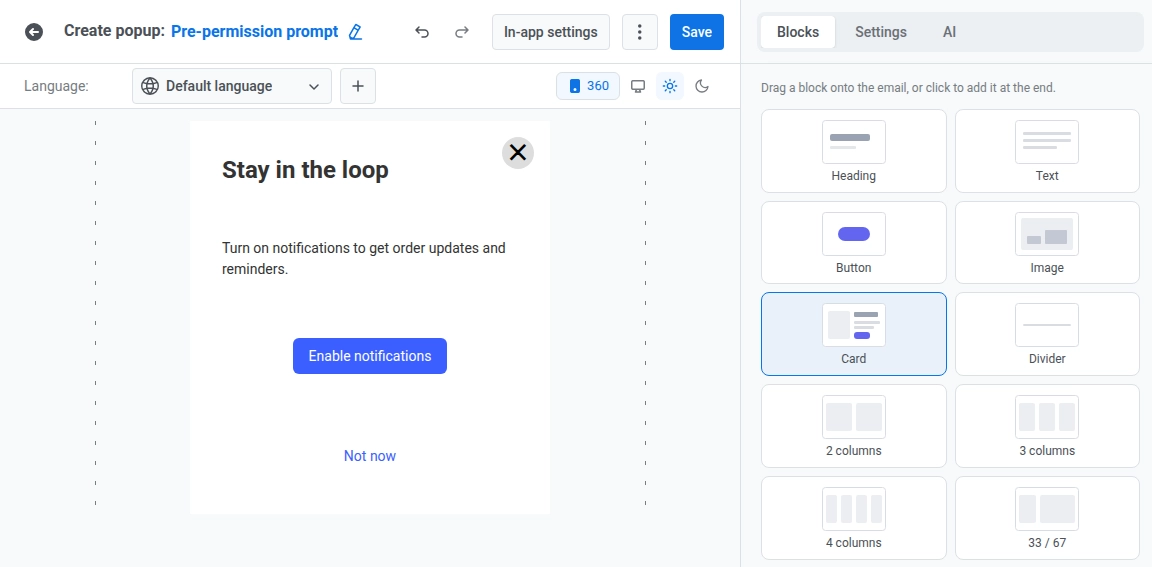
- Fügen Sie einen Button-Block für die Akzeptieren-Aktion und einen weiteren für die Ablehnen-Aktion hinzu. Beide Buttons können ihr JavaScript ausführen, sobald die In-App geladen ist, ohne auf etwas anderes warten zu müssen.
- Wählen Sie den Akzeptieren-Button aus und setzen Sie den Aktionstyp auf Benutzerdefiniertes Javascript.
- Fügen Sie nur den folgenden Code in onClick ein.
pushwoosh.registerForPushNotifications();pushwoosh.closeInApp();- Wählen Sie den Ablehnen-Button aus und setzen Sie den Aktionstyp auf Benutzerdefiniertes Javascript.
- Fügen Sie nur dies in onClick ein:
pushwoosh.closeInApp();Nachdem Sie die Vorlage gespeichert haben:
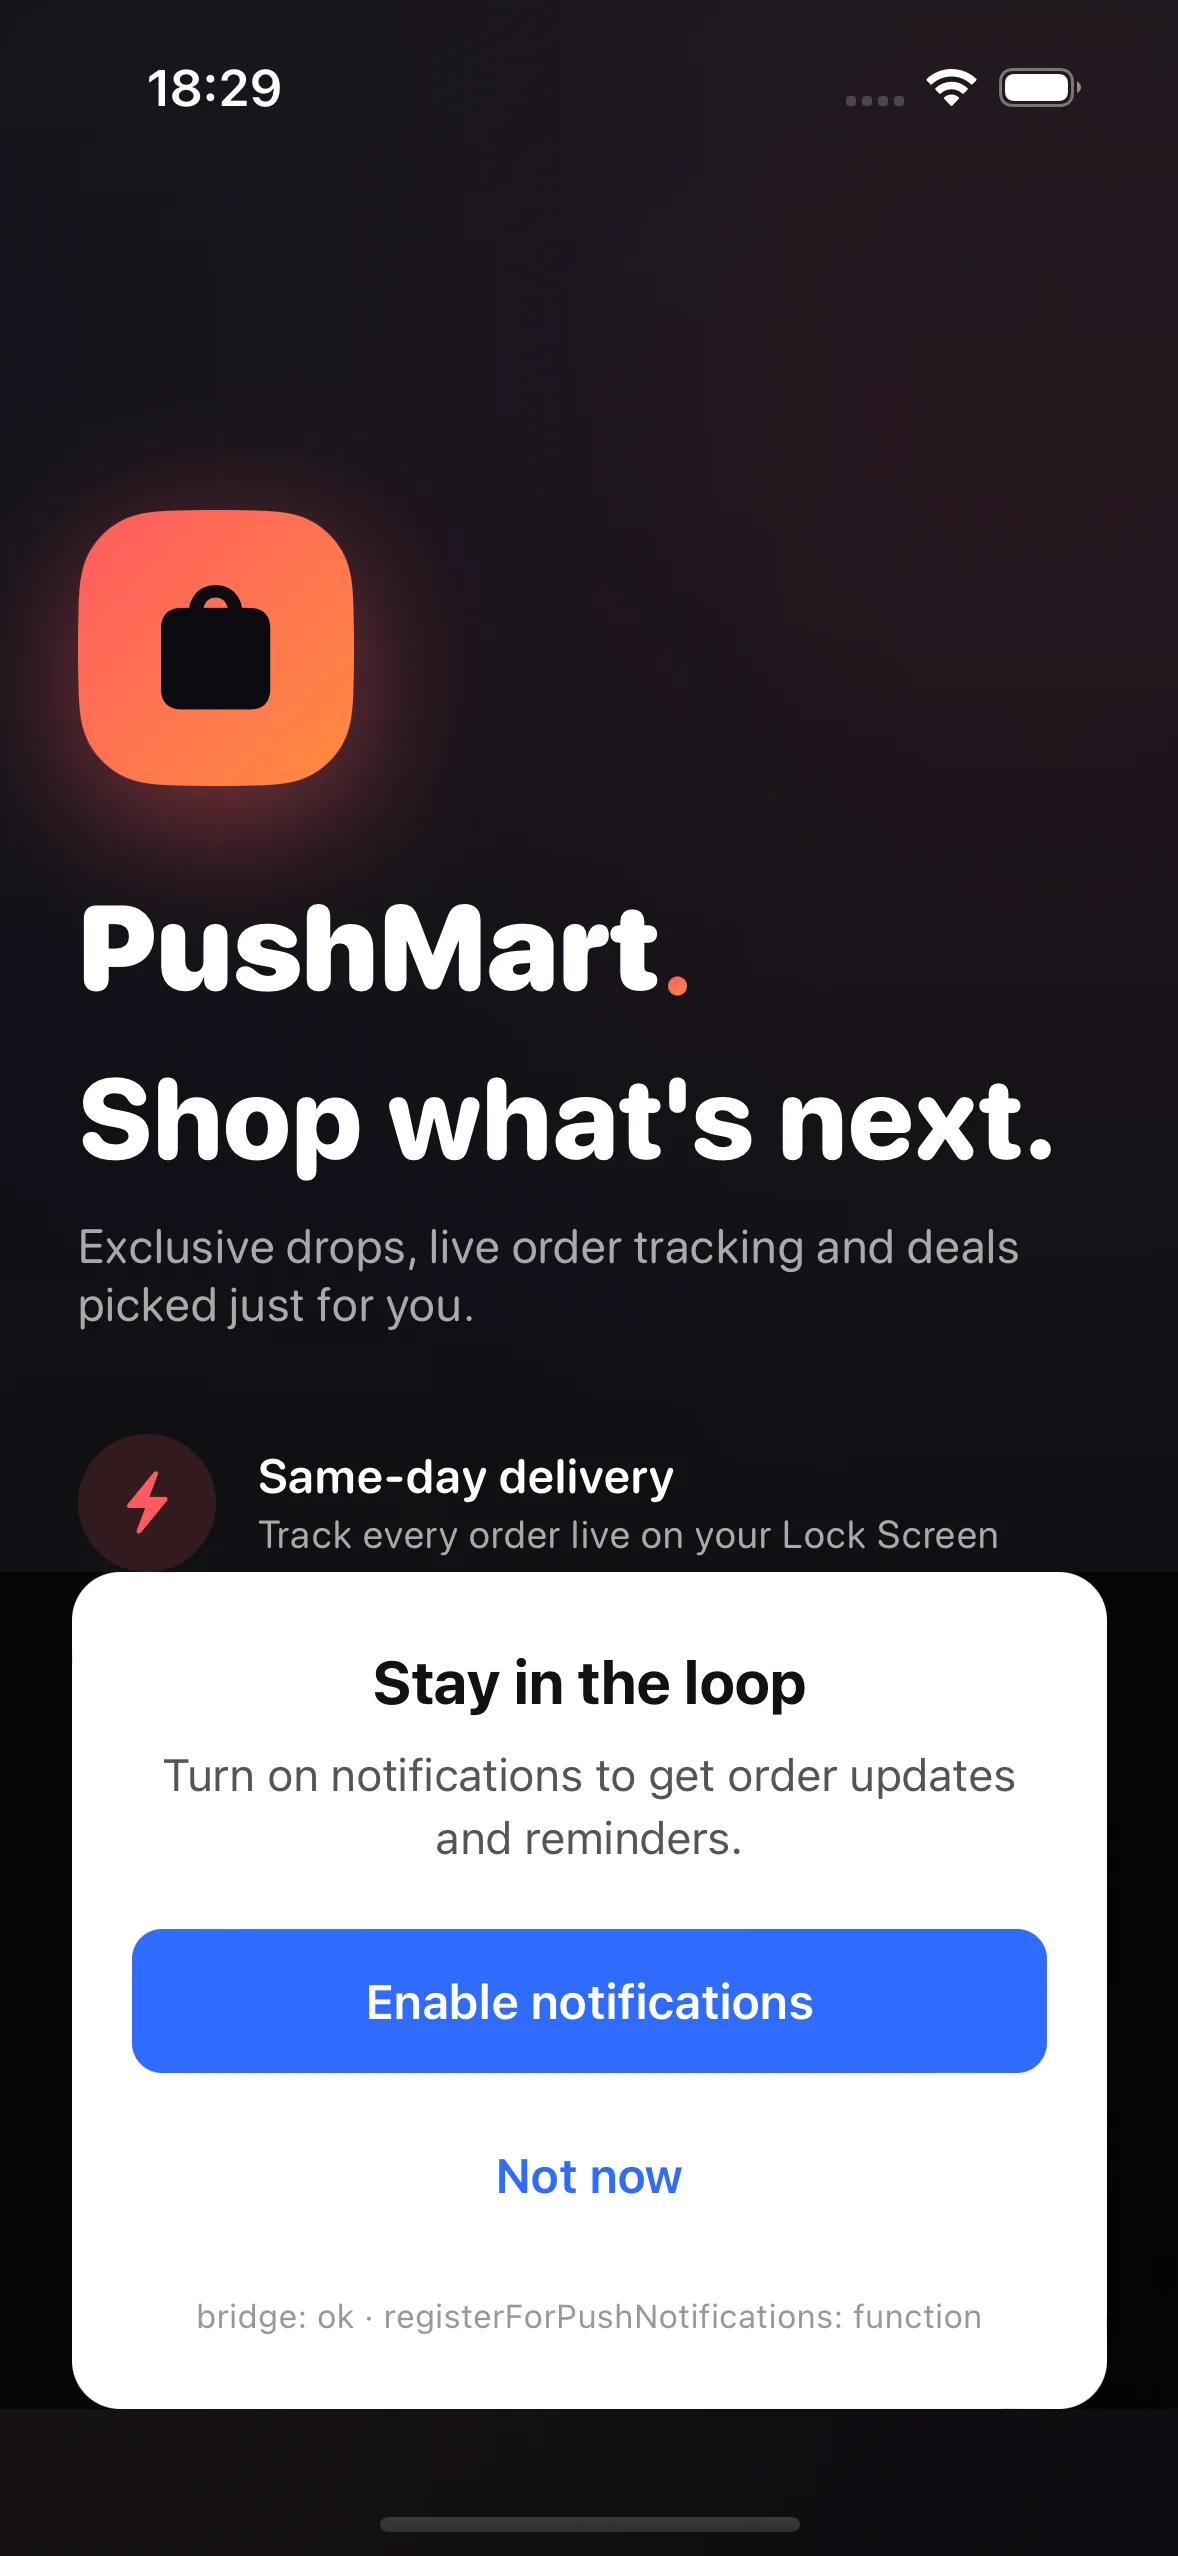
- Akzeptieren-Button: Der systemeigene Berechtigungsdialog erscheint.
- Ablehnen-Button: Die In-App schließt sich und es erscheint kein Systemdialog.
Die Anfrage für Benutzer überspringen, die bereits zugestimmt haben
Anchor link toFügen Sie eine Anzeigebedingung hinzu, damit sich die In-App für Benutzer verbirgt, die Push bereits erteilt haben, auch wenn ein späterer Trigger die Vorlage erneut anzeigt. Der Status der Push-Zustimmung stammt von Push Alerts Enabled, einem standardmäßigen booleschen Tag, das das SDK aus der Systembenachrichtigungsberechtigung des Geräts setzt.
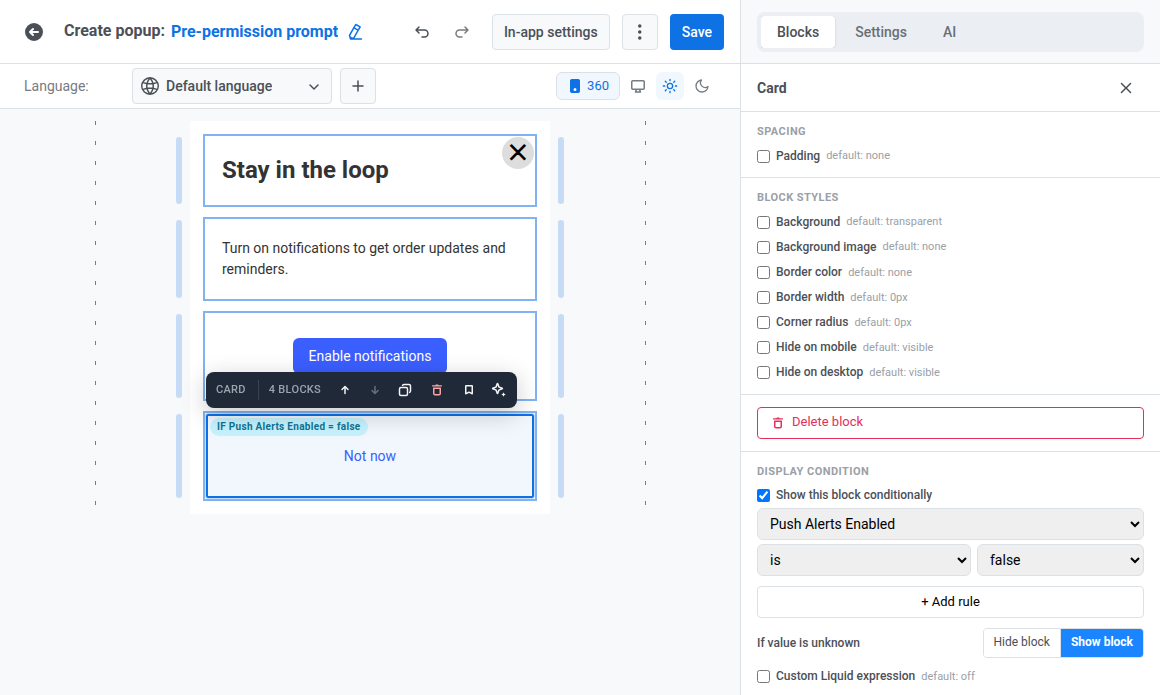
- Klicken Sie im Ebenen-Panel auf den ersten Block und klicken Sie dann bei gedrückter Umschalttaste auf jeden anderen Block, um die gesamte Vorlage gemeinsam auszuwählen.
- Aktivieren Sie Diesen Block bedingt anzeigen. Die Regel, die Sie unten festlegen, gilt für die gesamte Auswahl auf einmal.
- Setzen Sie die Regel auf Push Alerts Enabled ist falsch.
- Wählen Sie unter Wenn der Wert unbekannt ist die Option Block anzeigen. Eine Neuinstallation ohne bisherigen Tag-Wert sollte die Anfrage trotzdem sehen.
Die In-App auslösen, bevor die Berechtigung angefordert wird
Anchor link toEin Gerät, das noch nicht registriert wurde, hat keinen Push-Token, sodass Sie es nicht mit einer Push-Benachrichtigung erreichen können. Lösen Sie die In-App durch das benutzerdefinierte Event aus, das Sie mit der Entwicklung vereinbart haben.
- Bitten Sie Ihr Entwicklungsteam,
postEventmit dem vereinbarten Event-Namen in dem Moment aufzurufen, in dem Sie fragen möchten. - Gehen Sie zum Customer Journey Builder → Kampagne erstellen und beginnen Sie mit einem Trigger-basierten Eintritt, der auf dieses Event wartet.
- Fügen Sie ein In-App-Element hinzu und wählen Sie die von Ihnen erstellte Vorlage aus. Erfahren Sie mehr über das Senden von In-Apps über Customer Journey.
- Starten Sie die Journey, wenn Sie bereit sind, die Anfrage anzuzeigen.
Beispielszenario: Push-Berechtigung direkt nach dem Onboarding anfordern
Anchor link toStellen Sie sich vor, Sie möchten die Push-Berechtigung in dem Moment anfordern, in dem ein Benutzer das Onboarding abschließt, anstatt das Tutorial selbst zu unterbrechen.
- Erstellen Sie das Event
onboarding_completedund bestätigen Sie, dass Ihr Entwicklungsteam es auslöst, wenn der Benutzer den Onboarding-Flow abschließt. Erfahren Sie mehr über das Erstellen von Events - Setzen Sie
onboarding_completedals Auslöser für Ihre Journey, indem Sie einen Trigger-basierten Eintritt verwenden. - Fügen Sie ein In-App-Element hinzu und wählen Sie die von Ihnen erstellte Vorab-Berechtigungsvorlage aus.
- Starten Sie die Journey.
Jeder Benutzer, der das Onboarding abschließt, sieht die Anfrage einmal. Die Anzeigebedingung aus Die Anfrage für Benutzer überspringen, die bereits zugestimmt haben verhindert, dass sie für Benutzer, die Push bereits erteilt haben, erneut ausgelöst wird.
Überprüfen, ob es funktioniert hat
Anchor link toDie Systemanfrage ist einmalig, daher benötigen Sie zum Testen beider Buttons zwei Testgeräte (oder zwei Neuinstallationen), die Push noch nicht erteilt oder verweigert haben, eines für jeden Button. Auf jedem Gerät:
- Lösen Sie das vereinbarte Event von der App aus.
- Öffnen Sie die App erneut und bestätigen Sie, dass die Journey Ihre In-App zustellt.
Dann:
- Tippen Sie auf dem ersten Gerät auf den Akzeptieren-Button und bestätigen Sie, dass der systemeigene Berechtigungsdialog erscheint.
- Tippen Sie auf dem zweiten Gerät auf den Ablehnen-Button und bestätigen Sie, dass sich die In-App ohne Systemdialog schließt.
- Bestätigen Sie nach dem nächsten Öffnen der App, dass Push Alerts Enabled dem Berechtigungsstatus auf jedem Gerät entspricht.
Ein Segment von Benutzern erstellen, bei denen Push noch deaktiviert ist
Anchor link toFiltern Sie nach Push Alerts Enabled, um Benutzer zu finden, die die Berechtigung abgelehnt oder nie erteilt haben. Das Tag ist false, wenn Push noch nicht erlaubt ist, auch bevor der Benutzer den Systemdialog gesehen hat, sodass ein Gerät vor der Berechtigungsanfrage bereits in dieses Segment fällt.
- Fügen Sie im Segment-Builder einen Filter nach dem Tag Push Alerts Enabled hinzu.
- Setzen Sie den Operator auf ist falsch. Erfahren Sie mehr über das Erstellen von Segmenten nach Tags.
Verwenden Sie dieses Segment, um eine wiederholte Anfrage von Benutzern zurückzuhalten, bei denen Push noch nicht aktiviert ist, oder um eine periodische Rückgewinnungs-Journey durchzuführen. Ein ausgearbeitetes Beispiel mit demselben Tag finden Sie im Segment zur Wiederherstellung von Opt-outs.
Siehe auch
Anchor link to- iOS Push-Primer: die native, reine iOS-Alternative zu diesem plattformübergreifenden HTML-Ansatz.
- Popups zur Wiederherstellung von Opt-outs erstellen: Benutzer zurückgewinnen, die Push bereits deaktiviert haben (nicht die erste Anfrage), unter Verwendung desselben „Push Alerts Enabled“-Tags.
- In-Apps mit JavaScript erstellen: die vollständige Referenz zur JavaScript-Bridge.