Créer des campagnes de Wallet Pass
Une campagne de Wallet Pass vous permet de concevoir un modèle de pass unique pour Apple Wallet ou Google Wallet, de l’émettre à plusieurs utilisateurs et de gérer les mises à jour de manière centralisée.
Vous choisissez quels champs sont Partagés (synchronisant les modifications sur tous les appareils des utilisateurs simultanément) et lesquels sont Personnels (préservant des valeurs uniques comme les noms, les codes-barres ou les soldes pour chaque utilisateur).
Ce que vous pouvez faire avec les campagnes de Wallet Pass
Anchor link to- Concevoir un seul pass dans une campagne, au lieu de configurer chaque pass manuellement dans le constructeur de pass Apple Wallet ou Google Wallet.
- Choisir quels champs se mettent à jour partout (partagés) et lesquels restent spécifiques à chaque pass (personnels).
- Voir combien de passes émis sont affectés par une modification de champ avant de l’enregistrer.
- Remplacer un champ partagé sur un pass, puis redonner le contrôle à la campagne plus tard.
- Joindre des passes émis en dehors d’une campagne pour qu’ils commencent à suivre ses champs partagés.
- Suivre les révisions de la campagne et le statut de livraison de chaque mise à jour.
- Actualiser automatiquement un pass chaque fois que le tag derrière l’un de ses champs change, sans modifier la campagne.
Prérequis
Anchor link toUne campagne utilise la même configuration unique qu’un pass autonome :
Apple Wallet :
- Adhésion active au programme pour développeurs Apple
- Plateforme iOS connectée à l’application
- Certificat de signature de pass téléversé sur Pushwoosh
Google Wallet :
- Compte émetteur actif sur la console Google Pay & Wallet
- Google Wallet configuré pour l’application (ID d’émetteur et clé de compte de service Google Cloud)
Créer une campagne
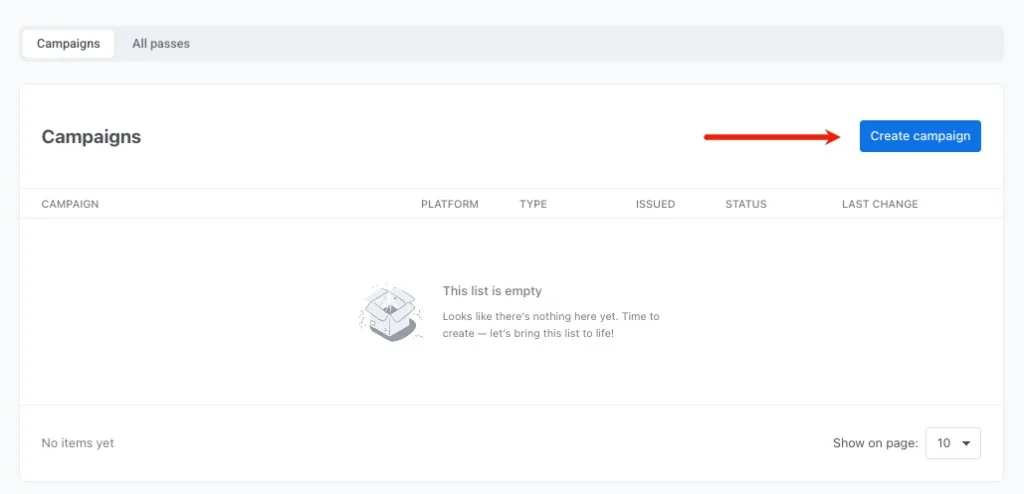
Anchor link toPour commencer à créer une campagne, allez dans Campagnes → Wallet Passes → Campagnes et cliquez sur Créer une campagne.
Définir les détails et la plateforme de la campagne
Anchor link to- Plateforme : sélectionnez Apple Wallet ou Google Wallet en haut de la page. Ce choix est permanent pour la campagne.
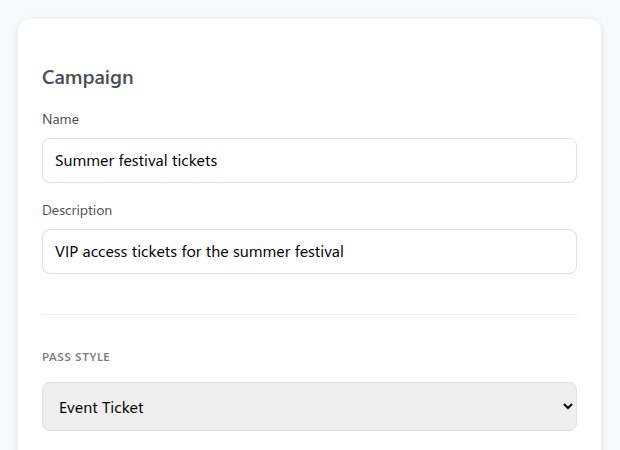
- Campagne : saisissez un Nom et une Description facultative pour votre référence interne. Aucun des deux n’apparaît sur le pass.
- Format du pass : sous Style de pass (Apple) ou Type de pass (Google), choisissez la mise en page de votre pass :
- Apple Wallet : Carte d’embarquement, Coupon, Billet d’événement, Carte de magasin, Générique. Voir Choisir un style de pass.
- Google Wallet : Générique, Offre, Carte de fidélité, Billet d’événement, Carte-cadeau, Vol, Transport. Ce choix ne peut pas être modifié après la création. Voir Choisir un type de pass.
Configurer le design et l’image de marque du pass
Anchor link toConfigurez les sections standard du pass :
- Informations de base, Couleurs et Code-barres : définissez le titre du pass, les couleurs de fond et de texte, et le type de code-barres. Pour des instructions détaillées sur chaque section, consultez Concevoir des passes dans le constructeur de pass Apple Wallet ou Concevoir des passes Google Wallet dans le constructeur de pass.
- Champs du pass : ajoutez les champs qui doivent apparaître sur la carte (voir Champs du pass Apple Wallet ou Champs et détails Google Wallet).
- Expiration : définissez les dates pertinentes et les règles d’expiration (voir Expiration Apple Wallet ou Expiration Google Wallet).
- Lieux : définissez la pertinence basée sur la localisation (voir Lieux Apple Wallet ou Lieux Google Wallet).
Définir les champs partagés et personnels
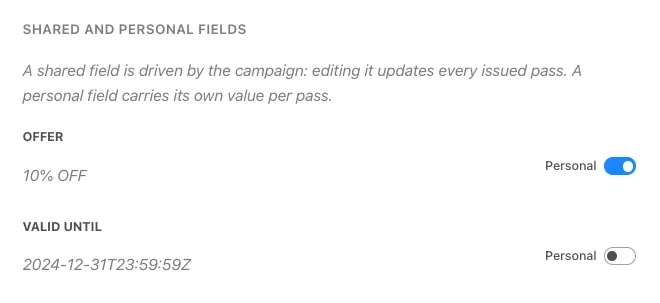
Anchor link toDans la section Champs partagés et personnels, configurez quels champs se mettent à jour globalement sur tous les passes et lesquels conservent des valeurs uniques par utilisateur. Cela contrôle ce qui se passe lorsque vous modifiez la campagne plus tard : les champs partagés se mettent à jour sur chaque pass émis, tandis que les champs personnels restent inchangés.
Activez le bouton Personnel pour tout champ qui doit contenir des valeurs uniques par utilisateur.
| Type de champ | Comportement | Exemples |
|---|---|---|
| Partagé | Piloté par la campagne. La mise à jour de ce champ synchronise la nouvelle valeur sur chaque pass sur les appareils des utilisateurs. | Date de l’événement, Numéro de porte, Adresse du magasin, Pourcentage de réduction |
| Personnel | Unique par utilisateur. La campagne n’écrase pas ces valeurs lors d’une mise à jour. | Nom d’utilisateur, Numéro de siège, ID de membre, Solde de points |
La valeur d’un champ personnel peut inclure un espace réservé pour un tag, {tag} ou {tag|format|fallback} (par exemple, {Seat}). Pushwoosh le remplit à partir du tag du destinataire lorsqu’il sert le pass. Si le destinataire n’a pas de valeur pour ce tag, Pushwoosh utilise la valeur de secours de l’espace réservé, ou laisse le champ vide si l’espace réservé n’en a pas.
- Juste le tag, rien d’autre, comme
{Seat}: le champ n’apparaît pas dans la boîte de dialogue Émettre un pass. - Le tag mélangé avec un autre texte, comme
Siège {Seat}, ou pas de tag du tout : le champ apparaît comme une entrée modifiable dans la boîte de dialogue Émettre un pass, pré-remplie avec cette valeur. Tout tag à l’intérieur se résout toujours par destinataire lorsque Pushwoosh sert le pass.
Activer la synchronisation des tags
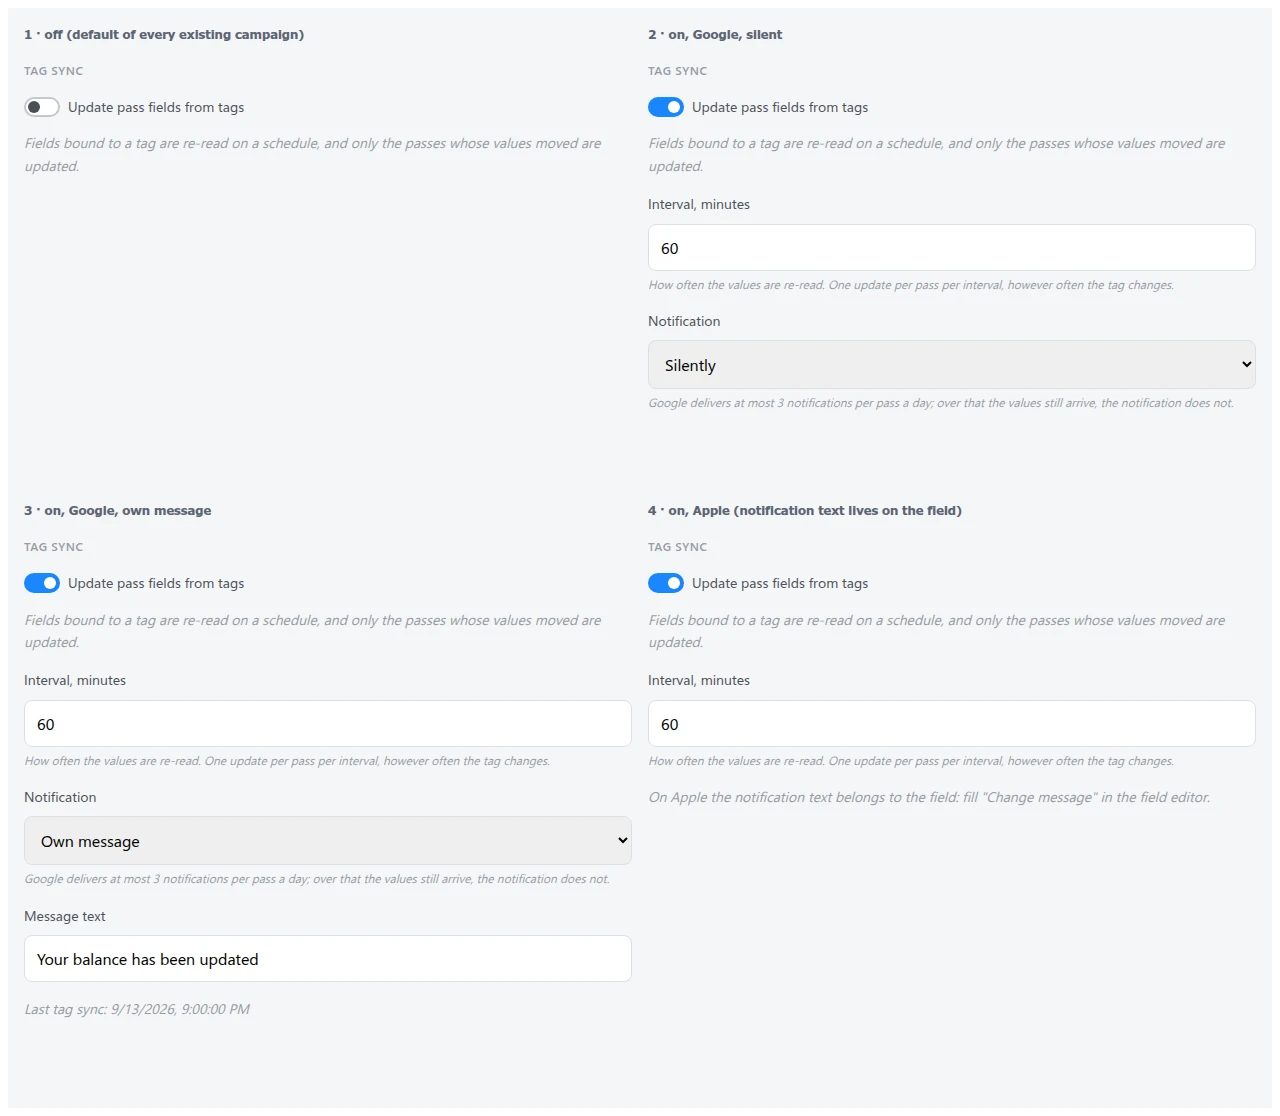
Anchor link toDans la section Synchronisation des tags, activez Mettre à jour les champs du pass à partir des tags pour que Pushwoosh revérifie périodiquement les espaces réservés pour les tags utilisés dans les champs de la campagne et envoie une nouvelle valeur à tout pass dont le tag a changé.
- Intervalle (minutes) : fréquence à laquelle Pushwoosh relit les tags. La valeur par défaut est 60 et ne peut pas être inférieure à 5. Un pass reçoit au plus une actualisation par intervalle, peu importe le nombre de fois que son tag change entre-temps.
- Notification (Google Wallet uniquement) : choisissez comment le détenteur est informé de l’actualisation : Silencieusement, Message personnalisé (remplissez Texte du message, envoyé avec la mise à jour), ou Notification de champ Google (alerte de mise à jour de champ propre à Google). Google les limite à 3 par pass par 24 heures. Au-delà, les nouvelles valeurs atteignent toujours le pass, mais sans notification.
Téléverser les images de la campagne
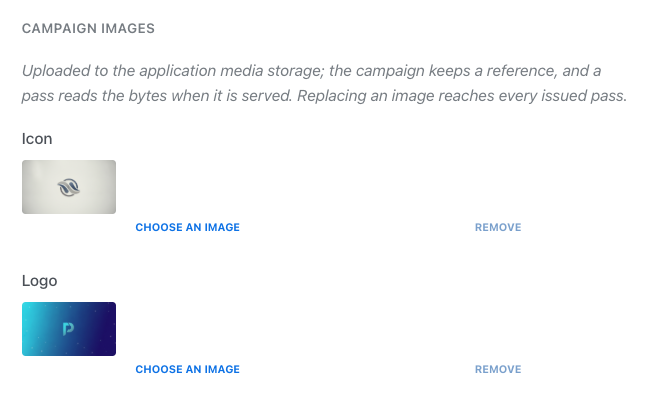
Anchor link to- Dans la section Images de la campagne, cliquez sur Choisir une image à côté d’un emplacement d’image.
- Sélectionnez une image existante de votre Médiathèque ou glissez-déposez un nouveau fichier pour le téléverser.
- Répétez pour chaque emplacement d’image disponible :
- Apple Wallet : Icône, Logo, Arrière-plan, Pied de page, Bandeau et Miniature (voir Images Apple Wallet).
- Google Wallet : Logo et Image principale.
Prévisualiser et créer la campagne
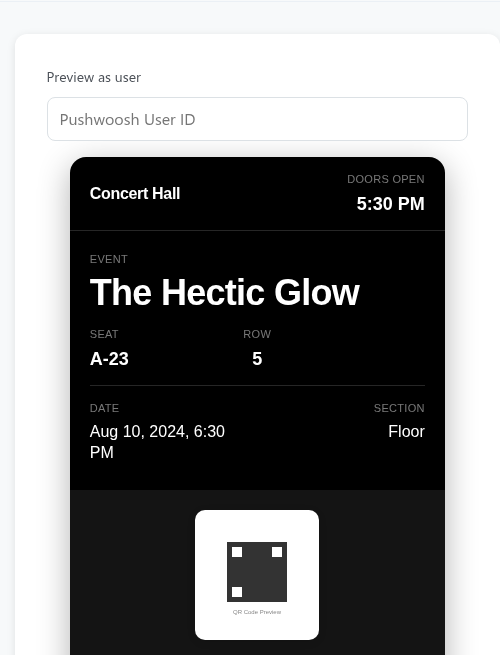
Anchor link to- Consultez le panneau Prévisualiser en tant qu’utilisateur à droite pour voir à quoi ressemble la carte. Vous pouvez saisir un ID utilisateur de test pour prévisualiser les champs personnalisés.
- Cliquez sur Créer une campagne en bas de la page.
Pushwoosh crée la campagne avec le statut Brouillon et ouvre son espace de travail, avec les onglets Design, Passes et Historique.
Émettre des passes aux utilisateurs
Anchor link toÉmettre un pass depuis la campagne
Anchor link to- Dans l’onglet Passes, cliquez sur Émettre un pass.
- Saisissez l’ID utilisateur Pushwoosh du destinataire.
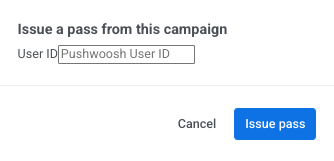
- Cliquez sur Émettre un pass pour confirmer.
Selon la configuration des Champs personnels, la modale les gère comme suit :
- Champs modifiables : apparaissent avec des valeurs par défaut que vous pouvez modifier pour cet utilisateur.
- Espaces réservés pour les tags (comme
{Seat}) : n’apparaissent pas dans la boîte de dialogue. Pushwoosh les remplit automatiquement à partir des tags de l’utilisateur.
Vous pouvez également modifier n’importe quel champ personnel sur un pass individuel à tout moment après son émission.
Pushwoosh génère le pass à partir du design actuel de la campagne et le liste dans l’onglet Passes et dans le tableau Tous les passes de l’application (Apple Wallet ou Google Wallet).
Joindre un pass existant à une campagne
Anchor link toVous pouvez joindre des passes autonomes (créés en dehors de toute campagne) à une campagne pour qu’ils commencent à recevoir des mises à jour partagées.
- Dans l’onglet Passes, cliquez sur Joindre des passes.
- Recherchez des passes par ID utilisateur, numéro de série ou code-barres.
- Sélectionnez les passes et confirmez.
Une fois joints :
- Les champs partagés commencent à suivre la campagne et se mettent à jour chaque fois que vous modifiez le modèle de pass.
- Les valeurs personnelles déjà présentes sur le pass (telles que les détails de l’utilisateur ou les soldes uniques) sont préservées.
Gérer une campagne existante
Anchor link toL’ouverture d’une campagne créée depuis Campagnes → Wallet Passes → Campagnes affiche son statut, son compteur de révisions, un aperçu en direct du pass et trois onglets principaux : Design, Passes et Historique.

Changer le statut de la campagne
Anchor link toUtilisez le statut pour suivre où en est chaque campagne : en cours de conception, en émission active de passes, ou terminée et archivée.
Pour changer le statut, sélectionnez une option dans le menu déroulant Statut dans l’en-tête de la campagne. La modification est enregistrée immédiatement sans étape de confirmation distincte :
- Brouillon ou Actif : vous permet d’émettre de nouveaux passes, de joindre des passes existants et d’envoyer des mises à jour de design.
- Archivé : met en pause l’émission de nouveaux passes. Vous ne pouvez pas émettre ou joindre de passes tant que la campagne est archivée, mais les passes précédemment émis continuent de fonctionner et de recevoir des mises à jour partagées.
Onglet Design
Anchor link toDans l’onglet Design, vous pouvez mettre à jour le modèle de pass, changer les couleurs, modifier les champs partagés et personnels, téléverser de nouvelles images de campagne ou modifier les paramètres de synchronisation des tags.
Mettre à jour le design et envoyer les modifications aux passes
Anchor link to- Dans l’onglet Design, modifiez les informations de base, les couleurs, le type de code-barres, l’expiration, les lieux, un champ partagé ou une image de campagne.
- Cliquez sur Enregistrer les modifications.
- Dans la boîte de dialogue Appliquer la modification de la campagne, confirmez la mise à jour :
- Aucun pass ne remplace le champ modifié : cliquez sur Mettre à jour N, conserver les modifications manuelles pour envoyer la modification à tous les N passes.
- Certains passes remplacent le champ modifié : la boîte de dialogue nomme le champ et indique combien de passes le remplacent. Cliquez sur Mettre à jour N, conserver les modifications manuelles pour envoyer la modification à tous les passes sauf ceux-là, ou sur Écraser les N pour l’envoyer à tous les N passes, y compris ceux qui ont été remplacés. L’écrasement efface la modification manuelle.
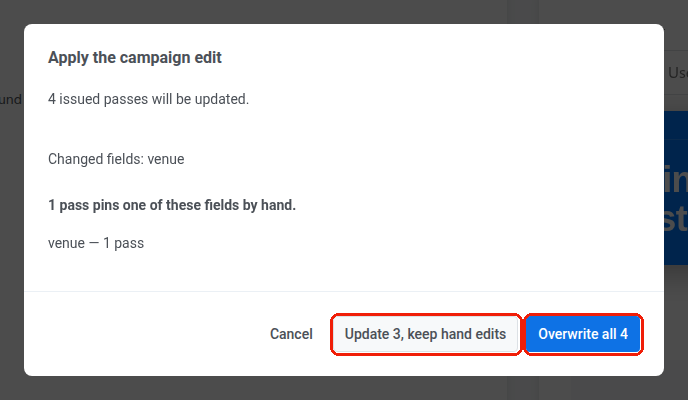
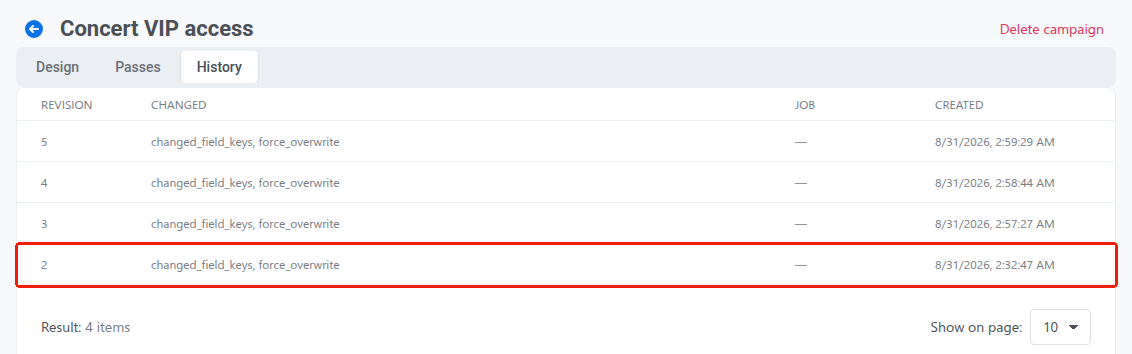
Quel que soit le bouton sur lequel vous cliquez, la mise à jour est enregistrée comme une nouvelle révision (par exemple, Révision 2), vous pouvez donc vérifier ce qui a changé et quand dans l’onglet Historique.
Remplacer un champ partagé sur un pass individuel
Anchor link toSi vous devez personnaliser un champ partagé pour un utilisateur spécifique, modifiez ce champ directement sur son pass individuel (depuis l’onglet Passes ou Tous les passes) :
- Créer un remplacement : l’enregistrement d’une valeur personnalisée sur un pass individuel détache ce champ des mises à jour à l’échelle de la campagne. Les futures mises à jour de la campagne, y compris une actualisation planifiée par synchronisation des tags, ignoreront ce pass pour ce champ spécifique.
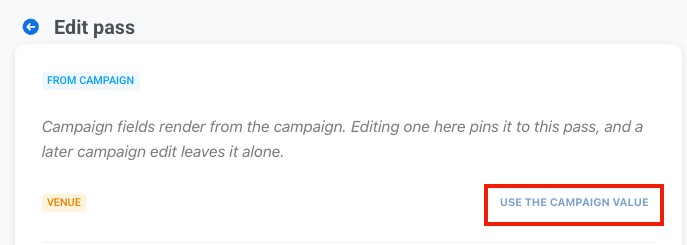
- Supprimer un remplacement : pour restaurer le contrôle de la campagne, modifiez le pass et cliquez sur Utiliser la valeur de la campagne à côté du champ remplacé.
Vous pouvez suivre quels passes ont des valeurs personnalisées dans l’onglet Passes sous la colonne Champs épinglés.
Onglet Passes
Anchor link toL’onglet Passes liste chaque pass émis par la campagne, y compris son numéro de série, l’ID utilisateur du destinataire, les champs épinglés actifs, la révision actuelle et la date de la dernière mise à jour.
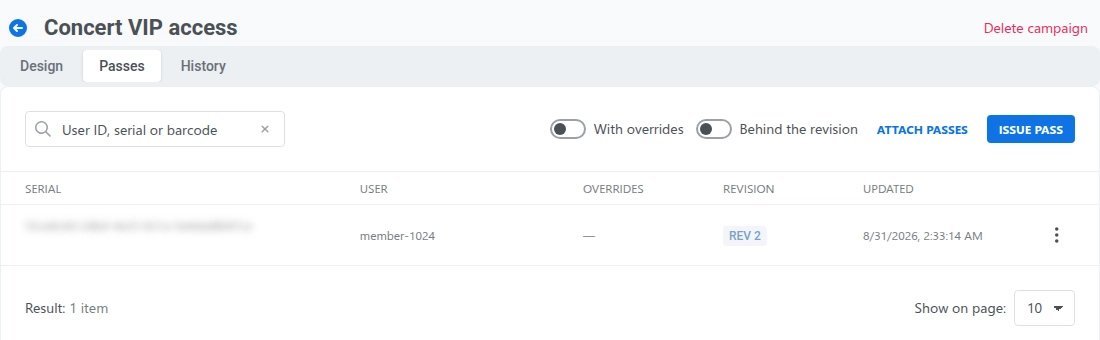
Si la synchronisation des tags est activée, l’onglet affiche également une ligne Tags synchronisés au-dessus du tableau avec la date et l’heure de la dernière exécution planifiée, ou pas encore avant la première.
Utilisez les filtres du tableau pour trouver des passes spécifiques :
- Avec des champs épinglés : affiche les passes qui ont au moins un champ modifié sur mesure.
- En retard sur la révision : affiche les passes qui n’ont pas encore reçu la dernière mise à jour de la campagne.
Pour émettre de nouveaux passes ou joindre des passes existants, voir Émettre des passes aux utilisateurs.
Ouvrez le menu d’actions d’une ligne (⋮) pour gérer ce pass :
- Modifier : ouvrez le pass sur la page de modification de sa plateforme pour changer les champs personnels ou en remplacer un partagé.
- Télécharger : sur les campagnes Apple Wallet, téléchargez le fichier
.pkpasssigné. Les campagnes Google Wallet n’affichent pas cette option, car Google Wallet n’a pas d’équivalent de fichier téléchargeable. - Envoyer un message : ouvrez le compositeur de push unique pour envoyer un message au destinataire du pass par ID utilisateur. Voir Envoyer un message aux détenteurs de Wallet Pass pour toutes les manières de les contacter.
- Code QR : affichez un code QR d’installation que les utilisateurs peuvent scanner pour ajouter le pass et enregistrer leur appareil pour les mises à jour.
- Copier le lien d’installation : copiez l’URL d’installation pour partager le pass dans vos canaux de messagerie.
- Supprimer : supprimez le pass. Cette action est irréversible. Sur Apple Wallet, les copies déjà installées cessent de recevoir des mises à jour et deviennent invalides lors de leur prochaine actualisation. Sur Google Wallet, Google ne permet pas de forcer la suppression d’un pass déjà enregistré sur un appareil, il devient donc invalide et est déplacé vers les Passes expirés de l’utilisateur pendant que Pushwoosh supprime son enregistrement. La suppression d’un pass ici ne supprime pas la campagne ni aucun autre pass émis.
Onglet Historique
Anchor link toL’onglet Historique liste toutes les révisions de la campagne par ordre chronologique, en montrant quels champs ont été modifiés dans chaque version.
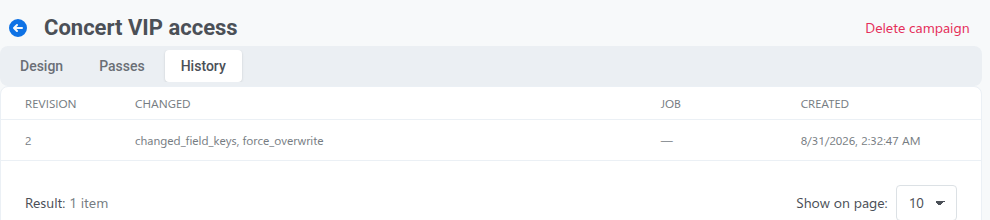
Le statut de livraison de la mise à jour la plus récente apparaît sous les onglets :
- Annuler : arrête l’envoi de la mise à jour aux passes qu’elle n’a pas encore atteints. Ces passes restent sur leur révision précédente.
- Réessayer les échecs : tente à nouveau la livraison pour les passes qui n’ont pas pu être mis à jour (marqués comme échoués après 5 tentatives).
Une fois qu’une nouvelle révision est enregistrée, les anciennes mises à jour ne peuvent plus être réessayées ou annulées.
Supprimer une campagne
Anchor link toOuvrez la campagne et cliquez sur Supprimer la campagne en haut à droite de la page.

La suppression d’une campagne ne supprime ni n’invalide les passes déjà émis. Les passes émis conservent leur contenu et leurs images actuels, mais cessent de recevoir des mises à jour partagées. Toute modification future devra être effectuée sur chaque pass individuellement.