สร้างเนื้อหาอีเมลด้วย Drag & drop editor
สร้างเนื้อหาอีเมลในเครื่องมือแก้ไขในตัวของ Pushwoosh โดยไม่ต้องเขียนโค้ด คุณจะได้รับเลย์เอาต์ที่ใช้ซ้ำได้พร้อมบล็อกเนื้อหา รูปภาพ ปุ่ม ข้อความส่วนบุคคล และส่วนท้ายที่สอดคล้องกับข้อกำหนด ซึ่งคุณสามารถใช้ใน Customer Journey หรืออีเมลแบบครั้งเดียวได้
สร้างเนื้อหาอีเมลใหม่
Anchor link to- ไปที่ Content → Email content
- เลือกวิธีเริ่มต้น:
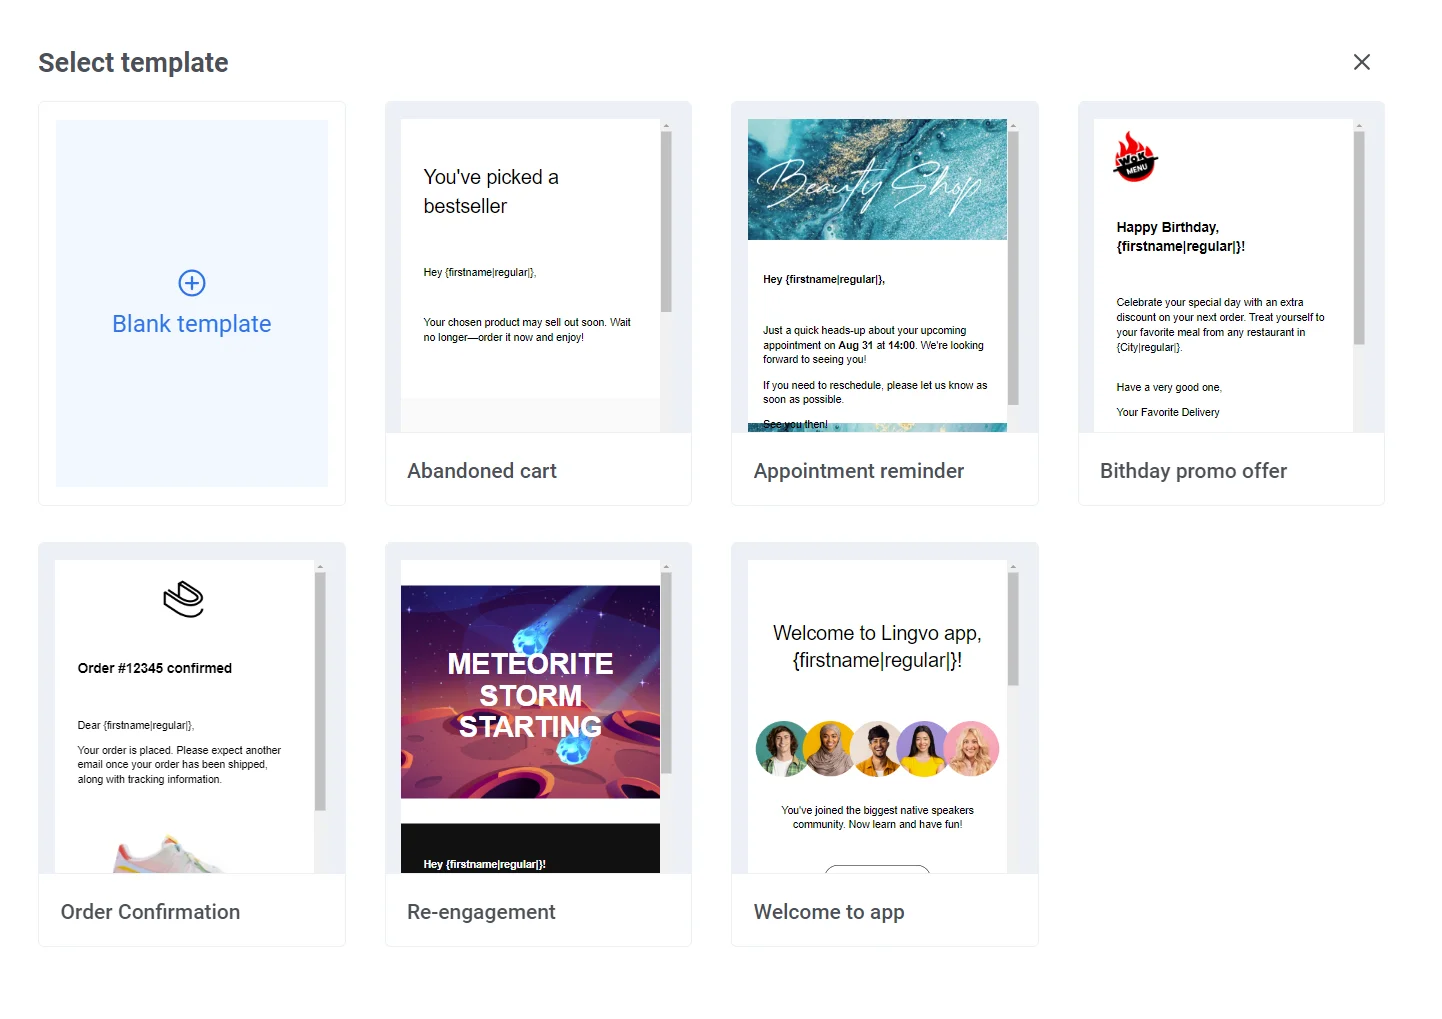
- คลิก Create email content เพื่อเปิดแกลเลอรีเทมเพลตของ builder เลือกเทมเพลตเพื่อเริ่มต้นด้วยเนื้อหาที่กรอกไว้แล้วและปรับสีตามแบรนด์ หรือเลือก Blank email เพื่อเริ่มจากศูนย์ เรียนรู้เพิ่มเติม
- คลิกลูกศรข้าง Create email content จากนั้นเลือก HTML code เพื่อใช้เครื่องมือแก้ไขโค้ด HTML เรียนรู้เพิ่มเติม
สำรวจเลย์เอาต์ของเครื่องมือแก้ไข
Anchor link toเมื่อคุณเปิดอีเมล เครื่องมือแก้ไขในตัวจะมีพื้นที่เหล่านี้:
แถบด้านบน (Top bar)
เปลี่ยนชื่ออีเมล เลิกทำหรือทำซ้ำการเปลี่ยนแปลง เรียกใช้ Check เพื่อตรวจจับปัญหาก่อนที่คุณจะส่ง และบันทึกงานของคุณ ดู ตรวจสอบอีเมลของคุณก่อนส่ง เปิดเมนู ⋮ สำหรับการดำเนินการเพิ่มเติม:
- Preview: ดูอีเมลตามที่จะแสดงผลสำหรับผู้รับ พร้อมปุ่มสลับ Desktop/Mobile ของตัวเอง ดู แก้ไขมุมมองมือถือ
- Test email: ส่งตัวอย่างไปยังอุปกรณ์ทดสอบหรือที่อยู่ทดสอบ ดู ส่งอีเมลทดสอบ
- Brand book: ใช้โลโก้ สี ฟอนต์ และค่าเริ่มต้นของบล็อกที่คุณบันทึกไว้กับอีเมลนี้ในคลิกเดียว เรียนรู้เพิ่มเติม
- ส่วน Brand styles: ใช้แบรนด์ที่คุณบันทึกไว้หรือรีเซ็ตการตั้งค่าสไตล์ของแต่ละบล็อกโดยไม่ต้องเปิด Brand book เรียนรู้เพิ่มเติม
- Version history: ดูและกู้คืนเวอร์ชันที่บันทึกไว้ก่อนหน้านี้ของอีเมลนี้ ดู กู้คืนเวอร์ชันก่อนหน้า

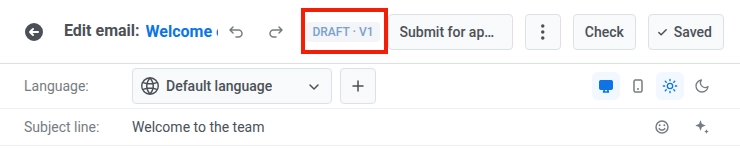
แถบภาษา / หัวเรื่อง / Preheader
เหนือ canvas ให้สลับภาษาในการแก้ไข ตั้งค่าหัวเรื่องและ preheader สำหรับอีเมล และใช้ Auto-translate เพื่อเติมคำแปลที่ขาดหายไป เรียนรู้วิธีตั้งค่าภาษาและการแปลภาษา

Canvas
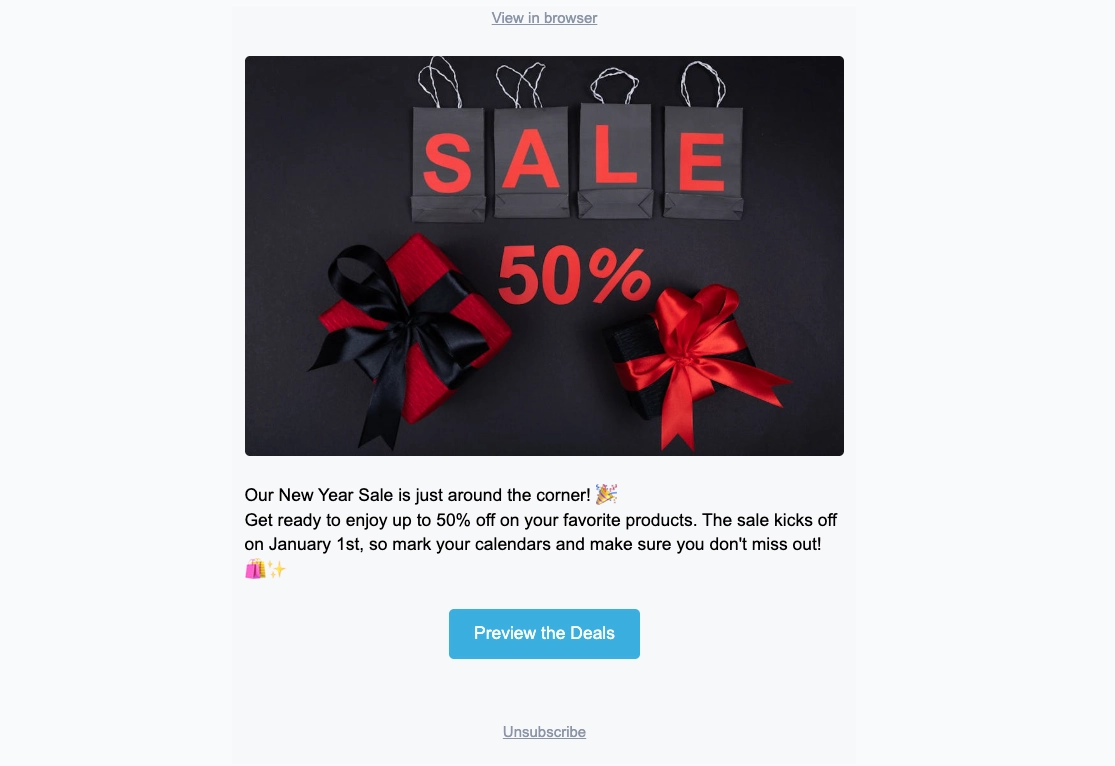
ดูอีเมลตามที่ผู้รับจะเห็น และแก้ไขข้อความ รูปภาพ และปุ่มโดยตรงบนเลย์เอาต์ อีเมลที่ว่างเปล่าจะแสดง Start with a block
แผง Layers
แสดงรายการทุกบล็อกในอีเมลของคุณเป็นโครงสร้างต้นไม้ ในลำดับเดียวกับบน canvas เปิดจากขอบด้านซ้ายเพื่อเลือกบล็อกที่ซ้อนกันหรือลากแถวเพื่อจัดลำดับเนื้อหาใหม่
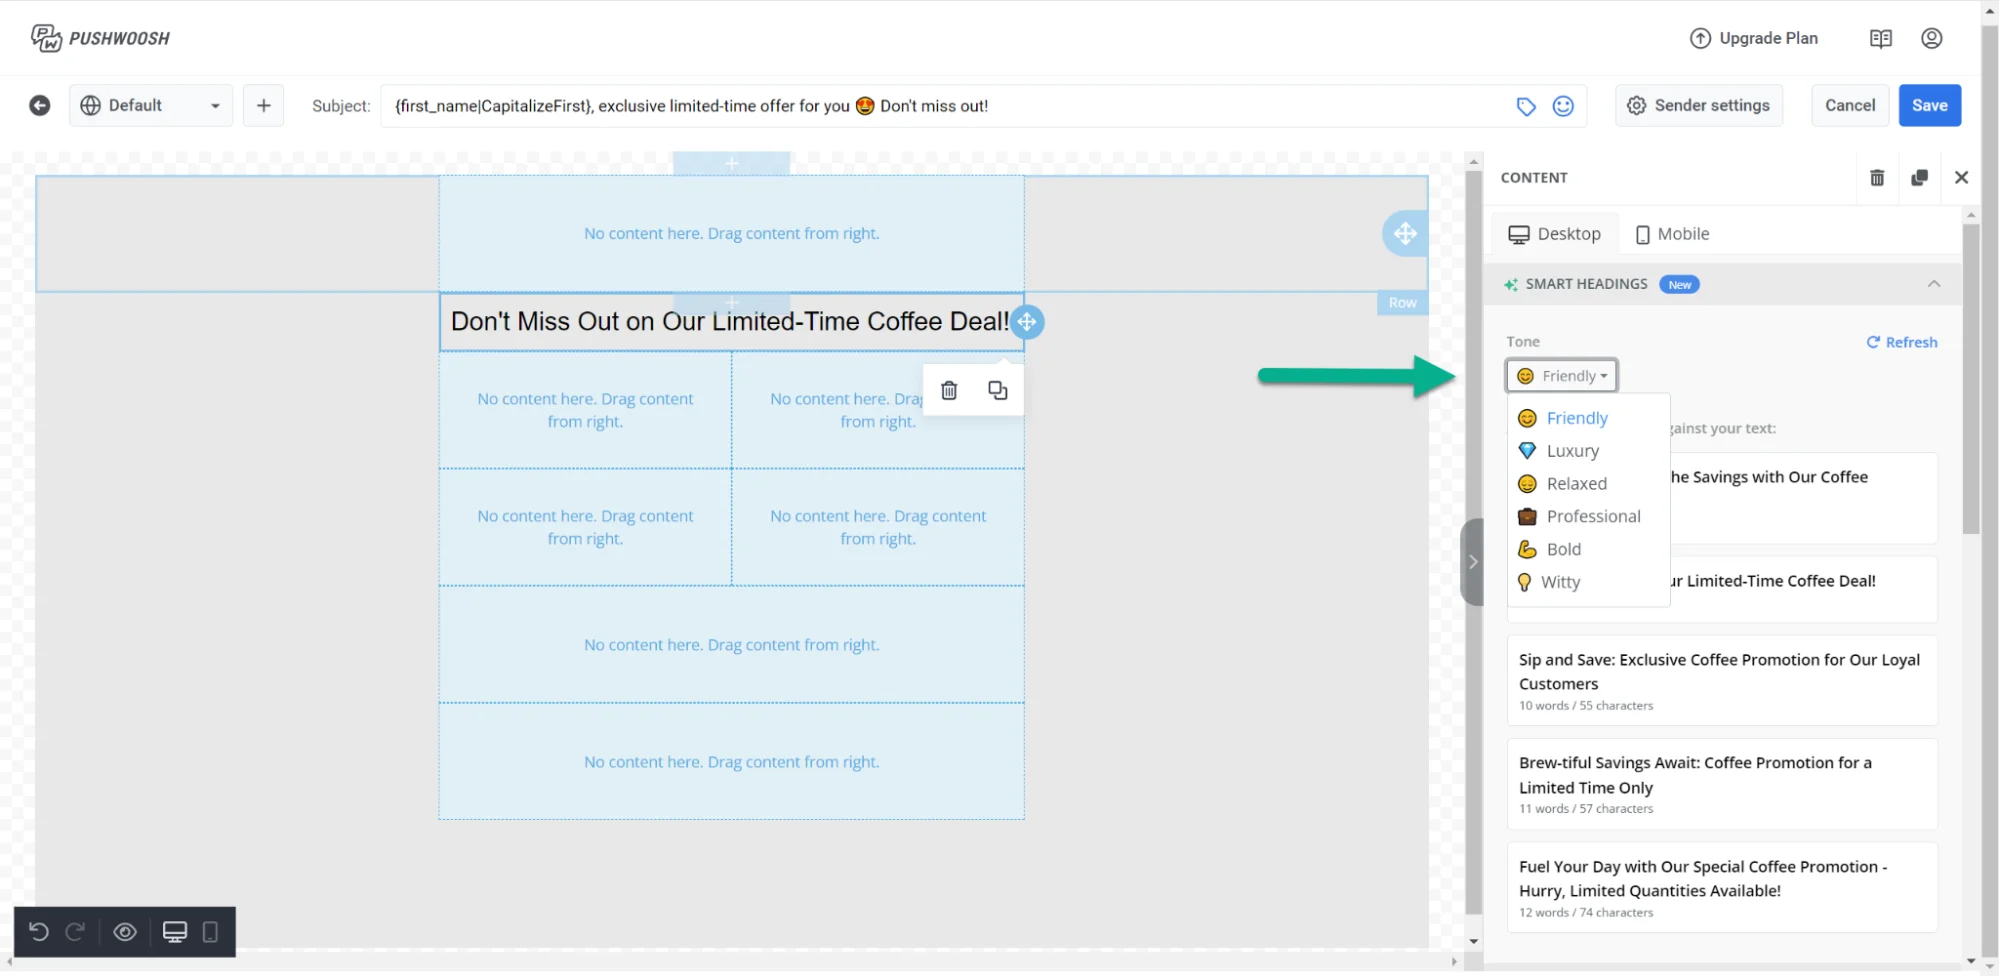
แผงด้านขวา
สลับระหว่างสามแท็บ:
- Blocks: เพิ่มเนื้อหาลงในอีเมล ดู อ้างอิงบล็อกเนื้อหาอีเมล
- Settings: ใช้สไตล์กับทั้งอีเมลในครั้งเดียว ดู กำหนดค่าสไตล์และส่วนท้ายของอีเมลทั้งหมด
- AI: สนทนากับผู้ช่วย AI เพื่อสร้างหรือแก้ไขเนื้อหาจากข้อความแจ้ง
เพิ่มบล็อกเนื้อหา
Anchor link to- เปิดแท็บ Blocks ในแผงด้านขวา
- ลากบล็อกลงบน canvas หรือคลิกบล็อกเพื่อเพิ่มที่ท้ายอีเมล
- เพิ่มบล็อกต่อไปจนกว่าเลย์เอาต์จะพร้อม
บล็อกแต่ละประเภทมีวัตถุประสงค์ที่แตกต่างกันในอีเมล:
- Heading: ชื่อเรื่องและหัวข้อสั้นๆ
- Text: เนื้อหาหลักและคำอธิบายที่ยาวขึ้น
- Button: คำกระตุ้นการตัดสินใจที่คลิกได้
- Image: รูปภาพจาก Media storage การอัปโหลด หรือ URL
- Video: โปสเตอร์วิดีโอที่คลิกได้ซึ่งจะเปิดบน YouTube หรือ Vimeo
- Card: รูปภาพพร้อมหัวเรื่อง ข้อความ และปุ่มในเลย์เอาต์เดียว
- Divider: เส้นที่แบ่งส่วนต่างๆ
- Columns: เลย์เอาต์แบบเคียงข้างกัน (2, 3 หรือ 4 คอลัมน์เท่ากัน หรือแบ่ง 33/67 และ 67/33)
- Products: ตารางของการ์ดผลิตภัณฑ์ — ป้อนผลิตภัณฑ์ด้วยตนเอง หรือดึงมาจาก Product catalog ของคุณ หรือตะกร้าสินค้าที่ถูกทิ้งของผู้รับ
- Timer: ตัวนับถอยหลังสำหรับข้อเสนอและกำหนดเวลา
- Menu: แถวหรือคอลัมน์ของลิงก์นำทางหรือลิงก์ติดต่อ
- Social: ไอคอนที่เชื่อมโยงไปยังโปรไฟล์โซเชียลของคุณ
- HTML: HTML ที่กำหนดเอง เช่น ฟอร์ม แบบสำรวจ หรือวิดีโอที่ฝังไว้
ดู อ้างอิงบล็อกเนื้อหาอีเมล สำหรับการตั้งค่าของแต่ละบล็อก วิธีบันทึกและใช้บล็อกซ้ำ และ ประเภทลิงก์ สำหรับปุ่มและข้อความ
แสดงเนื้อหาให้ผู้รับเฉพาะกลุ่ม
Anchor link toหากต้องการแสดงบล็อกให้ผู้รับบางรายเท่านั้น ให้ตั้งค่า เงื่อนไขการแสดงผล
แก้ไขมุมมองมือถือ
Anchor link toเมื่อคุณเพิ่มบล็อกเนื้อหาแล้ว ให้สลับไปที่มุมมองมือถือเพื่อตรวจสอบและปรับแต่งลักษณะที่ปรากฏบนโทรศัพท์ ถัดจากตัวสลับภาษาเหนือ canvas ให้ใช้ปุ่มสลับ Desktop / Mobile เพื่อสลับไปยังมุมมองมือถือที่สามารถแก้ไขได้อย่างเต็มที่ตามความกว้างจริงของโทรศัพท์ เลือก แก้ไข และจัดเรียงเนื้อหาใหม่ได้ตรงตามที่ผู้ติดตามของคุณจะเห็นบนโทรศัพท์ของพวกเขา แทนที่จะเป็นเพียงการดูตัวอย่างว่าเลย์เอาต์เดสก์ท็อปปรับตัวอย่างไร
การตั้งค่าทุกอย่างที่สามารถปรับเปลี่ยนสำหรับมือถือได้จะมีช่องทำเครื่องหมายอยู่ข้างๆ เมื่อช่องทำเครื่องหมายไม่ถูกเลือก คำใบ้จะแสดงค่าที่สืบทอดมาจากเดสก์ท็อป และการตั้งค่าจะยังคงใช้ค่านั้นต่อไป เปิดช่องทำเครื่องหมายเพื่อตั้งค่าแยกต่างหากสำหรับมือถือ ปิดอีกครั้งเพื่อกลับไปใช้ค่าของเดสก์ท็อป
ตั้งค่า padding และขนาดฟอนต์ที่แตกต่างกันสำหรับแต่ละอุปกรณ์
Anchor link to- Padding: ทุกบล็อก คอลัมน์ การ์ด และองค์ประกอบแต่ละอย่าง (เช่น ข้อความ รูปภาพ หรือปุ่ม) มีตัวควบคุม padding ที่คุณสามารถปรับเปลี่ยนสำหรับมือถือได้ สลับ canvas ไปที่ Mobile เปิดช่องทำเครื่องหมายข้าง Padding และตั้งค่าใหม่ padding ของเดสก์ท็อปจะยังคงเหมือนเดิมจนกว่าคุณจะเปิดช่องทำเครื่องหมาย
- Font size: เปิด Font size (mobile) บนองค์ประกอบข้อความเพื่อตั้งค่าขนาดสำหรับมือถือโดยเฉพาะ หากไม่มีการปรับเปลี่ยนนี้ หัวข้อขนาดใหญ่จะย่อขนาดลงโดยอัตโนมัติเพื่อให้พอดีกับหน้าจอโทรศัพท์
ควบคุมวิธีการเรียงซ้อนของคอลัมน์บนมือถือ
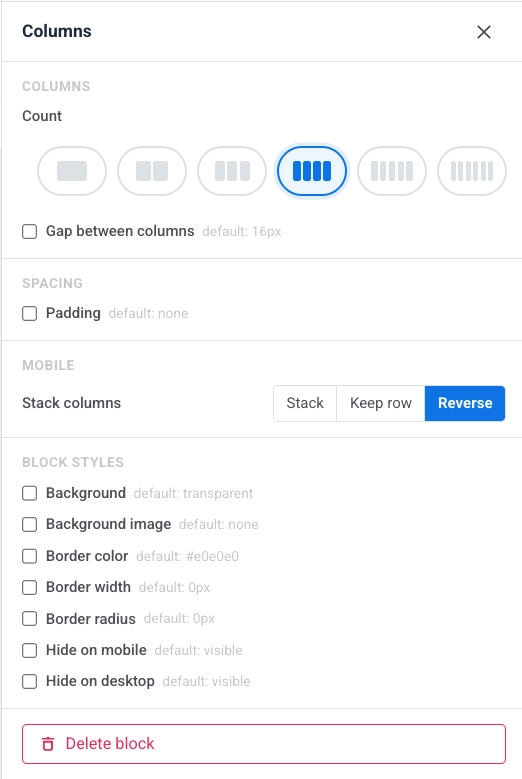
Anchor link toเลย์เอาต์ Columns จะเรียงซ้อนกันในแนวตั้งบนโทรศัพท์โดยค่าเริ่มต้น ในมุมมองมือถือ ใช้ Stack columns เพื่อตั้งค่าการทำงานของแต่ละบล็อก Columns:
- Stack: คอลัมน์จะไหลรวมเป็นคอลัมน์เดียว จากบนลงล่าง (ค่าเริ่มต้น)
- Keep row: คอลัมน์จะอยู่เคียงข้างกัน คงเลย์เอาต์ของเดสก์ท็อปไว้
- Reverse: คอลัมน์จะเรียงซ้อนกันในลำดับย้อนกลับ มีประโยชน์สำหรับแถวที่มีรูปภาพ + ข้อความ: ให้รูปภาพอยู่ทางขวาบนเดสก์ท็อป แต่แสดงไว้ด้านบนบนมือถือ
แสดงหรือซ่อนเนื้อหาตามอุปกรณ์
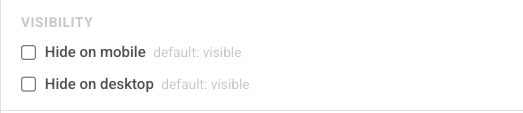
Anchor link toเปิดการตั้งค่าของบล็อกหรือองค์ประกอบและใช้ Hide on mobile หรือ Hide on desktop ใต้ Visibility เพื่อแสดงบนอุปกรณ์เพียงชนิดเดียว เพื่อให้คุณสามารถสร้างแบนเนอร์, CTA หรือการนำทางเฉพาะอุปกรณ์ได้โดยไม่ต้องดูแลรักษาเทมเพลตสองชุด
กำหนดค่าสไตล์และส่วนท้ายของอีเมลทั้งหมด
Anchor link toหลังจากวางเลย์เอาต์หลักแล้ว ให้เปิดแท็บ Settings เพื่อตั้งค่าฟอนต์ สี และระยะห่างที่จะใช้กับทั้งอีเมล และกรอกข้อมูลใน Footer พร้อมรายละเอียดบริษัทและลิงก์ยกเลิกการสมัครของคุณ ค่าเริ่มต้นที่นี่จะทำให้บล็อกใหม่มีความสอดคล้องกันจนกว่าคุณจะปรับเปลี่ยนบน canvas เรียนรู้เพิ่มเติม
บันทึกอีเมลของคุณ
Anchor link toคลิก Save ในแถบด้านบนเพื่อบันทึกการเปลี่ยนแปลงของคุณ ใช้ Undo/Redo ในแถบด้านบนเพื่อย้อนกลับและไปข้างหน้าในการแก้ไขของคุณ
กู้คืนเวอร์ชันก่อนหน้า
Anchor link toPushwoosh จะบันทึกสแนปชอตทุกครั้งที่คุณคลิก Save หากต้องการเข้าถึง ให้เปิดเมนู ⋮ ในแถบด้านบนและเลือก Version history — ซึ่งจะใช้ได้เมื่ออีเมลถูกบันทึกอย่างน้อยหนึ่งครั้ง
แผงด้านซ้ายจะแสดงรายการเวอร์ชันที่บันทึกไว้โดยเรียงจากใหม่สุดไปเก่าสุด พร้อมด้วยผู้สร้าง การประทับเวลา และป้าย Latest บนเวอร์ชันปัจจุบัน เลือกเวอร์ชันใดก็ได้เพื่อดูตัวอย่างทางด้านขวา จากนั้นคลิก Restore เพื่อโหลดลงในเครื่องมือแก้ไข
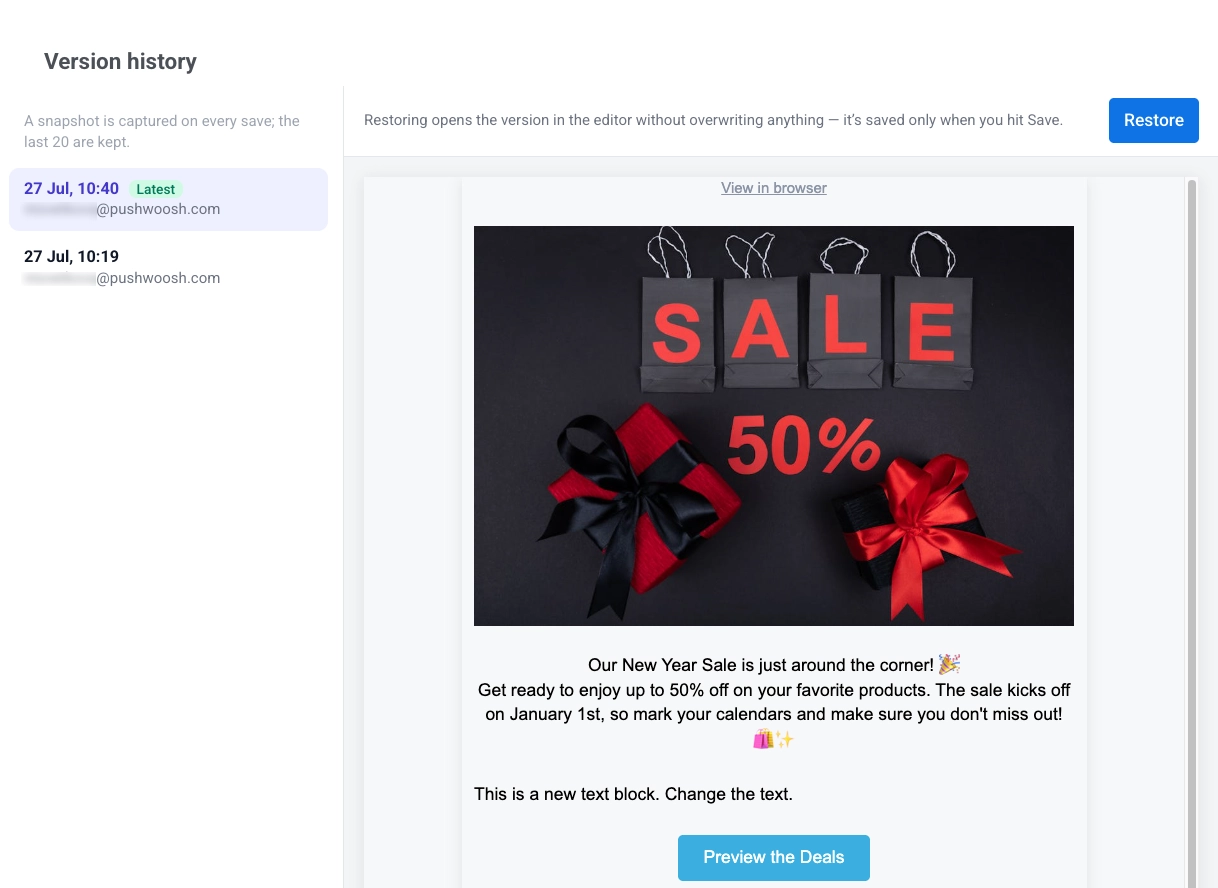
การกู้คืนจะโหลดเนื้อหา HTML, รูปแบบภาษา และธีมของเวอร์ชันนั้นเป็นการเปลี่ยนแปลงที่ยังไม่ได้บันทึก จะไม่กระทบต่อสไตล์และส่วนท้ายของอีเมลทั้งหมดที่ตั้งค่าไว้ในแท็บ Settings จะไม่มีอะไรถูกเขียนทับจนกว่าคุณจะคลิก Save หากต้องการเลิกทำการกู้คืน ให้กด Cmd/Ctrl+Z Pushwoosh จะเก็บเวอร์ชันล่าสุด 20 เวอร์ชันต่ออีเมล และเวอร์ชันที่รอการอนุมัติจะไม่ถูกลบออก
ตรวจสอบอีเมลของคุณก่อนส่ง
Anchor link toคลิก Check ในแถบด้านบนเพื่อเปิด Smart check และสแกนอีเมลของคุณเพื่อหาปัญหาทั่วไป:
- ปุ่มที่ไม่มีลิงก์
- ตัวยึดตำแหน่ง AI ที่ยังไม่ได้กรอก
- ช่องรูปภาพที่ว่างเปล่าและข้อความ alt ที่หายไป
- ความคมชัดของข้อความที่ไม่เป็นไปตามมาตรฐาน WCAG AA
- หัวเรื่องที่ว่างเปล่าหรือยาวเกินไป
- ที่อยู่ไปรษณีย์ของผู้ส่งที่หายไปในส่วนท้ายของอีเมลการตลาด
- เนื้อหาที่ทำให้อีเมลเกินขีดจำกัดการตัดของ Gmail (~102 KB หลังจากนั้น Gmail จะตัดข้อความ)
- เนื้อหาที่ยังไม่ได้แปล
- คำแปลที่ยังไม่ได้ตรวจสอบ ที่ยังไม่ได้รับการยืนยัน
- ตัวนับถอยหลังที่วันสิ้นสุดผ่านไปแล้ว
- เงื่อนไขการแสดงผล ที่มีกฎที่เสียหรือว่างเปล่า, สาขาที่สูญเสียบล็อกที่เชื่อมต่ออยู่, หรือเงื่อนไขที่จะไม่ถูกนำไปใช้เนื่องจากเนื้อหาไดนามิกถูกปิดใช้งานสำหรับบัญชี
- ไวยากรณ์ Liquid ที่เสียในหัวเรื่อง, preheader, ส่วนท้าย หรือเนื้อหา ซึ่งตรวจสอบในทุกภาษาที่คุณเพิ่ม
- บล็อก Products ที่ใช้ Catalog rule, Cart หรือ Recommendations โดยไม่มี API access token
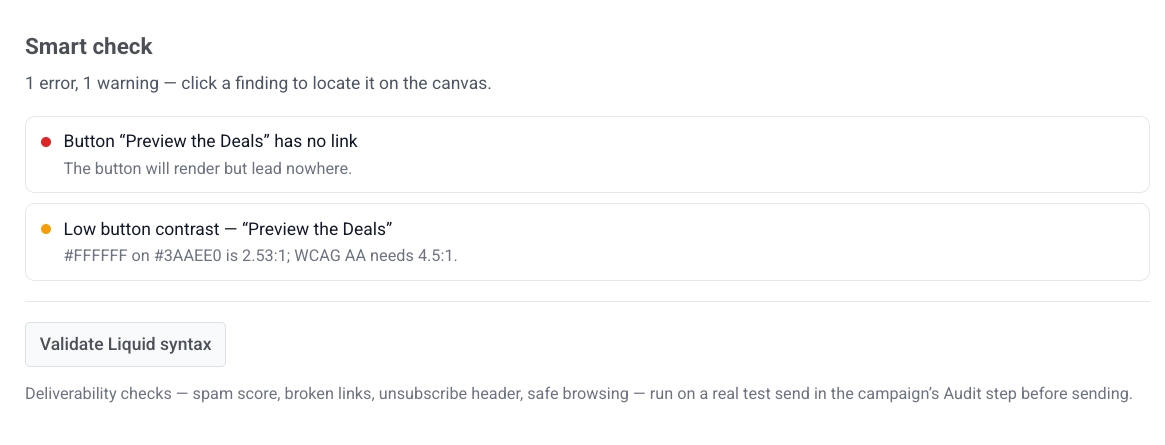
คลิกที่ผลการค้นหาเพื่อข้ามไปยังองค์ประกอบที่ได้รับผลกระทบบน canvas โดยตรง
Smart check จะตรวจสอบไวยากรณ์ Liquid โดยอัตโนมัติทุกครั้งที่คุณเปิด — ไม่จำเป็นต้องคลิกปุ่มแยกต่างหาก ในขณะที่การตรวจสอบกำลังทำงาน แผงจะแสดง Checking Liquid syntax…; Smart check จะไม่รายงานว่าทุกอย่างผ่านการตรวจสอบจนกว่าการตรวจสอบนี้จะเสร็จสิ้น ดังนั้นการตรวจสอบ Liquid ที่ช้าหรือล้มเหลวจะไม่สามารถซ่อนอยู่หลังข้อความ “ทุกอย่างเรียบร้อย” ที่ไม่เป็นความจริงได้
ส่งอีเมลทดสอบ
Anchor link toก่อนที่จะส่งแคมเปญอีเมลของคุณ คุณสามารถส่งอีเมลทดสอบเพื่อดูตัวอย่างว่าเนื้อหาจะปรากฏในกล่องจดหมายของผู้รับอย่างไร
- เปิดเมนู ⋮ ในแถบด้านบนและเลือก Test email
- ในหน้าต่างที่เปิดขึ้นมา ให้เพิ่มผู้รับได้สูงสุด 50 คน: เลือก อุปกรณ์ทดสอบ ที่บันทึกไว้อย่างน้อยหนึ่งเครื่อง หรือพิมพ์ที่อยู่อีเมลที่ถูกต้องเพื่อเพิ่มลงในรายการ หากต้องการลบผู้รับ ให้คลิก × บนนั้น
-
ตามต้องการ ให้เลือก Add [TEST] before the subject line เพื่อเติม
[TEST]ไว้หน้าหัวเรื่องในทุกภาษาของเนื้อหาอีเมลนี้ ช่องทำเครื่องหมายนี้ปิดอยู่โดยค่าเริ่มต้น -
คลิก Send เพื่อส่งข้อความทดสอบไปยังผู้รับที่เลือกทั้งหมด หากที่อยู่ทั้งหมดล้มเหลว Pushwoosh จะแสดงข้อผิดพลาดในกล่องโต้ตอบ หากมีเพียงบางส่วนที่ล้มเหลว จะแสดงรายการที่อยู่ที่ล้มเหลวในข้อความแจ้งเตือนและยังคงส่งไปยังส่วนที่เหลือ
ใช้เนื้อหาอีเมลที่คุณบันทึกไว้
Anchor link toตอนนี้เนื้อหาอีเมลของคุณพร้อมแล้ว สามารถนำไปใช้ในแคมเปญอีเมลได้ เรียนรู้เพิ่มเติมเกี่ยวกับวิธีการใช้งาน