Создание кампаний Wallet Pass
Кампания Wallet Pass позволяет создать единый шаблон карты Apple Wallet или Google Wallet, выпустить его для нескольких пользователей и централизованно управлять обновлениями.
Вы выбираете, какие поля будут Общими (изменения синхронизируются на всех устройствах пользователей одновременно), а какие — Персональными (сохраняют уникальные значения, такие как имена, штрихкоды или балансы, для каждого пользователя).
Что можно делать с кампаниями Wallet Pass
Anchor link to- Создавать одну карту в кампании, вместо того чтобы настраивать каждую карту вручную в конструкторе карт Apple Wallet или Google Wallet.
- Выбирать, какие поля обновляются везде (общие), а какие остаются индивидуальными для каждой карты (персональные).
- Видеть, на скольких выпущенных картах отразится изменение поля, прежде чем вы его сохраните.
- Переопределять общее поле на одной карте, а затем возвращать управление кампании.
- Прикреплять карты, выпущенные вне кампании, чтобы они начали отслеживать ее общие поля.
- Отслеживать ревизии кампании и статус доставки каждого обновления.
- Автоматически обновлять карту всякий раз, когда изменяется тег, связанный с одним из ее полей, без редактирования кампании.
Предварительные требования
Anchor link toДля кампании требуется та же однократная настройка, что и для отдельной карты:
Apple Wallet:
- Активная подписка на Apple Developer Program
- Платформа iOS подключена к приложению
- Сертификат для подписи карт загружен в Pushwoosh
Google Wallet:
- Активный аккаунт эмитента в Google Pay & Wallet Console
- Google Wallet сконфигурирован для приложения (Issuer ID и ключ сервисного аккаунта Google Cloud)
Создание кампании
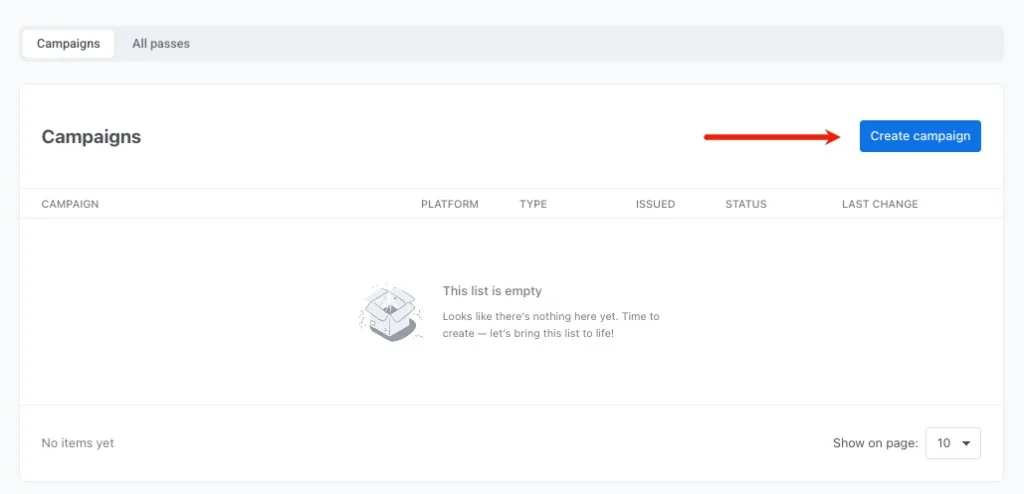
Anchor link toЧтобы начать создание кампании, перейдите в Campaigns → Wallet Passes → Campaigns и нажмите Create campaign.
Укажите детали кампании и платформу
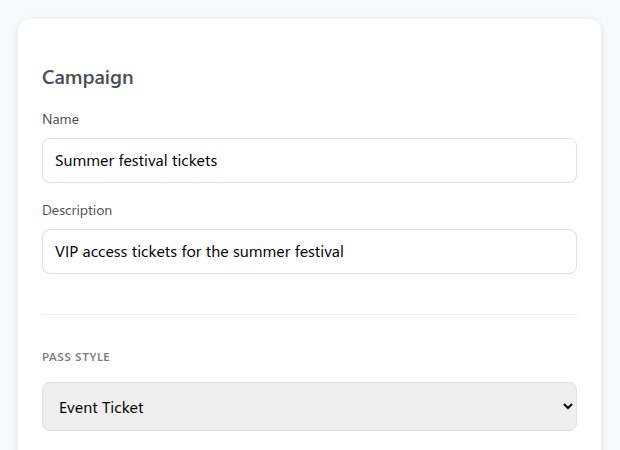
Anchor link to- Platform: выберите Apple Wallet или Google Wallet в верхней части страницы. Этот выбор является окончательным для кампании.
- Campaign: введите Name и, при желании, Description для внутреннего использования. Ни то, ни другое не отображается на карте.
- Pass format: в разделе Pass Style (Apple) или Pass Type (Google) выберите макет для вашей карты:
- Apple Wallet: Boarding Pass, Coupon, Event Ticket, Store Card, Generic. См. Выберите стиль карты.
- Google Wallet: Generic, Offer, Loyalty card, Event ticket, Gift card, Flight, Transit. Этот параметр нельзя изменить после создания. См. Выберите тип карты.
Настройте дизайн и брендинг карты
Anchor link toНастройте стандартные разделы карты:
- Basic Information, Colors, and Barcode: установите заголовок карты, цвета фона и текста, а также тип штрихкода. Подробные инструкции по каждому разделу см. в Дизайн карт в конструкторе Apple Wallet или Дизайн карт Google Wallet в конструкторе.
- Pass fields: добавьте поля, которые должны отображаться на карте (см. Поля карт Apple Wallet или Поля и детали Google Wallet).
- Expiration: установите соответствующие даты и правила истечения срока действия (см. Срок действия Apple Wallet или Срок действия Google Wallet).
- Locations: установите релевантность на основе местоположения (см. Местоположения Apple Wallet или Местоположения Google Wallet).
Установите общие и персональные поля
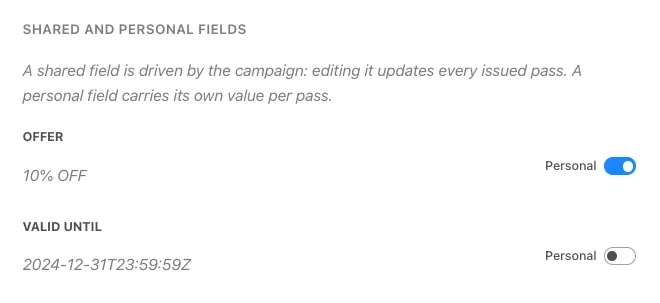
Anchor link toВ разделе Shared and personal fields настройте, какие поля будут обновляться глобально для всех карт, а какие сохранят уникальные значения для каждого пользователя. Это определяет, что произойдет при последующем редактировании кампании: общие поля обновятся на каждой выпущенной карте, а персональные останутся без изменений.
Включите переключатель Personal для любого поля, которое должно содержать уникальные значения для каждого пользователя.
| Тип поля | Поведение | Примеры |
|---|---|---|
| Shared | Управляется кампанией. Обновление этого поля синхронизирует новое значение на всех картах на устройствах пользователей. | Дата мероприятия, номер выхода на посадку, адрес магазина, процент скидки |
| Personal | Уникально для каждого пользователя. Кампания не перезаписывает эти значения при обновлении. | Имя пользователя, номер места, ID участника, баланс баллов |
Значение персонального поля может включать плейсхолдер тега, {tag} или {tag|format|fallback} (например, {Seat}). Pushwoosh заполняет его из тега получателя при выдаче карты. Если у получателя нет значения для этого тега, Pushwoosh использует резервное значение из плейсхолдера или оставляет поле пустым, если в плейсхолдере его нет.
- Только тег, без ничего другого, например
{Seat}: поле не отображается в диалоговом окне Issue pass. - Тег в сочетании с другим текстом, например
Seat {Seat}, или без тега вообще: поле отображается как редактируемое поле ввода в диалоговом окне Issue pass, предварительно заполненное этим значением. Любой тег внутри него все равно будет разрешаться для каждого получателя, когда Pushwoosh выдает карту.
Включите синхронизацию тегов
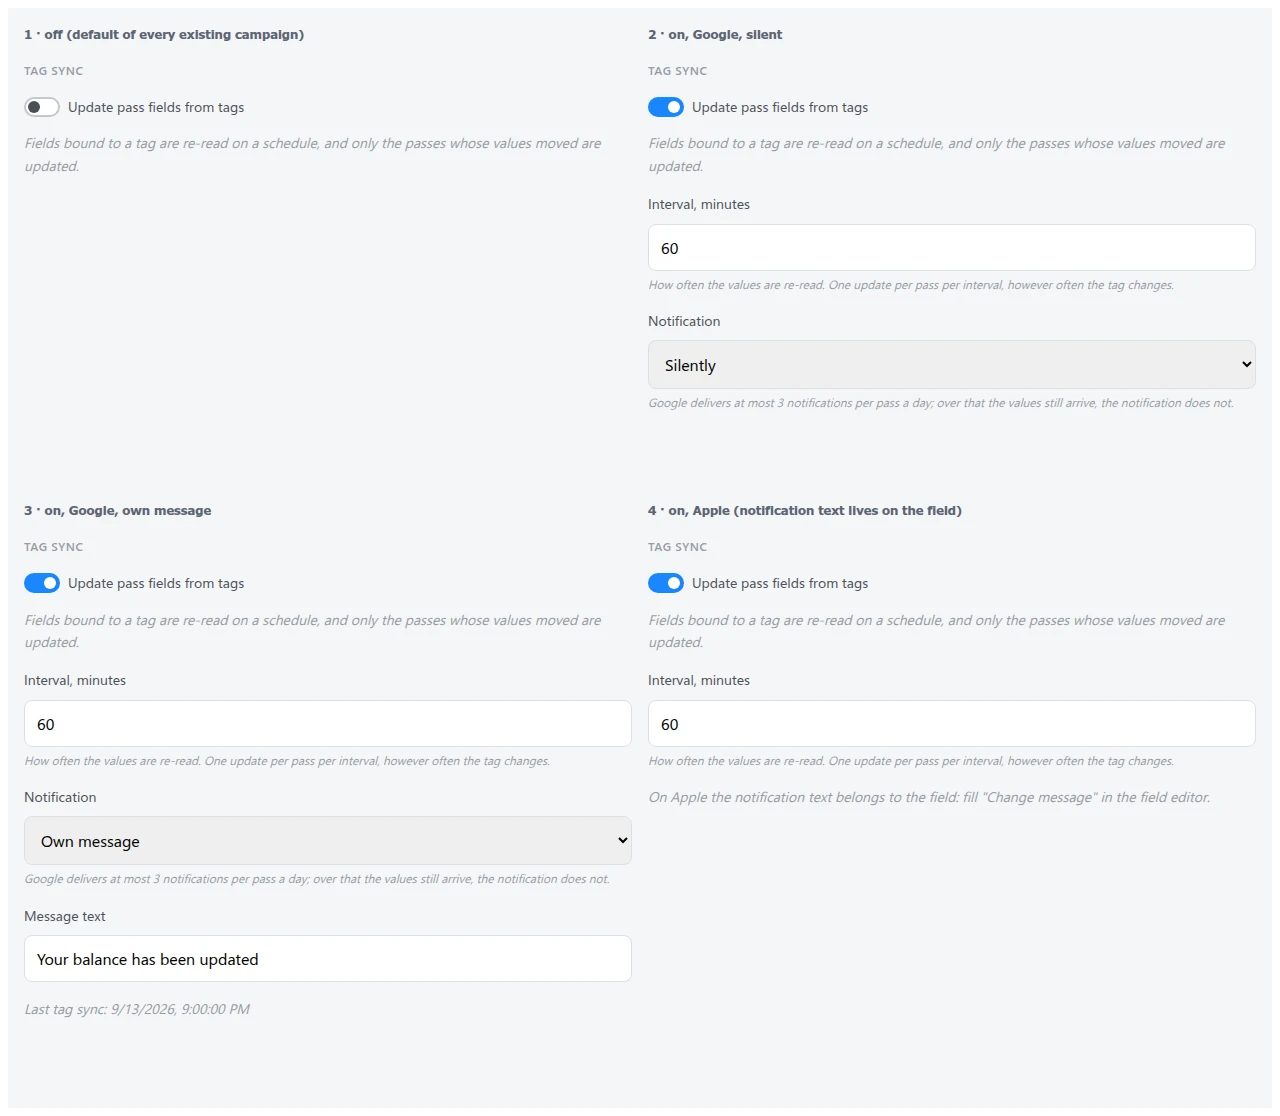
Anchor link toВ разделе Tag sync включите Update pass fields from tags, чтобы Pushwoosh периодически перепроверял плейсхолдеры тегов, используемые в полях кампании, и отправлял свежее значение на любую карту, чей тег изменился.
- Interval (minutes): как часто Pushwoosh перечитывает теги. По умолчанию 60, минимальное значение — 5. Карта обновляется не чаще одного раза за интервал, независимо от того, сколько раз за это время изменился ее тег.
- Notification (только для Google Wallet): выберите, как владелец карты узнает об обновлении: Silently (без уведомления), Own message (заполните Message text, отправляется вместе с обновлением) или Google field notification (собственное оповещение Google об обновлении поля). Google ограничивает их до 3 на карту в сутки. После этого новые значения все равно будут доставлены на карту, но уже без уведомления.
Загрузите изображения для кампании
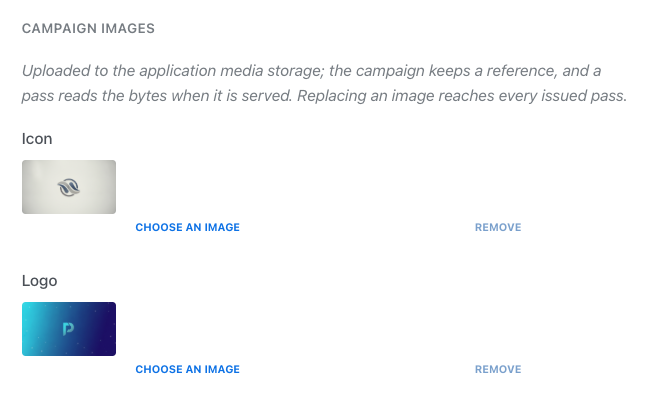
Anchor link to- В разделе Campaign images нажмите Choose an image рядом со слотом для изображения.
- Выберите существующее изображение из вашего Медиахранилища или перетащите новый файл для загрузки.
- Повторите для каждого доступного слота для изображений:
- Apple Wallet: Icon, Logo, Background, Footer, Strip и Thumbnail (см. Изображения Apple Wallet).
- Google Wallet: Logo и Hero image.
Предпросмотр и создание кампании
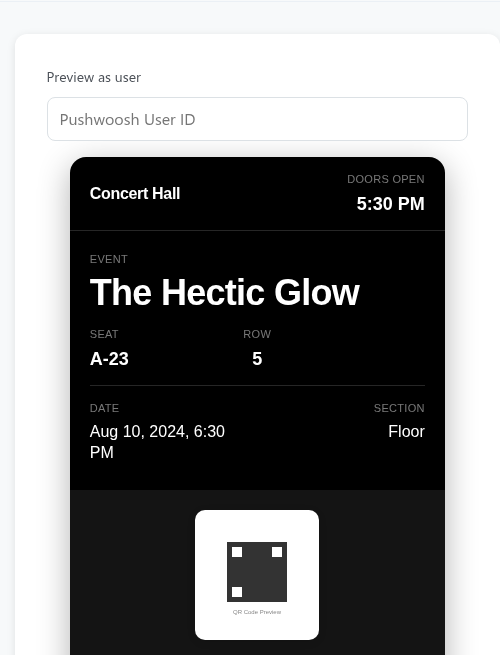
Anchor link to- Проверьте панель Preview as user справа, чтобы увидеть, как выглядит карта. Вы можете ввести тестовый User ID для предпросмотра персонализированных полей.
- Нажмите Create campaign внизу страницы.
Pushwoosh создает кампанию в статусе Draft и открывает ее рабочее пространство с вкладками Design, Passes и History.
Выпуск карт для пользователей
Anchor link toВыпуск карты из кампании
Anchor link to- На вкладке Passes нажмите Issue pass.
- Введите User ID получателя в Pushwoosh.
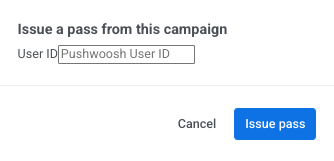
- Нажмите Issue pass для подтверждения.
В зависимости от того, как вы настроили Personal fields, модальное окно обрабатывает их следующим образом:
- Редактируемые поля: появляются со значениями по умолчанию, которые вы можете изменить для этого пользователя.
- Плейсхолдеры тегов (например,
{Seat}): не появляются в диалоговом окне. Pushwoosh автоматически заполняет их из тегов пользователя.
Вы также можете редактировать любое персональное поле на отдельной карте в любое время после выпуска.
Pushwoosh генерирует карту на основе текущего дизайна кампании и отображает ее на вкладке Passes и в таблице All passes приложения (Apple Wallet или Google Wallet).
Прикрепление существующей карты к кампании
Anchor link toВы можете прикрепить отдельные карты (созданные вне какой-либо кампании) к кампании, чтобы они начали получать общие обновления.
- На вкладке Passes нажмите Attach passes.
- Найдите карты по User ID, серийному номеру или штрихкоду.
- Выберите карты и подтвердите.
После прикрепления:
- Shared fields начинают отслеживать кампанию и обновляются всякий раз, когда вы изменяете шаблон карты.
- Personal values, уже имеющиеся на карте (например, данные пользователя или уникальные балансы), сохраняются.
Управление существующей кампанией
Anchor link toПри открытии созданной кампании из Campaigns → Wallet Passes → Campaigns отображается ее статус, счетчик ревизий, предпросмотр карты в реальном времени и три основные вкладки: Design, Passes и History.

Изменение статуса кампании
Anchor link toИспользуйте статус для отслеживания состояния каждой кампании: находится ли она в стадии разработки, активно выпускает карты или завершена и заархивирована.
Чтобы изменить статус, выберите опцию из выпадающего списка Status в заголовке кампании. Изменение сохраняется немедленно без отдельного шага подтверждения:
- Draft или Active: позволяет выпускать новые карты, прикреплять существующие и отправлять обновления дизайна.
- Archived: приостанавливает выпуск новых карт. Вы не можете выпускать или прикреплять карты, пока кампания заархивирована, но ранее выпущенные карты продолжают работать и получать общие обновления.
Вкладка Design
Anchor link toНа вкладке Design вы можете обновить шаблон карты, изменить цвета, модифицировать общие и персональные поля, загрузить новые изображения для кампании или изменить настройки синхронизации тегов.
Обновление дизайна и отправка изменений на карты
Anchor link to- На вкладке Design отредактируйте основную информацию, цвета, тип штрихкода, срок действия, местоположения, общее поле или изображение кампании.
- Нажмите Save changes.
- В диалоговом окне Apply the campaign edit подтвердите обновление:
- Ни одна карта не переопределяет измененное поле: нажмите Update N, keep hand edits, чтобы отправить изменение на все N карт.
- Некоторые карты переопределяют измененное поле: в диалоговом окне будет указано имя поля и количество карт, которые его переопределяют. Нажмите Update N, keep hand edits, чтобы отправить изменение на все карты, кроме этих, или Overwrite all N, чтобы отправить его на все N карт, включая переопределенные. Перезапись удаляет переопределение.
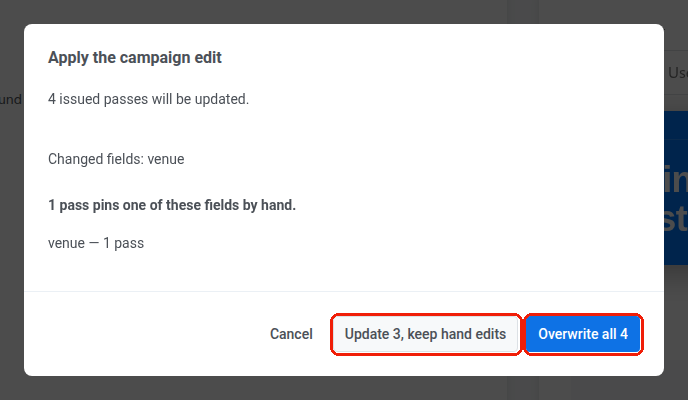
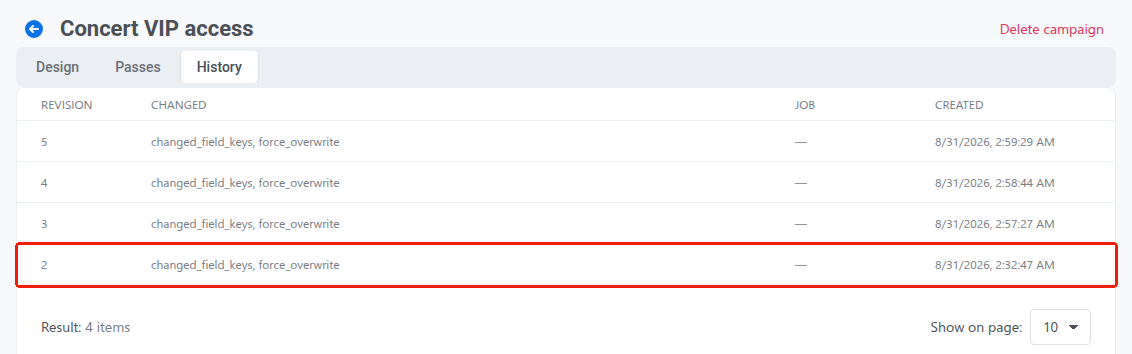
Какую бы кнопку вы ни нажали, обновление сохраняется как новая ревизия (например, Revision 2), так что вы можете проверить, что и когда изменилось, на вкладке History.
Переопределение общего поля на отдельной карте
Anchor link toЕсли вам нужно настроить общее поле для конкретного пользователя, отредактируйте это поле непосредственно на его индивидуальной карте (с вкладки Passes или All passes):
- Создание переопределения: сохранение пользовательского значения на отдельной карте отсоединяет это поле от обновлений на уровне кампании. Будущие обновления кампании, включая плановое обновление по синхронизации тегов, будут пропускать эту карту для этого конкретного поля.
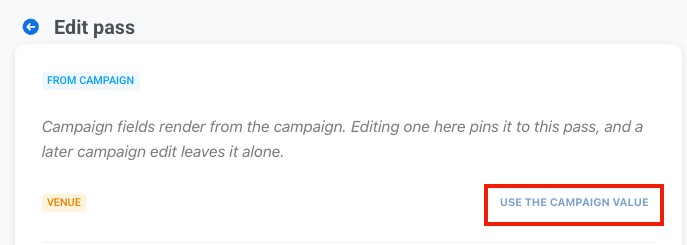
- Удаление переопределения: чтобы восстановить управление кампанией, отредактируйте карту и нажмите Use the campaign value рядом с переопределенным полем.
Вы можете отслеживать, у каких карт есть настроенные значения, на вкладке Passes в столбце Pinned fields.
Вкладка Passes
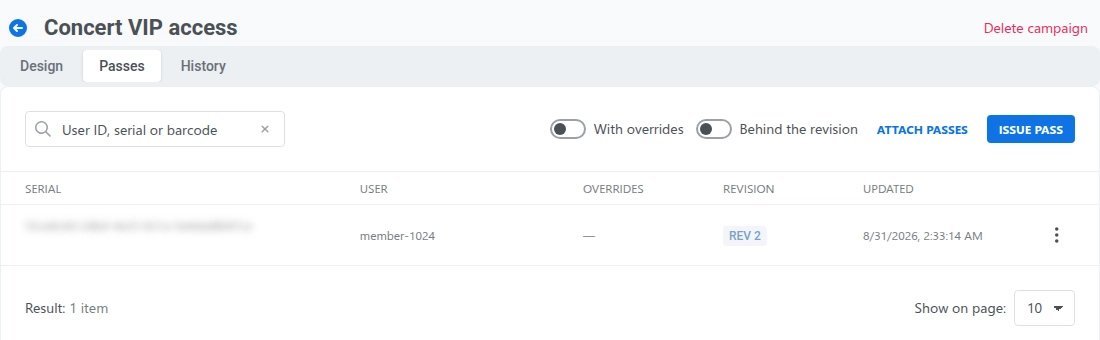
Anchor link toНа вкладке Passes перечислены все карты, выпущенные в рамках кампании, включая их серийный номер, User ID получателя, активные закрепленные поля, текущую ревизию и дату последнего обновления.
Если включена синхронизация тегов, на вкладке также отображается строка Tags synced над таблицей с датой и временем последнего планового запуска, или not yet до первого запуска.
Используйте фильтры таблицы для поиска конкретных карт:
- With pinned fields: показывает карты, у которых есть хотя бы одно поле, отредактированное вручную.
- Behind the revision: показывает карты, которые еще не получили последнее обновление кампании.
Чтобы выпустить новые карты или прикрепить существующие, см. Выпуск карт для пользователей.
Откройте меню действий строки (⋮), чтобы управлять этой картой:
- Edit: открыть карту на странице редактирования ее платформы, чтобы изменить персональные поля или переопределить общее.
- Download: в кампаниях Apple Wallet позволяет скачать подписанный файл
.pkpass. В кампаниях Google Wallet эта опция не отображается, так как у Google Wallet нет эквивалента загружаемого файла. - Send message: открыть одноразовый редактор push-уведомлений, чтобы отправить сообщение получателю карты по User ID. Все способы связи с ними см. в Сообщения владельцам карт Wallet.
- QR code: показать QR-код для установки, который пользователи могут отсканировать, чтобы добавить карту и зарегистрировать свое устройство для получения обновлений.
- Copy install link: скопировать URL для установки, чтобы поделиться картой в ваших каналах обмена сообщениями.
- Delete: удалить карту. Это действие нельзя отменить. В Apple Wallet уже установленные копии перестают получать обновления и становятся недействительными при следующем обновлении. В Google Wallet Google не позволяет принудительно удалять карту, уже сохраненную на устройстве, поэтому она становится недействительной и перемещается в Expired passes пользователя, в то время как Pushwoosh удаляет ее запись. Удаление карты здесь не удаляет кампанию или любую другую выпущенную карту.
Вкладка History
Anchor link toНа вкладке History перечислены все ревизии кампании в хронологическом порядке, с указанием того, какие поля были изменены в каждой версии.
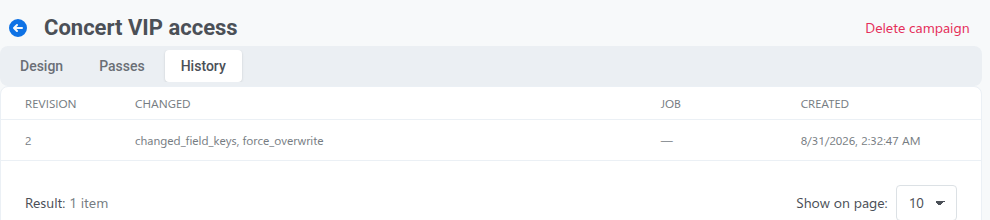
Статус доставки последнего обновления отображается под вкладками:
- Cancel: останавливает отправку обновления на карты, до которых оно еще не дошло. Эти карты остаются на своей предыдущей ревизии.
- Retry failed: повторная попытка доставки для карт, которые не удалось обновить (помечаются как неудачные после 5 попыток).
После сохранения новой ревизии более старые обновления уже нельзя повторить или отменить.
Удаление кампании
Anchor link toОткройте кампанию и нажмите Delete campaign в правом верхнем углу страницы.

Удаление кампании не удаляет и не делает недействительными уже выпущенные карты. Выпущенные карты сохраняют свое текущее содержимое и изображения, но перестают получать общие обновления. Любые будущие изменения должны вноситься на каждой карте индивидуально.