Feed campaigns
Этот контент еще не доступен на вашем языке.
A feed campaign watches one of your news feeds and sends each new item to your subscribers right after it’s published. You set the campaign up once: which feed and category to follow, which channel to send through, and who gets it. From then on, every new item goes out on its own, with no manual sends.
Each message is built from the item itself: its title, description, image, and link.
Prerequisites
Anchor link to- A feed registered under Content → News Feeds, or the feed’s URL so you can register it while creating the campaign.
- For Inbox and Push and Inbox, Message Inbox set up in your app. Share the mobile Message Inbox guide with your developers.
Create a feed campaign
Anchor link toGo to Campaigns → Feed campaigns and click Create campaign. The campaign is set up in four steps: Content, Audience, Settings, and Review. Click Next to move to the following step.
Choose the feed and channel
Anchor link to- In Feed, pick a registered feed. Its URL appears under the field. To register a new one without leaving the campaign, click Create new and add the feed.
- In Category, pick a category to send only that category’s items, or keep All categories to send every item. The list is built from the categories of the feed’s recent items.
- Under How should we send new items?, pick a channel:
- Push: a notification on the device.
- Inbox: a message in the app’s inbox.
- Push and Inbox: a notification that’s also saved to the inbox.
- For Inbox or Push and Inbox, set Remove from inbox after to how many days a message stays in the inbox, from 1 to 365. It defaults to 1 day.
Check the preview on the right to see how the feed’s newest item looks as a push and as an inbox message.
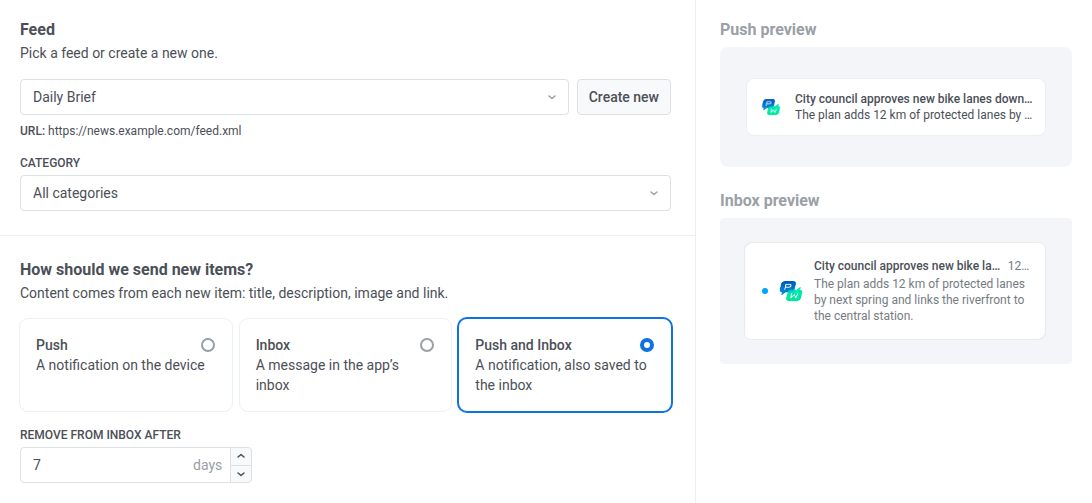
If an item has no description, its title becomes the message text and the message goes out without a separate title.
Choose the audience
Anchor link toPick who gets the messages:
- Send to segment: pick a segment from the list, or click Create segment to build or import a new one.
- Send to all subscribers: every subscriber of the application.
If the segment is deleted later, the campaign stops sending. Edit the campaign and pick another segment.
Set sending options
Anchor link to-
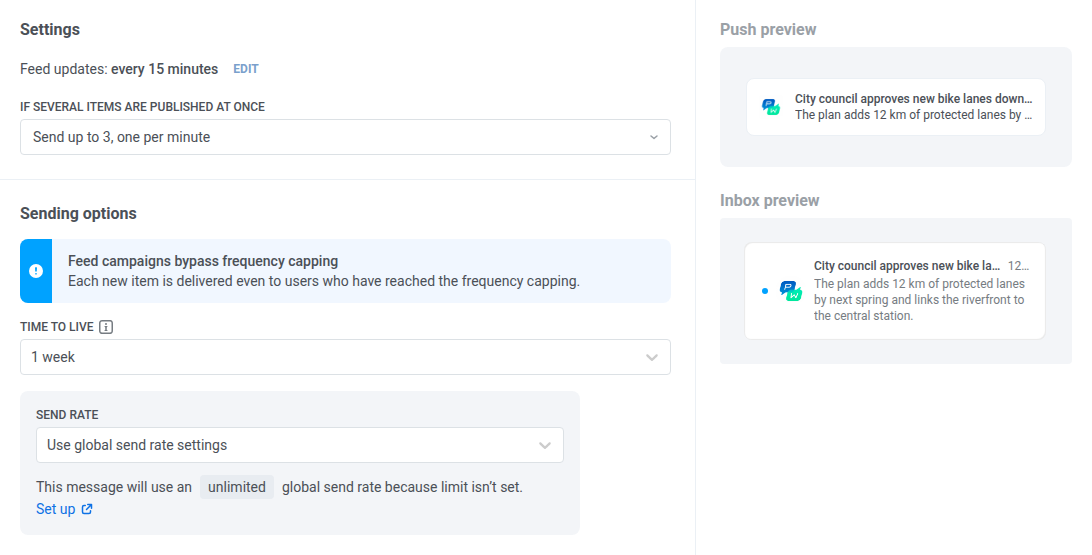
Check Feed updates. It shows how often Pushwoosh checks the feed for new items. The interval belongs to the feed. To change it, click Edit next to it and save the feed. The new interval applies to every campaign that uses this feed.
-
In If several items are published at once, choose what to do when one check finds more than one new item:
- Send only the newest: the default. One item goes out per check.
- Send up to 2, one per minute, Send up to 3, one per minute, or Send up to 5, one per minute: the newest items go out first, a minute apart.
Items over the limit aren’t dropped right away. If they’re still recent at the next check, published within about two check intervals, they go out then.
-
For Push or Push and Inbox, set Time to live: how long a push is kept for delivery while the device is offline. It defaults to 1 week.
-
For Push or Push and Inbox, set Send rate, or keep Use global send rate settings. See Send rate limits.
Review and launch
Anchor link to- Check the summary of Content, Audience, and Settings. To fix a section, click Change options next to it.
- Click Launch campaign.
- Enter Campaign name and confirm.
The campaign starts active. Only items that Pushwoosh picks up from the feed after you launch it are sent. Items already in the feed are not.
Track your campaigns
Anchor link toThe Feed campaigns page lists your campaigns. Use Search to find a campaign, and the All, Active, and Inactive tabs to filter by status.
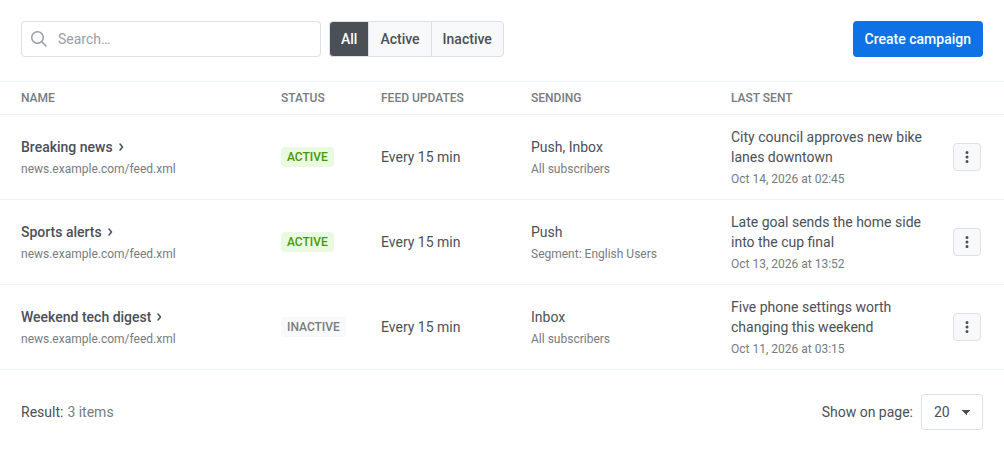
For each campaign, the table shows:
- Name, with the feed’s URL under it.
- Status: Active or Inactive.
- Feed updates: how often the feed is checked, for example Every 15 min or Every 1 hour.
- Sending: the channel (Push, Inbox, or Push, Inbox), and the audience under it, either All subscribers or Segment: followed by the segment’s name.
- Last sent: the title of the last item sent and when it went out, or Nothing sent yet.
To see delivery statistics for the messages a campaign sent, click its name.
Manage a campaign
Anchor link toClick a row’s menu (⋮) to manage a campaign:
- Click View statistics to open the campaign’s message statistics.
- Click Edit to change any step of the campaign, then click Save changes. The new settings apply from the next feed check.
- Click Rename… to change the campaign’s name.
- Click Deactivate… to stop sending. Items published during a long pause won’t be sent later. If you activate the campaign again within about two feed checks, recent items it missed can still go out. Click Activate… to resume sending new items.
- Click Delete… to stop sending and remove the campaign. This can’t be undone, so deactivate the campaign instead if you only want to pause it.
A feed that a feed campaign uses can’t be deleted from News Feeds. Delete the campaign first. If you deactivate the feed in News Feeds, its campaigns send nothing until you activate the feed again.