Supabase: إدراج صف
استخدم Supabase: insert row لكتابة صف في جدول Supabase من خطوة في الرحلة، من خلال واجهة برمجة تطبيقات REST لمشروعك، باستخدام مفتاح دور الخدمة. تقوم هذه النقطة بالمصادقة باستخدام مفتاح دور الخدمة الخاص بها. لا تستخدم أي تكامل على مستوى الحساب تم تكوينه في مكان آخر في الإعدادات.
الاستخدامات النموذجية:
- الكتابة في قاعدة بيانات تطبيقك الخاصة: أدخل صفًا يقرأه تطبيقك بالفعل من جدول Supabase هذا.
- تسجيل الأحداث فور حدوثها: اكتب بيانات الرحلة الأولية مباشرة في الجدول بدلاً من انتظار خط أنابيب الدُفعات.
- المزامنة مع البيانات الموجودة: أدخل قيمة جهاز أو Tag يمكن لجداول Supabase الخاصة بك ربطها ببياناتك الخاصة.
تكوين النقطة
Anchor link to- اسحب Supabase: insert row من قسم Integrations في اللوحة اليسرى إلى لوحة الرسم.
- انقر نقرًا مزدوجًا على النقطة وأدخل Step Name.
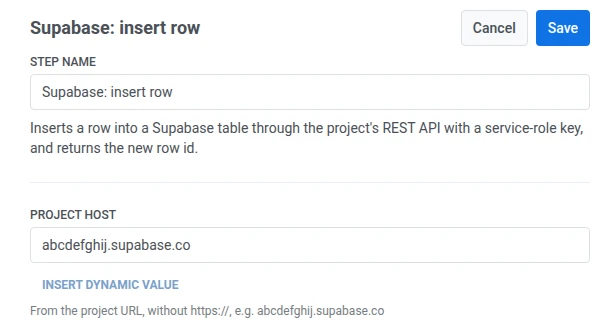
- في Project host، أدخل مضيف مشروعك من عنوان URL الخاص به، على سبيل المثال
abcdefghij.supabase.co. لا تقم بتضمينhttps://أو شرطة مائلة في النهاية. يضيف Pushwooshhttps://ومسار واجهة برمجة التطبيقات بنفسه.
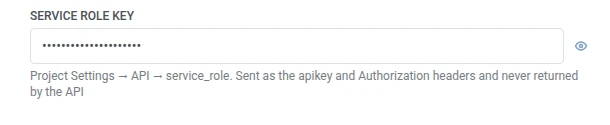
- في Service role key، أدخل المفتاح من Project Settings > API > service_role. يتم تخزينه مموهًا، مثل رأس سري لـ webhook، ولا يعيده Supabase أبدًا إلى Pushwoosh.
- في Table، أدخل اسم الجدول المستهدف.

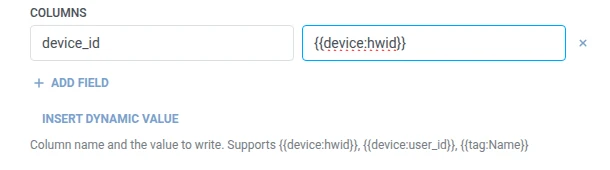
- في Columns، أضف صفًا واحدًا لكل عمود في الجدول للكتابة فيه. أدخل اسم العمود والقيمة. يجب أن تكون الأسماء غير فارغة وفريدة. يمكن أن تكون القيمة نصًا ثابتًا أو ماكرو للمسافر مثل
{{tag:Name}}، وهي نفس وحدات الماكرو الموجودة في نص Webhook. أو انقر فوق Insert Dynamic Value لاختيار سمة أنتجتها خطوة سابقة في هذه الرحلة، على سبيل المثال استجابة LLM أو قيمة Webhook معينة.
- انقر على Save.
الاستجابة
Anchor link toيستمر المسافر إلى أي خطوة تقوم بتوصيلها بعد ذلك على لوحة الرسم.
السمات بعد تشغيل الخطوة
Anchor link to| السمة | ما تحتويه |
|---|---|
supabase_row_id | معرف الصف الجديد |
كيفية استخدامها في الخطوات اللاحقة
Anchor link toلقد استمر المسافر بالفعل إلى الخطوة التالية بغض النظر عن هذه السمة. احفظها في Tag باستخدام تحديث ملف تعريف المستخدم إذا كنت بحاجة إلى الرجوع إلى هذا الصف المحدد أو تحديثه لاحقًا، على سبيل المثال من خلال واجهة برمجة تطبيقات Supabase الخاصة.
الإخفاقات والاستجابات غير المتوقعة
Anchor link toيؤدي الطلب الفاشل إلى إسقاط المسافر من الرحلة. راجع الأخطاء والطلبات الفاشلة.
سيناريو مثال: تسجيل نسخة تجريبية جديدة في Supabase
Anchor link toيريد أحد التطبيقات تسجيل كل بداية فترة تجريبية في قاعدة بيانات Supabase الخاصة به، دون الحاجة إلى مهمة تصدير منفصلة.
- أضف عنصر الدخول المستند إلى مُشغِّل وقم بتعيينه ليتم تفعيله عند وقوع حدث
TrialStarted. - أضف Supabase: insert row مباشرة بعده. قم بتعيين Table إلى
travelers. في Columns، قم بتعيينdevice_idإلى{{device:hwid}}. - انقر على Save.
بمجرد تشغيل هذا، تحصل كل بداية فترة تجريبية على صف في جدول travelers، جاهزًا لاستعلامات التطبيق الخاصة.