航班状态集成
在航班发生变化时立即告知乘客:新登机口、延误、登机、到达或取消。航班状态集成将 Pushwoosh 连接到航班数据提供商 AeroDataBox,这样 customer journey 就可以监控特定乘客的航班,并在其状态发生变化时立即做出反应。
集成概述
Anchor link to集成类型
Anchor link to来源: 您可以在 journey 内部将预订订阅到其航班。Pushwoosh 会将状态更改作为 event 发送回来,您可以在同一个 journey 的后续步骤中使用该 event。
先决条件
Anchor link to在连接航班状态之前,请确保您拥有:
- 一个有效的 Pushwoosh 帐户,并在 Pushwoosh 的 NUE 数据中心拥有一个应用程序。航班状态功能目前在其他数据中心尚不可用。
- 一个 AeroDataBox 帐户和 API 密钥。数据源费用将在您自己的 AeroDataBox 帐户上结算。
- 一个携带航班承运人、航班号、日期和出发机场的预订事件(请参阅构建航班状态 journey)。
- 一个专用的 API Access token,供 journey 进行身份验证。
集成如何工作?
Anchor link to连接集成和监控一个航班是两个独立的步骤,在不同的时间完成:
- 在 Settings → 3rd-party integrations 中连接您的 AeroDataBox 密钥。
- 一个预订事件将乘客带入您的 journey。
- Journey 的 Webhook 步骤通过 Pushwoosh 的公共 API 将该预订订阅到其航班。
- Pushwoosh 使用 AeroDataBox 监控航班并检测变化:登机口、延误、登机、到达、取消或行李传送带分配。
- 每个变化都会作为
PW_FlightStatusChanged事件传递给应用程序,journey 的 Wait for Trigger 和 Condition split 会将其路由到正确的消息。
每个航班订阅会在当地出发日期后 36 小时自动结束。它也可能提前结束:航班降落或被取消后,或者不再有任何内容监控它时。随后 Pushwoosh 会取消对应的 AeroDataBox 订阅,以免其在后台继续计费。
此时间窗口在订阅时根据预订的出发日期确定,即使 AeroDataBox 之后报告延误也不会顺延。如果延误使航班推迟到下一个日历日,订阅可能会在延误后的实际出发之前结束。
航班状态涵盖四种类型的更新,每种都可以单独使用或在一个 journey 中组合使用:
- 登机口变更提醒: 在乘客的出发登机口发生变化时立即通知他们。
- 延误通知: 一旦航班延误超过几分钟,就提醒乘客,以便他们调整计划。
- 登机和到达更新: 在登机开始或航班降落时通知乘客。
- 行李提取: 一旦行李传送带编号被分配,立即发送。
设置集成
Anchor link to将航班状态连接到 Pushwoosh
Anchor link to每个应用程序只需连接一次您的 AeroDataBox 密钥:
-
打开您的应用程序,然后转到 Settings → 3rd-party integrations。
-
在 Available services 下,找到 Flight Status 卡片,然后单击 Configure。
-
将您的 AeroDataBox 密钥粘贴到 API key 中,然后单击 Connect。
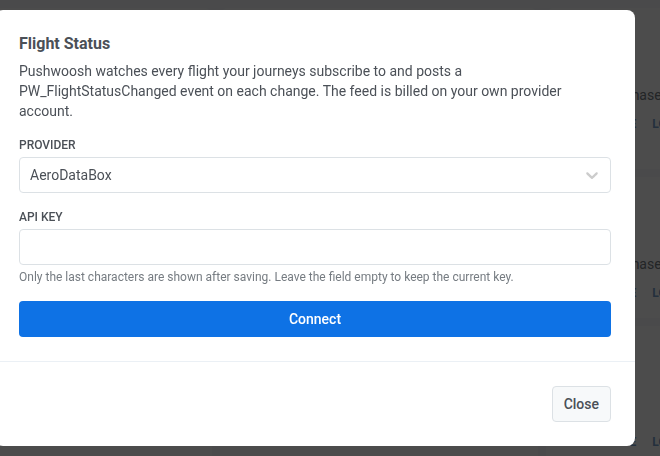
单击 Connect 后,卡片会移动到 Connected services。
如果密钥被拒绝
Anchor link toPushwoosh 会在后台检查密钥。如果出现问题,卡片会显示以下消息之一:
| 消息 | 原因 |
|---|---|
provider rejected the API key | 密钥无效或已在 AeroDataBox 中被撤销 |
provider account is out of credits | 您的 AeroDataBox 套餐积分已用完 |
provider rate limit reached | AeroDataBox 正在限制请求,此问题会自行清除 |
provider is unavailable | 无法访问 AeroDataBox,原因可能是网络问题或任一方出现中断 |
provider refused the request | AeroDataBox 返回了一个 Pushwoosh 无法识别的错误 |
更换密钥
Anchor link to在 Connected services 中重新打开 Flight Status 卡片,例如在密钥被拒绝之后:
- 更换密钥: 将新密钥粘贴到 API key 中。
- 保留当前密钥: 将 API key 留空。该字段只显示已保存密钥的最后几个字符。
断开集成
Anchor link to- 在 Connected services 中打开 Flight Status 卡片。
- 移除密钥。
断开连接后:
- 不再创建新的订阅。
- Journey 已在监控的航班将保留其订阅,直到它们自行结束或您从 journey 中删除它们。
- 卡片上的活动订阅计数会包含这些订阅,直到它们结束。
构建航班状态 Journey
Anchor link to构建 Journey 之前
Anchor link to请确保您拥有:
- 一个携带航班承运人、航班号、日期 (
YYYY-MM-DD) 和出发机场的预订事件,外加一个以<carrier><number>/<date>/<departure airport>格式保存航班密钥的属性,例如LH400/2026-09-20/MUC。这是整个 journey 中会话匹配所使用的内容。 - 一个专用的 API Access token。订阅方法接受您帐户中的任何令牌,无需授予任何权限。专门为此 journey 创建一个,以便您以后可以在不影响其他任何内容的情况下撤销它。
- 您数据中心的公共 API 主机。对于 NUE 帐户,即
rpc-api.svc-nue.pushwoosh.com。 - Journey 的 Campaign entry limit 已关闭。Campaign entry limit 仅跟踪每个用户的进入次数。它不知道您在下面设置的会话标识符,因此会阻止乘客的第二次航班,直到限制期过去。
从预订事件开始 Journey
Anchor link to- 添加一个 Trigger-based entry 并选择您的预订事件,例如
flight_booked。 - 在 Control how many sessions a user can have at the same time 下,选择 Multiple active sessions per user。
- 选择航班密钥属性作为会话标识符。这允许同一位乘客同时跟踪多个航班,每个航班都在其自己的会话中。
使用 Webhook 步骤订阅预订
Anchor link to在入口之后直接添加一个 Webhook 步骤。其请求正文会从入口事件中提取航班字段,因此该步骤需要紧跟在入口之后才能使用它们。
-
将 REQUEST TYPE 设置为
POST。 -
将 URL 设置为
https://rpc-api.svc-nue.pushwoosh.com/api/integrations/flight-status/subscriptions。 -
在 HEADERS 中,保留
Content-Type: application/json。 -
添加一个标头
Authorization: Token <your API token>。保存后,Pushwoosh 会屏蔽此值,因为任何名为Authorization的标头都会被自动视为机密。有关编辑和版本历史记录的含义,请参阅将标头值标记为机密。 -
在 DATA 中,输入下面的请求正文,直接键入您自己的应用程序代码:
{"application": "<your application code>","user_id": "{{device:user_id}}","source": "journey","flight": {"carrier": "","flight_number": "","flight_date": "","departure_airport": ""}} -
对于四个空的
flight值中的每一个,打开 DATA BUILDER。 -
选择类别 Event。
-
从您的预订事件中选择匹配的属性(承运人、航班号、航班日期、出发机场)。
-
复制 Pushwoosh 生成的宏并将其粘贴为该字段的值。对其余三个值重复此操作。
您无需从响应中映射任何内容。响应返回 flight_key,它已经在您的预订事件中。
等待状态更新
Anchor link to在 Webhook 步骤后添加一个 Wait for Trigger 步骤。
- 添加一个分支并将其事件设置为
PW_FlightStatusChanged。 - 在多会话属性匹配下,选择您在入口处使用的相同航班密钥属性。这确保状态更新只会唤醒其航班确实相关的乘客。
- 将等待期设置为足以覆盖航班的时间。对于大多数行程,48 小时足够了。
- 将 Not triggered 分支保留,不设置下一步,或添加一个备用消息。在等待结束前航班没有任何更新的乘客会在此处离开 journey,这是预期行为。
按事件类型分支
Anchor link to在 Wait for Trigger 步骤后添加一个 Condition split。
- 选择 Event 作为条件类型。
- 在 Event from Journey 中,选择
PW_FlightStatusChanged。 - 在 Attribute 下,选择
event_type。 - 将条件设置为 is。
- 添加一个值为
gate_change的分支。 - 单击 Save。这将创建两个分支:一个您为登机口变更命名的分支,以及一个用于所有其他事件类型的 All other users 分支。
重复此元素,或向其添加更多分支,以处理您希望操作的其他 event_type 值:delay、boarding、departed、arrived、cancelled 和 baggage_ready 的工作方式都相同。
通知乘客
Anchor link to在登机口变更分支上添加一个 Push 元素。
- 选择或创建一个推送预设。
- 将 Message type 设置为 Transactional message,因为航班状态提醒是服务通知,而不是促销信息。频率限制不适用,并且它仍然可以触达 control group 中的乘客。
- 启用使用事件属性进行个性化。
- 选择
PW_FlightStatusChanged作为源事件。 - 使用
flight_number和gate_new填充您的预设占位符。
改为显示 Live Activity 卡片
Anchor link to添加三个 Live Activity 元素,代替 Push 或与 Push 一起使用:
- Start: 紧接在 Webhook 步骤之后,而不是直接在入口之后。入口只能连接一个下一步,因此 Webhook 和 Start 不能都紧跟在入口之后。
- Update: 位于登机口变更分支上。
- End: 在 journey 不再需要跟踪该航班时使用,例如到达或取消之后。
在 Start 元素上,在 Card attributes 下,添加卡片的 ActivityAttributes 类型所需的全部六个字段。Card attributes 是一个自由的名称和值列表,界面不会检查名称,因此请严格按照下面列出的名称输入。其中五个已经在您的预订事件中:
carrierflight_numberflight_datedeparture_airportflight_keyarrival_airport:订阅调用不需要它,因此只有在使用 Live Activity 时才需要将其添加到预订事件中。
只有 Start 会设置 Card attributes,并且它们在卡片的整个生命周期内保持不变。Update 和 End 不设置它们。会变化的字段(例如状态、登机口和延误)属于 Card content,来自您为该应用发布的小组件 schema。
PW_FlightStatusChanged 事件参考
Anchor link to集成检测到的每个变化都作为单个 PW_FlightStatusChanged 事件传递,所有属性始终存在:空属性会作为空值发送,绝不会被省略。
| 属性 | 类型 | 描述 |
|---|---|---|
event_type | String | 发生了什么变化(见下文的值) |
flight_key | String | 您在预订事件中设置的相同航班密钥 |
flight_number | String | 航班号 |
departure_airport | String | 出发机场代码 |
arrival_airport | String | 到达机场代码 |
status | String | 当前航班状态(见下文的值) |
gate_old / gate_new | String | 变更前后的出发登机口 |
terminal_old / terminal_new | String | 变更前后的出发航站楼 |
baggage_claim | String | 行李传送带编号(一旦分配) |
provider | String | 报告变更的数据提供商 (aerodatabox) |
delay_minutes | Integer | 相对于计划时间的延误分钟数,每个事件中都会出现 |
scheduled_at / estimated_at / actual_at | String | 计划、当前预计和实际出发时间,采用提供商自己的格式 |
arrival_terminal | String | 到达航站楼(一旦分配) |
arrival_scheduled_at / arrival_estimated_at / arrival_actual_at | String | 计划、当前预计和实际到达时间,采用提供商自己的格式 |
scheduled_at_local / estimated_at_local / actual_at_local | String | 上述三个出发时间,采用出发机场的当地时间 |
arrival_scheduled_at_local / arrival_estimated_at_local / arrival_actual_at_local | String | 上述三个到达时间,采用到达机场的当地时间 |
flight_date / event_time | Date | 航班日期以及变更发生的时间 |
属性值和格式
Anchor link toevent_type值:gate_change、delay、boarding、departed、arrived、cancelled、baggage_ready。status值:scheduled、check_in、boarding、departed、delayed、arrived、cancelled、diverted、unknown。Pushwoosh 无法识别的 AeroDataBox 状态将报告为unknown。delay_minutes: 每个事件中都会出现,而不仅仅是delay事件。0 表示航班准点,负值表示航班提前。当延误达到 5 分钟时会发送delay事件。- 时间属性: 所有时间属性(包括
arrival_*和_local属性)都是 String,而不是 Date。这样空的时间值不会从事件中被删除,当地时间也会保留机场的 UTC 偏移量。要按日期筛选,请使用flight_date和event_time。