入站 Webhook 集成
入站 Webhook 允许外部服务直接向 Pushwoosh 发送事件。当第三方系统触发 Webhook 时,Pushwoosh 会验证请求、识别订阅者并触发映射的事件。然后,该事件可以启动或推进一个 Journey。
使用入站 Webhook 可以连接 CRM、电子商务平台或分析服务等工具,而无需构建或维护您自己的服务器。 每个入站 Webhook 在收到并成功处理匹配的请求时,会触发一个 Pushwoosh 事件。
开始之前
Anchor link to在打开 Webhook 设置之前,请准备好以下内容。
-
决定 Webhook 应触发哪个 Pushwoosh 事件。 从您的项目中选择一个您希望从第三方服务触发的现有事件。例如,
CheckoutSuccess。如果您还没有合适的事件,可以创建一个,并设置您希望从传入数据中填充的属性。 -
确保您的第三方服务可以发送 Webhook。 当您关心的事件发生时(例如新订单或表单提交),该服务必须能够向外部 URL 发送 HTTP POST 请求。
-
从您的第三方服务获取一个示例 JSON 负载。 这是服务在每个事件上发送的数据的一个小示例。您将需要它来将负载字段映射到 Pushwoosh 事件属性。
创建 Webhook
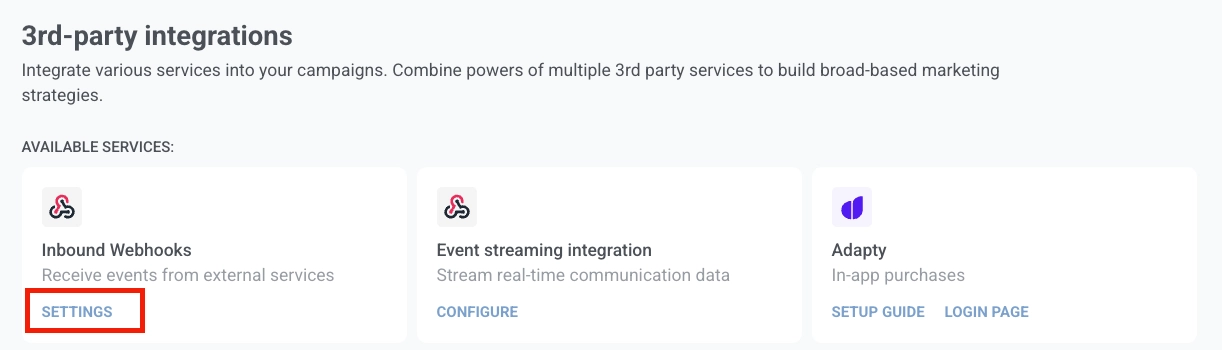
Anchor link to- 在您的 Pushwoosh 账户中,前往 Settings → Integrations → Inbound webhooks,然后点击 Settings。
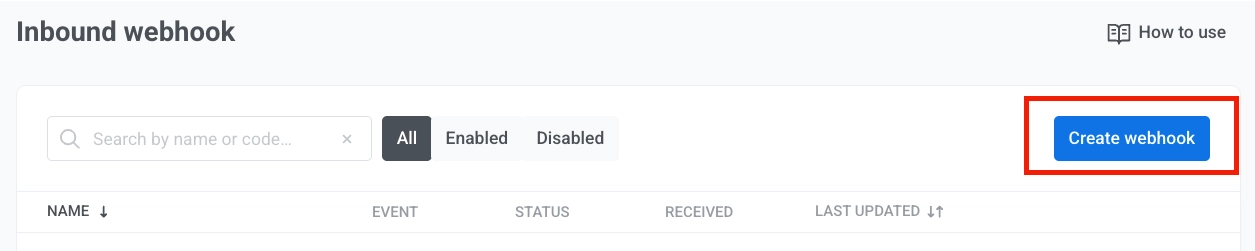
- 点击 Create webhook 打开设置流程。
-
输入一个 Webhook 名称,以便您稍后可以在列表中识别该 Webhook。
-
选择当 Webhook 收到有效请求时应触发的 Pushwoosh 事件。您可以从项目中已有的事件中进行选择。如果需要先创建事件,请参阅事件。

- 在 Match incoming data 中,粘贴来自第三方服务的示例 JSON 负载。Pushwoosh 会自动将负载字段加载到下拉菜单中。
示例负载:
{ "user_id": "12345", "email_address": "jane@example.com", "mobile": "+15551234567", "purchase_date": "2024-03-15", "order_number": "ORD-001", "price": 99.99, "payment_state": "success"}- 在 Identify users by 中,选择 Pushwoosh 应如何将传入请求与用户匹配:
- User ID: 按 Pushwoosh 中的内部用户 ID 匹配。
- Email: 按电子邮件地址匹配。
- Phone: 按电话号码匹配。
- HWID: 按设备、浏览器或电子邮件标识符匹配。
在 Payload field 中,选择包含匹配值的字段。

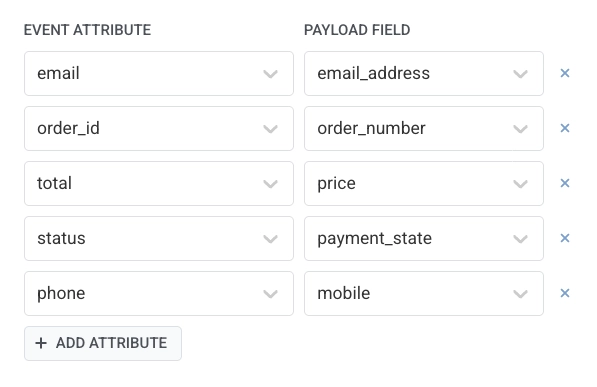
- 将每个事件属性映射到一个负载字段。在每个映射行中:
- Event attribute: Pushwoosh 中的属性名称。从为此事件定义的属性中选择。
- Payload field: 传入负载中包含该值的字段。
例如,将 email 映射到 email_address,将 total 映射到 price,将 order_id 映射到 order_number。
点击 + Add attribute 添加一行。点击 × 删除一行。
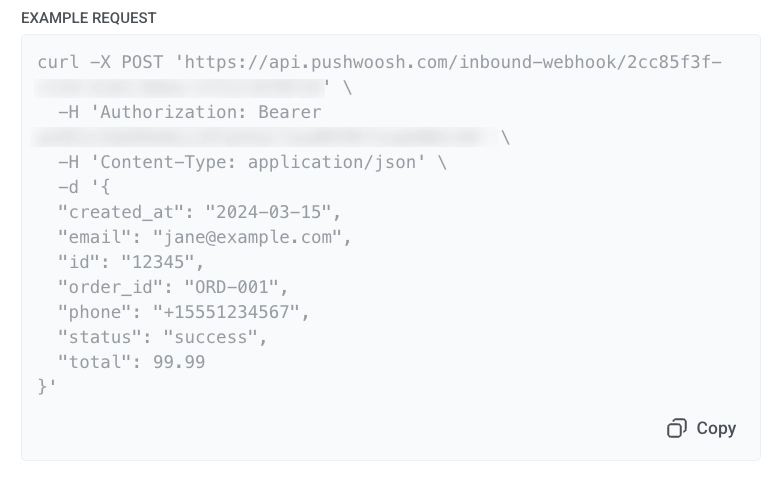
- 配置完成后,点击 Enable。Webhook URL 窗口将打开。
复制这些值并将其粘贴到您的外部系统的 Webhook 设置中:
- 复制 URL 并在您的第三方服务中将其设置为 Webhook 目标地址。
- 复制 Secret 并将其作为
Authorization标头值粘贴到您的外部服务中。该值包含Bearer前缀,因此请直接使用。如果请求中缺少此标头或不匹配,Pushwoosh 将拒绝该请求。
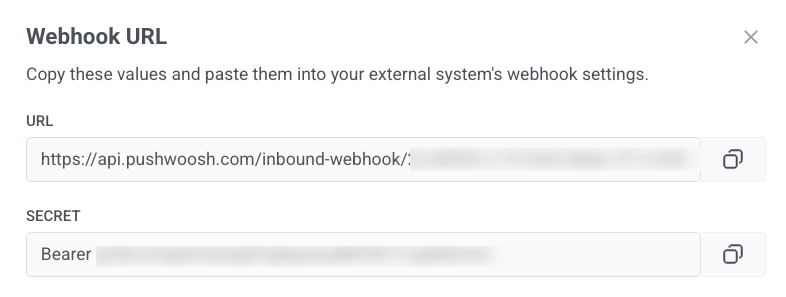
- 该窗口还显示一个带有示例
POST请求的 Example request。点击示例块中的 Copy 复制完整请求。您可以用它来发送测试请求,确认 Pushwoosh 接受该 Webhook,或者将其作为集成模板与您的团队分享。
启用 Webhook 后,它会以启用状态出现在 Webhook 列表中,并开始接受请求。
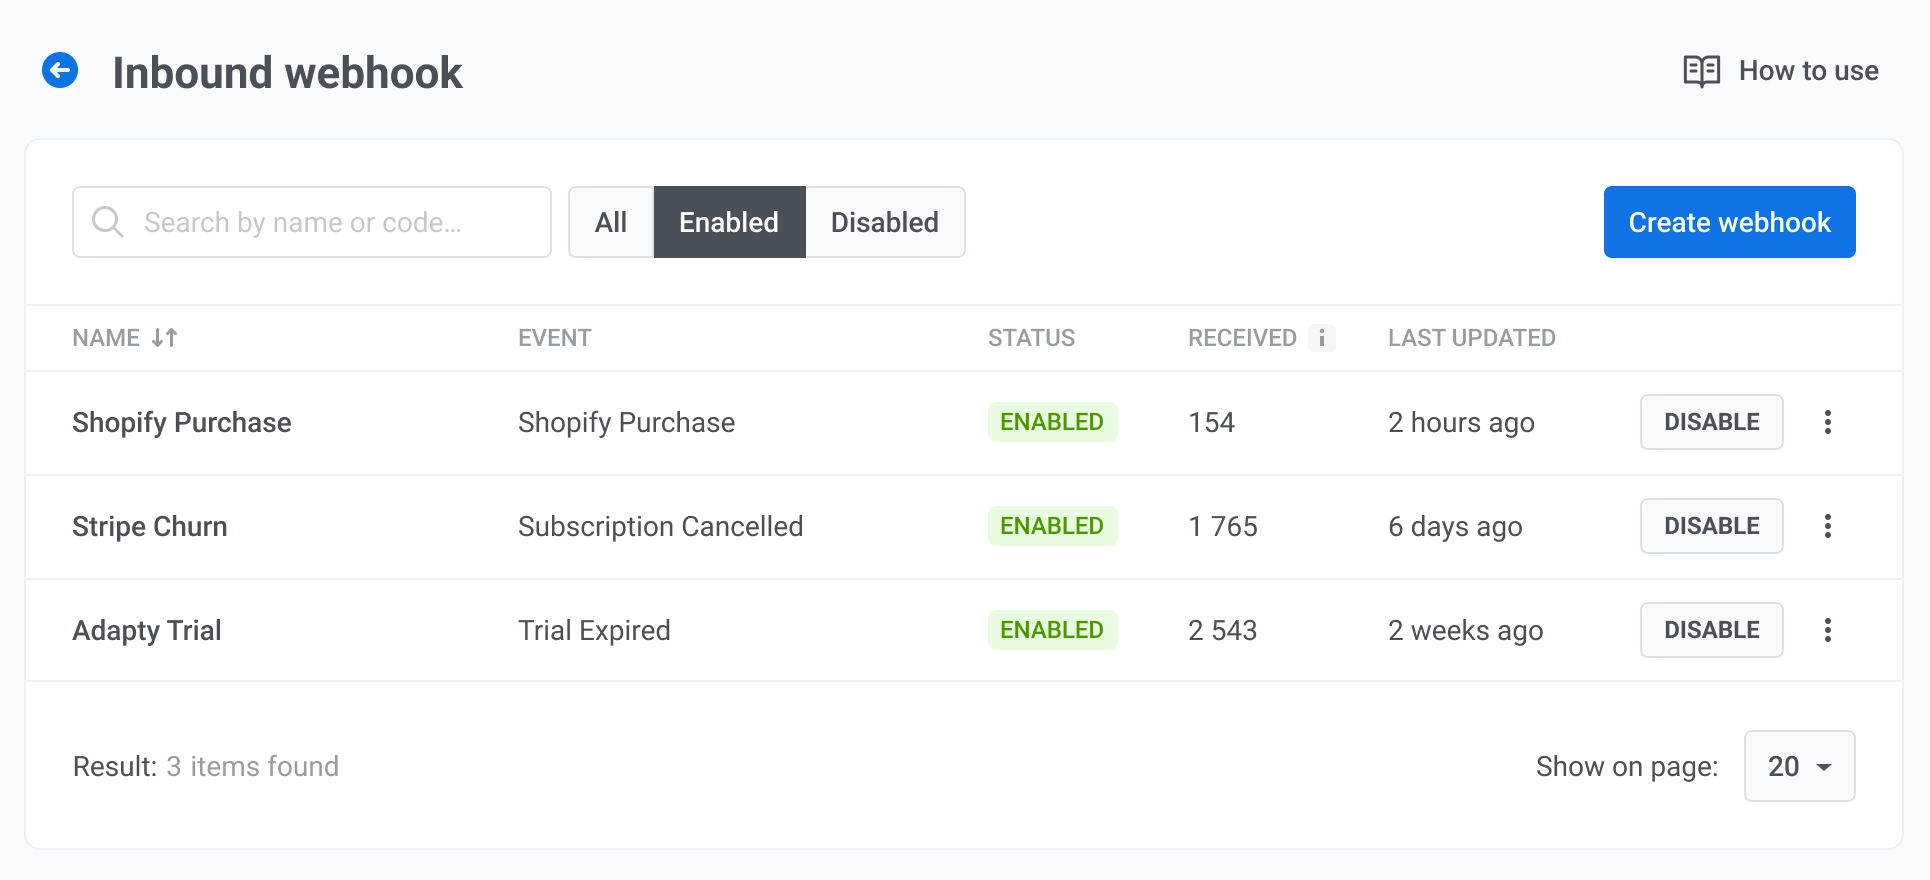
Webhook 列表
Anchor link to入站 Webhook 列表显示了您项目中的每个 Webhook。
每行显示:
- Name: Webhook 名称。
- Event: 当 Webhook 收到有效请求时触发的 Pushwoosh 事件。
- Status: Enabled 或 Disabled。
- Received: Webhook 收到的请求数。
- Last updated: Webhook 的最后更改时间。
管理 Webhook
Anchor link to打开行菜单以:
- Edit settings: 打开 Webhook 配置,以便您可以更改名称、事件、字段映射和用户识别方式。
- Copy URL: 打开 Webhook URL 窗口,其中包含 URL 和 Secret,以便您再次复制它们。
- Activity log: 打开此 Webhook 的请求日志。
- Delete: 从列表中删除该 Webhook。
对于已启用的 Webhook,点击 Disable 可在不删除配置的情况下停用它。对于已禁用的 Webhook,点击 Enable 可重新开始接受请求。
查看活动日志
Anchor link to活动日志显示所选 Webhook 的所有传入请求。
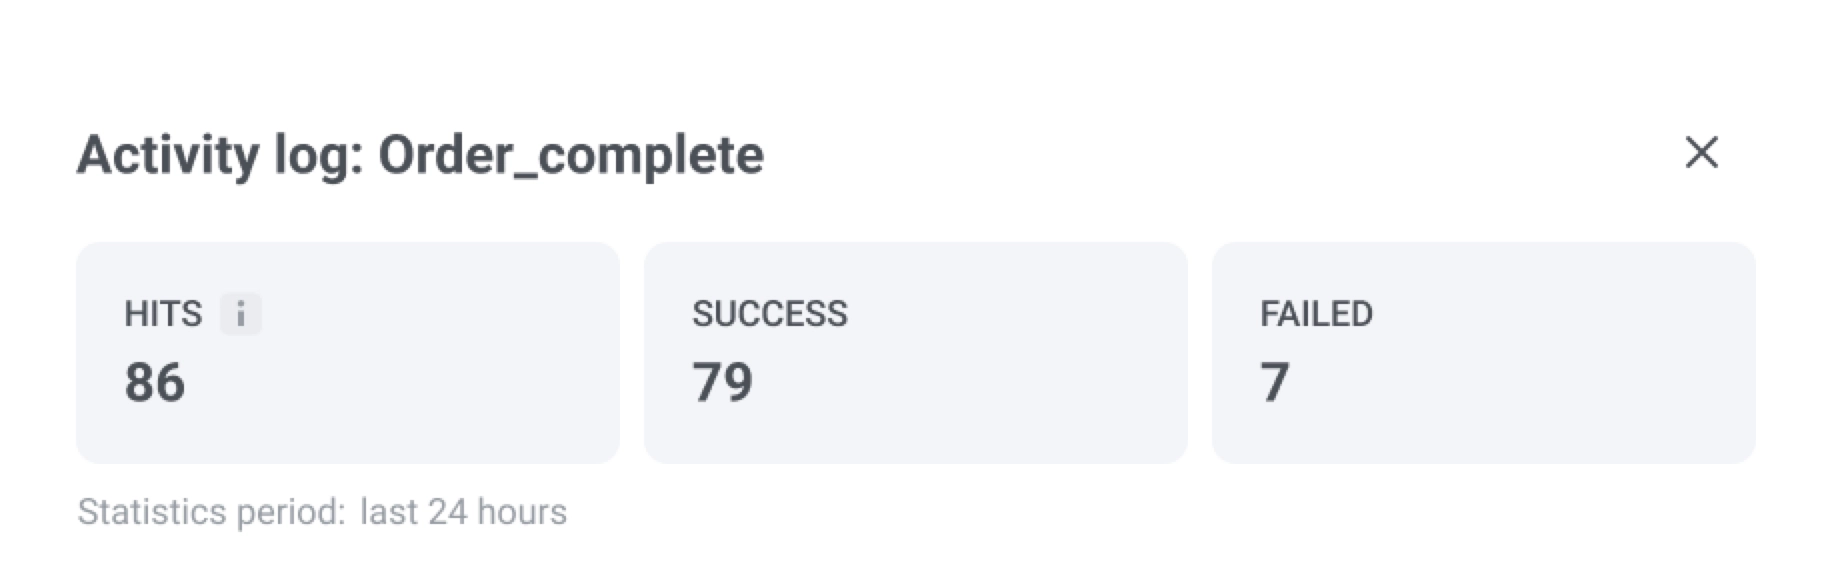
摘要面板
在顶部,查看过去 24 小时的摘要:
- Hits: 收到的传入请求总数。
- Success: 身份验证通过、找到用户且事件已触发的请求。
- Failed: 未处理的请求。失败的请求不会停止 Webhook。Pushwoosh 会继续接受并处理后续请求。
| 失败原因 | 含义 |
|---|---|
| Auth rejected | 共享密钥与 Webhook 配置不匹配。如果连续五个请求因此错误而失败,Pushwoosh 会向您发送通知。更新密钥即可恢复。无需重新激活。 |
| User identifier field missing | 用于用户识别的映射负载字段在请求中不存在。 |
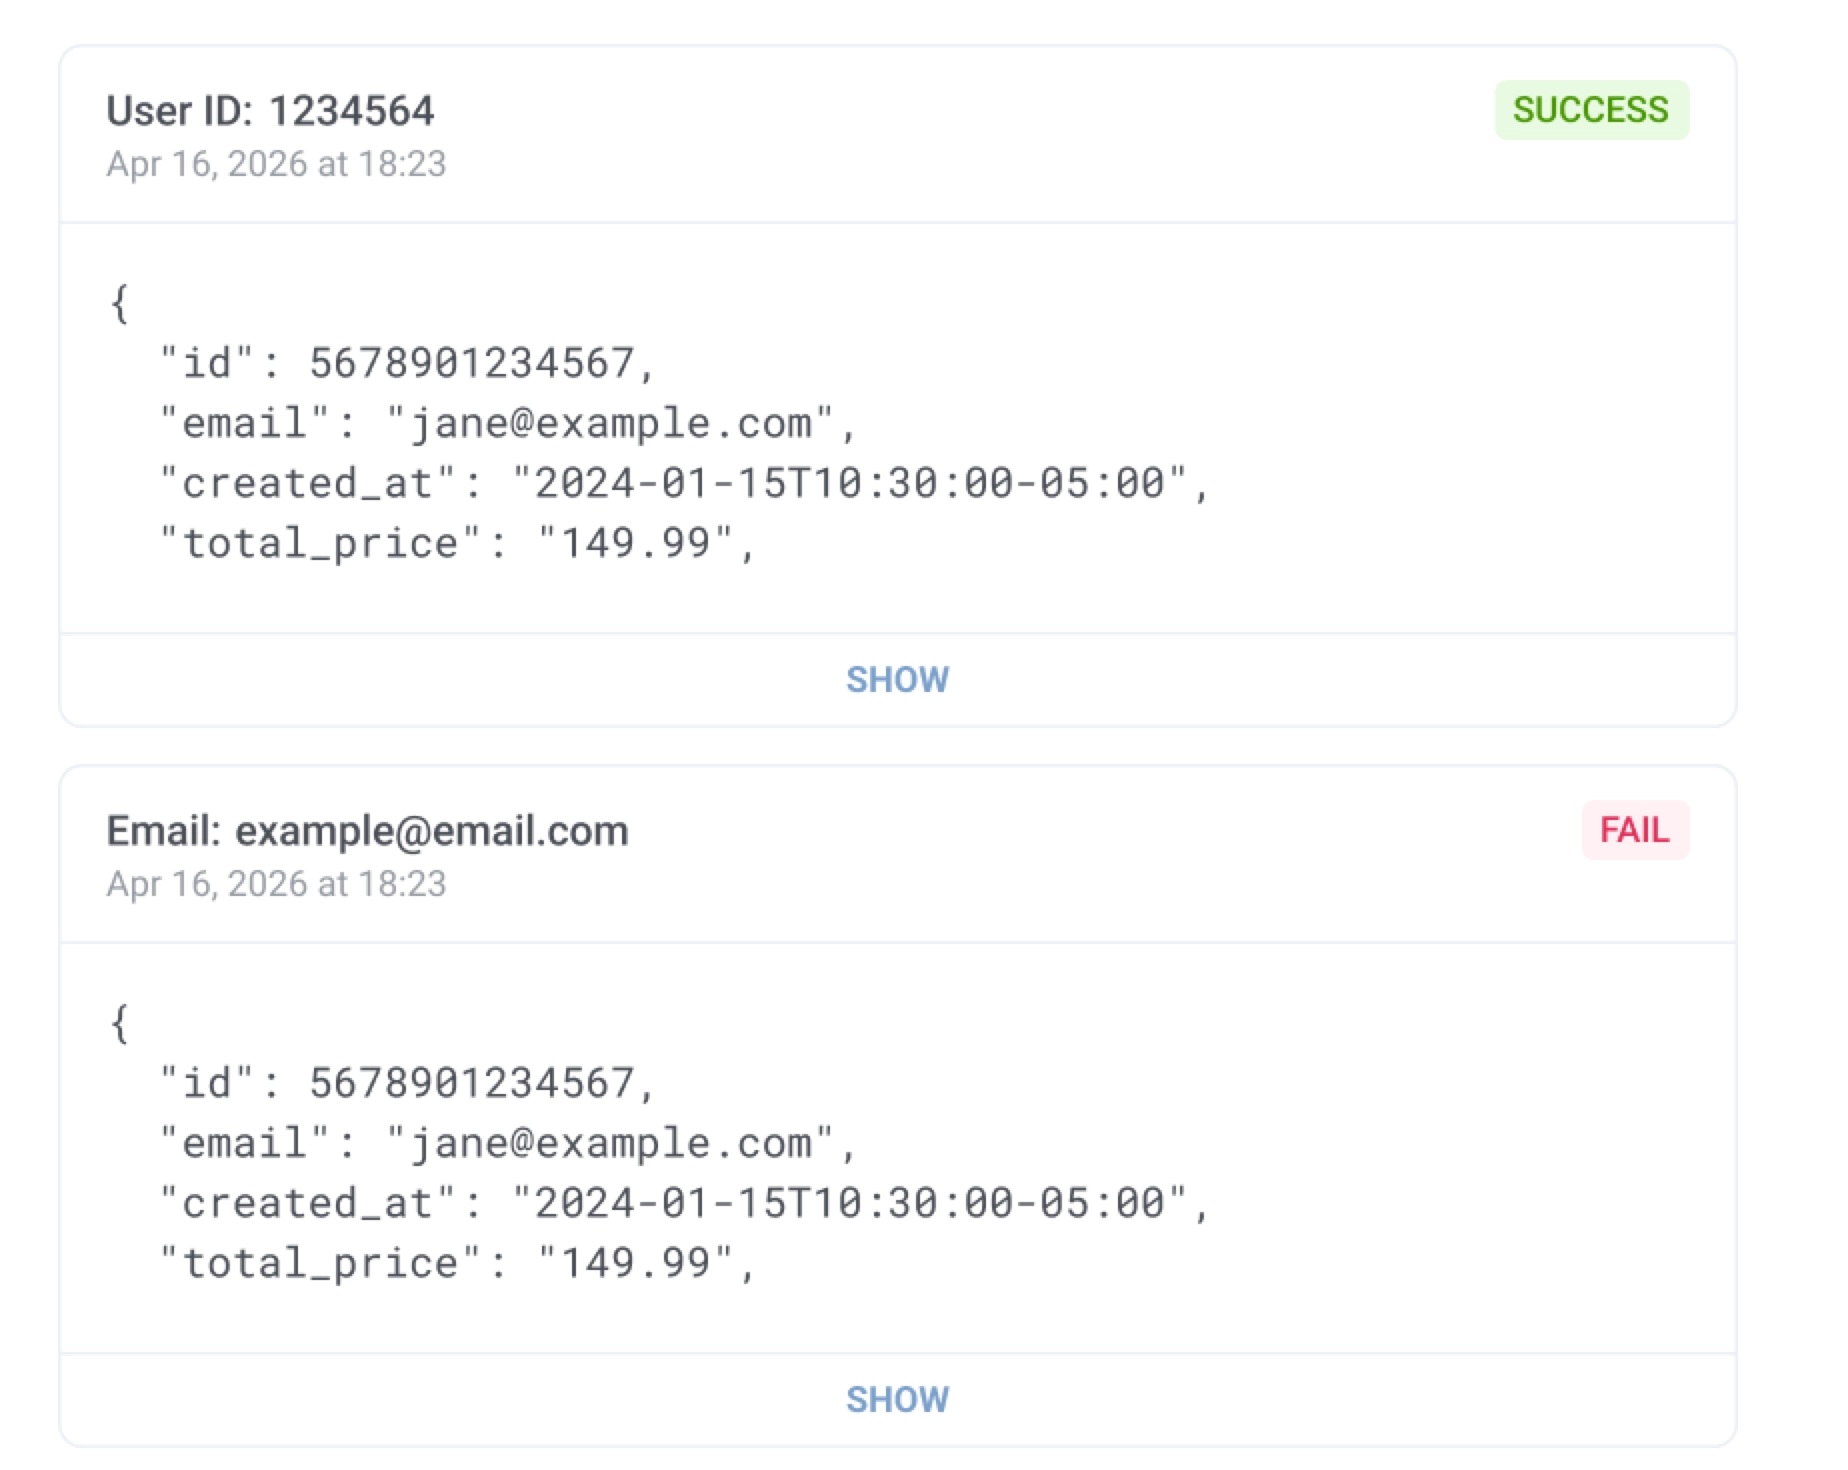
请求条目
每个条目都显示用户标识符(例如,User ID 或 Email)、一个 Success 或 Failed 徽章、请求时间戳以及收到的 JSON 负载预览。点击 Show 展开完整的请求详情。
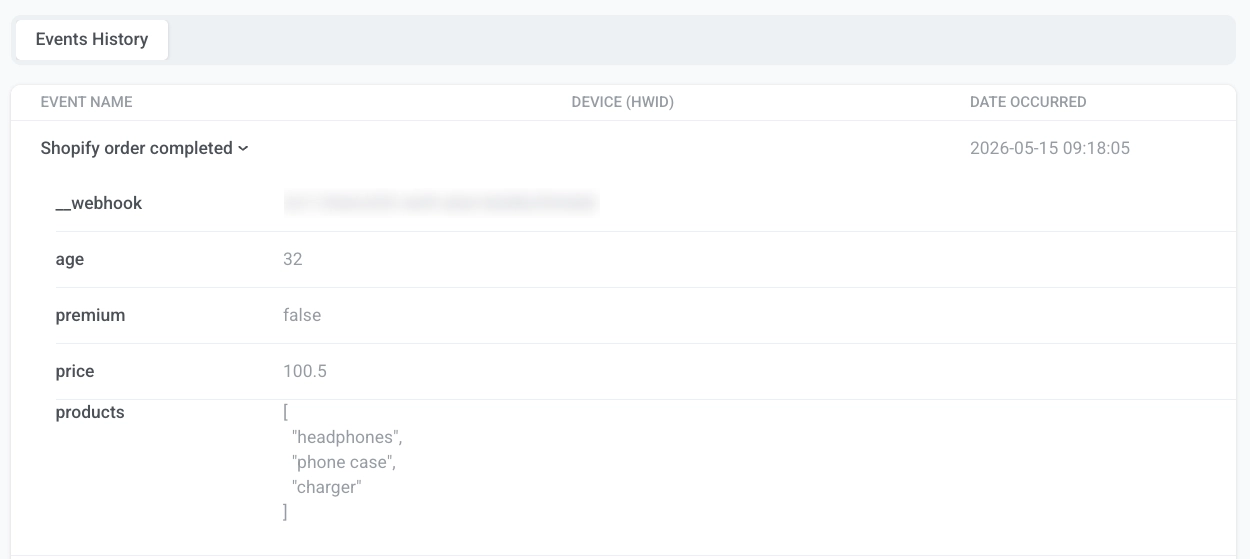
在 User Explorer 中查看 Webhook 触发的事件
Anchor link to当 Webhook 请求成功处理后,Pushwoosh 会在 User Explorer 中记录该事件。它出现的位置取决于您识别用户的方式:
- User ID、Email 或 Phone: 事件记录在用户个人资料中。打开该用户并转到 Events history。
- HWID: 事件记录在匹配的设备上。打开该用户,在 Active user devices 中找到该设备,然后转到其 Events history 选项卡。
按名称查找事件并展开它,以查看映射的属性(例如,price 或 products)以及带有 Webhook ID 的 __webhook 属性。
将入站 Webhook 与 Journey 结合使用
Anchor link to在 Webhook 启用并成功触发事件后,可将所选事件用作基于触发器的 Journey 入口。当 Webhook 收到有效请求时,Pushwoosh 会触发映射的事件。任何使用此事件作为入口触发器的 Journey 都会为匹配的用户自动启动。