跳到内容

Conversion events

此内容尚未提供您的语言版本。

Conversion events collect user revenue in one uniform format so you can use it for attribution, analytics, and segmentation.

What are conversion events

Anchor link to

Pushwoosh records revenue from user transactions as PW_Conversion, a built-in event. Each record includes:

  • value: the transaction amount
  • currency: ISO 4217 currency code
  • transaction_id and product_id: optional identifiers

PW_Conversion covers purchases, subscription renewals, and payments from third-party platforms, regardless of where the original money event comes from.

Alongside default and custom events, conversion events are a third event category in Pushwoosh. Pushwoosh normalizes revenue from differently shaped source events (such as OrderPlaced, CheckoutSuccess, PW_InAppPurchase, or Stripe and Shopify webhook events) into PW_Conversion records.

Revenue reaches Pushwoosh in one of two ways:

  • Send PW_Conversion from your code: your app or backend sends the event directly after a purchase.
  • Map an existing event in the Control Panel: map a purchase event you already send to PW_Conversion without changing your code. You can map more than one source event per application.

Whichever path you use, Pushwoosh stores one normalized record per conversion. Segmentation, Customer Journeys, dashboards, and ManyMoney AI all read from the same data.

Once conversion events are set up, that data becomes usable everywhere revenue matters in Pushwoosh:

  • Build RFM segments for high-value users based on spend amount and recency, without custom revenue logic for each event.
  • Attribute revenue to Customer Journeys and campaigns. See which flows drive purchases, not just clicks or opens.
  • View revenue in dashboards and reporting without building custom logic for each purchase event.
  • Combine revenue from SDK purchase events and payment webhooks (Stripe, Shopify) into one dataset instead of analyzing each source separately.
  • Let ManyMoney AI use real transaction data in its recommendations and campaign optimizations.

How to set up conversion events

Anchor link to

Conversion events are configured per application. You can set up conversion events in one of two ways. Follow the instructions for the path that fits your implementation.

Send PW_Conversion from your code

Anchor link to

This path fits when you can add or change event code in your app or backend. After each purchase, send PW_Conversion through the postEvent method.

  1. Go to Audience > Events. Find the Conversion events tracking card.
Events page with Conversion events tracking card before setup, showing zero mapped events and Start collecting revenue button
  1. Click View code.
Set conversion events page with View code link
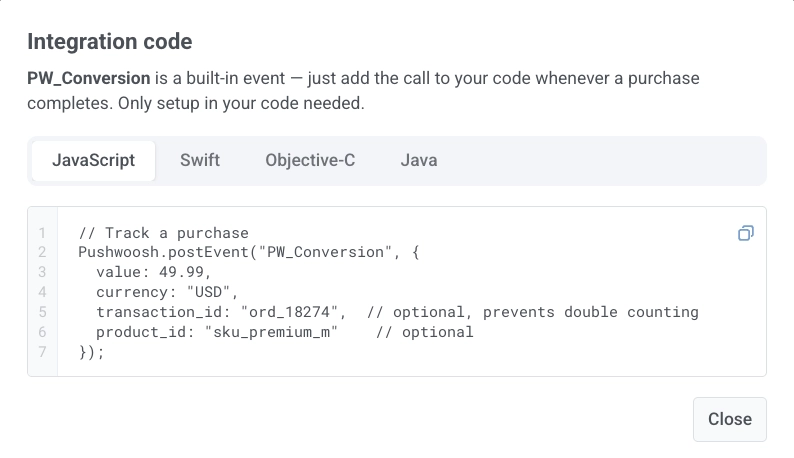
  1. Copy the sample and add the postEvent call wherever a purchase completes in your app or backend.
Integration code dialog with PW_Conversion postEvent samples for JavaScript Swift Objective-C and Java

Example for JavaScript:

Pushwoosh.postEvent("PW_Conversion", {
value: 49.99,
currency: "USD",
transaction_id: "ord_18274",
product_id: "sku_premium_m"
});

Attributes for the postEvent call

Anchor link to

The following table lists the attributes you can pass when sending PW_Conversion.

Field
Type
Required
Description
valuenumberYesThe monetary amount of the transaction.
currencystring (ISO 4217)YesThe transaction currency code, for example USD or EUR.
transaction_idstringNoA unique identifier for the transaction. Recommended for your own record-keeping. Pushwoosh stores it as-is but does not use it to deduplicate revenue on its own.
product_idstringNoThe identifier of the purchased product or plan.

Map an existing event to track revenue

Anchor link to

This path fits when purchase data already flows through another event and you do not want to change your code. When a mapped source event arrives, Pushwoosh fires and records it as a PW_Conversion event.

  1. Go to Audience > Events. Find the Conversion events tracking card.

  2. Click Start collecting revenue (or Event mapping, if you’ve already mapped an event). The Set conversion events page opens.

Set conversion events page with Use existing events to track conversion section
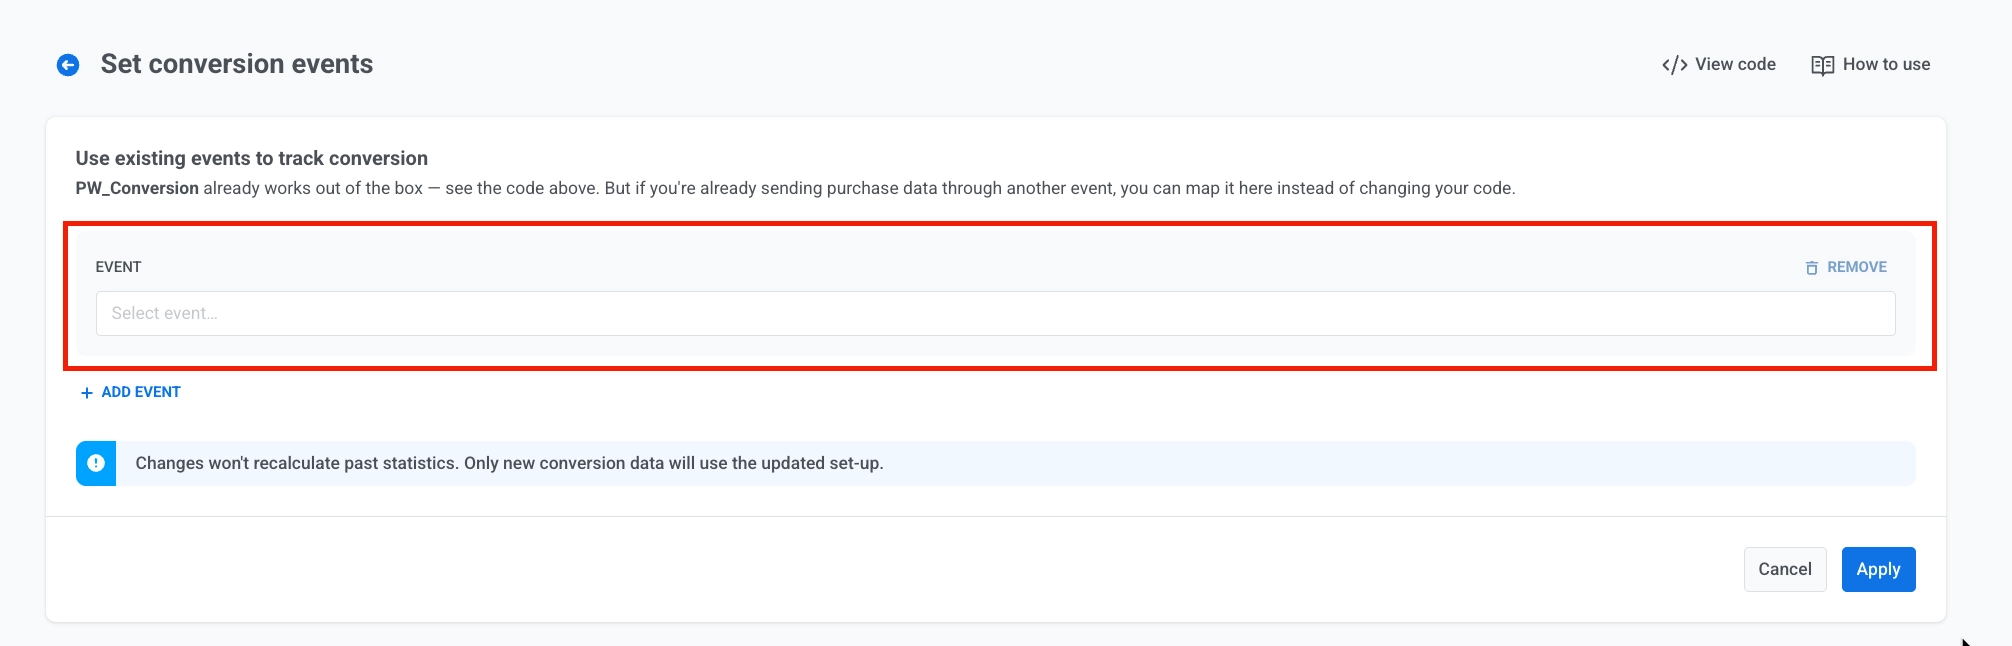
  1. In Use existing events to track conversion, open the EVENT dropdown and select the event you already send. The list includes custom events, default events, and inbound-webhook events (such as Stripe or Shopify).
Set conversion events page with default EVENT dropdown showing Select event placeholder
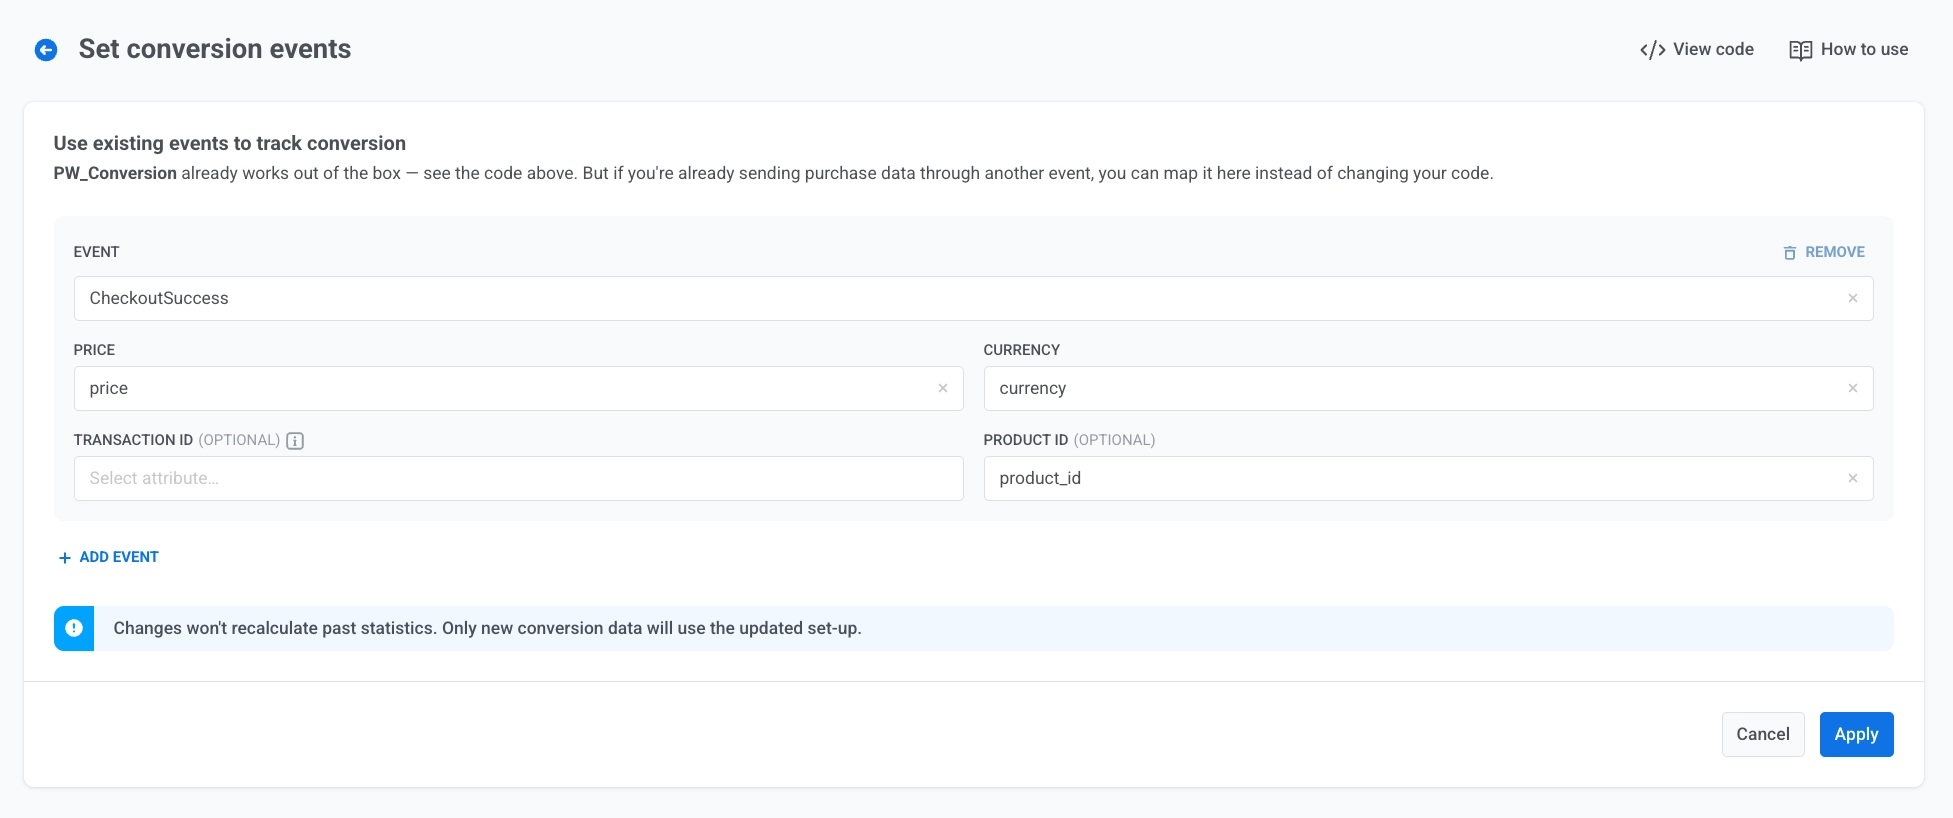
  1. Map the remaining attributes:

    • In PRICE, select the attribute that stores the transaction amount.
    • In CURRENCY, select the attribute that stores the currency code.
    • Optionally, map TRANSACTION ID (OPTIONAL) and PRODUCT ID (OPTIONAL).
Conversion event mapping form with EVENT price currency transaction ID and product ID fields filled in

To map another source event, click + ADD EVENT. To remove a mapping, click REMOVE.

  1. Click Apply.

You can map multiple events as sources for the same application. For example, map a custom purchase_completed event alongside a Stripe webhook event.

How does Pushwoosh handle multiple currencies

Anchor link to

Pushwoosh stores and sums revenue separately for each transaction currency. It does not convert everything into a single base currency yet. If your app charges in multiple currencies, expect totals broken out by currency rather than one combined number.

Monitor conversion events

Anchor link to

The Conversion events tracking card on Audience > Events summarizes conversion activity for the selected application. It shows two numbers:

  • Mapped events: how many source events currently feed into PW_Conversion.
  • Triggered last 7 days: the total number of PW_Conversion events fired in that window, from any current or past mapping, or from direct postEvent calls.

Click View code to reopen the PW_Conversion integration sample.

Conversion events tracking card after setup, showing triggered event count, event mapped count, View code, Event mapping, and How to use links