ड्रैग एंड ड्रॉप एडिटर से ईमेल कंटेंट बनाएं
Pushwoosh के बिल्ट-इन एडिटर में बिना कोड लिखे ईमेल कंटेंट बनाएं। आपको कंटेंट ब्लॉक, इमेज, बटन, व्यक्तिगत टेक्स्ट और एक अनुपालन फुटर के साथ एक पुन: प्रयोज्य लेआउट मिलता है जिसे आप कस्टमर जर्नी या एक बार के ईमेल में उपयोग कर सकते हैं।
नया ईमेल कंटेंट बनाएं
Anchor link to- Content → Email content पर जाएं।
- चुनें कि कैसे शुरू करें:
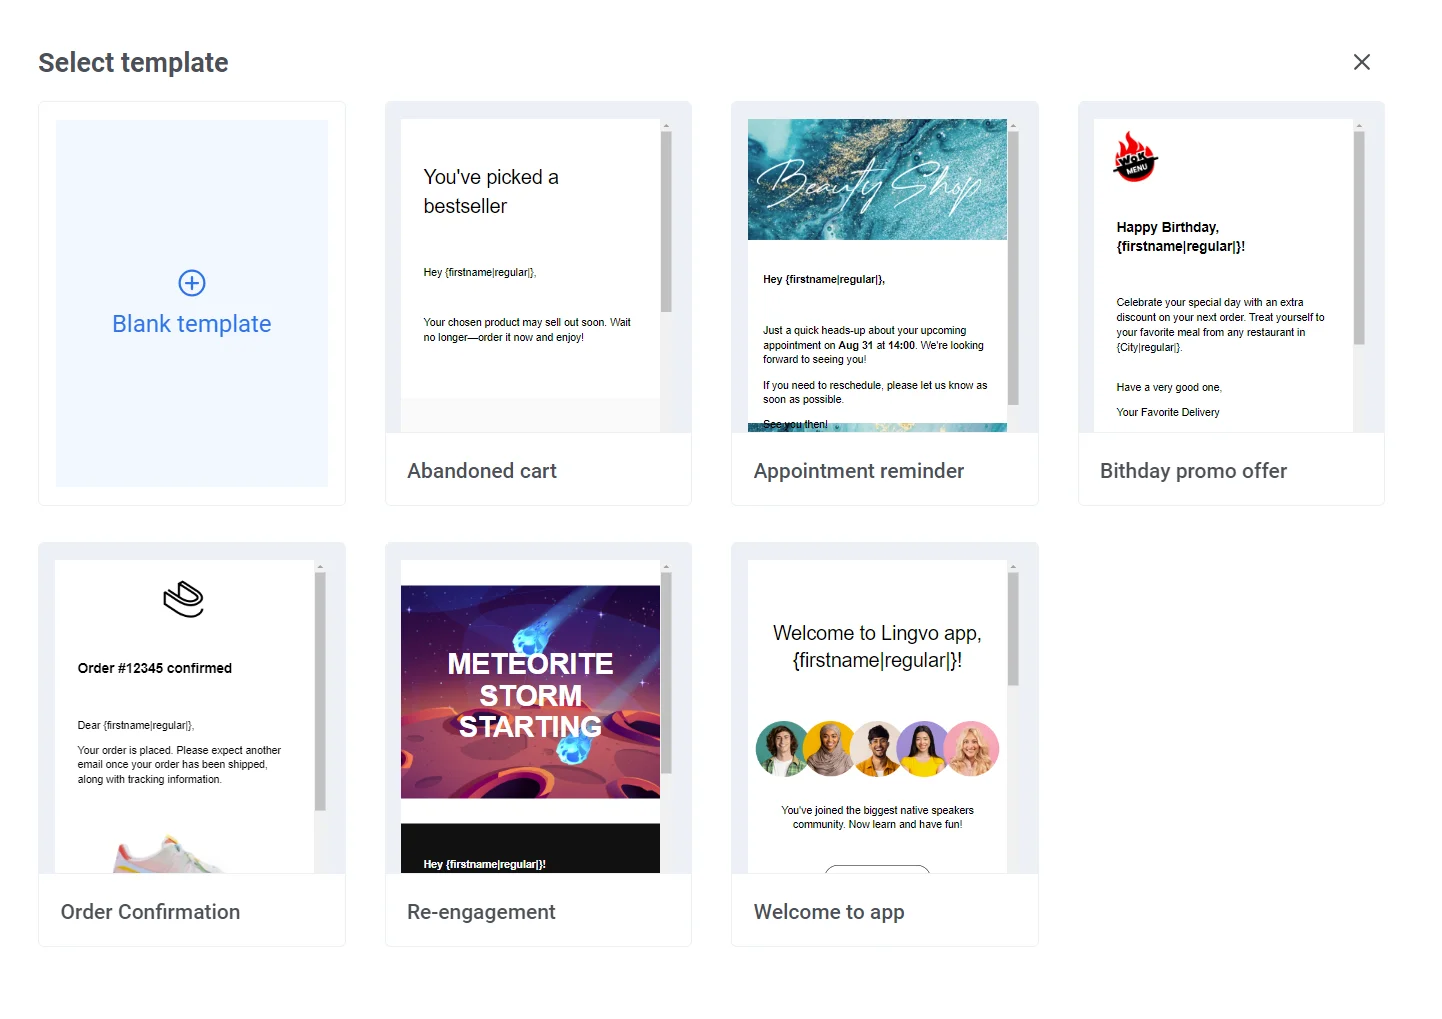
- बिल्डर की टेम्पलेट गैलरी खोलने के लिए Create email content पर क्लिक करें। पहले से भरे और ब्रांड के रंगों में बदले हुए टेम्पलेट से शुरू करने के लिए कोई टेम्पलेट चुनें, या स्क्रैच से शुरू करने के लिए Blank email चुनें। और जानें
- Create email content के बगल में तीर पर क्लिक करें, फिर HTML कोड एडिटर का उपयोग करने के लिए HTML code चुनें। और जानें
एडिटर लेआउट का अन्वेषण करें
Anchor link toएक बार जब आप एक ईमेल खोलते हैं, तो बिल्ट-इन एडिटर में ये क्षेत्र होते हैं:
टॉप बार
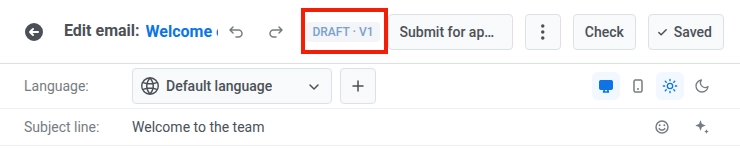
ईमेल का नाम बदलें, परिवर्तनों को पूर्ववत करें या फिर से करें, भेजने से पहले समस्याओं को पकड़ने के लिए Check चलाएं, और अपने काम को सहेजें। देखें भेजने से पहले अपना ईमेल जांचें। अधिक कार्यों के लिए ⋮ मेनू खोलें:
- Preview: देखें कि प्राप्तकर्ताओं के लिए ईमेल कैसे प्रस्तुत होगा, इसके अपने डेस्कटॉप/मोबाइल टॉगल के साथ। देखें मोबाइल व्यू संपादित करें।
- Test email: एक परीक्षण डिवाइस या पते पर एक पूर्वावलोकन भेजें। देखें एक परीक्षण ईमेल भेजें।
- Brand book: अपने सहेजे गए लोगो, रंग, फ़ॉन्ट और ब्लॉक डिफ़ॉल्ट को इस ईमेल पर एक क्लिक में लागू करें। और जानें
- Brand styles अनुभाग: ब्रांड बुक खोले बिना अपने सहेजे गए ब्रांड को लागू करें या प्रति-ब्लॉक शैली ओवरराइड को रीसेट करें। और जानें
- Version history: इस ईमेल के पहले सहेजे गए संस्करण को देखें और पुनर्स्थापित करें। देखें एक पिछला संस्करण पुनर्स्थापित करें।

भाषा / विषय / प्रीहेडर बार
कैनवास के ऊपर, संपादन भाषा बदलें, ईमेल के लिए विषय पंक्ति और प्रीहेडर सेट करें, और छूटे हुए अनुवादों को भरने के लिए Auto-translate का उपयोग करें। भाषाओं और स्थानीयकरण को कैसे सेट करें जानें।

कैनवास
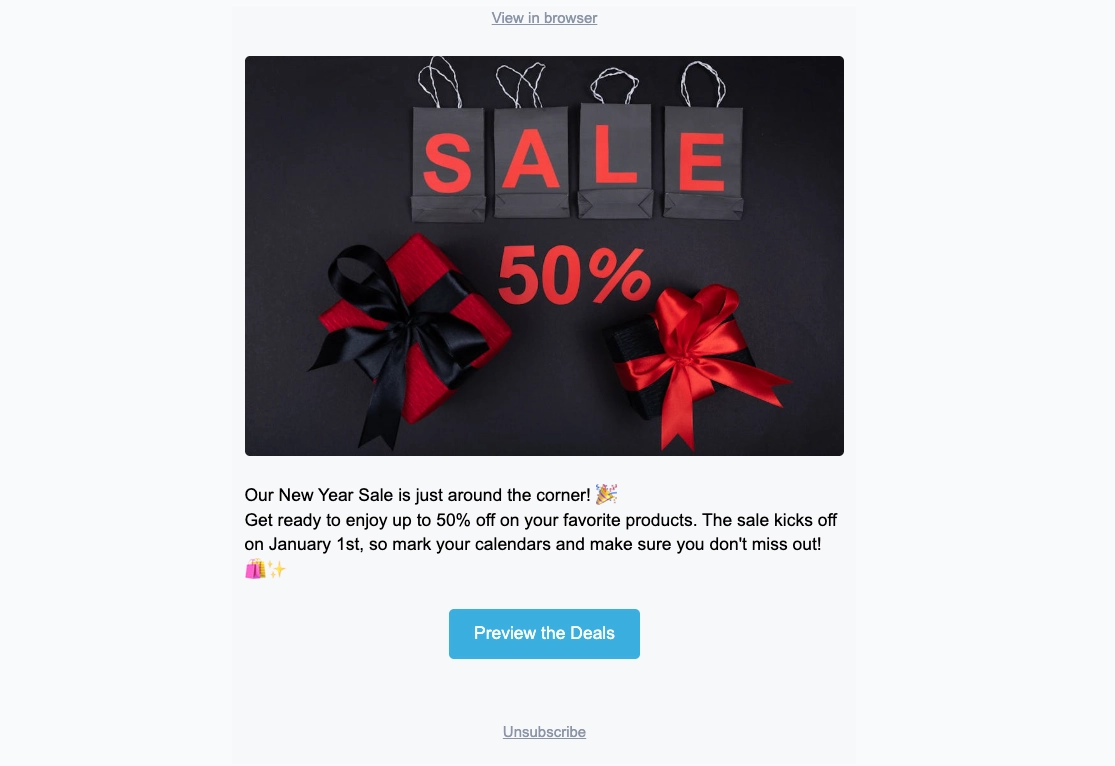
देखें कि प्राप्तकर्ता ईमेल को कैसे देखेंगे, और सीधे लेआउट पर टेक्स्ट, इमेज और बटन संपादित करें। एक खाली ईमेल Start with a block दिखाता है।
लेयर्स पैनल
आपके ईमेल में प्रत्येक ब्लॉक को एक ट्री के रूप में सूचीबद्ध करता है, उसी क्रम में जैसे कैनवास पर। इसे बाएं किनारे से खोलें ताकि एक नेस्टेड ब्लॉक का चयन किया जा सके या कंटेंट को फिर से व्यवस्थित करने के लिए पंक्तियों को खींचें।
दायां पैनल
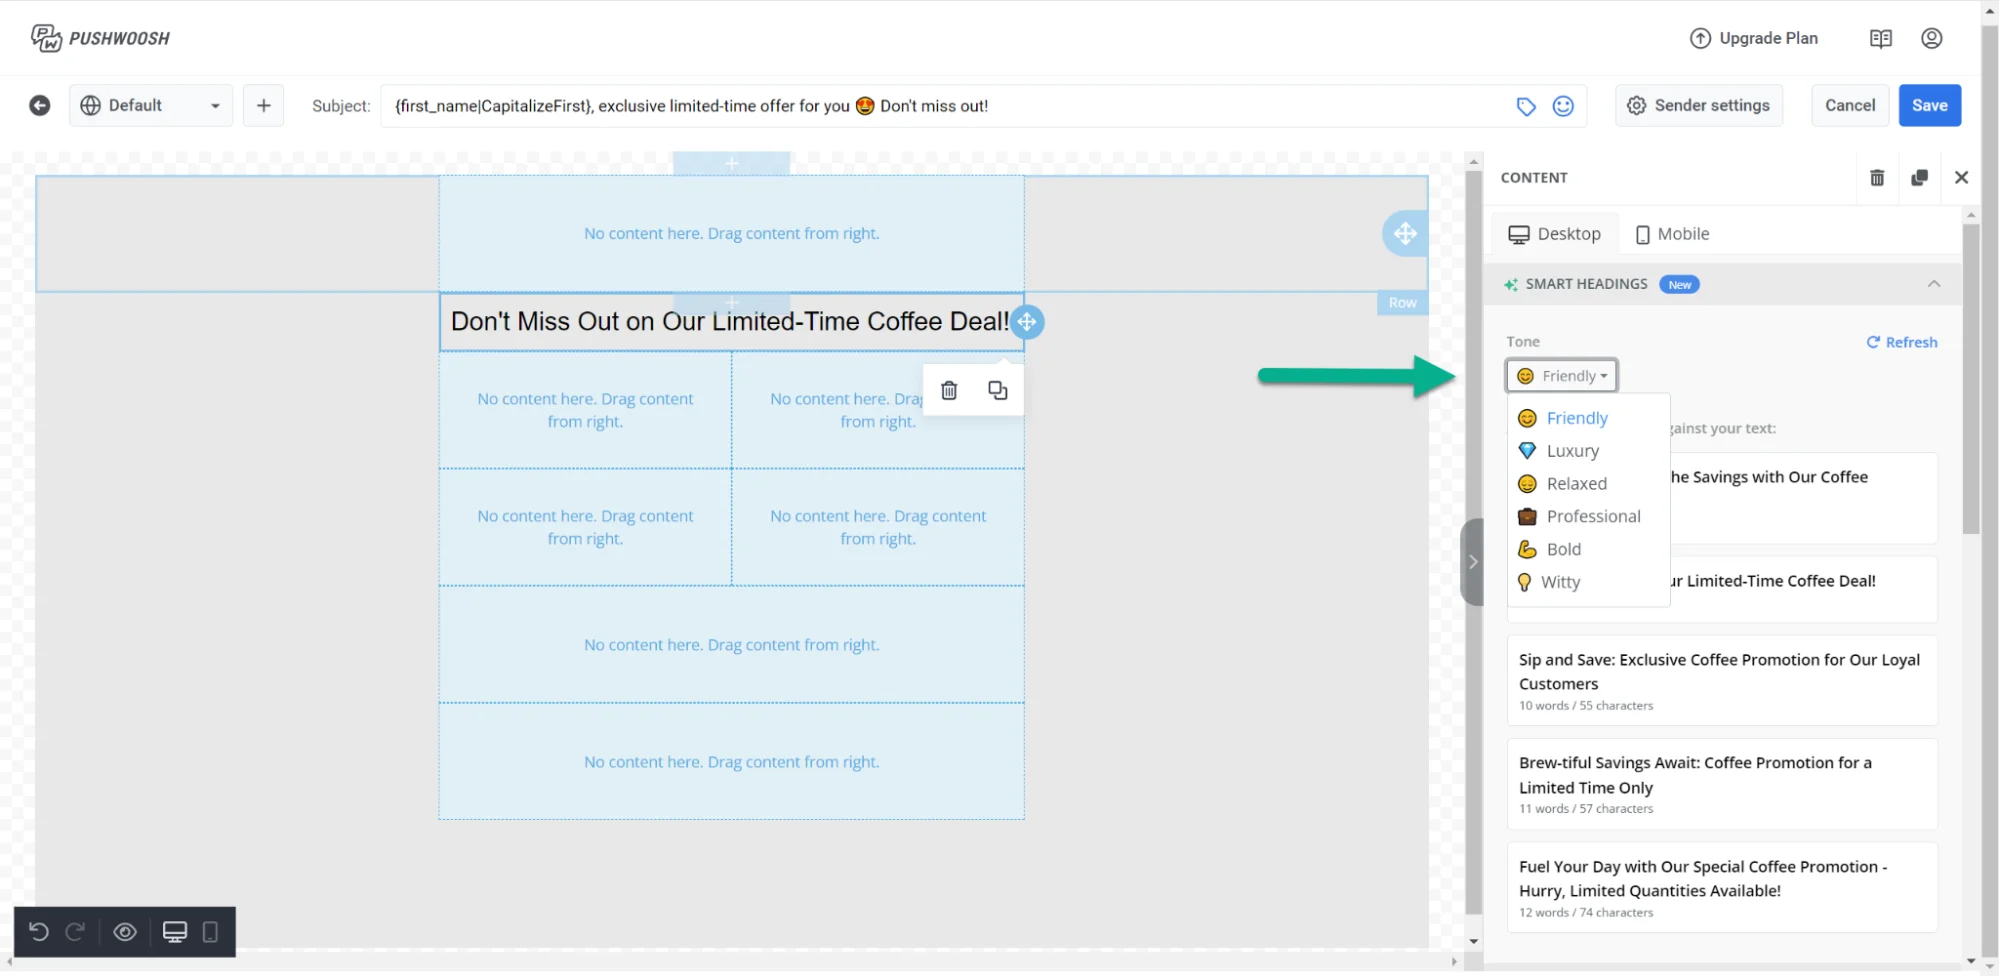
तीन टैब के बीच स्विच करें:
- Blocks: ईमेल में कंटेंट जोड़ें। देखें ईमेल कंटेंट ब्लॉक संदर्भ।
- Settings: पूरे ईमेल पर एक साथ स्टाइलिंग लागू करें। देखें ईमेल-व्यापी स्टाइलिंग और फुटर कॉन्फ़िगर करें।
- AI: एक प्रॉम्प्ट से कंटेंट उत्पन्न करने या संपादित करने के लिए AI सहायक के साथ चैट करें।
कंटेंट ब्लॉक जोड़ें
Anchor link to- दाएं पैनल में Blocks टैब खोलें।
- एक ब्लॉक को कैनवास पर खींचें, या ईमेल के अंत में इसे जोड़ने के लिए एक ब्लॉक पर क्लिक करें।
- लेआउट तैयार होने तक ब्लॉक जोड़ते रहें।
प्रत्येक ब्लॉक प्रकार ईमेल में एक अलग उद्देश्य पूरा करता है:
- Heading: शीर्षक और छोटी सुर्खियाँ
- Text: मुख्य प्रति और लंबे विवरण
- Button: एक क्लिक करने योग्य कॉल टू एक्शन
- Image: Media storage, अपलोड, या URL से चित्र
- Video: एक क्लिक करने योग्य वीडियो पोस्टर जो YouTube या Vimeo पर खुलता है
- Card: एक लेआउट में शीर्षक, टेक्स्ट और बटन के साथ एक छवि
- Divider: एक रेखा जो अनुभागों को अलग करती है
- Columns: अगल-बगल लेआउट (2, 3, या 4 समान कॉलम, या 33/67 और 67/33 विभाजन)
- Products: उत्पाद कार्ड का एक ग्रिड — उत्पादों को हाथ से दर्ज करें, या उन्हें अपने Product catalog या प्राप्तकर्ता के छोड़े गए कार्ट से खींचें
- Timer: ऑफ़र और समय सीमा के लिए एक उलटी गिनती
- Menu: नेविगेशन या संपर्क लिंक की एक पंक्ति या स्तंभ
- Social: आपके सामाजिक प्रोफाइल से लिंक करने वाले आइकन
- HTML: कस्टम HTML, जैसे कि एक फ़ॉर्म, सर्वेक्षण, या एम्बेडेड वीडियो
प्रत्येक ब्लॉक के लिए सेटिंग्स के लिए ईमेल कंटेंट ब्लॉक संदर्भ देखें, ब्लॉक को कैसे सहेजें और पुन: उपयोग करें, और बटन और टेक्स्ट के लिए लिंक प्रकार।
विशिष्ट प्राप्तकर्ताओं को कंटेंट दिखाएं
Anchor link toकिसी ब्लॉक को केवल कुछ प्राप्तकर्ताओं को दिखाने के लिए, एक प्रदर्शन शर्त सेट करें।
मोबाइल व्यू संपादित करें
Anchor link toएक बार जब आप अपने कंटेंट ब्लॉक जोड़ लेते हैं, तो यह जांचने और समायोजित करने के लिए मोबाइल पर स्विच करें कि वे फोन पर कैसे दिखते हैं। कैनवास के ऊपर भाषा स्विचर के बगल में, वास्तविक फोन चौड़ाई पर पूरी तरह से संपादन योग्य मोबाइल व्यू में स्विच करने के लिए Desktop / Mobile टॉगल का उपयोग करें। कंटेंट का चयन, संपादन और पुनर्व्यवस्थित करें ठीक उसी तरह जैसे आपके ग्राहक इसे अपने फोन पर देखेंगे, बजाय इसके कि केवल यह पूर्वावलोकन करें कि डेस्कटॉप लेआउट कैसे अनुकूलित होता है।
प्रत्येक मोबाइल-ओवरराइड करने योग्य सेटिंग के बगल में एक चेकबॉक्स होता है। जब चेकबॉक्स बंद होता है, तो एक संकेत विरासत में मिले डेस्कटॉप मान को दिखाता है, और सेटिंग उसका उपयोग करना जारी रखती है। मोबाइल के लिए एक अलग मान सेट करने के लिए चेकबॉक्स चालू करें। डेस्कटॉप मान पर वापस जाने के लिए इसे फिर से बंद करें।
प्रति डिवाइस अलग पैडिंग और फ़ॉन्ट आकार सेट करें
Anchor link to- Padding: प्रत्येक ब्लॉक, कॉलम, कार्ड, और व्यक्तिगत तत्व (जैसे टेक्स्ट, एक छवि, या एक बटन) में एक पैडिंग नियंत्रण होता है जिसे आप मोबाइल के लिए ओवरराइड कर सकते हैं। कैनवास को Mobile पर स्विच करें, Padding के बगल में चेकबॉक्स चालू करें, और नया मान सेट करें। डेस्कटॉप पैडिंग तब तक समान रहती है जब तक आप चेकबॉक्स चालू नहीं करते।
- Font size: केवल मोबाइल के लिए एक आकार सेट करने के लिए एक टेक्स्ट तत्व पर Font size (mobile) चालू करें। इस ओवरराइड के बिना, बड़ी सुर्खियाँ फोन स्क्रीन पर फिट होने के लिए स्वचालित रूप से सिकुड़ जाती हैं।
नियंत्रित करें कि कॉलम मोबाइल पर कैसे स्टैक होते हैं
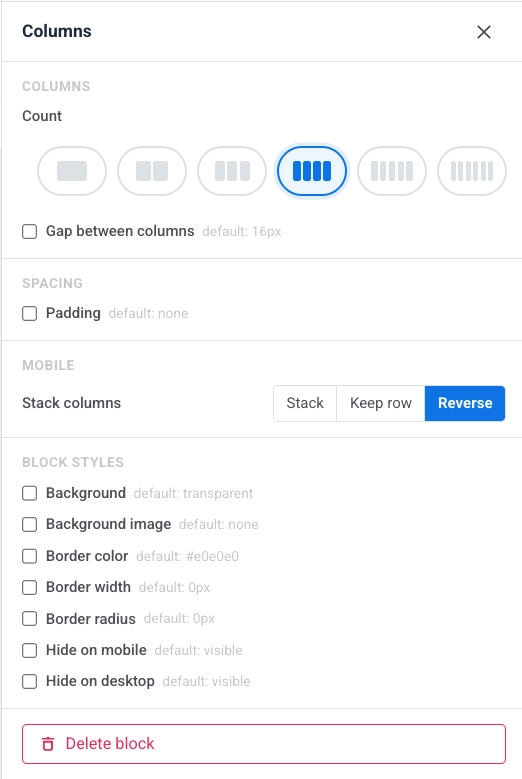
Anchor link toColumns लेआउट डिफ़ॉल्ट रूप से फोन पर लंबवत रूप से स्टैक होते हैं। मोबाइल व्यू में, यह सेट करने के लिए Stack columns का उपयोग करें कि प्रत्येक कॉलम ब्लॉक कैसे व्यवहार करता है:
- Stack: कॉलम एक ही कॉलम में, ऊपर से नीचे तक प्रवाहित होते हैं (डिफ़ॉल्ट)।
- Keep row: कॉलम अगल-बगल रहते हैं, डेस्कटॉप लेआउट को संरक्षित करते हैं।
- Reverse: कॉलम उल्टे क्रम में स्टैक होते हैं। छवि + टेक्स्ट पंक्तियों के लिए उपयोगी: छवि को डेस्कटॉप पर दाईं ओर रखें, लेकिन इसे मोबाइल पर शीर्ष पर दिखाएं।
प्रति डिवाइस कंटेंट दिखाएं या छिपाएं
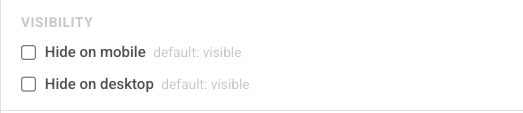
Anchor link toएक ब्लॉक या तत्व की सेटिंग्स खोलें और इसे केवल एक डिवाइस पर दिखाने के लिए Visibility के तहत Hide on mobile या Hide on desktop का उपयोग करें, ताकि आप दो टेम्पलेट बनाए बिना डिवाइस-विशिष्ट बैनर, CTA, या नेविगेशन बना सकें।
ईमेल-व्यापी स्टाइलिंग और फुटर कॉन्फ़िगर करें
Anchor link toमुख्य लेआउट के स्थान पर होने के बाद, Settings टैब खोलें ताकि पूरे ईमेल में लागू होने वाले फ़ॉन्ट, रंग और रिक्ति सेट की जा सके, और Footer को अपनी कंपनी के विवरण और सदस्यता समाप्त करने के लिंक से भरें। यहां डिफ़ॉल्ट नए ब्लॉक को तब तक सुसंगत रखते हैं जब तक आप उन्हें कैनवास पर ओवरराइड नहीं करते। और जानें
अपना ईमेल सहेजें
Anchor link toअपने परिवर्तनों को सहेजने के लिए टॉप बार में Save पर क्लिक करें। अपने संपादनों के माध्यम से पीछे और आगे जाने के लिए टॉप बार में Undo/Redo का उपयोग करें।
एक पिछला संस्करण पुनर्स्थापित करें
Anchor link toजब भी आप Save पर क्लिक करते हैं तो Pushwoosh एक स्नैपशॉट सहेजता है। उन तक पहुंचने के लिए, टॉप बार में ⋮ मेनू खोलें और Version history चुनें — ईमेल को कम से कम एक बार सहेजे जाने के बाद उपलब्ध होता है।
बायां पैनल सहेजे गए संस्करणों को सबसे नए से पहले सूचीबद्ध करता है, लेखक, टाइमस्टैम्प और वर्तमान संस्करण पर एक Latest बैज के साथ। दाईं ओर इसका पूर्वावलोकन करने के लिए किसी भी संस्करण का चयन करें, फिर इसे एडिटर में लोड करने के लिए Restore पर क्लिक करें।
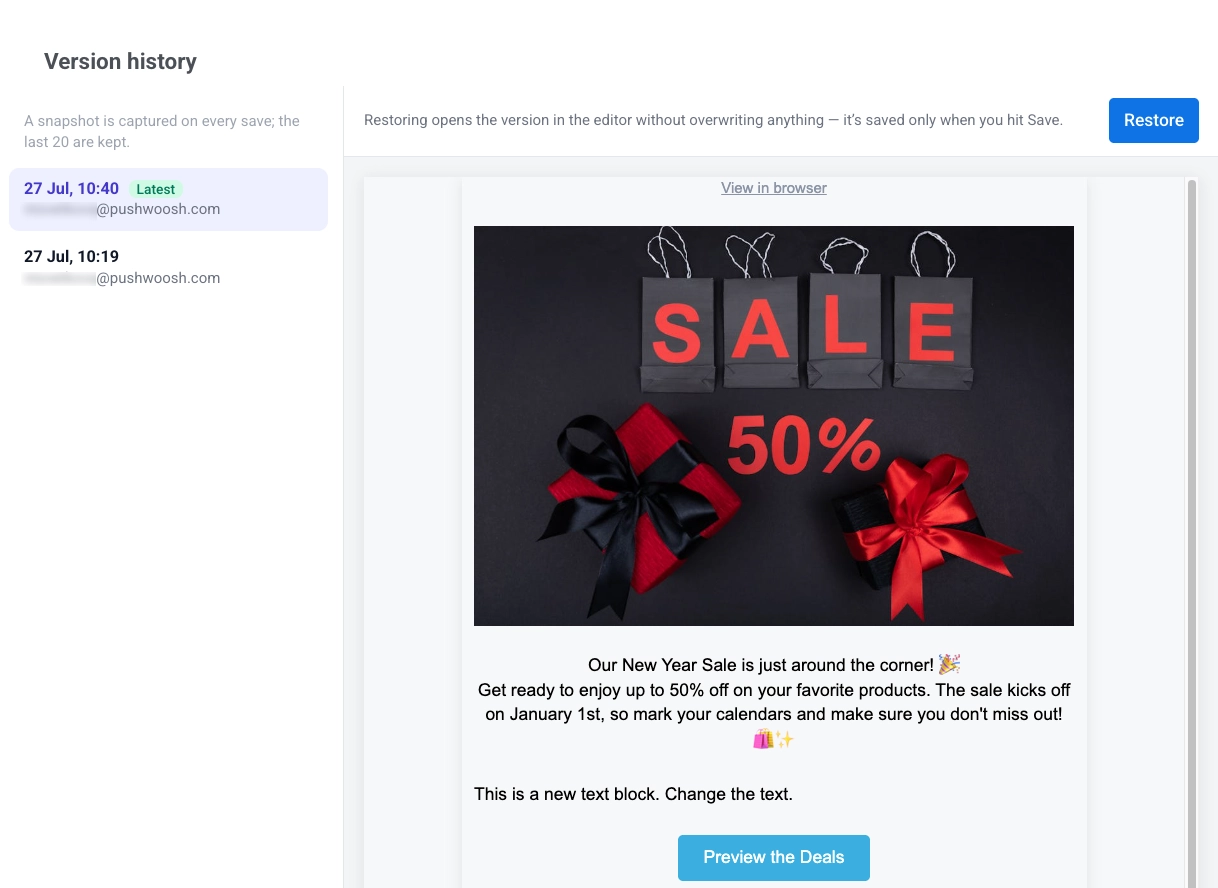
पुनर्स्थापित करने से संस्करण की HTML सामग्री, स्थानीय संस्करण, और थीम को बिना सहेजे गए परिवर्तनों के रूप में लोड किया जाता है। यह Settings टैब में सेट ईमेल-व्यापी स्टाइलिंग और फुटर को नहीं छूता है। जब तक आप Save पर क्लिक नहीं करते तब तक कुछ भी ओवरराइट नहीं होता है। पुनर्स्थापना को पूर्ववत करने के लिए, Cmd/Ctrl+Z दबाएं। Pushwoosh प्रति ईमेल 20 सबसे हाल के संस्करणों को रखता है, और अनुमोदन की प्रतीक्षा कर रहा एक संस्करण कभी भी बेदखल नहीं किया जाता है।
भेजने से पहले अपना ईमेल जांचें
Anchor link toSmart check खोलने और सामान्य समस्याओं के लिए अपने ईमेल को स्कैन करने के लिए टॉप बार में Check पर क्लिक करें:
- बिना लिंक के बटन
- बिना भरे AI प्लेसहोल्डर
- खाली छवि स्लॉट और लापता ऑल्ट टेक्स्ट
- टेक्स्ट कंट्रास्ट जो WCAG AA को पूरा नहीं करता है
- एक खाली या बहुत लंबी विषय पंक्ति
- एक मार्केटिंग ईमेल के फुटर में एक लापता प्रेषक डाक पता
- सामग्री जो ईमेल को जीमेल की क्लिपिंग सीमा (~102 KB, जिसके बाद जीमेल संदेश को छोटा कर देता है) से अधिक धकेलती है
- अनुवादित सामग्री
- अपुनरीक्षित अनुवाद अपुष्ट छोड़ दिए गए
- एक उलटी गिनती टाइमर जिसकी समाप्ति तिथि पहले ही बीत चुकी है
- एक टूटे या खाली नियम के साथ एक प्रदर्शन शर्त, एक शाखा जिसने उस ब्लॉक को खो दिया है जिससे वह जुड़ती है, या एक शर्त जो लागू नहीं होगी क्योंकि खाते के लिए गतिशील सामग्री अक्षम है
- विषय, प्रीहेडर, फुटर, या बॉडी में टूटी हुई Liquid सिंटैक्स, आपके द्वारा जोड़ी गई हर भाषा में जांची गई
- Catalog rule, Cart, या Recommendations का उपयोग करने वाला एक Products ब्लॉक जिसमें कोई API एक्सेस टोकन नहीं है
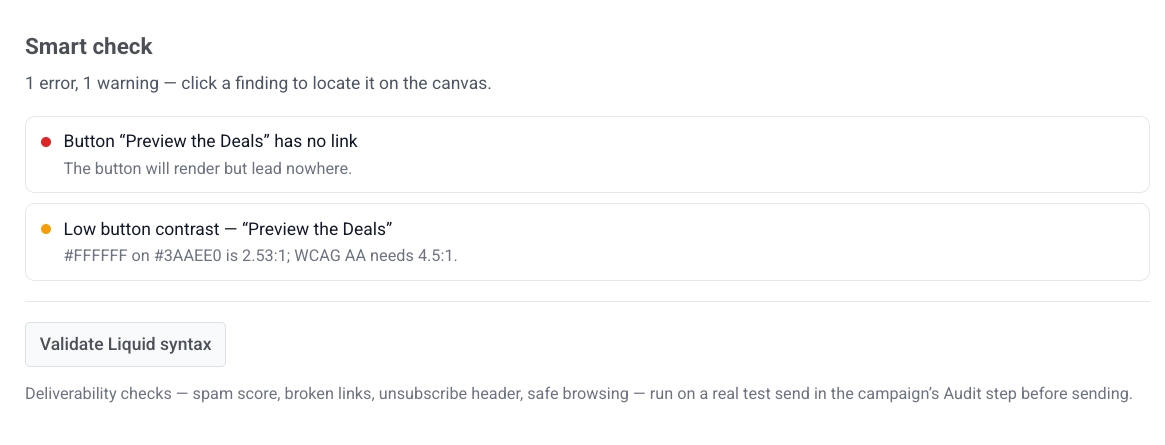
कैनवास पर प्रभावित तत्व पर सीधे जाने के लिए एक खोज पर क्लिक करें।
स्मार्ट चेक हर बार जब आप इसे खोलते हैं तो स्वचालित रूप से लिक्विड सिंटैक्स को मान्य करता है — क्लिक करने के लिए कोई अलग बटन नहीं है। जब जांच चल रही होती है, तो पैनल Checking Liquid syntax… दिखाता है; स्मार्ट चेक यह रिपोर्ट नहीं करता है कि सब कुछ पास हो गया है जब तक कि यह जांच वापस नहीं आ जाती है, इसलिए एक धीमी या असफल लिक्विड जांच एक झूठे “सब ठीक है” के पीछे नहीं छिप सकती है।
एक परीक्षण ईमेल भेजें
Anchor link toअपना ईमेल अभियान भेजने से पहले, आप यह पूर्वावलोकन करने के लिए एक परीक्षण ईमेल भेज सकते हैं कि सामग्री प्राप्तकर्ताओं के इनबॉक्स में कैसे दिखाई देगी।
- टॉप बार में ⋮ मेनू खोलें और Test email चुनें।
- खुलने वाली विंडो में, 50 तक प्राप्तकर्ता जोड़ें: एक या अधिक सहेजे गए परीक्षण उपकरण चुनें, या सूची में जोड़ने के लिए कोई भी मान्य ईमेल पता टाइप करें। किसी प्राप्तकर्ता को हटाने के लिए, उस पर × पर क्लिक करें।
-
वैकल्पिक रूप से, इस ईमेल कंटेंट की हर भाषा में सब्जेक्ट के आगे
[TEST]जोड़ने के लिए Add [TEST] before the subject line चुनें। चेकबॉक्स डिफ़ॉल्ट रूप से बंद रहता है। -
सभी चुने हुए प्राप्तकर्ताओं को परीक्षण संदेश भेजने के लिए Send पर क्लिक करें। यदि प्रत्येक पता विफल हो जाता है, तो Pushwoosh संवाद में एक त्रुटि दिखाता है; यदि केवल कुछ विफल होते हैं, तो यह एक टोस्ट में विफल पतों को सूचीबद्ध करता है और फिर भी बाकी को वितरित करता है।
अपने सहेजे गए ईमेल कंटेंट का उपयोग करें
Anchor link toअब जब आपका ईमेल कंटेंट तैयार है, तो इसका उपयोग ईमेल अभियानों में किया जा सकता है। इसका उपयोग कैसे करें के बारे में और जानें