Manage a Wallet Pass Campaign
यह सामग्री अभी तक आपकी भाषा में उपलब्ध नहीं है।
After you create a campaign, you manage it from its own page: change the design and push it to issued passes, track every pass the campaign issued, and review past revisions. To open it, go to Campaigns → Wallet Passes and click the campaign on the Campaigns tab. The page has three tabs: Design, Passes, and History.

Change the campaign status
Anchor link toUse status to track where each campaign stands: still being designed, actively issuing passes, or done and archived.
To change the status, select an option from the Status dropdown at the top of the Design tab. The change saves immediately without a separate confirmation step and counts as a new revision:
- Draft or Active: you can issue new passes, attach existing ones, and push design updates. Tag sync runs only in Active.
- Archived: you can’t issue or attach passes. Previously issued passes keep working and receiving shared updates.
Design tab
Anchor link toOn the Design tab, you can update the pass template, change colors, modify shared and personal fields, upload new campaign images, or change tag sync settings.
Update design and push changes to passes
Anchor link to- On the Design tab, edit basic information, colors, barcode type, expiration, locations, a shared field, or a campaign image.
- Click Save changes.
- In the Apply the campaign edit dialog, confirm the update:
- No pass overrides the changed field: click Update N, keep manual edits to push the edit to all N passes.
- Some passes override the changed field: the dialog names the field and how many passes override it. Click Update N, keep manual edits to push the edit to every pass except those, or Overwrite all N to push it to all N passes, including the overridden ones. Overwriting erases the override.
- Every affected pass overrides the changed field: only Overwrite all N is available.
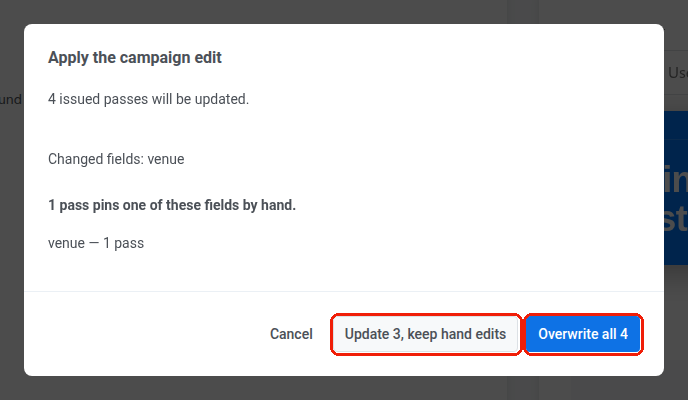
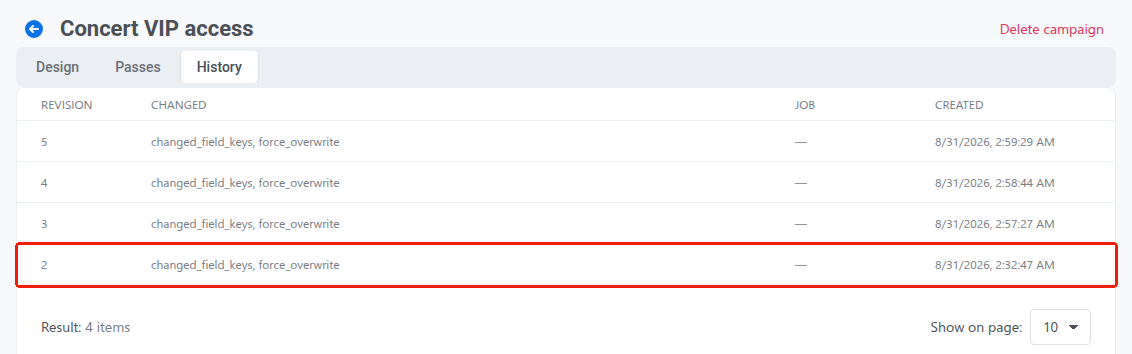
Whichever button you click, the update saves as a new revision (for example, Revision 2), so you can check when it changed on the History tab.
While an update is being delivered to issued passes, an Update in progress panel shows its progress below the tabs on every tab of the campaign page. To stop the update, click Cancel the run. Passes it has not reached yet stay on their previous revision.
Pushwoosh marks a pass as failed after 5 unsuccessful delivery attempts. A failed pass stays on its previous revision, so it appears under the Behind the revision filter on the Passes tab.
Override a shared field on an individual pass
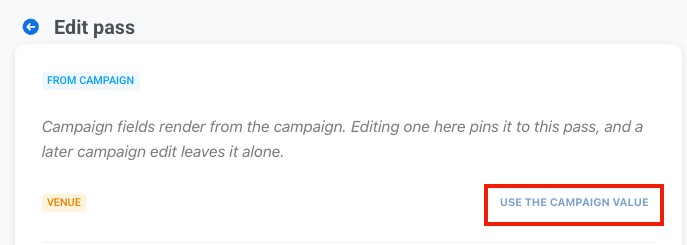
Anchor link toA field changed by hand on one pass is called an override. The Pinned fields column on the Passes tab lists the overrides of each pass.
If you need to customize a shared field for a specific user, edit that field directly on their individual pass (from the Passes tab or All passes):
- Create an override: saving a custom value on an individual pass detaches that field from campaign-wide updates. Future updates to the campaign, including a scheduled tag sync refresh, will skip this pass for that specific field.
- Remove an override: on an Apple Wallet pass, edit the pass and click Use the campaign value next to the overridden field to restore campaign control. Google Wallet passes have no such button, so an override on a Google Wallet pass stays until you click Overwrite all N in a campaign edit.
To see which passes have overrides, open the Passes tab and check the Pinned fields column.
Passes tab
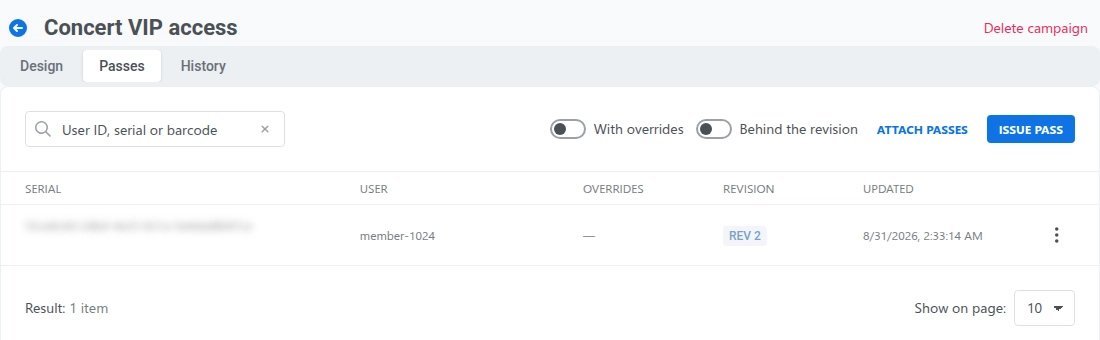
Anchor link toUse the Passes tab to check every pass the campaign issued. For each pass, the table shows the serial number, recipient User ID, active pinned fields, current revision, and last update date.
If tag sync is on, the tab also shows a Tags synced line above the table with the date and time of the last scheduled run, or not yet before the first one.
Use table filters to find specific passes:
- With pinned fields: shows passes that have at least one override.
- Behind the revision: shows passes that are not on the campaign’s latest revision. A change of status, name, description, or tag sync settings also creates a revision without updating any pass, so after such a change every pass shows as behind.
To issue new passes or attach existing ones, see Issue passes to users.
Open a row’s actions menu (⋮) to manage that pass:
- Edit: open the pass on its platform’s edit page to change personal fields or override a shared one.
- Download, Send message, QR code, and Copy install link: work as they do in All passes. See View and manage existing passes. Download appears on Apple Wallet campaigns only, because Google Wallet has no downloadable pass file.
- Delete: remove the pass. This can’t be undone. On Apple Wallet, already-installed copies stop receiving updates and become invalid on their next refresh. On Google Wallet, Google doesn’t allow force-removing a pass already saved on a device, so it becomes invalid and moves to the user’s Expired passes while Pushwoosh removes its record. Deleting a pass here doesn’t delete the campaign or any other issued pass.
History tab
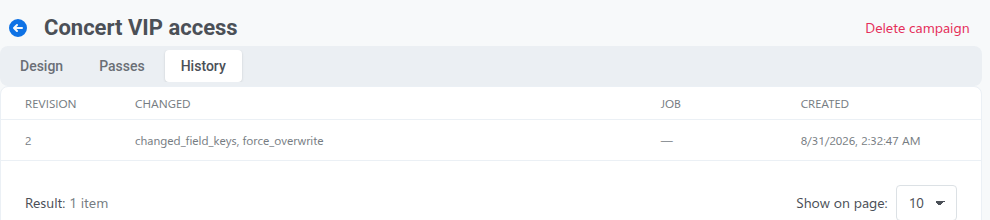
Anchor link toThe History tab lists all revisions of the campaign, newest first. For each revision, it shows the revision number and when the revision was created.
Delete a campaign
Anchor link toOpen the campaign, click Delete campaign at the top right of the page, and confirm in the Delete this campaign? dialog.

Deleting a campaign does not delete or invalidate already issued passes. Issued passes retain their current content and images, but stop receiving shared updates. Any future changes must be made on each pass individually.