কন্টাক্ট ইম্পোর্ট করুন
একটি CSV ফাইল থেকে ইমেল, SMS, WhatsApp, এবং Viber-এর জন্য কন্টাক্ট রেজিস্টার করুন। একটি ফোন নম্বর কলাম একটি কন্টাক্টকে SMS এবং WhatsApp উভয়ের জন্য রেজিস্টার করতে পারে, তাই প্রতিটি চ্যানেলের জন্য আলাদা ফাইলের প্রয়োজন নেই।
আপনার CSV ফাইল প্রস্তুত করুন
Anchor link toফাইল ফরম্যাট
Anchor link to- প্রথম সারিতে অবশ্যই কলাম হেডার থাকতে হবে যা প্রতিটি কলামের ডেটা বর্ণনা করে।
- প্রতিটি পরবর্তী সারি একটি একক কন্টাক্ট প্রতিনিধিত্ব করে, যার মানগুলি হেডারের সাথে সঙ্গতিপূর্ণ।
- মানগুলি অবশ্যই কমা দ্বারা পৃথক করা উচিত।
- সঠিক অক্ষর প্রদর্শন নিশ্চিত করতে ফাইলটি UTF-8 এনকোডিং-এ সেভ করুন।
- ফাইলের সর্বোচ্চ আকার 100 MB।
কন্টাক্ট কলাম
Anchor link toআপনি কোন চ্যানেলের জন্য কন্টাক্ট রেজিস্টার করতে চান তার উপর নির্ভর করে, নিম্নলিখিত কলামগুলির মধ্যে অন্তত একটি অন্তর্ভুক্ত করুন:
- Email: প্রাপকের ইমেল ঠিকানা।
- Phone number (SMS, WhatsApp, এবং Viber-এর জন্য): আন্তর্জাতিক ফরম্যাটে,
+এবং দেশের কোড দিয়ে শুরু করে, উদাহরণস্বরূপ +120XXXXX234।whatsapp:বাviber:প্রিফিক্স ছাড়া সাধারণ নম্বরটি লিখুন। আপনি কলামটি সেই চ্যানেলে ম্যাপ করলে Pushwoosh প্রিফিক্সটি যোগ করে।
যদি কোনো ফোন নম্বর বৈধ আন্তর্জাতিক ফরম্যাটে না থাকে, তাহলে সেটি সেই চ্যানেলের জন্য বাদ দেওয়া হয়। সারির বাকি অংশ তবুও ইম্পোর্ট হয়।
ঐচ্ছিক কলাম
Anchor link to- User ID: ব্যবহারকারীর জন্য একটি অনন্য শনাক্তকারী (যেমন নাম বা ইমেল)। প্রয়োজন নেই, তবে সুপারিশ করা হয় যাতে কন্টাক্টের চ্যানেলগুলি একাধিক ব্যবহারকারী প্রোফাইলের পরিবর্তে একটি প্রোফাইল শেয়ার করে।
- অন্য যেকোনো কলাম সেগমেন্টেশন এবং পার্সোনালাইজেশনের জন্য একটি সিস্টেম ট্যাগে ম্যাপ করা যেতে পারে, উদাহরণস্বরূপ Location, Birthday, Language, বা Customer type।
উদাহরণ CSV ফাইল
Anchor link toEmail,Mobile,User ID,Name,Locationjohn.smith@email.com,+120XXXXX234,john.smith@email.com,John Smith,New Yorkjane.smith@email.com,+131XXXXX890,jane.smith@email.com,Jane Smith,Los AngelesCSV ফাইল আপলোড এবং ম্যাপ করুন
Anchor link to-
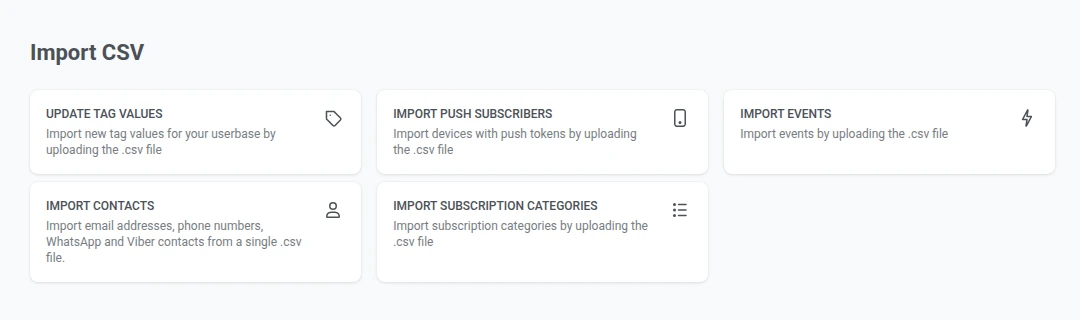
Audience → Import CSV → Import Contacts-এ যান।
-
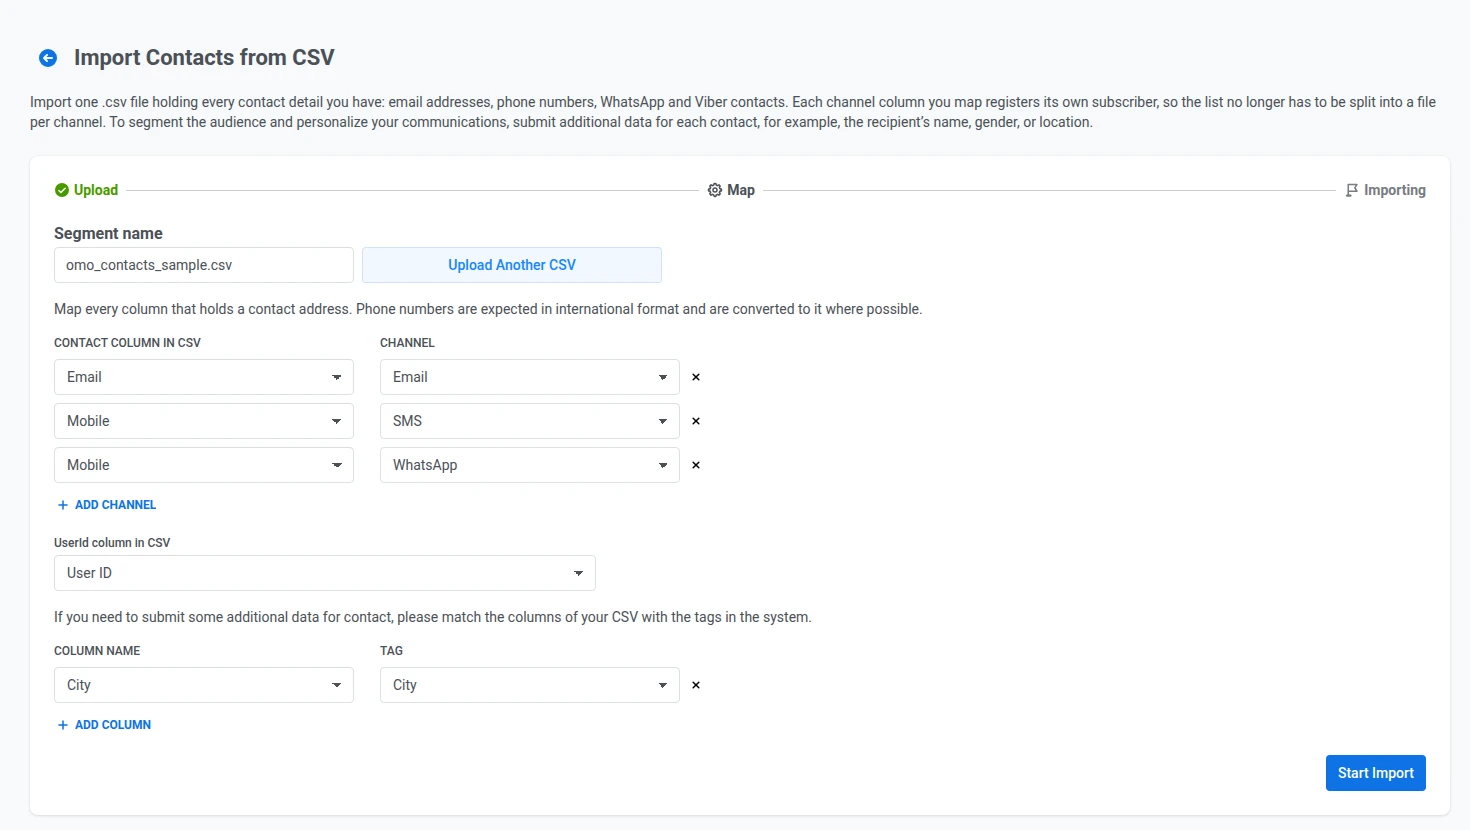
Upload CSV-তে ক্লিক করুন এবং আপনার ফাইল নির্বাচন করুন। এটি প্রতিস্থাপন করতে, Upload Another CSV-তে ক্লিক করুন।
-
ইম্পোর্ট করা কন্টাক্টদের জন্য একটি Segment name লিখুন।
-
Contact column in CSV-এর অধীনে, একটি কলাম নির্বাচন করুন এবং এর পাশে, এটি যে Channel রেজিস্টার করে তা চয়ন করুন (Email, SMS, WhatsApp, বা Viber)। অন্য একটি কলাম ম্যাপ করতে, বা একই কলামকে একটি অতিরিক্ত চ্যানেলে ম্যাপ করতে + Add channel-এ ক্লিক করুন।
-
UserId column in CSV-এর অধীনে, অনন্য ব্যবহারকারী শনাক্তকারী সহ কলামটি নির্বাচন করুন, যদি আপনার ফাইলে একটি থাকে।
-
সেগমেন্টেশনের জন্য অতিরিক্ত ডেটা অন্তর্ভুক্ত করতে, আপনার CSV থেকে একটি Column Name নির্বাচন করুন এবং এটিকে একটি Tag বরাদ্দ করুন। আরও অ্যাট্রিবিউট ম্যাপ করতে + Add Column-এ ক্লিক করুন।
-
Start Import-এ ক্লিক করুন।
ইম্পোর্টের পরে, কন্টাক্টগুলি আপনার ম্যাপ করা চ্যানেলগুলিতে ক্যাম্পেইনের জন্য উপলব্ধ হবে। তারা Segments list-এ একটি নতুন সেগমেন্ট হিসাবে উপস্থিত হবে এবং User explorer-এর মাধ্যমেও অ্যাক্সেস করা যাবে।
সমাপ্তি স্ক্রিনে দুটি গণনা দেখানো হয়:
- Created: অ্যাপের জন্য নতুন চ্যানেল রেজিস্ট্রেশন।
- Updated: আগে থেকে বিদ্যমান চ্যানেল রেজিস্ট্রেশন, যার মধ্যে সেই ক্ষেত্রগুলিও রয়েছে যখন একই ঠিকানা বা নম্বর একটি ভিন্ন User ID-এর অধীনে বা একটি ভিন্ন ডিভাইস প্ল্যাটফর্মে পুনরায় রেজিস্টার হয়।
উভয়ই চ্যানেল রেজিস্ট্রেশন গণনা করে, কন্টাক্ট বা CSV সারি নয়। দুটি চ্যানেলে (উদাহরণস্বরূপ SMS এবং WhatsApp) ম্যাপ করা একটি কন্টাক্ট 2 যোগ করে।
একটি আপডেট হওয়া কন্টাক্টের ক্ষেত্রে, শুধুমাত্র ধাপ ৬-এ ম্যাপ করা ট্যাগগুলি পরিবর্তিত হয়। তাদের মানগুলি CSV-এর মান দিয়ে ওভাররাইট করা হয়। কন্টাক্টে আগে থেকে সেট করা অন্যান্য ট্যাগ যেমন আছে তেমনই থাকে।
ইম্পোর্টের সময় এড়িয়ে যাওয়া সারি
Anchor link toসমাপ্তি স্ক্রিনটি কারণ অনুসারে এড়িয়ে যাওয়া সারিগুলিকে গ্রুপ করে:
- Email address is not valid
- Phone number is not valid
- No contact address in the row: প্রতিটি ম্যাপ করা কলাম খালি ছিল
একটি সারি আংশিকভাবে ইম্পোর্ট হতে পারে এবং তারপরেও এই ব্রেকডাউনে প্রদর্শিত হতে পারে। উদাহরণস্বরূপ, ইমেল কলামটি সফল হয়, কিন্তু ফোন কলামটি ভ্যালিডেশনে ব্যর্থ হয়।
শুধুমাত্র সেই সারিগুলির একটি CSV পেতে Download skipped rows-এ ক্লিক করুন। ফাইলটি একটি অতিরিক্ত কলাম হিসাবে এড়িয়ে যাওয়ার কারণ যোগ করে যাতে আপনি সারিগুলি ঠিক করতে এবং পুনরায় আপলোড করতে পারেন।
যে সারিগুলি ইম্পোর্ট রেজিস্টার করতে ব্যর্থ হয়েছে
Anchor link toকিছু সারি ফাইলে ঠিক দেখায় কিন্তু তারপরেও প্রক্রিয়া করা হয় না। উদাহরণস্বরূপ, একটি ইমেল ঠিকানা সঠিকভাবে লেখা হতে পারে এবং তারপরেও বাতিল হতে পারে কারণ এটি একটি ডিসপোজেবল বা বাউন্সড ডোমেনের অন্তর্গত। Pushwoosh এই ধরনের সারিগুলিকে Failed হিসাবে গণনা করে, Created, Updated বা Skipped থেকে আলাদাভাবে।
ব্যর্থ সারিগুলি কারণ অনুসারে বিভক্ত করা হয় না এবং এড়িয়ে যাওয়া-সারি ডাউনলোডে অন্তর্ভুক্ত করা হয় না। সেগুলি খুঁজে পেতে, আপনার উৎস CSV-কে ইম্পোর্ট করা সেগমেন্টের সাথে তুলনা করুন। অনুপস্থিত ঠিকানাগুলি ঠিক করুন (উদাহরণস্বরূপ, একটি ডিসপোজেবল বা বাউন্সড ডোমেন সরান), তারপর একটি নতুন ইম্পোর্টে শুধুমাত্র সেই সারিগুলি পুনরায় আপলোড করুন।