একটি ক্লাউড পেজ তৈরি করুন
একটি ক্লাউড পেজ তৈরি এবং প্রকাশ করতে এই গাইডটি ব্যবহার করুন।
শুরু করার আগে
Anchor link to- ক্লাউড পেজ অনুরোধের ভিত্তিতে উপলব্ধ। আপনার প্রকল্পের জন্য এটি সক্রিয় করতে Pushwoosh সাপোর্ট-এর সাথে যোগাযোগ করুন।
- পৃষ্ঠার প্রধান অ্যাকশনের পরে ব্যবহারকারীদের কোথায় রিডাইরেক্ট করতে হবে তা ঠিক করুন, উদাহরণস্বরূপ একটি ধন্যবাদ পৃষ্ঠা, একটি ফলাফলের পৃষ্ঠা, বা অন্য কোনো URL-এ।
একটি পেজ তৈরি করুন
Anchor link to১. Content → Cloud Pages-এ যান। ২. Create cloud page-এ ক্লিক করুন।
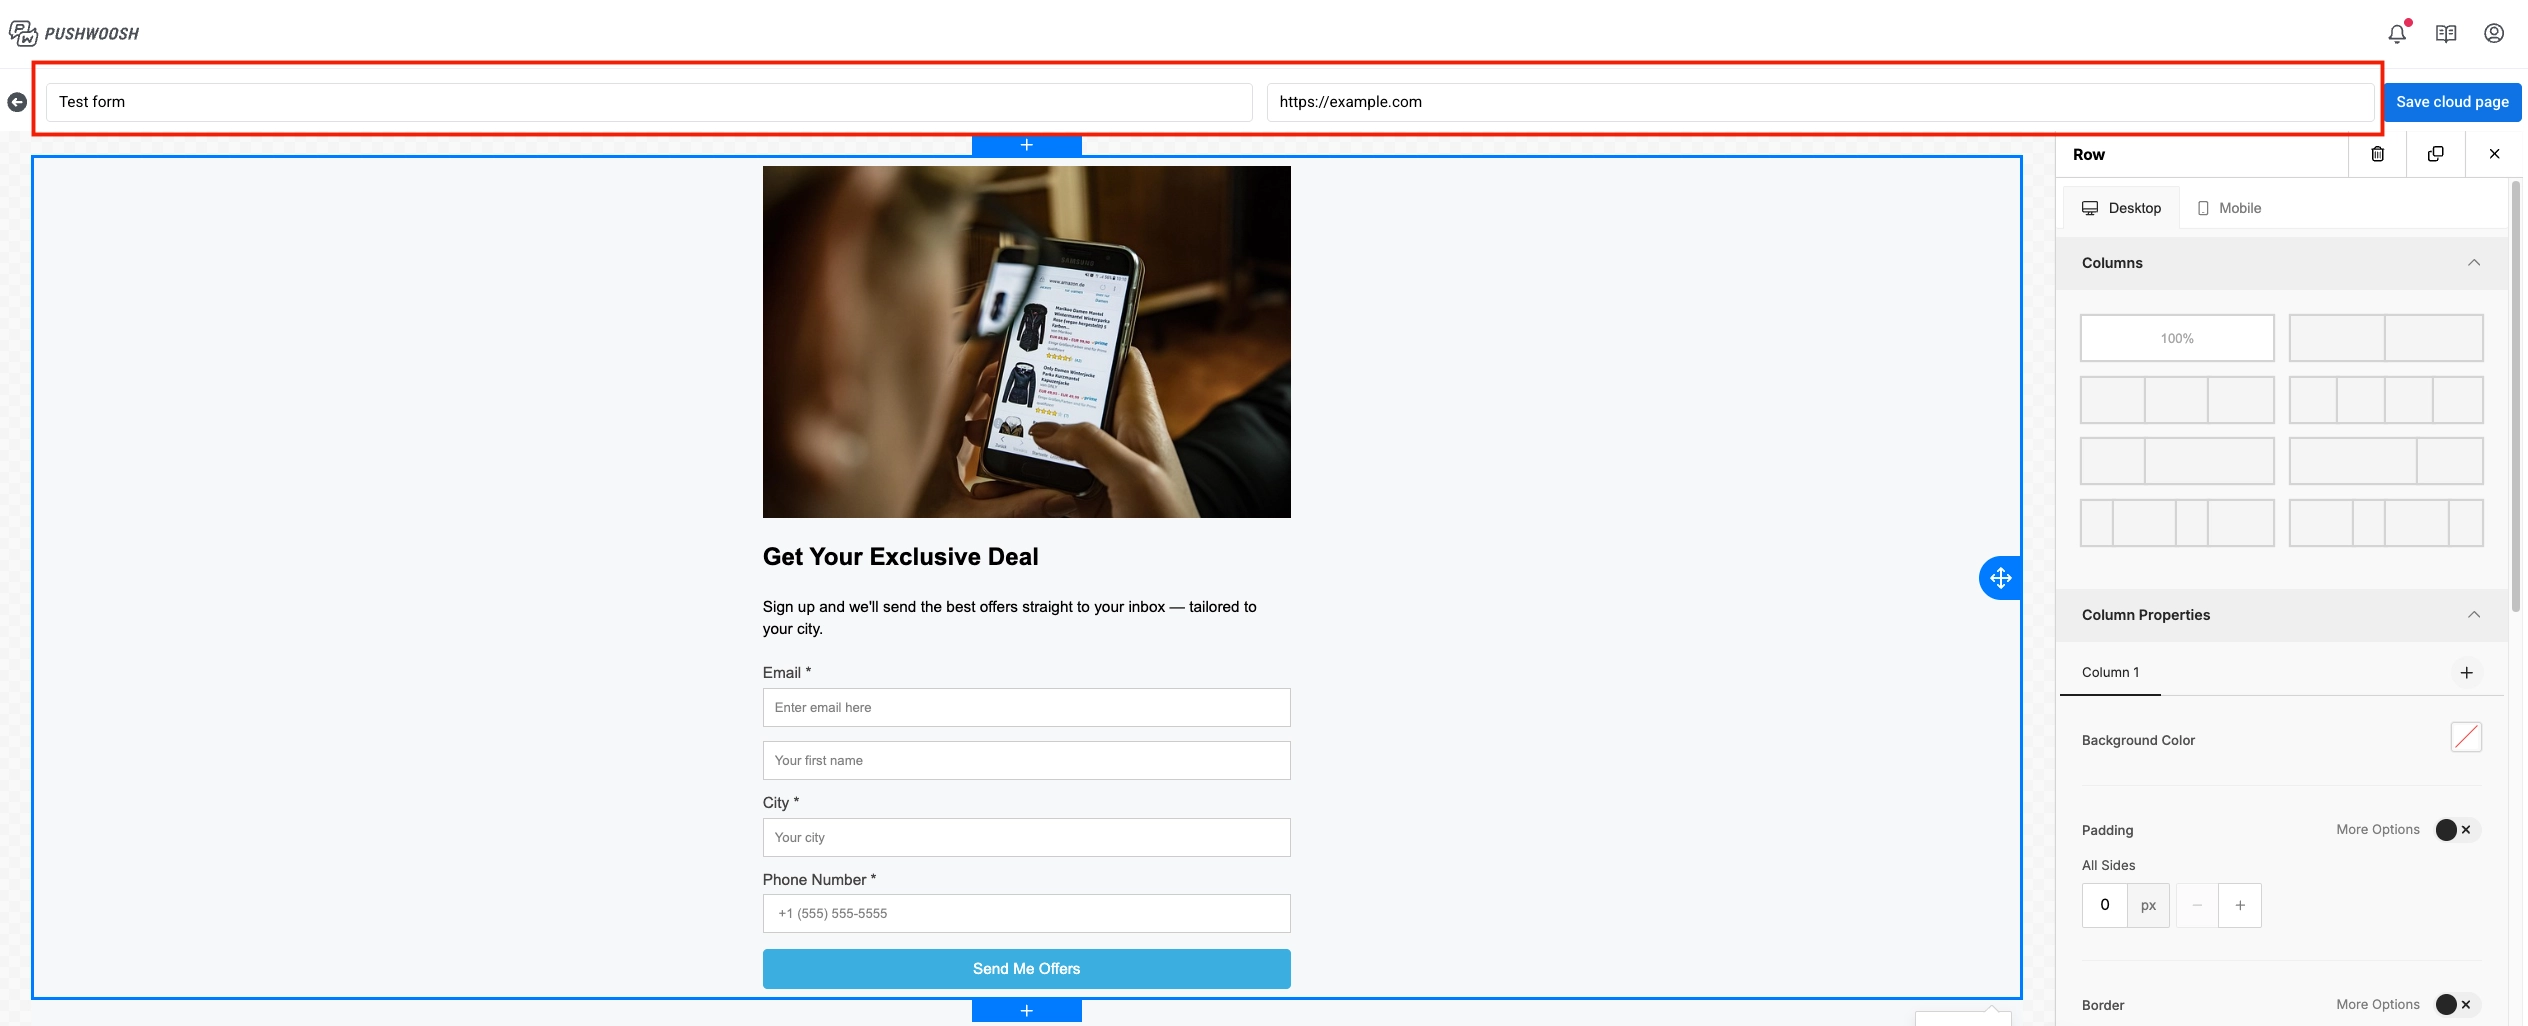
৩. পেজের নাম লিখুন। ৪. Redirect to (after form submit)-এ URL যোগ করুন। এই ফিল্ডটি আবশ্যক। পৃষ্ঠায় একটি অ্যাকশন সম্পন্ন করার পরে ব্যবহারকারীরা কোথায় যাবে তা নির্ধারণ করতে এটি ব্যবহার করুন, উদাহরণস্বরূপ একটি ধন্যবাদ পৃষ্ঠা বা অন্য কোনো প্রচারণার পৃষ্ঠায়।
৫. On existing user-এ, যখন একজন বিদ্যমান কন্ট্যাক্ট আবার ফর্ম জমা দেয় তখন কী ঘটবে তা বেছে নিন:
- Update existing user (ডিফল্ট): জমা দেওয়া মানগুলির সাথে কন্ট্যাক্ট প্রোফাইল ফিল্ডগুলি আপডেট করে।
- Skip existing user: ব্যবহারকারী যে ডিভাইস থেকে জমা দেয় সেটি রেজিস্টার করে, কিন্তু কন্ট্যাক্ট প্রোফাইলের বিদ্যমান ট্যাগগুলি আপডেট করে না।
- Error for existing user: এককালীন সাইনআপ যেমন এক্সক্লুসিভ অফার বা ওয়েবিনারের জন্য। যদি কন্ট্যাক্টটি ইতিমধ্যে বিদ্যমান থাকে, তাহলে জমাটি প্রত্যাখ্যান করা হয়, প্রোফাইল আপডেট করা হয় না, এবং ব্যবহারকারীকে ফর্মে ফিরিয়ে দেওয়া হয় এবং একটি ত্রুটি বার্তা দেখানো হয়।

পেজের কন্টেন্ট তৈরি করুন
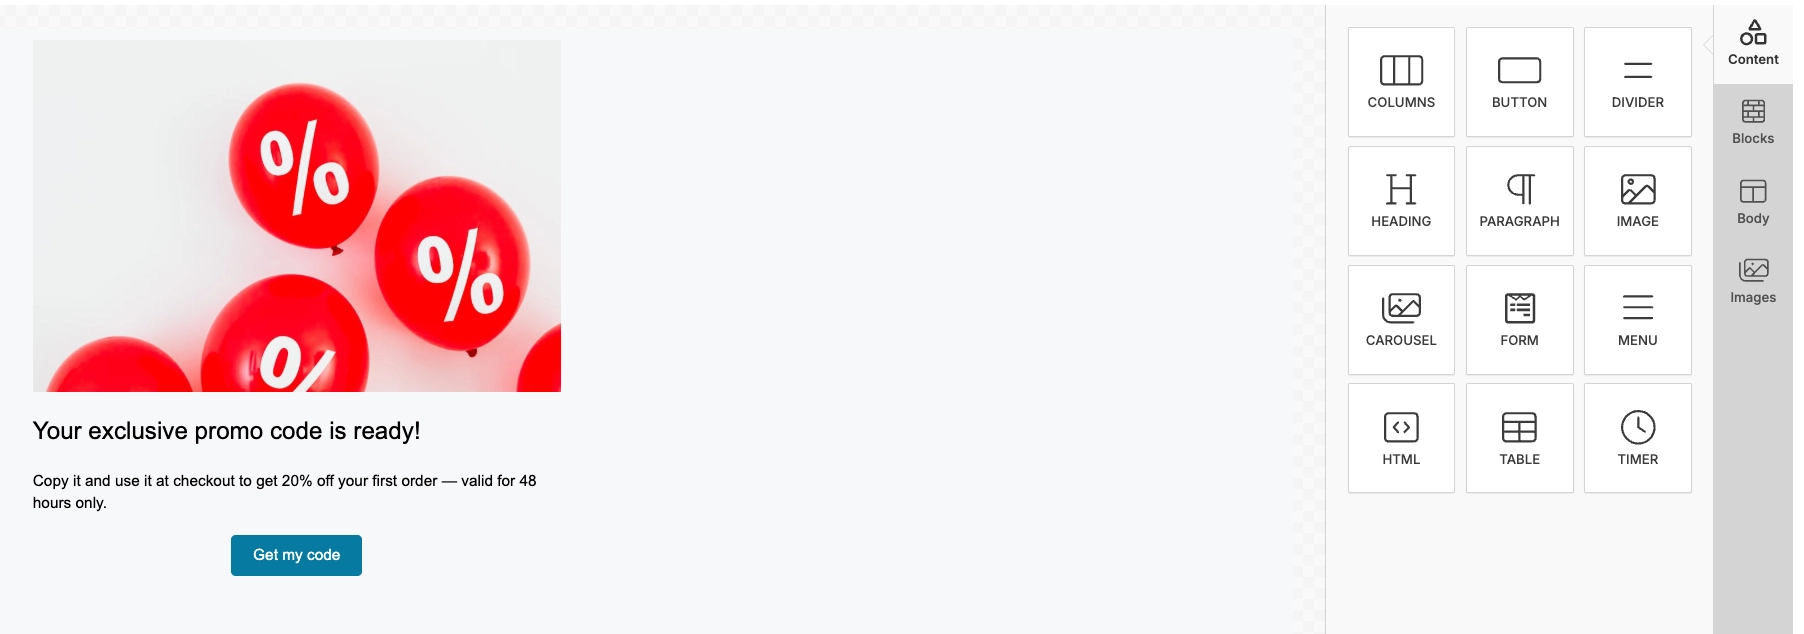
Anchor link toড্র্যাগ-অ্যান্ড-ড্রপ ওয়ার্কফ্লো ড্র্যাগ অ্যান্ড ড্রপ ইমেল এডিটর-এর মতোই।
১. এডিটরে Content প্যানেল খুলুন। ২. ক্যানভাসে একটি ব্লক টেনে আনুন। ৩. ব্লকের কন্টেন্ট সম্পাদনা করুন। ৪. প্রতিটি প্রয়োজনীয় ব্লকের জন্য পুনরাবৃত্তি করুন। ৫. Save cloud page-এ ক্লিক করুন।
ছবি যোগ করুন
Anchor link toএকটি ছবি যোগ করতে, ক্যানভাসে একটি Image ব্লক টেনে আনুন। একটি ফাইল আপলোড করুন, একটি স্টক ফটো বাছুন (More Images → Stock Photos), অথবা আপনার মিডিয়া স্টোর থেকে একটি ছবির URL পেস্ট করুন।
একটি লিড বা সাবমিশন ফর্ম তৈরি করুন
Anchor link toযোগাযোগের বিবরণ এবং সেগমেন্টেশনের জন্য আপনার প্রয়োজনীয় অন্যান্য মান সংগ্রহ করতে একটি ফর্ম যোগ করুন। ১. একটি Form ব্লক যোগ করুন। ২. আপনার প্রয়োজনীয় ফিল্ডগুলি যোগ করুন। প্রতিটি ফিল্ডের জন্য, ফিল্ডের ধরন এবং ফিল্ডের নাম সেট করুন, তারপর জমা দেওয়ার আগে ব্যবহারকারীদের যে মানগুলি অবশ্যই প্রদান করতে হবে তার জন্য Required Field সক্রিয় করুন।
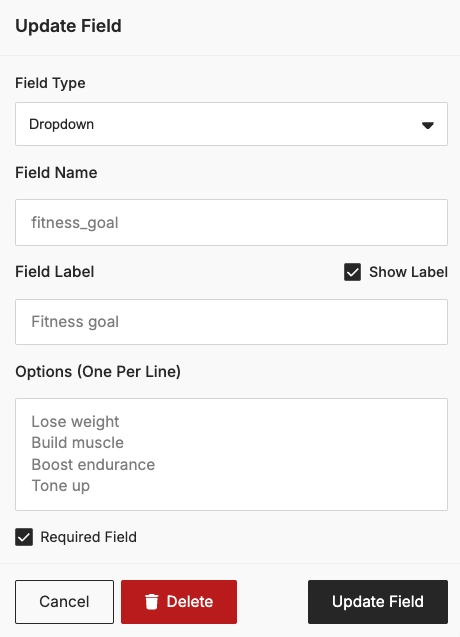
৩. Submit button কনফিগার করুন। ৪. সবকিছু প্রস্তুত হয়ে গেলে, Save cloud page-এ ক্লিক করুন।

ফর্ম জমা দেওয়ার পরে কী হয়
Anchor link toকন্ট্যাক্ট প্রোফাইল এবং ডিভাইস
Anchor link toযখন একজন ব্যবহারকারী ফর্ম জমা দেয়, Pushwoosh ইউজার এক্সপ্লোরার-এ একটি কন্ট্যাক্ট প্রোফাইল তৈরি বা আপডেট করে।
উদাহরণস্বরূপ, যদি ফর্মে একটি ইমেল ফিল্ড এবং একটি ফোন ফিল্ড অন্তর্ভুক্ত থাকে, Pushwoosh একটি ইমেল ডিভাইস এবং একটি এসএমএস ডিভাইস রেজিস্টার করে। উভয় ডিভাইস একটি ইউজার আইডি-এর অধীনে লিঙ্ক করা হয়।

ট্যাগ
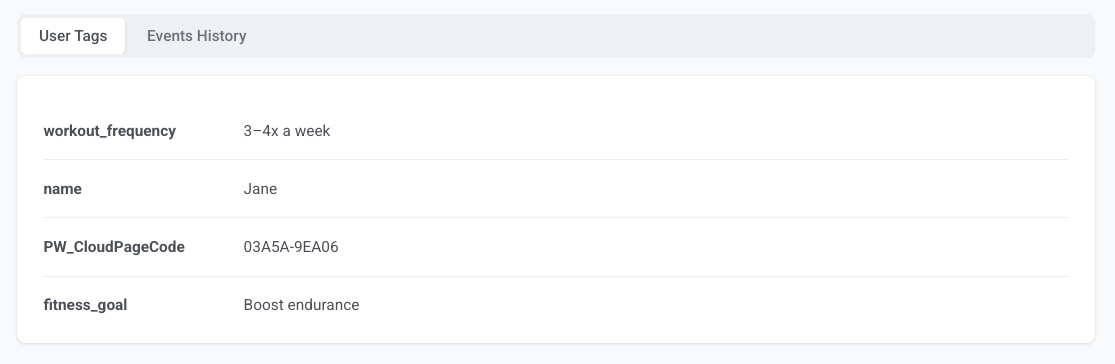
Anchor link toঅন্যান্য সমস্ত ফিল্ড ফিল্ডের নাম অনুসারে কাস্টম ট্যাগ হিসাবে সংরক্ষিত হয়। উদাহরণস্বরূপ, যদি আপনার ফর্মে fitness_goal এবং workout_frequency ফিল্ড থাকে, তাহলে কন্ট্যাক্ট প্রোফাইলে fitness_goal = Boost endurance এবং workout_frequency = 3–4x a week-এর মতো ট্যাগ দেখাবে।
পেজ কোডটি PW_CloudPageCode ট্যাগে সংরক্ষিত হয়।
ইভেন্ট
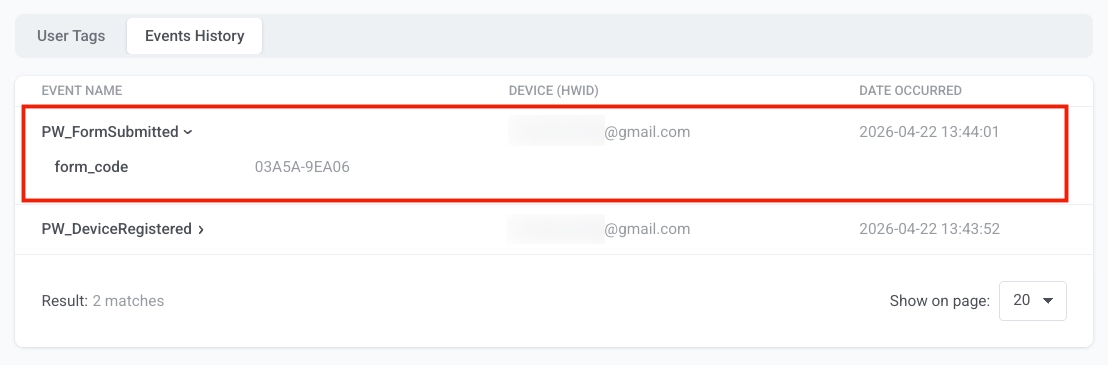
Anchor link toPushwoosh প্রতিটি ফর্ম জমা দেওয়ার সময় PW_FormSubmitted ফায়ার করে। আপনি এটি ইউজার এক্সপ্লোরার-এ কন্ট্যাক্ট প্রোফাইলের Events History ট্যাবে দেখতে পারেন। ইভেন্টটিতে একটি form_code অ্যাট্রিবিউট অন্তর্ভুক্ত থাকে যা শনাক্ত করে যে জমাটি কোন ক্লাউড পেজ থেকে এসেছে, এবং এটি কখন ঘটেছে তার একটি টাইমস্ট্যাম্প।
ওয়েলকাম সিকোয়েন্স, ফলো-আপ ফ্লো এবং অন্যান্য অটোমেশন শুরু করতে কাস্টমার জার্নিতে এটি একটি ট্রিগার হিসাবে ব্যবহার করুন। উদাহরণস্বরূপ, আপনি একটি জার্নি তৈরি করতে পারেন যা একজন ব্যবহারকারী ফিটনেস কুইজ ফর্ম জমা দেওয়ার সাথে সাথে একটি স্বাগত ইমেল পাঠায়, তারপর ২৪ ঘন্টা পরে একটি ব্যক্তিগতকৃত ওয়ার্কআউট প্ল্যান দিয়ে ফলো-আপ করে।
পেজটি পরীক্ষা করুন
Anchor link toআপনি পেজটি সংরক্ষণ করার পরে, এটি তার URL-এর মাধ্যমে সর্বজনীনভাবে অ্যাক্সেসযোগ্য হয়ে যায়। ডিফল্ট ফর্ম্যাট হল https://cloud-pages.svc-nue.pushwoosh.com/cloud-pages/v1/page/<page-code>।
১. পেজ তালিকায়, পেজ অ্যাকশন মেনু খুলুন এবং Preview-তে ক্লিক করুন। ২. যাচাই করুন যে পেজের কন্টেন্ট সঠিকভাবে লোড হয়েছে এবং প্রত্যাশিতভাবে প্রদর্শিত হচ্ছে। ৩. যদি আপনার পেজে একটি ফর্ম থাকে, তাহলে পরীক্ষার ডেটা দিয়ে ফর্মটি পূরণ করুন এবং সাবমিট বোতামে ক্লিক করুন।
৪. নিশ্চিত করুন যে রিডাইরেক্টটি প্রত্যাশিত পৃষ্ঠাটি খোলে। ৫. ইউজার এক্সপ্লোরার খুলুন এবং নিশ্চিত করুন যে জমা দেওয়া ব্যবহারকারীর ডেটা এবং ট্যাগগুলি প্রদর্শিত হচ্ছে।
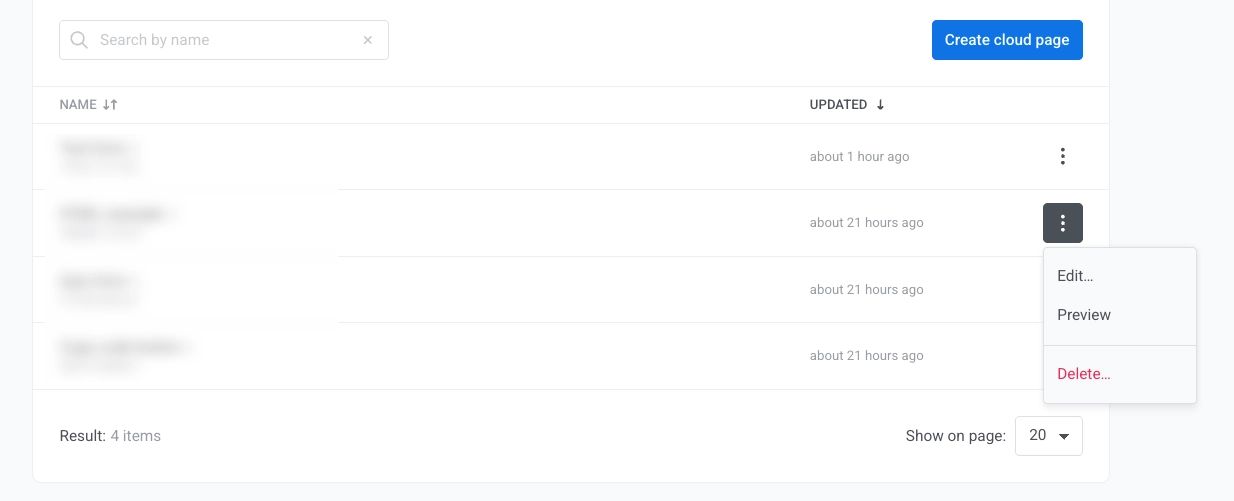
একটি পেজ সম্পাদনা বা মুছুন
Anchor link toসমস্ত ক্লাউড পেজ Content → Cloud Pages-এ তালিকাভুক্ত করা আছে, যেখানে আপনি সেগুলি পরিচালনা এবং সম্পাদনা করতে পারেন।
১. Content → Cloud Pages-এ যান। ২. পেজ অ্যাকশন মেনু খুলুন। ৩. পেজটি Edit বা Delete করতে ক্লিক করুন।