Import contacts
Este contenido aún no está disponible en su idioma.
Upload a single CSV file to register contacts as subscribers on email, SMS, WhatsApp, and Viber at once. Map each column that holds a contact address to the channel it belongs to. The same column, such as a phone number, can be mapped to more than one channel, so you no longer need a separate file for SMS and WhatsApp numbers that are the same number.
Prepare your CSV file
Anchor link toCSV formatting rules
Anchor link toGeneral structure
Anchor link to- The first row must contain column headers describing the data in each column.
- Each subsequent row represents a single contact, with values corresponding to the headers.
- Values must be separated by commas.
- Save the file in UTF-8 encoding to ensure proper character display.
- The maximum file size is 100 MB.
Contact columns
Anchor link toInclude at least one of the following columns, depending on which channels you want to register the contact for:
- Email: the recipient’s email address.
- Phone number (for SMS, WhatsApp, and Viber): must be in international format, starting with
+followed by the country code, for example +120XXXXX234. Enter the plain phone number. Pushwoosh adds thewhatsapp:orviber:prefix internally once you map the column to that channel, so don’t add it yourself.
A phone number that isn’t in a valid international format is dropped for that channel during import rather than causing the whole row to fail.
Optional columns
Anchor link to- User ID: a unique identifier for the user (e.g. name or email). Not required, but recommended so the contact’s channels share one user profile instead of several.
- Any other column can be mapped to a system tag for segmentation and personalization, for example Location, Birthday, Language, or Customer type.
Example CSV file
Anchor link toEmail,Mobile,User ID,Name,Locationjohn.smith@email.com,+120XXXXX234,john.smith@email.com,John Smith,New Yorkjane.smith@email.com,+131XXXXX890,jane.smith@email.com,Jane Smith,Los AngelesUpload and map the CSV file
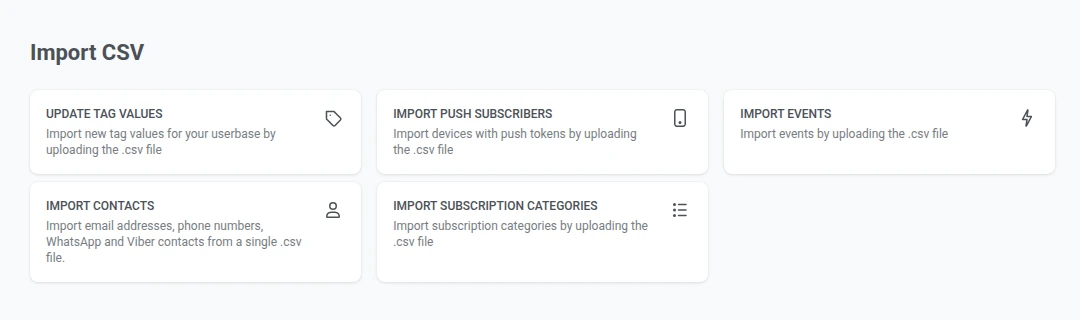
Anchor link to- Go to Audience → Import CSV → Import Contacts.
-
Click Upload CSV and select your file. To replace it, click Upload Another CSV.
-
Enter a Segment name for the imported contacts.
-
Under Contact column in CSV, select a column and, next to it, choose the Channel it registers (Email, SMS, WhatsApp, or Viber). Click + Add channel to map another column, or to map the same column to an additional channel.
-
Under UserId column in CSV, select the column with unique user identifiers, if your file has one.
-
To include extra data for segmentation, select a Column Name from your CSV and assign it a Tag. Click + Add Column to map more attributes.
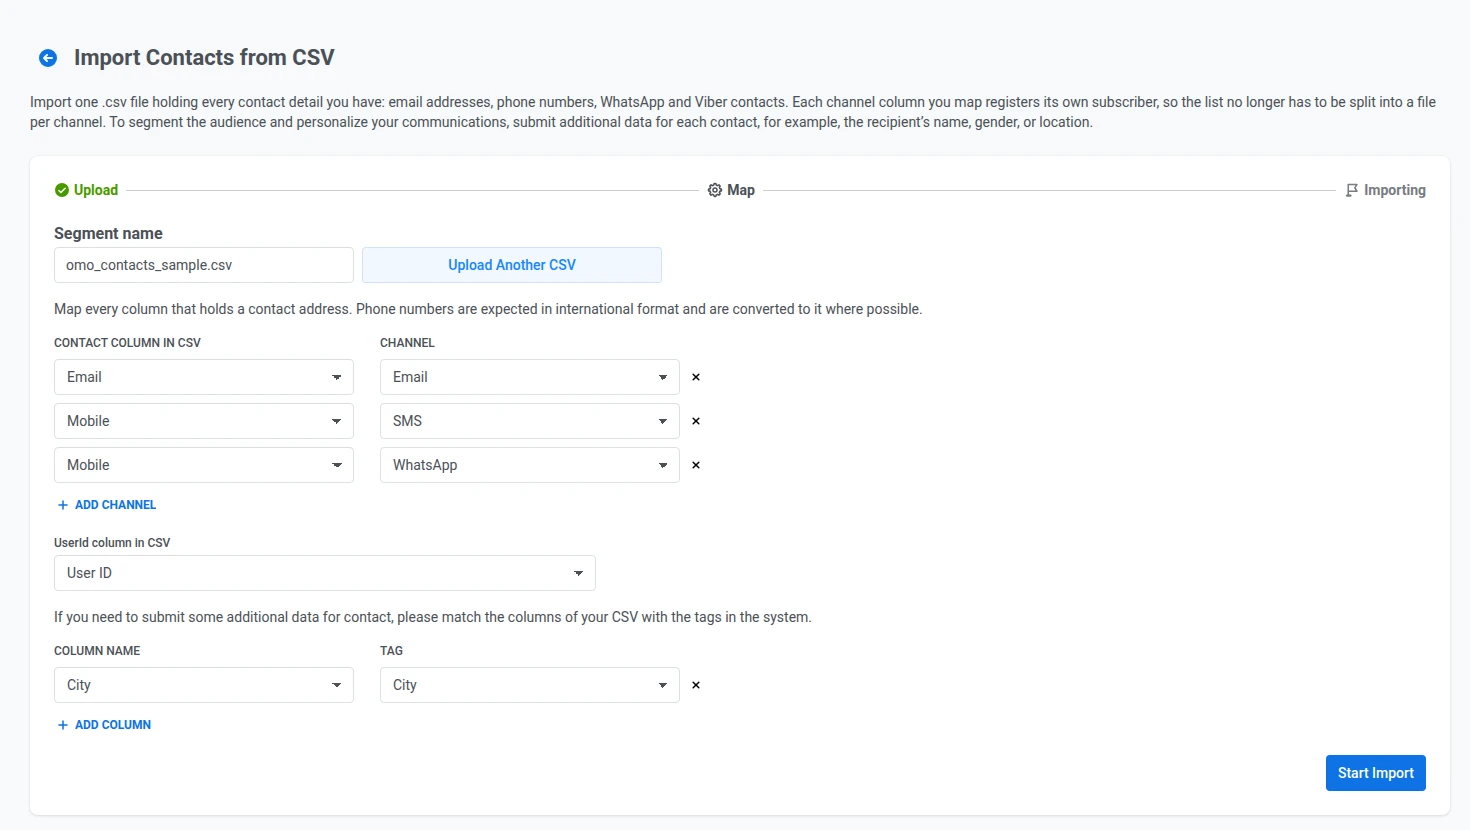
- Click Start Import to begin processing the file.
After the import, the contacts are available for campaigns on the channels you mapped. They appear as a new segment in the Segments list and can also be accessed via User explorer.
Rows skipped during import
Anchor link toThe completion screen breaks skipped rows down by reason: Phone number is not valid or No contact address in the row (every mapped column was empty). A row can still be partially imported and appear in this breakdown at the same time, for example when its email column succeeds but its phone column fails validation.
Click Download skipped rows to get a CSV of just those rows, with the reason added as an extra column, so you can fix and re-upload them.