User Explorer
The User Explorer section provides a detailed view of your audience, allowing you to explore individual user data, including their devices, received messages, and interactions. It gathers and organizes customer data from multiple touchpoints, structuring real-time insights into centralized user profiles. This enables effective debugging, user segmentation, and targeted marketing strategies.
Search for a user
Anchor link to- Go to Audience → User Explorer.
- In the search bar, select a criterion from the dropdown:
- User ID: search by User ID
- HWID, Email, Phone: search by HWID, email address, or phone number
- Token: search by push token
- Enter the value for the selected criterion.
- Click Search.
Matching users appear in the results list under USER ID. Click the name to open the user profile.
View user profile
Anchor link toThe View user page opens when you select a user from the search results. Use the tabs at the top to review profile data:
- User overview: view user-level tags and edit tag values
- Devices and platforms: review channels, set test devices, or manage a channel
- Events History: search and filter events, view event attributes
- Received Messages: find messages by code and open delivery details
- Segments: see segment membership and open segment settings
- Campaigns: see Customer Journey entry, status, and exit dates
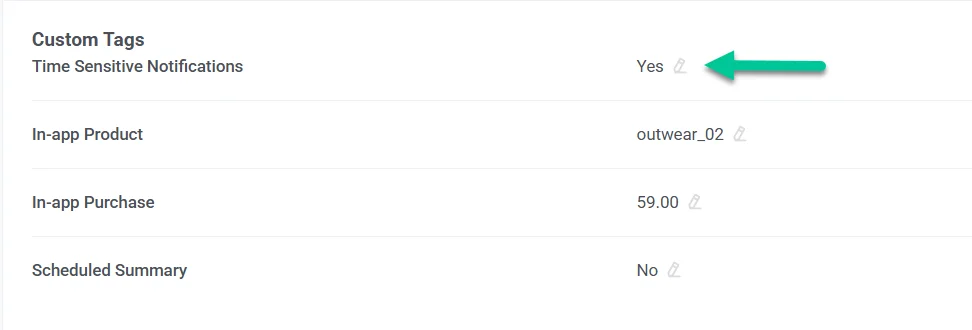
User overview tab
Anchor link toThe User overview tab shows the user’s User ID and a table of tags assigned at the user level.
The table includes every tag that has a value for this user.

Edit tag values
Anchor link toTo edit a tag value in the table:
- Find the tag in the table.
- Click the pencil icon next to the value.
- Enter a new value.
- Click Submit to save changes or Cancel to discard them.
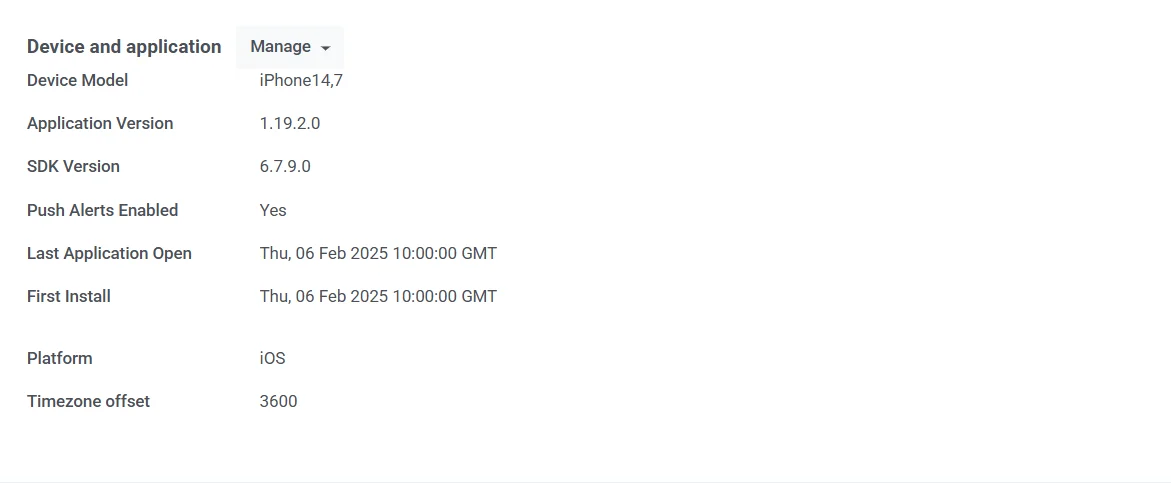
Devices and platforms tab
Anchor link toThe Devices and platforms tab lists every channel linked to the user. Select a platform in the left sidebar to view its profile in the main panel.
For each platform, you can review:
- Subscription status (for example, SUBSCRIBED for email)
- Platform identifier (for example, an email address or phone number)
- Metadata: Last active, First subscription, Location, Language, and Timezone
- Tags assigned to that platform. The table lists default and custom tags that have values for this channel. You can edit values with the pencil icon.
Setting a test device
Anchor link toWith a channel selected in the sidebar, click Set as test device at the top of its profile on the right. In the dialog, enter a recognizable name, add a description if needed, and click Apply.
The channel is added as a test device and can receive test messages before you launch a campaign.
To remove it, click Remove from test devices on that channel profile.
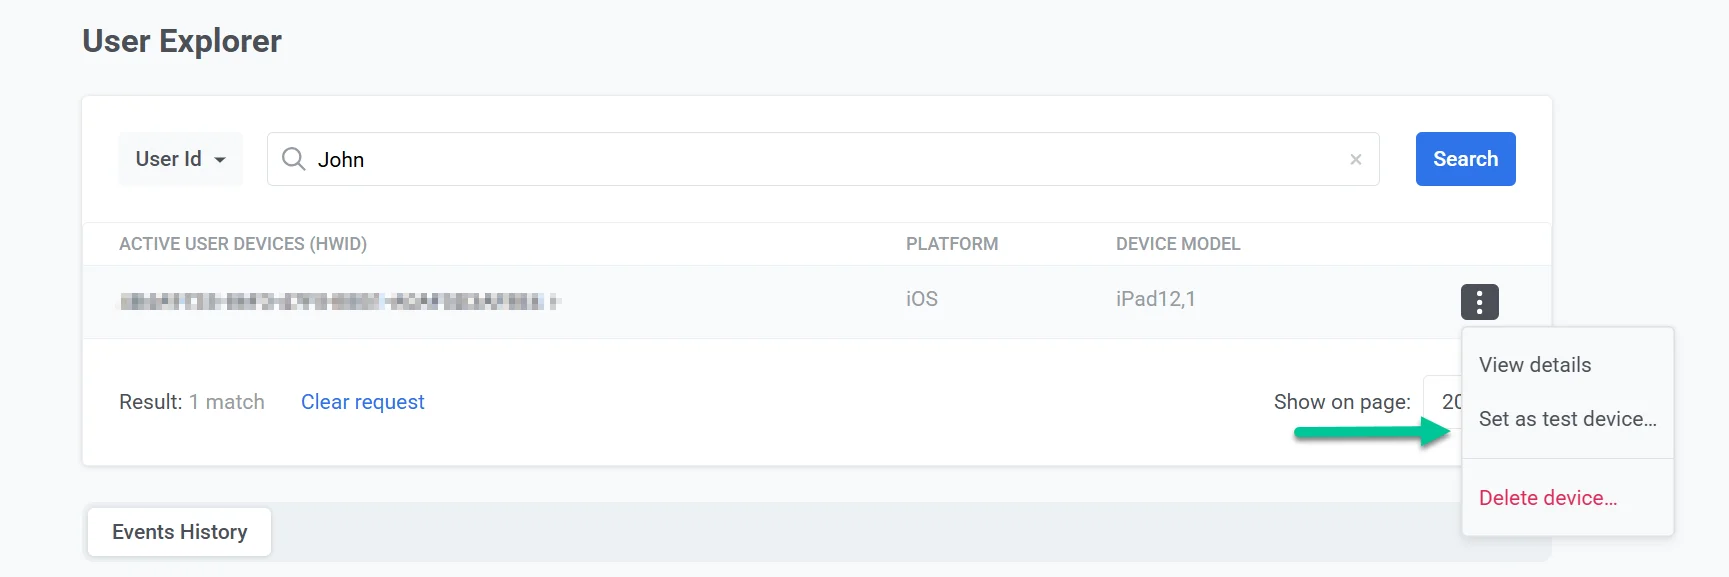
Managing devices
Anchor link toUse the three-dot menu (⋮) in the platform profile header to manage that channel.
Delete a device
Anchor link toSelect Delete email for email or Delete device for other platforms to remove the channel from the user profile.
Unsubscribe user from marketing emails (email only)
Anchor link toFor an email profile, select Unsubscribe from email campaigns in the same menu to opt the user out of marketing email without removing the address.
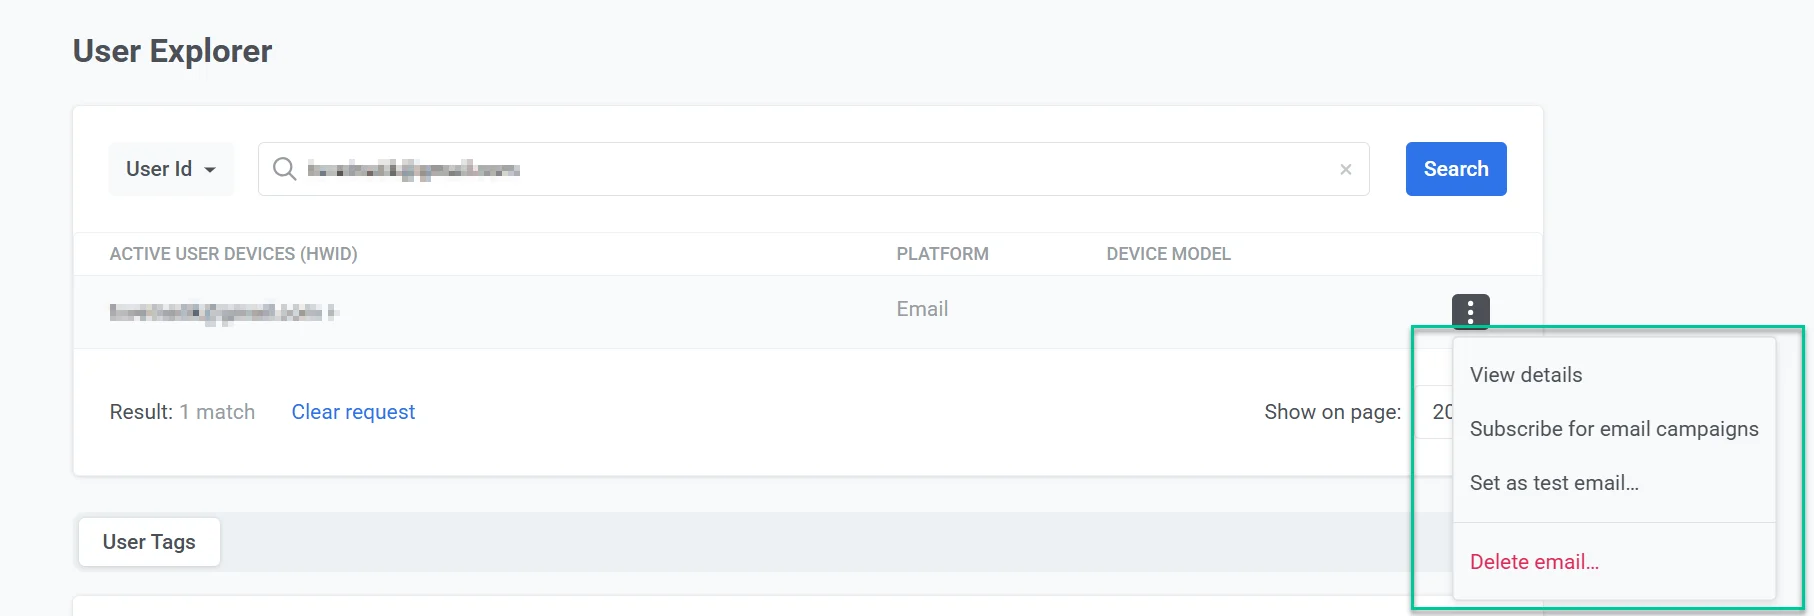
Pushwoosh sets the Unsubscribed Emails tag to true for that address. The user will no longer receive marketing emails. Transactional emails are not affected and will still be delivered. Learn more.
Events history tab
Anchor link toPushwoosh tracks and stores the events log for each user for up to one year.
On the Events History tab, use Search to filter events by name. Use the channel dropdown to limit results to a specific platform.
Events are listed in chronological order. Each row shows the timestamp, event name, and device or platform.
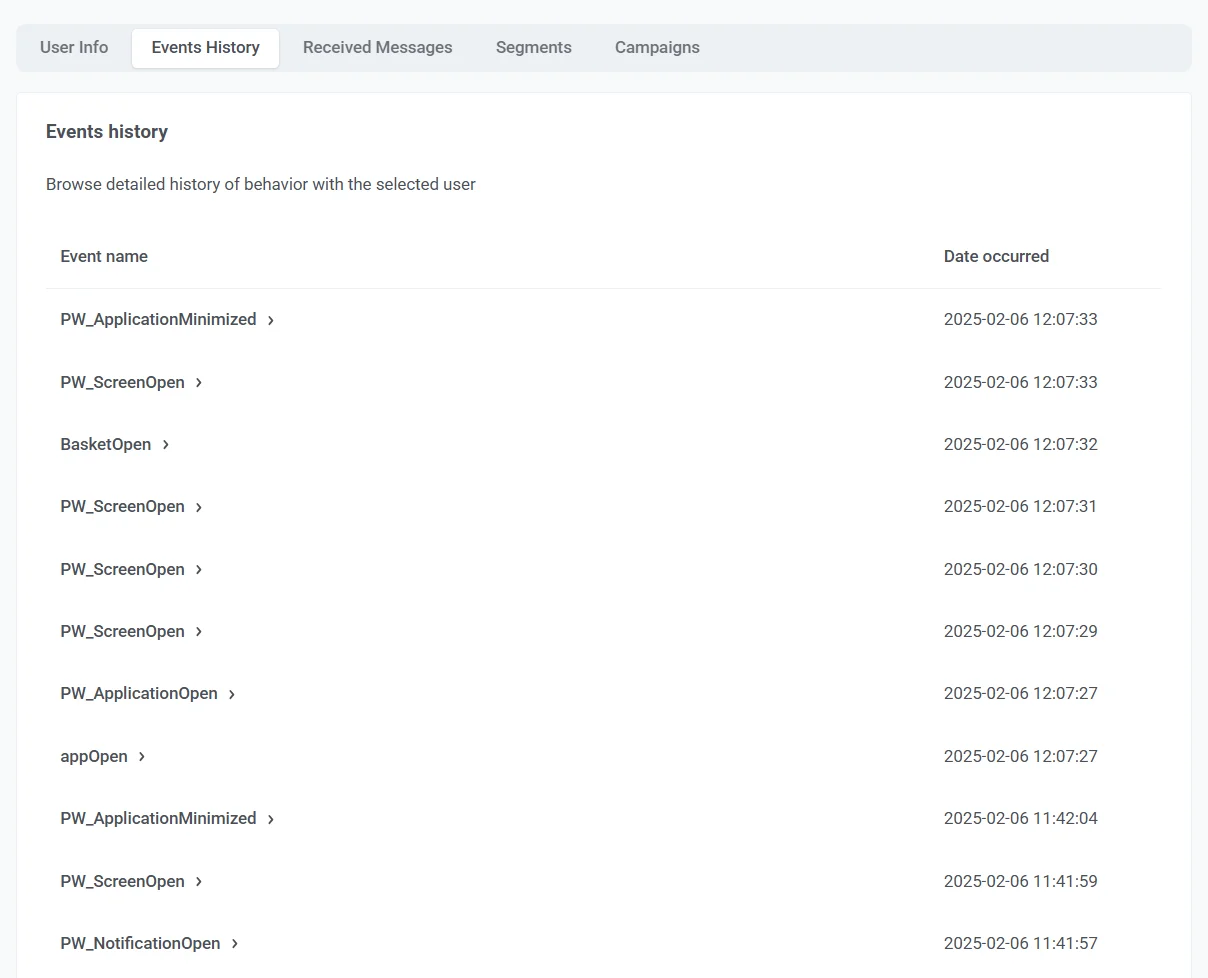
Click the arrow at the start of a row to expand the event. The expanded section lists the attributes recorded for that event, such as platform, device type, or application version. Available attributes depend on the event type.
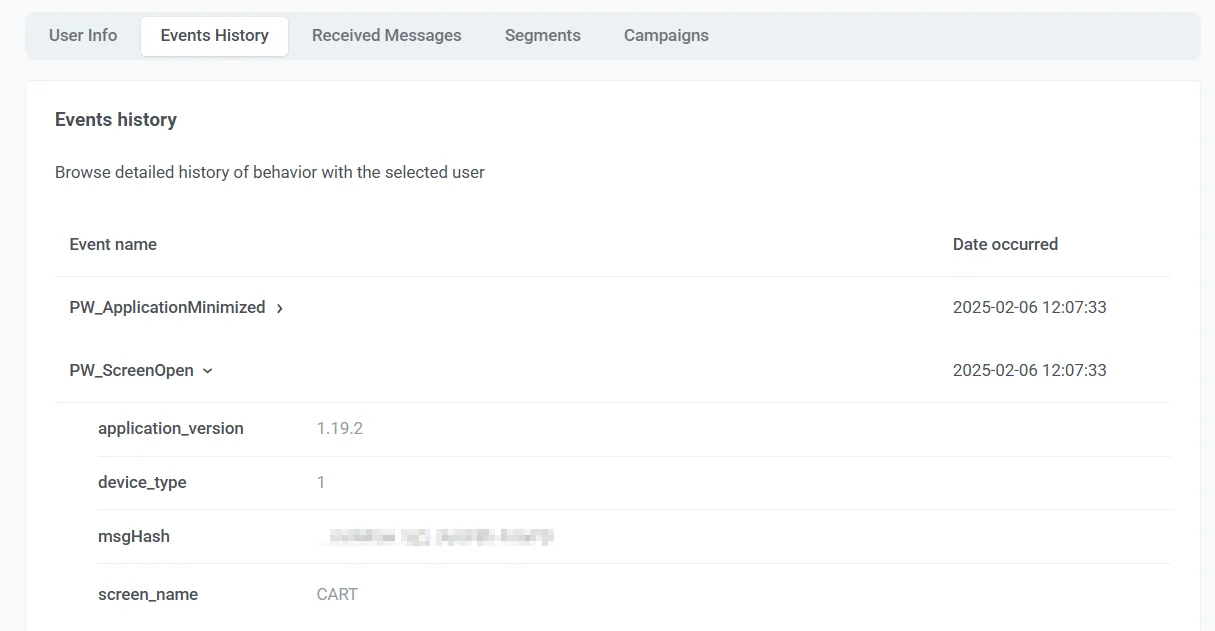
For example, PW_ApplicationMinimized may include application_version and device_type, and PW_DeviceRegistered may include platform and platform_id.
See default events for system event names and typical attributes.
Received messages tab
Anchor link toThe Received Messages tab lists messages sent to this user across channels. Use Search to find a message by message code.
Use the channel dropdown to show messages for one platform only.
Use the message type selector next to the channel dropdown to narrow the list by how the message was sent:
- All messages: show every message (default).
- Broadcast: show only broadcast messages sent to a segment or your whole audience.
- Transactional: show only transactional messages sent through the API to this specific user.
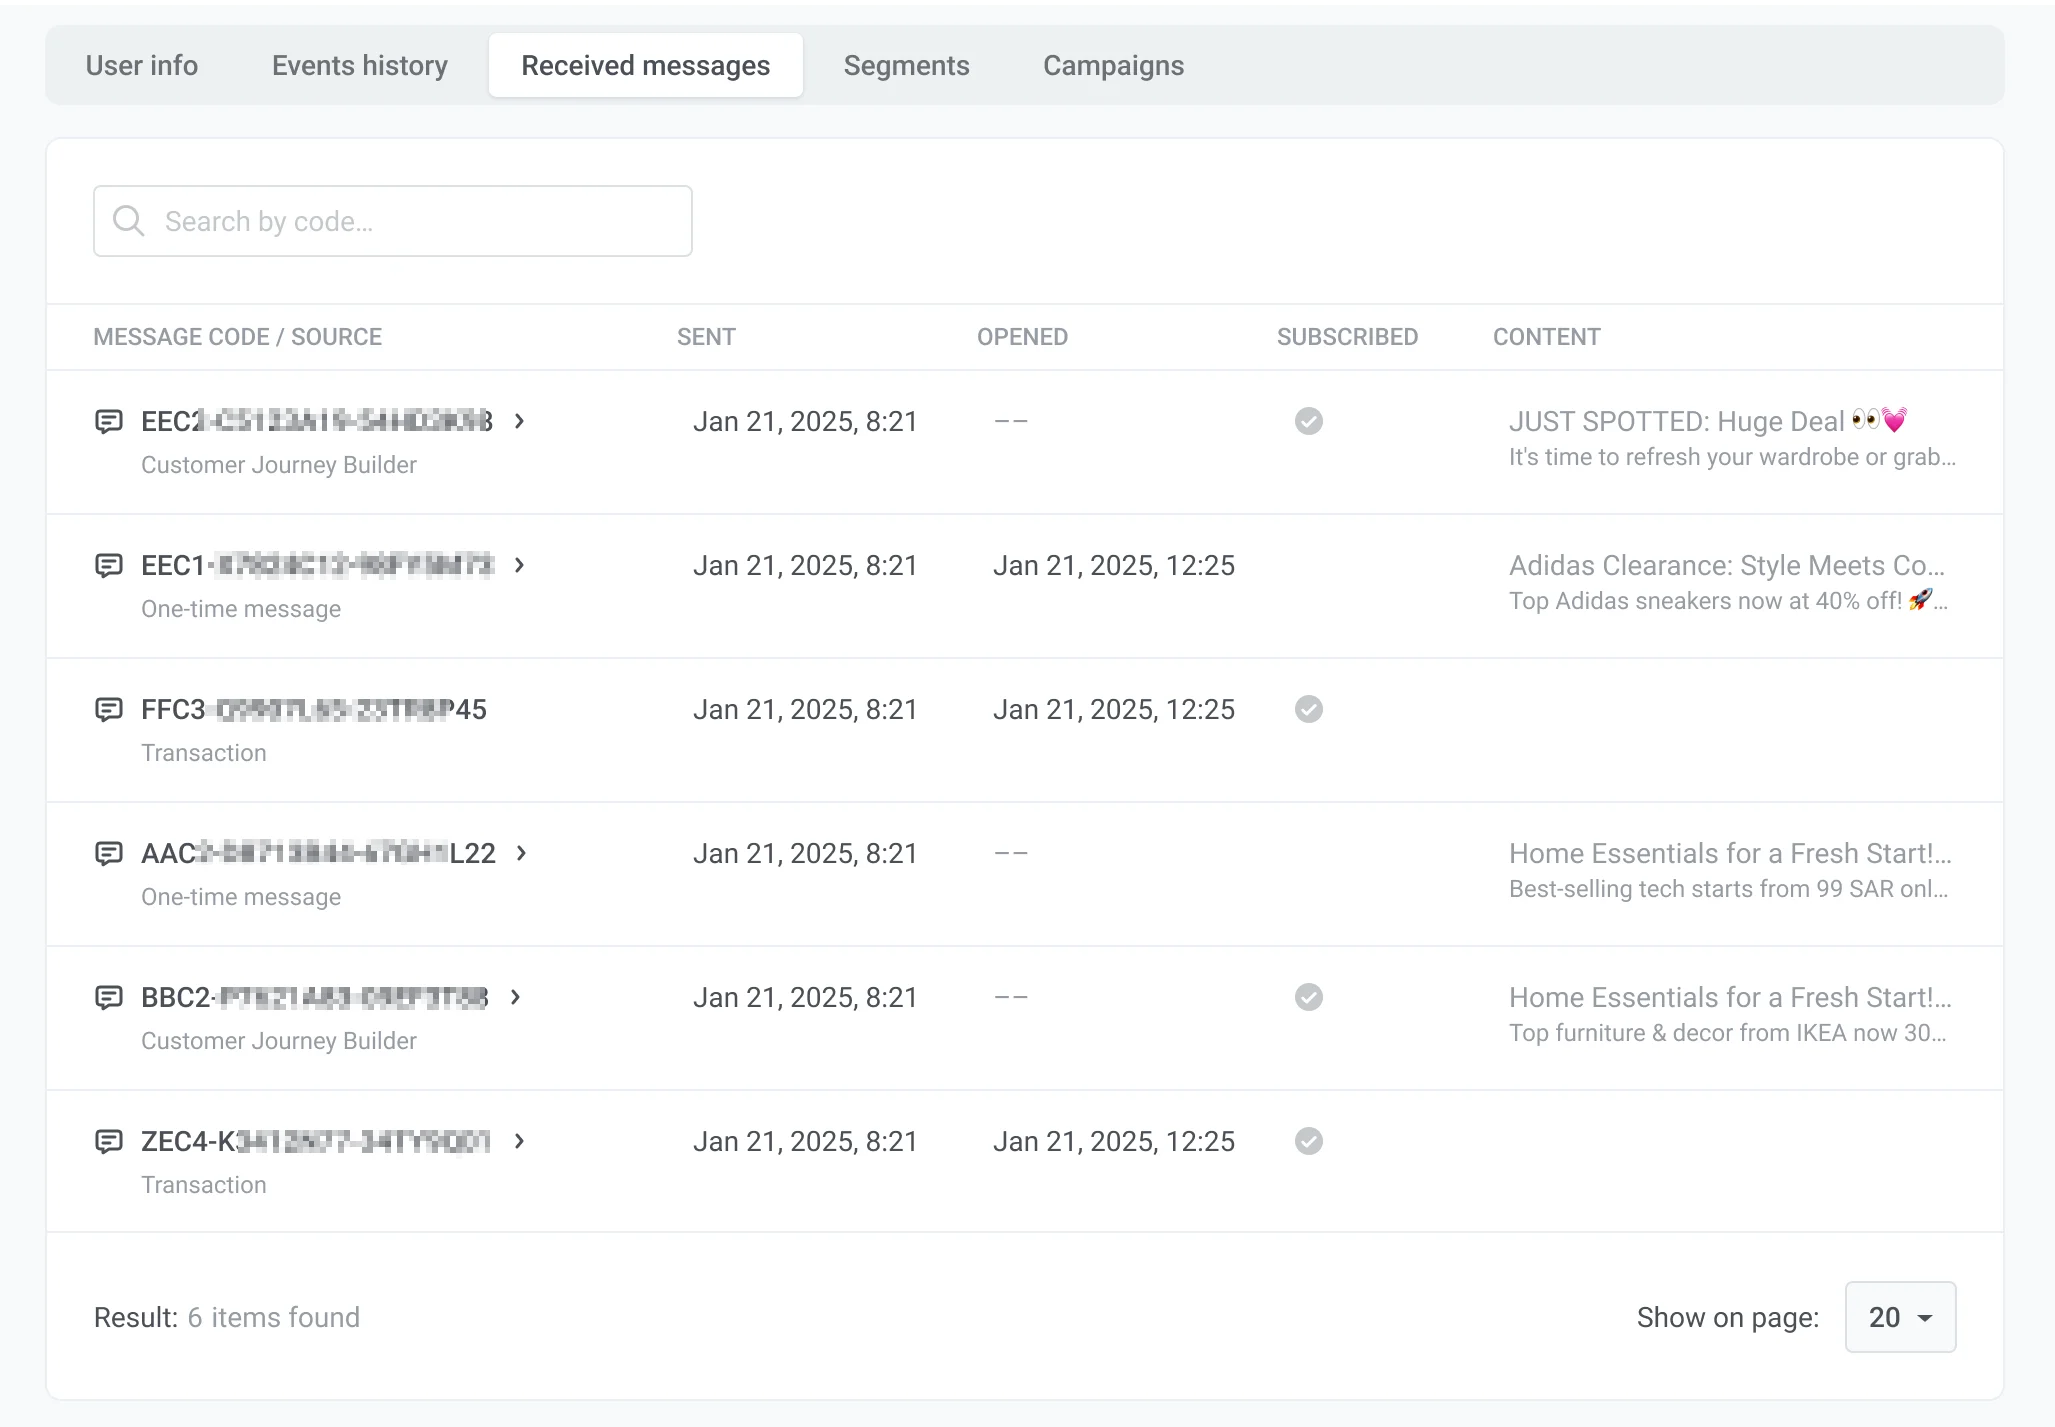
Each row includes:
-
Message code / Source: The message identifier and where it was sent from (for example, Transaction or Customer Journey Builder). Click the message code to open message details and statistics. Learn more.
-
Sent: The date and time the message was sent.
-
Opened: The date and time the user opened the message, if applicable.
-
Content: A preview of the message, such as the email subject line.
Segments tab
Anchor link toThe Segments tab lists segments this user currently belongs to.
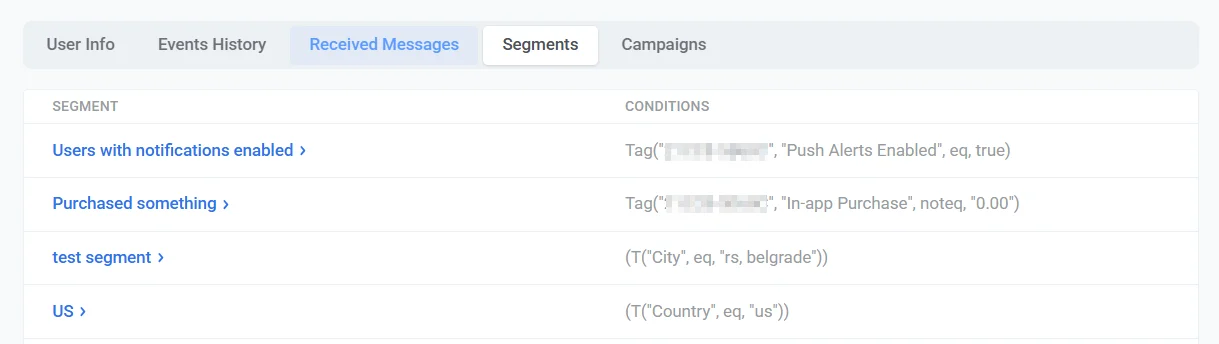
Each row includes:
- Segment: The segment name. Click the name to open the segment and view or edit its settings.
- Conditions: The filter expression that defines the segment, including tags and other rules that match this user.
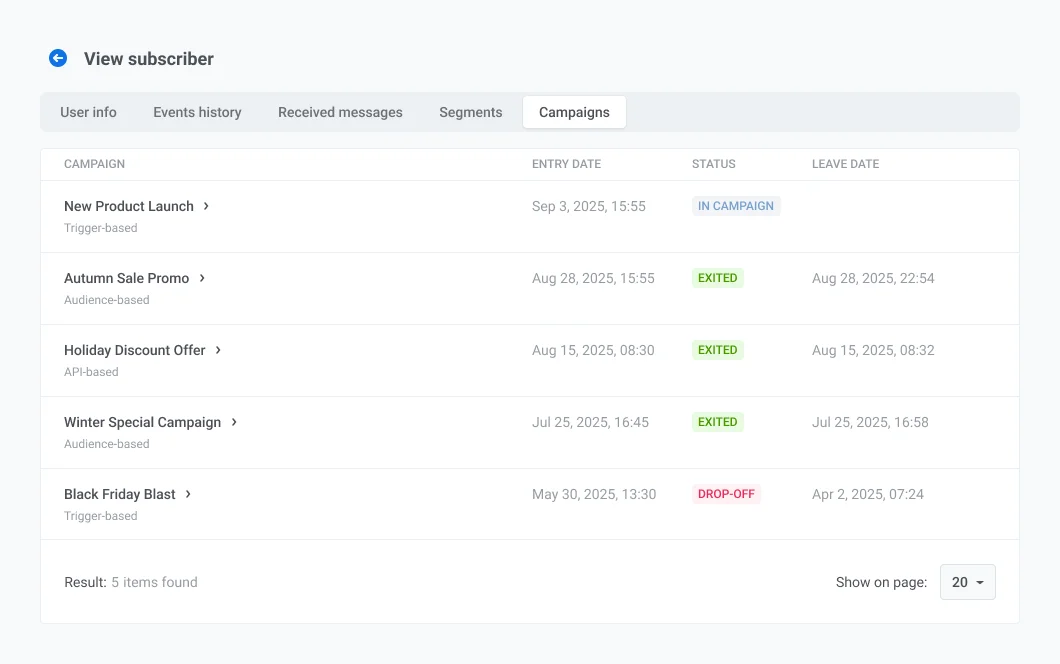
Campaigns tab
Anchor link toThe Campaigns tab lists Customer Journey campaigns this user has entered.
Each row includes:
- Campaign: The campaign name and type shown below it, such as Audience based or Trigger based. Click the name to open the campaign.
- Entry date: The date and time the user entered the campaign.
- Status: The user’s status in the campaign:
- IN CAMPAIGN: the user is currently progressing through the journey.
- EXITED: the user completed or left the journey.
- DROP-OFF: the user was dropped from the journey due to an error.
- Leave date: The date and time the user left the campaign.