Inbound webhook integration
Inbound webhooks let third-party services send events directly to Pushwoosh. When a third-party service triggers a webhook, Pushwoosh authenticates the request, identifies the user, and applies the mapping you configured: fill in tags on the user profile, fire a Pushwoosh event, or both. A fired event can then start or advance a journey.
Use inbound webhooks to connect tools like CRMs, e-commerce platforms, or analytics services without building or maintaining your own server.
If the incoming identifier doesn’t match an existing user, Pushwoosh can create the user instead of dropping the request. Turn on the auto-create checkbox described in Map incoming data.
Before you start
Anchor link toPrepare the following before you open the webhook setup.
-
Decide what the webhook should do. A webhook must map at least one tag, one event, or both. To fire an event, pick an existing one from your project (for example,
CheckoutSuccess) or create one with the attributes you want to fill from the incoming data. Tags can be mapped to existing tags or created on the spot while setting up the webhook. -
Make sure your third-party service can send webhooks. The service must be able to send an HTTP POST request to an external URL when the event you care about happens, for example a new order or a form submission.
-
Get a sample JSON payload from your third-party service. This is a small example of the data the service sends on each event. You will need it to map payload fields to tags and event attributes.
Create a webhook
Anchor link toOpen the webhook setup
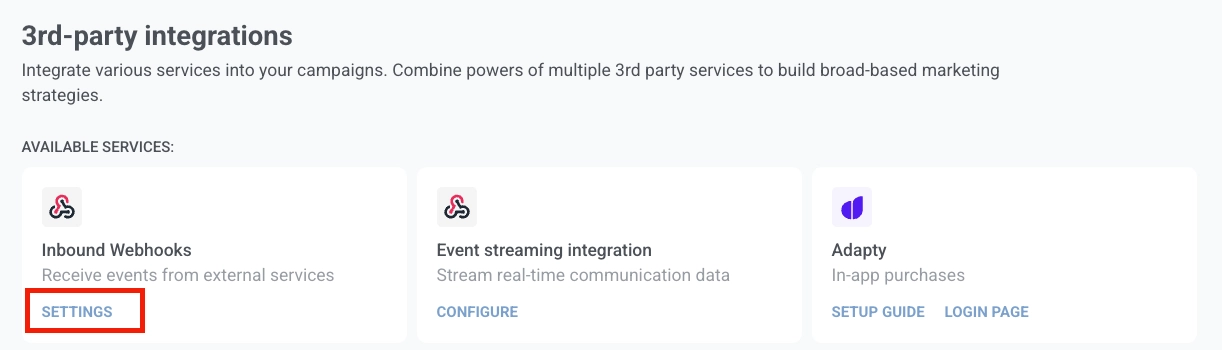
Anchor link to- In your Pushwoosh account, go to Settings → Integrations → Inbound webhooks and click Settings.
- Click Create webhook to open the setup screen: Paste a sample payload on the left, Webhook setup on the right.
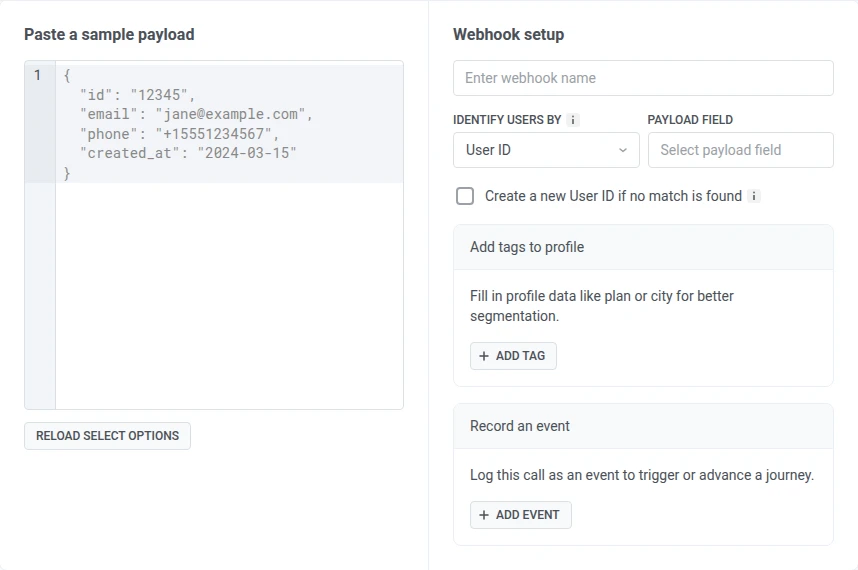
- Enter a webhook name so you can identify the webhook in the list later.
Map incoming data
Anchor link to- In Paste a sample payload, paste a sample JSON payload from your third-party service. Pushwoosh extracts the fields and loads them into the payload-field dropdowns.
Sample payload:
{ "id": "12345", "email": "jane@example.com", "phone": "+15551234567", "loyalty_tier": "gold", "order_number": "ORD-001", "price": 99.99}- In Identify users by, choose how Pushwoosh should match the incoming request to a user:
- User ID: your internal identifier assigned to a user in the system.
- Email: matches by email address.
- Phone: matches by phone number.
- HWID: a device, browser, or email identifier.
- Token: matches by a device push token.
- In Payload field, select the field that contains the matching value.
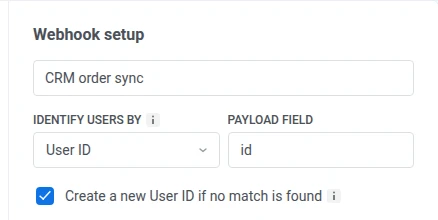
- Optional: turn on the checkbox below Payload field to create a new user automatically when no match is found, instead of dropping the request. Its label matches your identifier choice, for example Create a new User ID if no match is found or Create a new Email if no match is found. The checkbox is disabled for HWID and Token, because Pushwoosh can’t create a device, browser, or push-token identifier ahead of an actual SDK session.
Each webhook must map at least one tag, fire one event, or both.
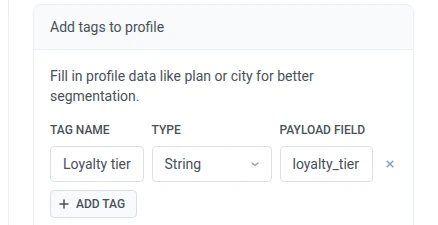
Add tags to profile
Anchor link toUse Add tags to profile to save payload values as tags on the matched user profile. Fill in profile data like plan tier or city for better segmentation.
- Click + Add tag.
- In Tag name, pick an existing tag from the list, or type a new name. Pushwoosh shows Create:
<name>to confirm it will create one. - If you picked an existing tag, Type shows its type and can’t be changed. If you created a new tag, open Type and choose its data type. Pushwoosh saves it as a user-specific tag of this type.
- In Payload field, select the field from your sample payload that holds the value.
- Repeat steps 1–4 for every tag you want to fill.
To remove a row, click ×.
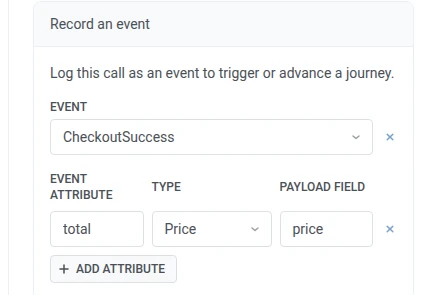
Record an event
Anchor link toUse Record an event to fire a Pushwoosh event when the webhook receives a valid request. A fired event can start or advance a journey.
- In Event, select the Pushwoosh event to fire.
- Click + Add attribute.
- In Event attribute, pick an existing attribute of the selected event from the list, or type a new name. Pushwoosh shows Create:
<name>to confirm it will create one. - If you picked an existing attribute, Type shows its type and can’t be changed. If you created a new attribute, open Type and choose its data type.
- In Payload field, select the field from your sample payload that holds the value.
- Repeat steps 2–5 for every attribute you want to fill.
To remove a row, click ×.
Enable and connect
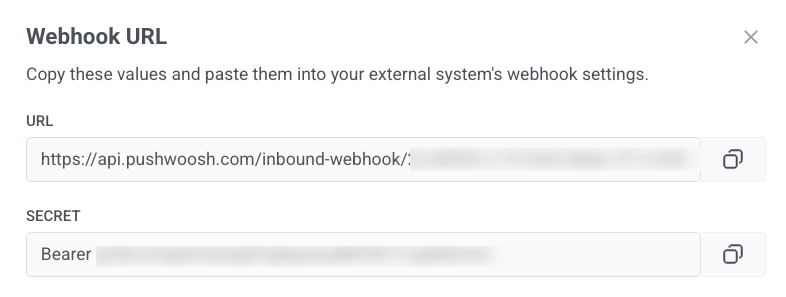
Anchor link to- When configuration is complete, click Enable webhook. The Webhook URL window opens.
-
Copy the URL and set it as the webhook destination in your third-party service.
-
Copy the Secret and paste it into your third-party service as the
Authorizationheader value. The value includes theBearerprefix, so use it as-is. Pushwoosh rejects any request where this header is missing or does not match.
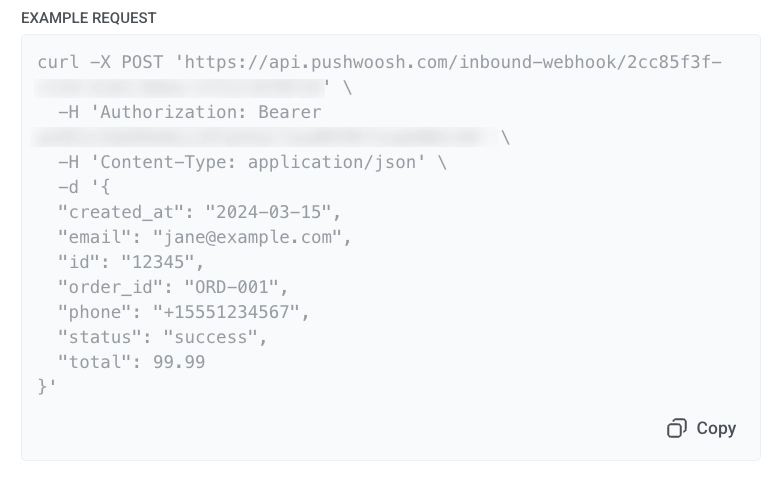
- Click Copy in the Example request block to copy a sample
POSTrequest. Use it to send a test request and confirm that Pushwoosh accepts the webhook, or share it with your team as a template for the integration.
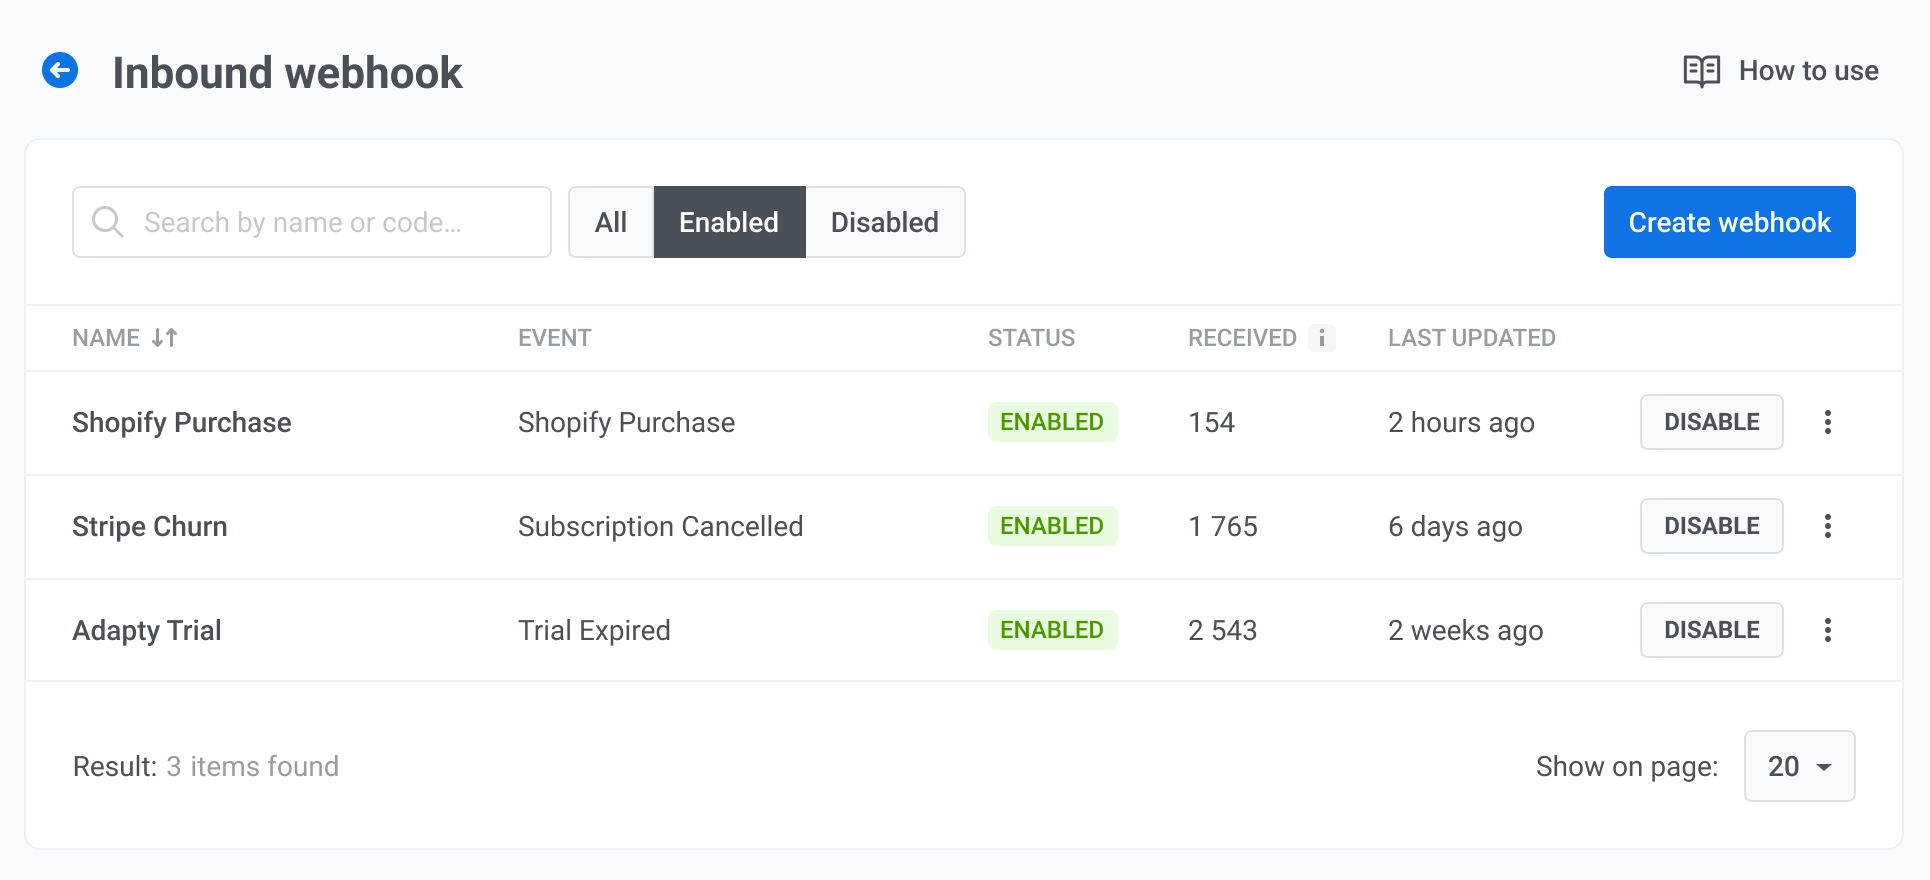
After you enable the webhook, it appears in the Webhooks list with an enabled status and starts accepting requests.
Webhooks list
Anchor link toThe inbound webhook list shows every webhook in your project.
Each row shows:
- Name: webhook name.
- Status: Enabled or Disabled.
- Received: total number of incoming requests received by the webhook.
- Last modified: when the webhook was last changed.
Manage webhooks
Anchor link toOpen the row menu to:
- Edit settings: opens the webhook configuration so you can change the name, event, field mapping, and user identification.
- Copy URL: opens the Webhook URL window with the URL and Secret so you can copy them again.
- Activity log: opens the request log for this webhook.
- Delete: removes the webhook from the list.
For an enabled webhook, click Disable to deactivate it without deleting the configuration. For a disabled webhook, click Enable to start accepting requests again.
View the activity log
Anchor link toThe activity log shows all incoming requests for the selected webhook.
Summary panel
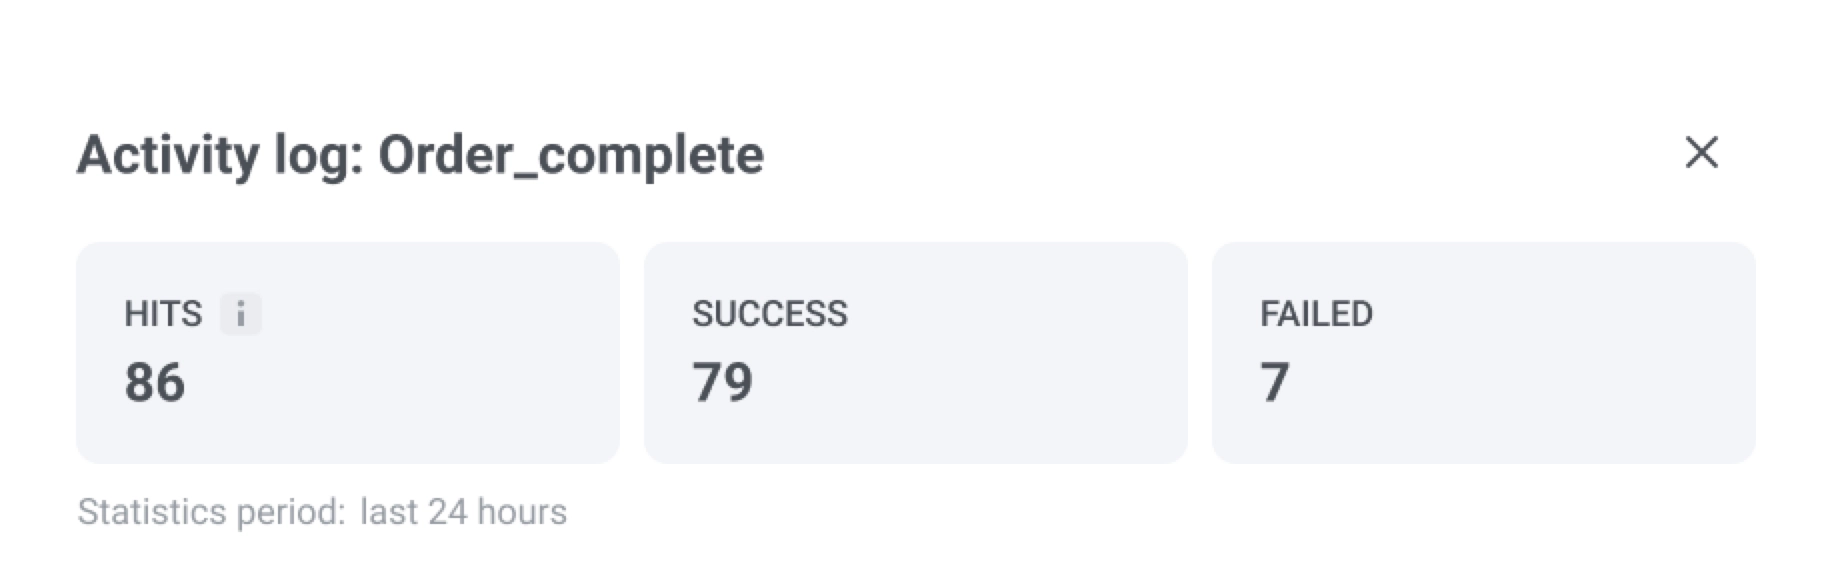
At the top, review the summary for the last 24 hours:
- Total hits: total number of incoming requests received.
- Warning: requests where the user was identified (or created) but at least one configured tag or event mapping failed to apply.
- Failed: requests that were not processed at all, for example due to a bad secret or a missing identifier field. A failed request does not stop the webhook. Pushwoosh continues to accept and process later requests.
| Failure reason | What it means |
|---|---|
| Auth rejected | The shared secret does not match the webhook configuration. If five consecutive requests fail with this error, Pushwoosh sends you a notification. Update the secret to resume. No reactivation needed. |
| User identifier field missing | The payload field mapped for user identification is not present in the request. |
Request entries
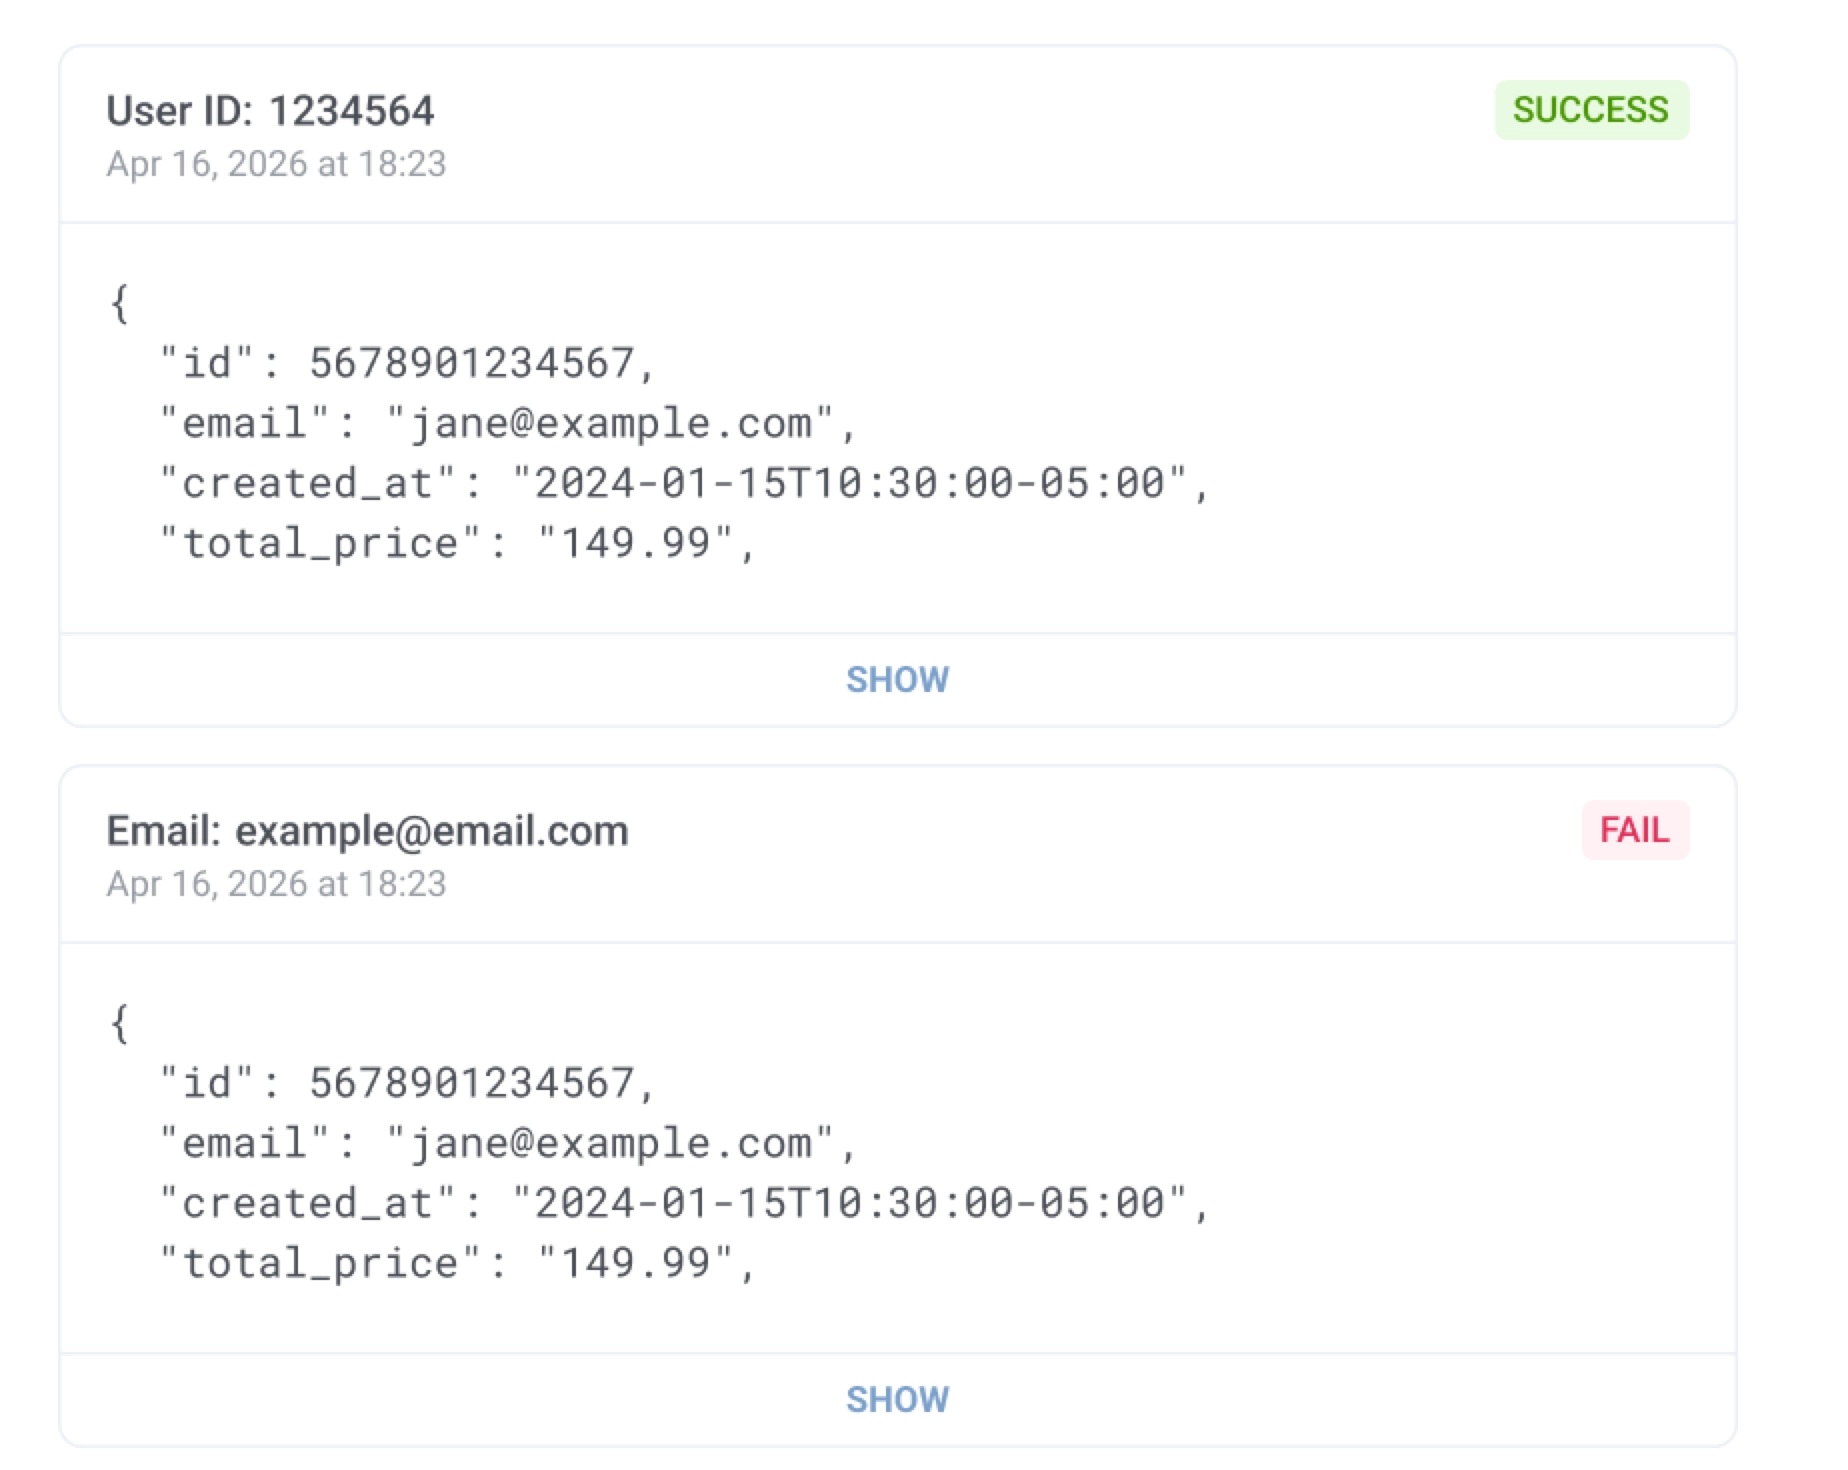
Each entry shows a status icon, the user identifier (for example, User ID or Email), the request timestamp, and a checkmark for each capability you configured on the webhook: User ID (or your chosen identifier), Tags, and Event. A checkmark means that part of the request was applied successfully; a request can show a mix of checked and failed items. Click Show to expand the full received JSON payload.
View webhook-fired events and tags in User Explorer
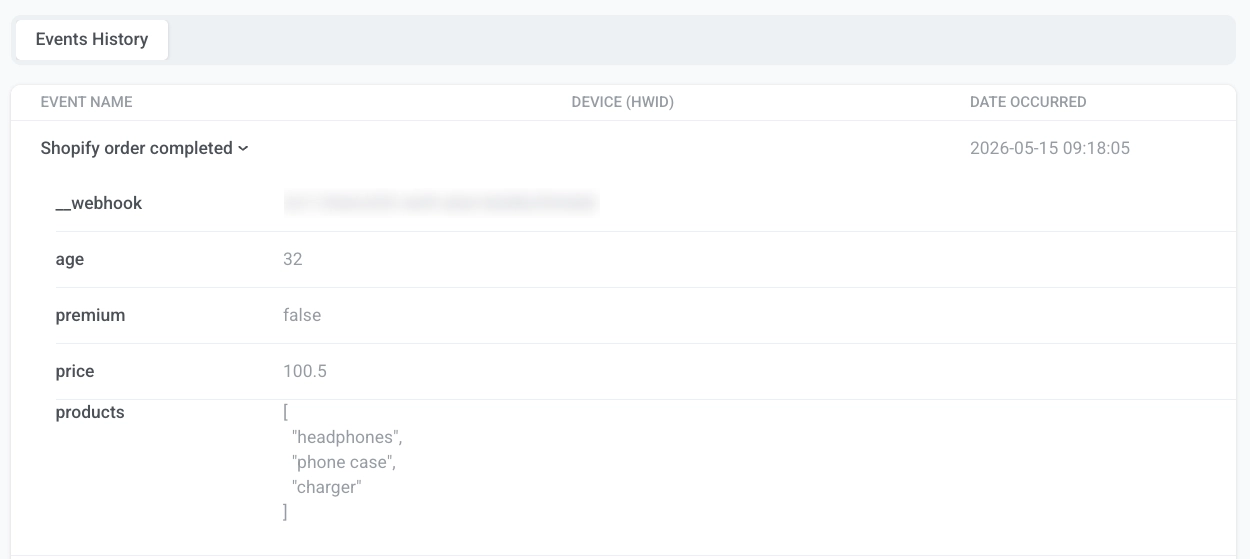
Anchor link toWhen a webhook request is processed successfully, Pushwoosh records the result on the matched (or newly created) user in User Explorer. Where the event appears depends on how you identified the user:
- User ID, Email, or Phone: the event is recorded on the user profile. Open the user and go to Events history.
- HWID: the event is recorded on the matching device. Open the user, find the device in Active user devices, and go to its Events history tab.
Find the event by name and expand it to see the mapped attributes (for example, price or products) and the __webhook attribute with the webhook ID. Mapped tags appear on the same user, on the User overview tab, regardless of the identifier type.
Use inbound webhooks with journeys
Anchor link toAfter a webhook is enabled and firing events successfully, use the selected event as a trigger-based journey entry. When the webhook receives a valid request, Pushwoosh fires the mapped event. Any journey that uses this event as an entry trigger starts automatically for the matched user.