Send instant in-apps
Instant in-apps deliver messages to users the moment a specified action happens inside the app, maximizing the chance they will be seen.
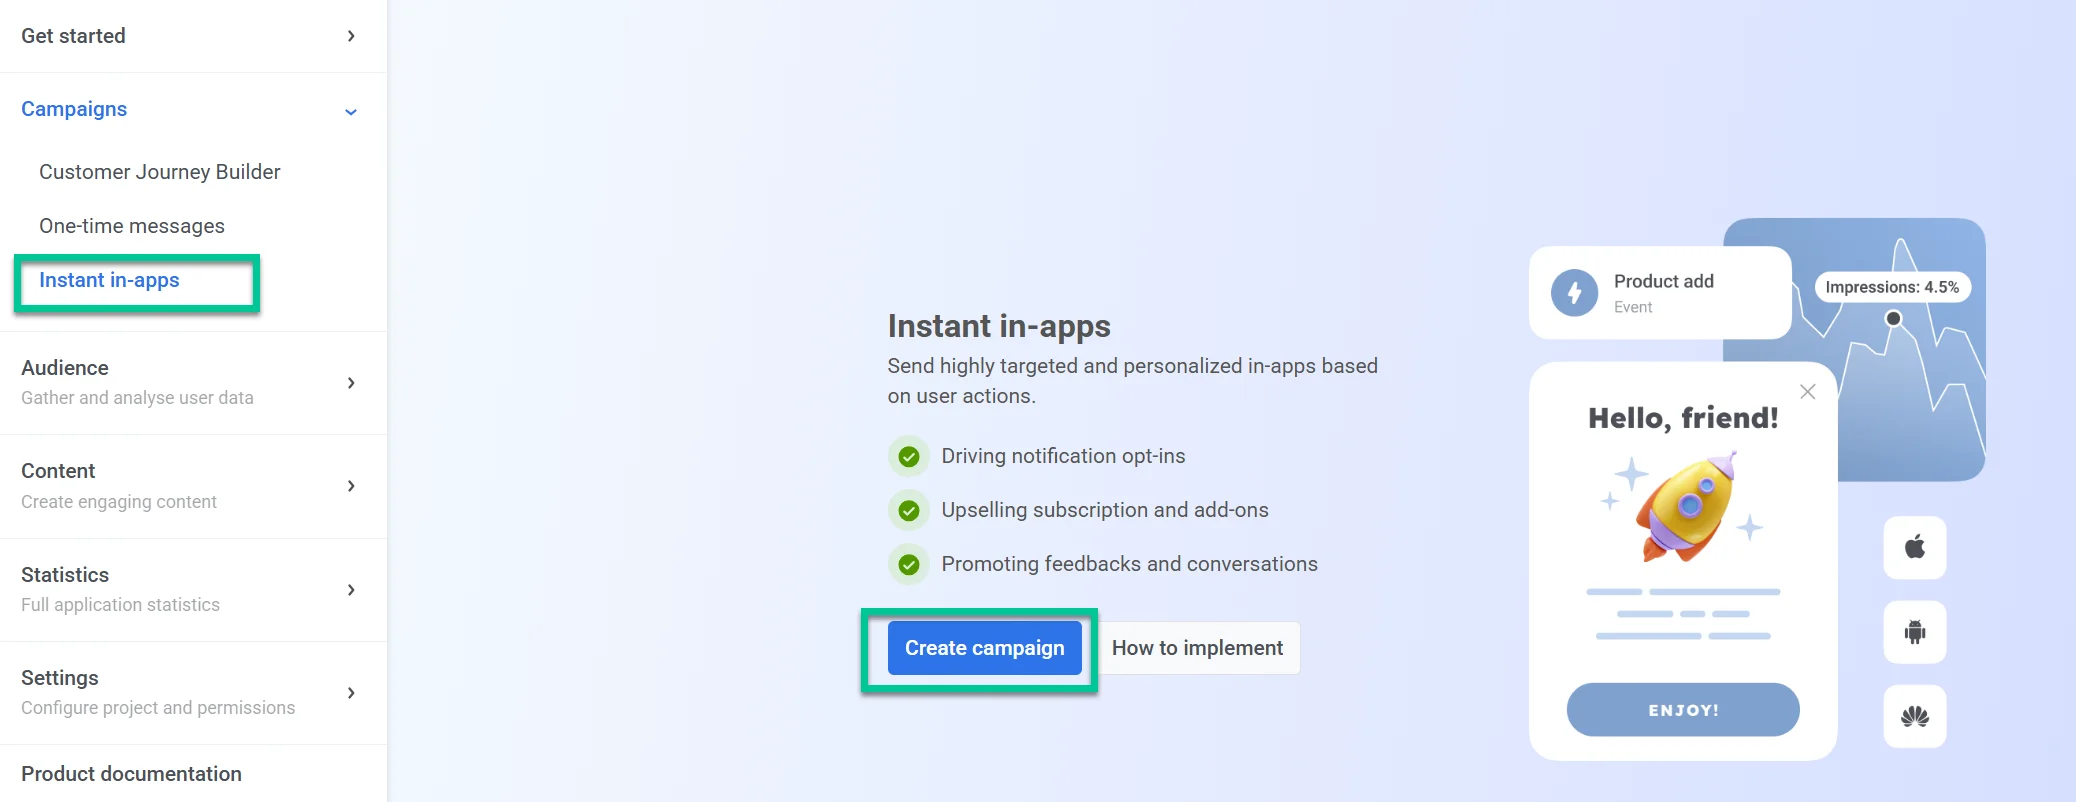
To send in-app messages through in-app campaigns:
- Navigate to Campaigns in the Pushwoosh Control Panel.
- Select Instant in-apps.
- Click Create in-app to set up a new campaign.
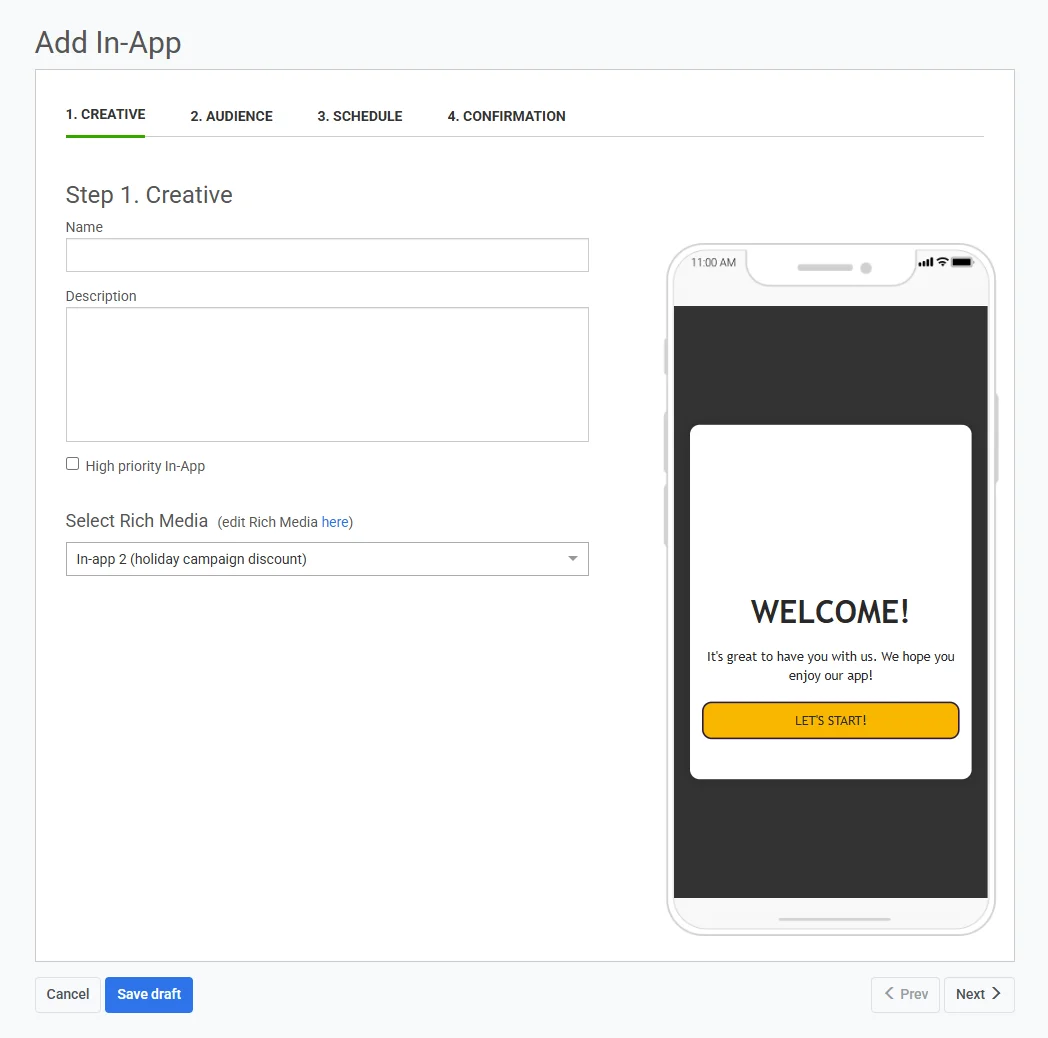
Define creative content
Anchor link toSelect an in-app banner
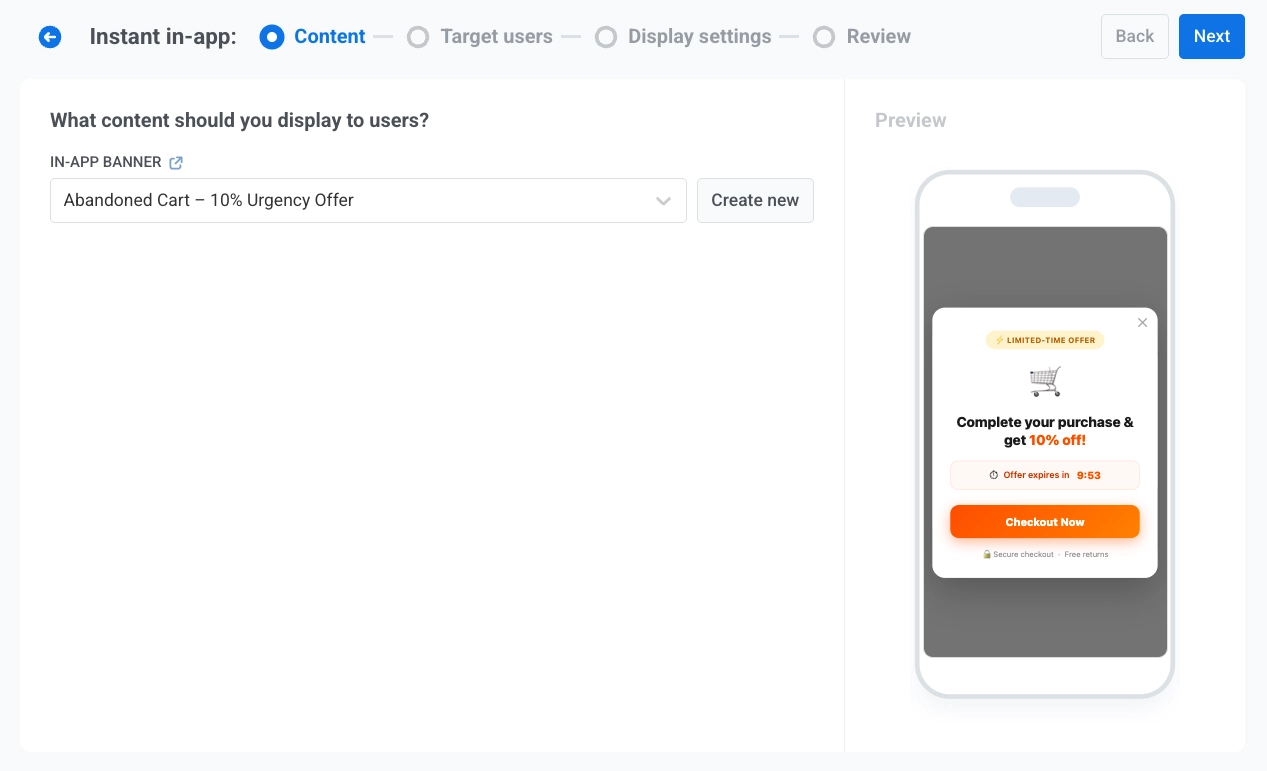
Anchor link toIn the IN-APP BANNER field, select an existing in-app template from the list or click Create new.
Ways to create an in-app template
Anchor link toYou can:
- Create a template using the built-in in-app editor. Learn more
- Use a template from the built-in library. Browse available templates
- Upload Rich Media manually.
Preview the message
Anchor link toOn the right side of the screen, you’ll see a mobile preview of the selected in-app banner.
Click Next to proceed to Target users settings.
Define audience
Anchor link toIn Target users, set the event that triggers the message and choose which users should see it.
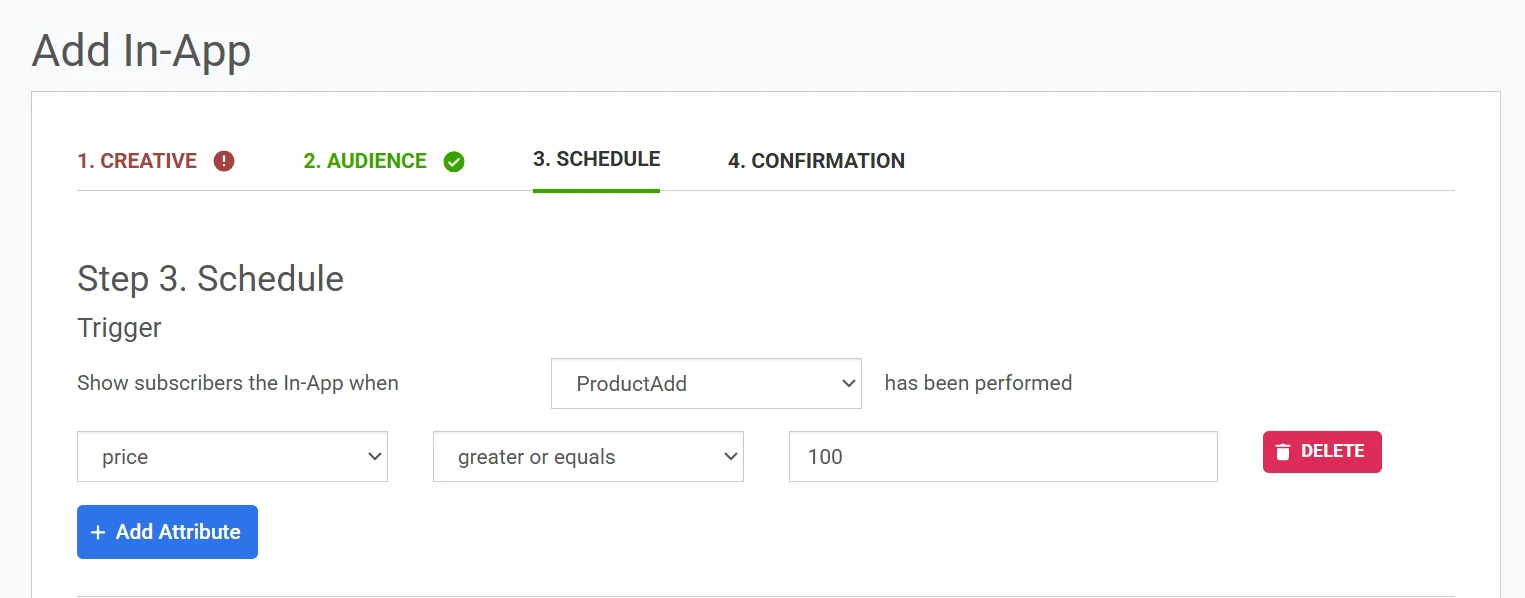
Set a trigger event
Anchor link toIn TRIGGER EVENT, select the event that will launch the in-app message. Selecting a trigger is required.
To make trigger conditions more specific, add event parameters:
- Click ADD ATTRIBUTE.
- Select values in ATTRIBUTE, CONDITION, and VALUE.
- Add more attributes if needed.
Select which users will receive the in-app
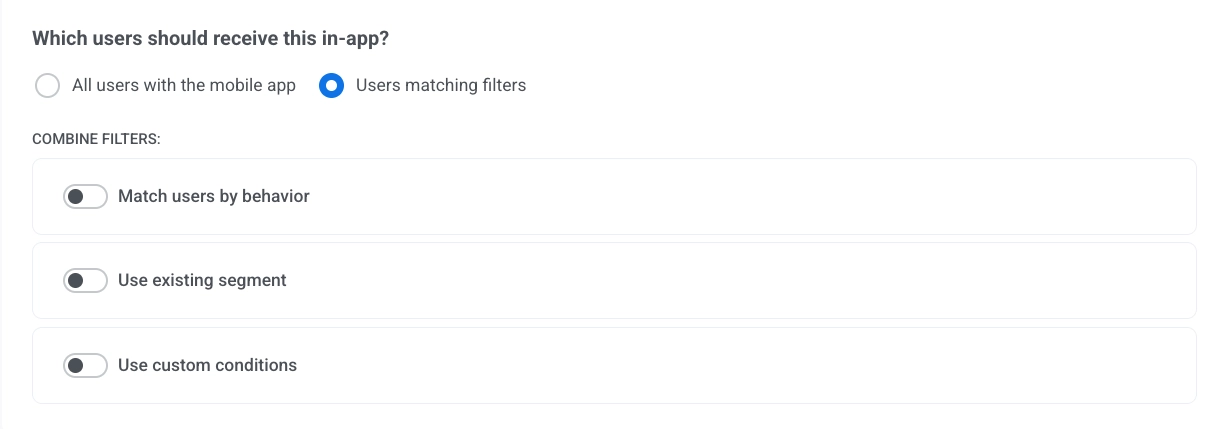
Anchor link toIn Which users should receive this in-app?, select one option:
- All users with the mobile app: Send the in-app to all app users.
- Users matching filters: Limit delivery to users that match selected conditions.
Configure filters for target users
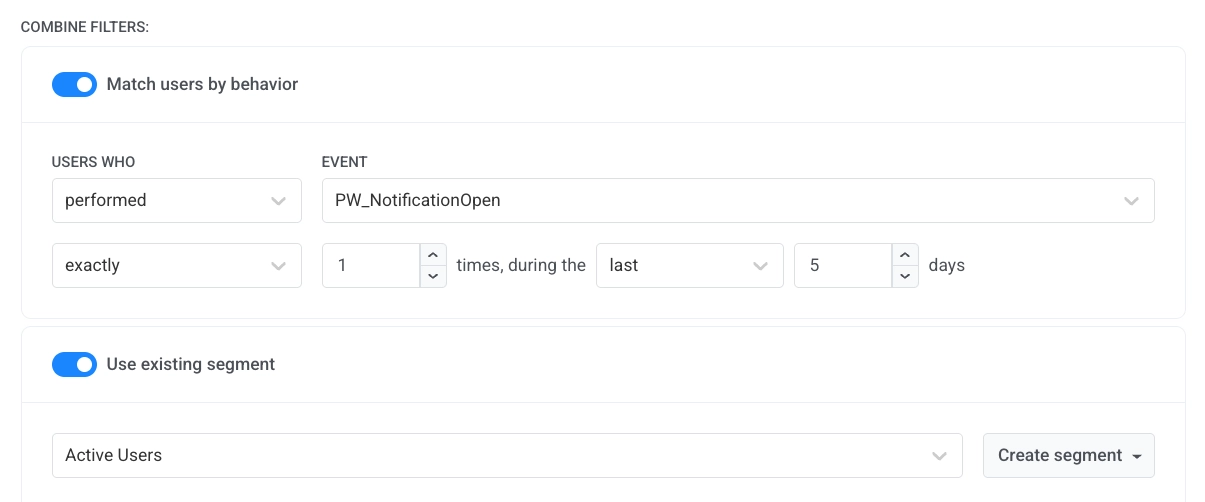
Anchor link toIf you select Users matching filters, use COMBINE FILTERS to configure targeting:
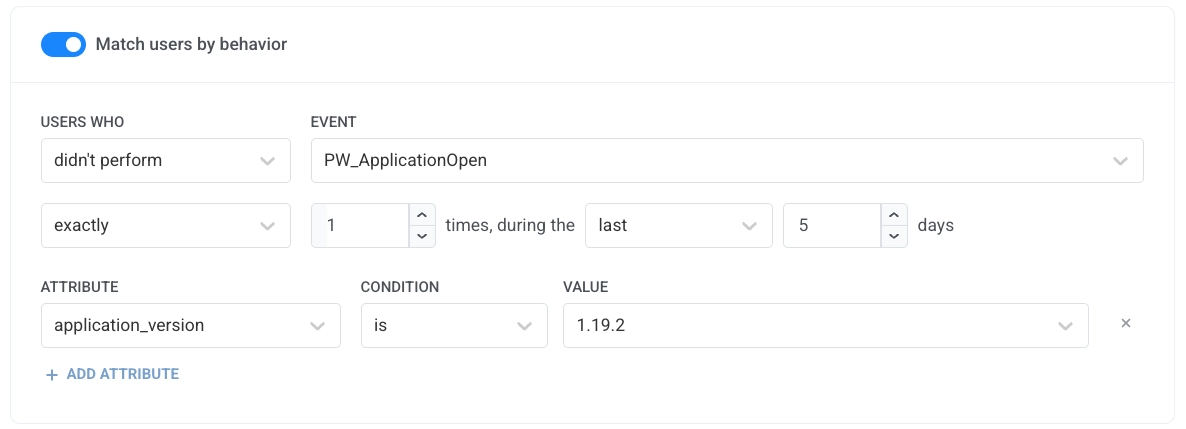
Match users by behavior
Anchor link toEnable Match users by behavior to define event-based rules. Select values in USERS WHO and EVENT, then set frequency and timeframe.
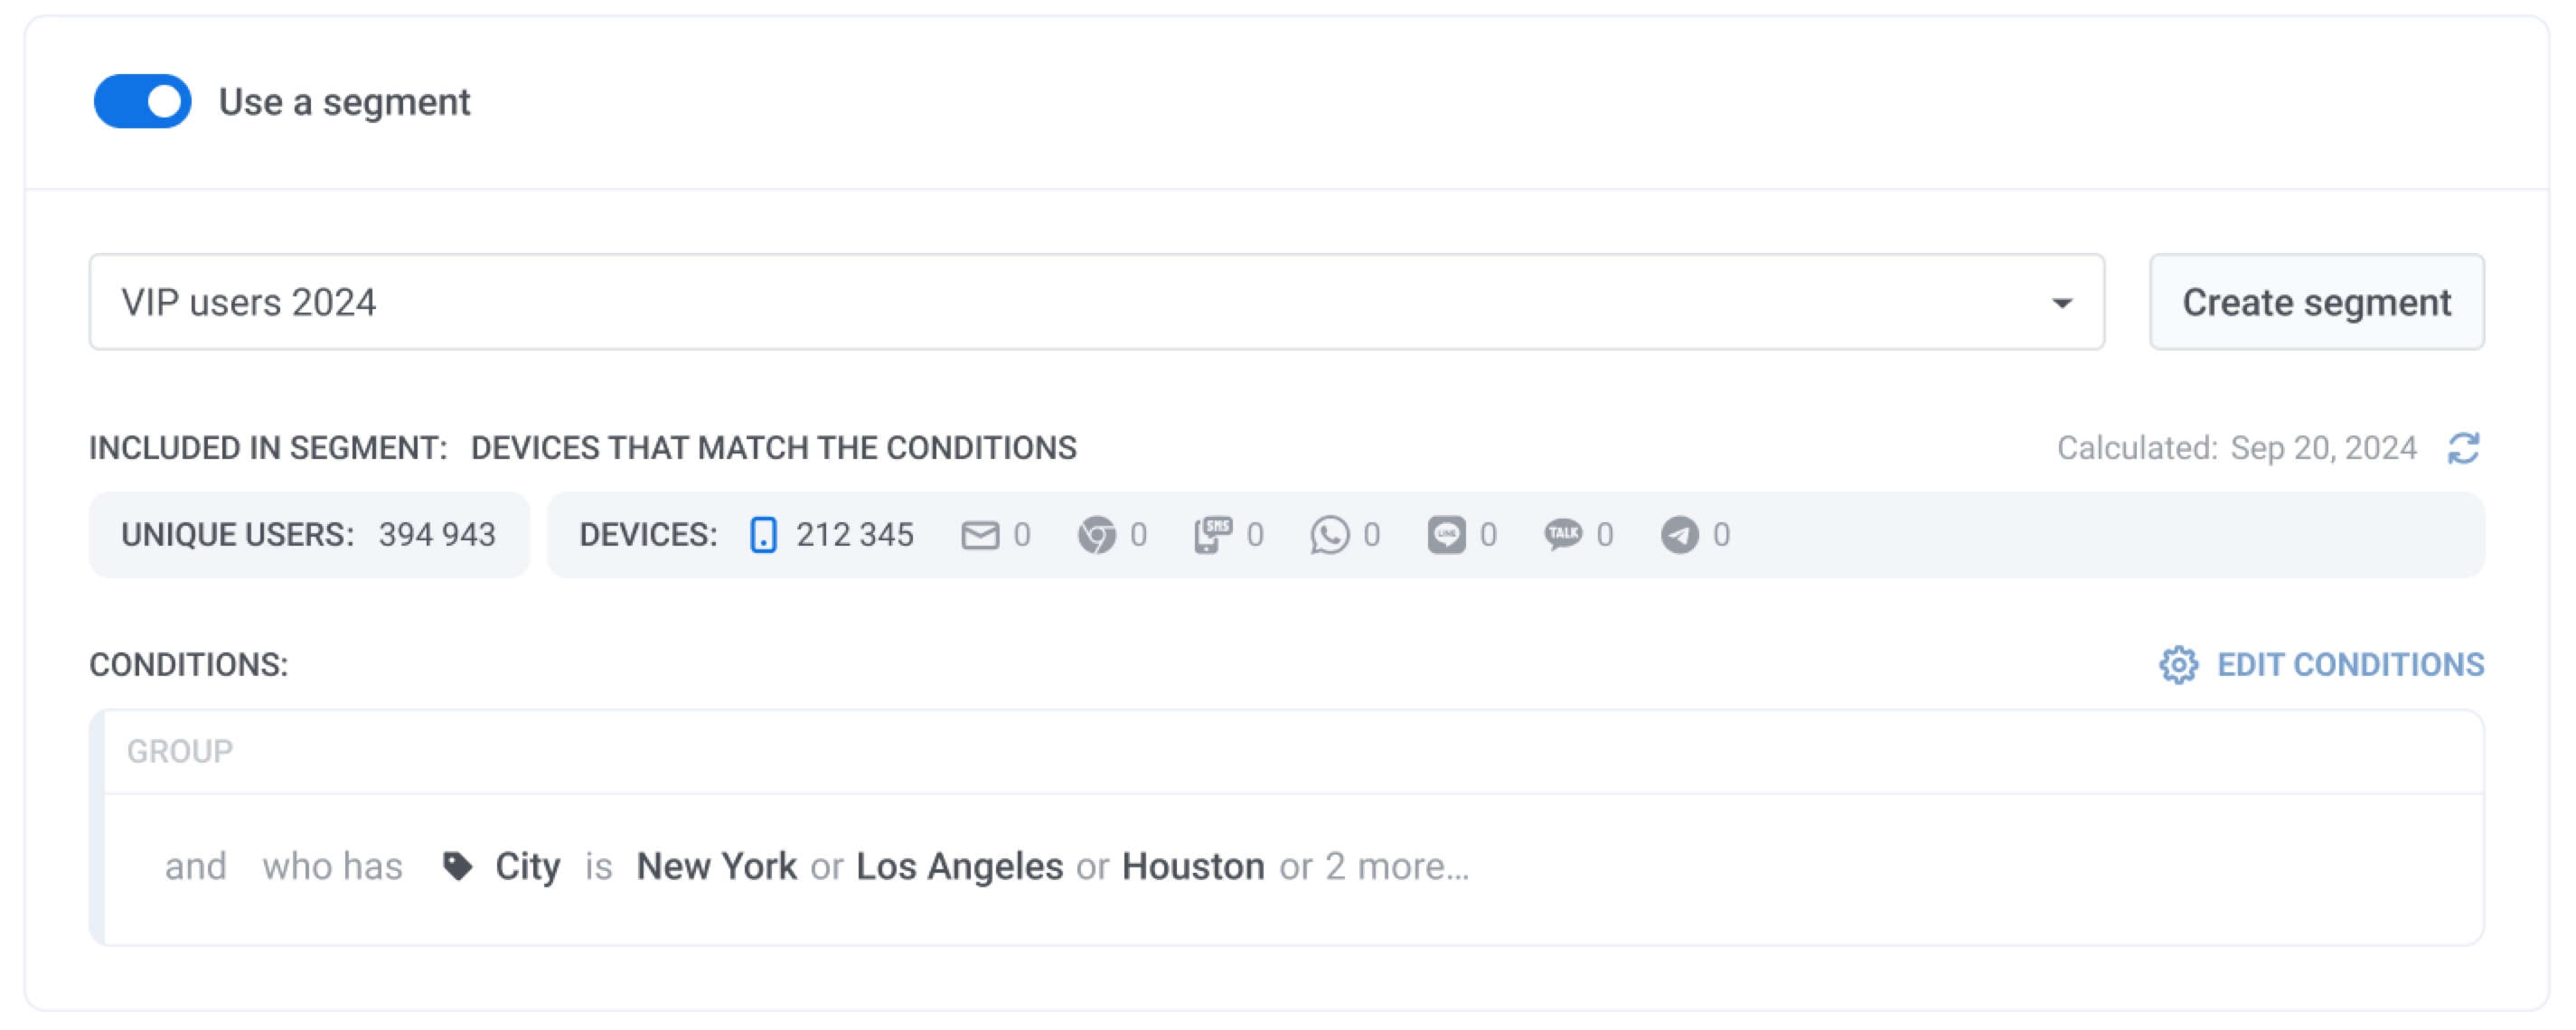
Use existing segment
Anchor link toEnable Use existing segment to select a saved segment from the list. You can click Refresh to update the segment size and Edit segment to review conditions.
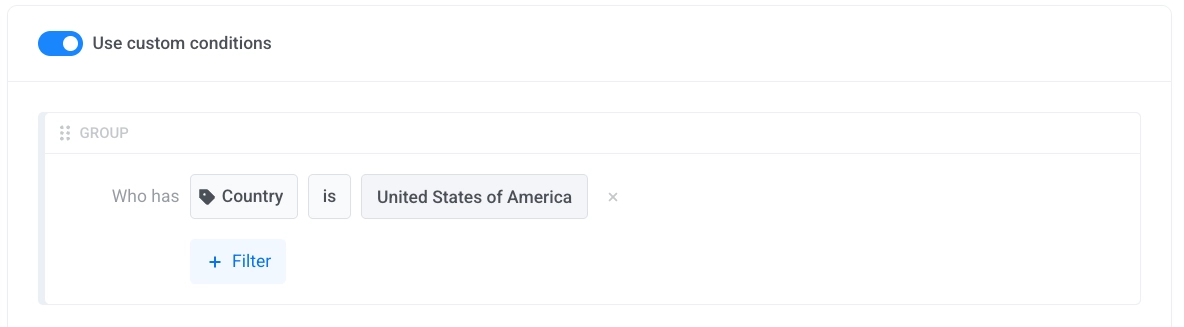
Use custom conditions
Anchor link toEnable Use custom conditions to build a custom filter group by adding conditions.
Schedule the in-app message
Anchor link toConfigure display settings
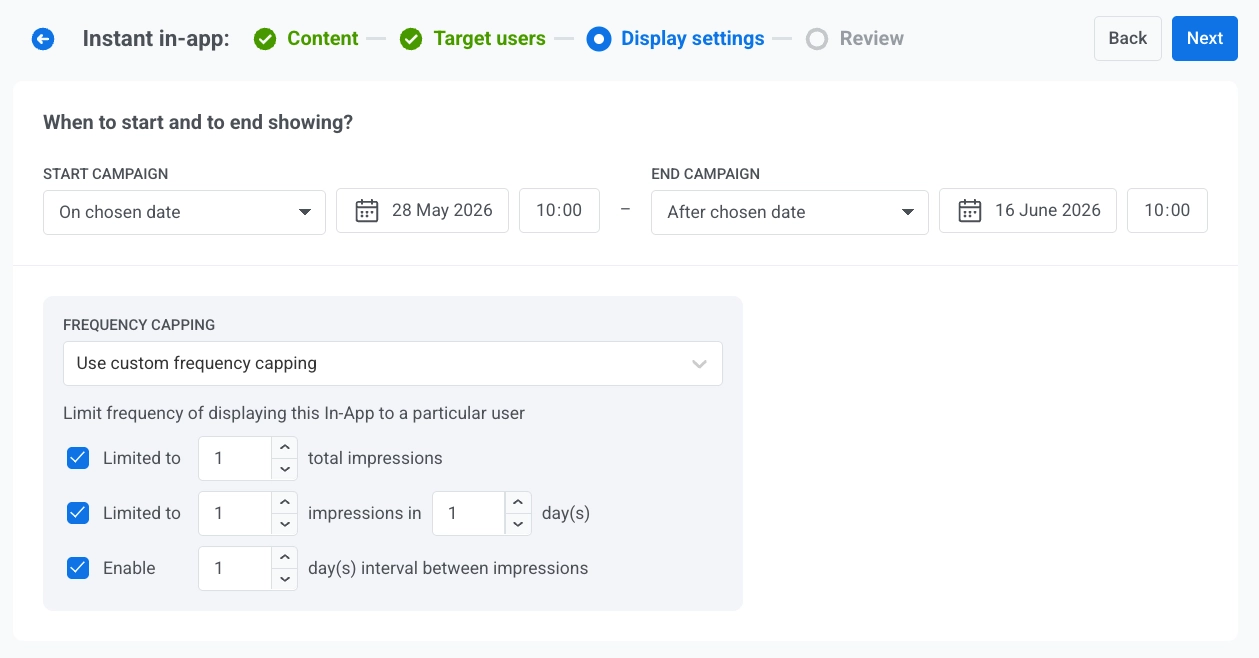
Anchor link toOn the Display settings step, define the campaign period, timezone, and frequency capping.
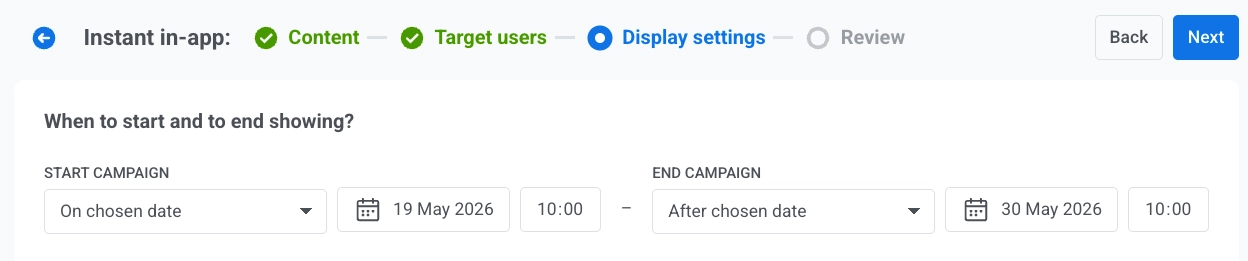
- In START CAMPAIGN, choose Immediately or On chosen date.
- If you choose On chosen date, set the date and time.
- In END CAMPAIGN, choose Never or After chosen date.
- If you choose After chosen date, set the date and time.
Set the timezone for campaign schedule
Anchor link toIn Timezone for campaign schedule, select the timezone used to interpret the campaign start and end dates and times. By default, the schedule uses UTC-0 – Coordinated Universal Time. Choose a different timezone if you want the start and end times to follow a specific local time.
Configure frequency capping
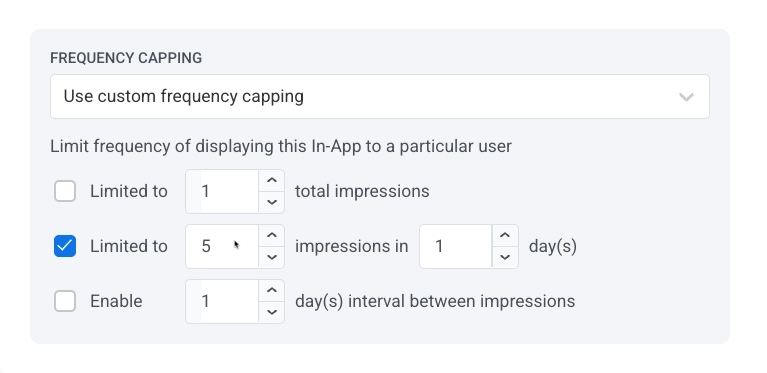
Anchor link toIn FREQUENCY CAPPING, choose one option:
- Use Global frequency capping: Apply the global in-app channel limit configured in Message delivery settings.
- Send messages without global frequency capping: Ignore global capping limits for this in-app.
- Use custom frequency capping: Apply campaign-specific limits instead of global thresholds. The message still counts toward the global in-app channel counter.
Custom capping options
Anchor link to| Limited to total impressions | Set the maximum number of times one user can see this in-app. |
| Limited to impressions in day(s) | Set how many impressions are allowed during the selected number of days. |
| Enable day(s) interval between impressions | Set a minimum interval between repeated impressions for one user. |
How custom and global frequency capping work together
Anchor link toCustom frequency capping adds a campaign-level limit. Global in-app channel capping still applies and can block delivery.
For example, if an in-app message is set to appear 5 times in 3 days, and the global frequency capping for in-app messages is also 5 times in 3 days, but the user has already seen 3 other in-app messages, this specific message will be shown only 2 more times before reaching the global limit. Learn more about Global frequency capping.
Review and complete setup
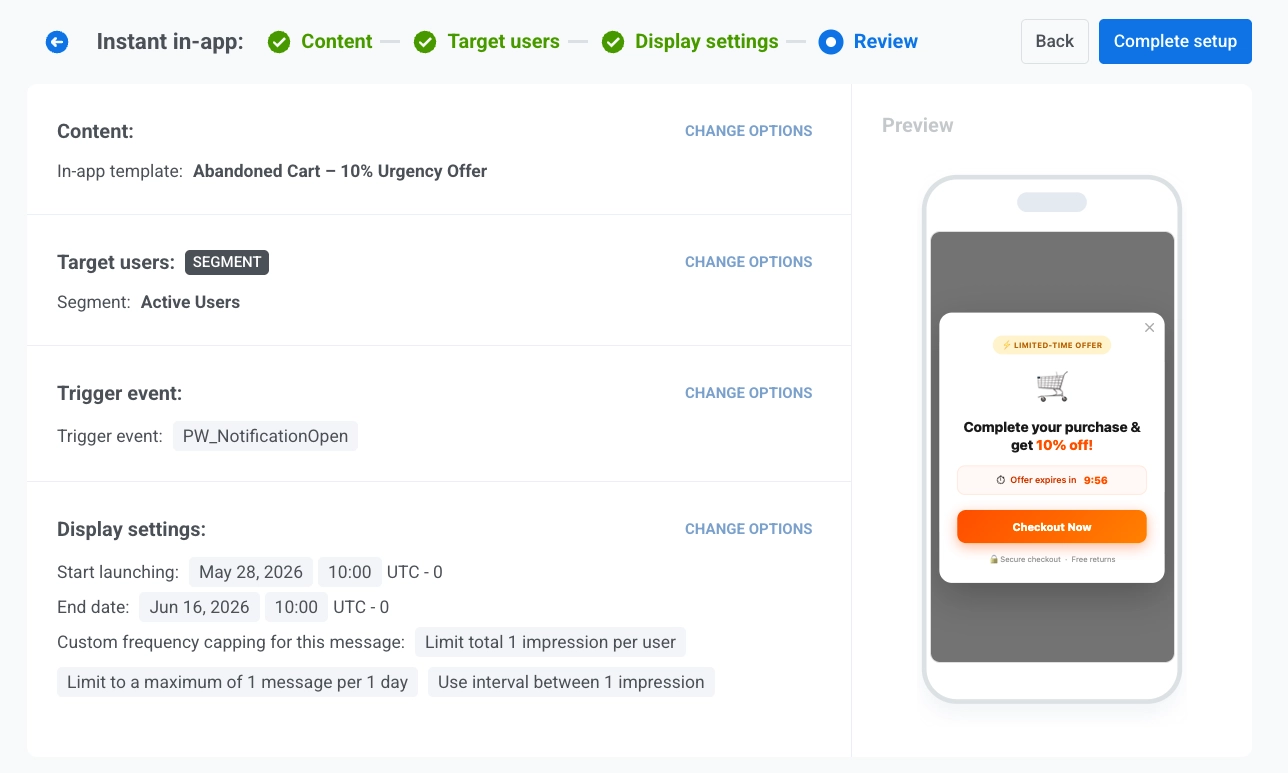
Anchor link toOn the Review step, verify all campaign settings before launch.
- Check Content, Target users, Trigger event, and Display settings.
- Review the mobile preview on the right.
- If needed, click CHANGE OPTIONS in any section to edit settings.
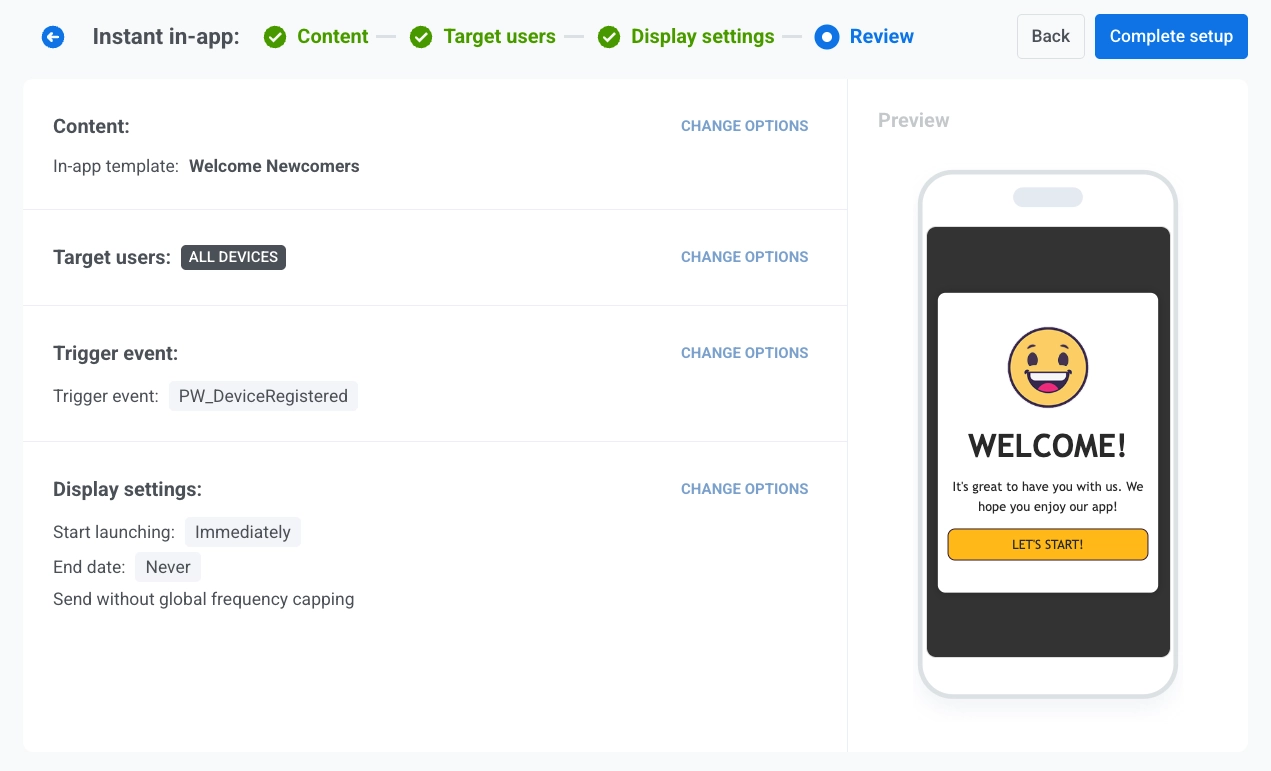
- Click Complete setup.
- Select Launch campaign to activate the campaign or Save as draft to save settings without launching.
In the Confirm launching window, confirm details and click the action you selected.
After launch, the campaign appears in the Instant in-apps list with the current status, such as Scheduled. If you save the campaign as a draft, it appears in the same list with the Draft status.
View and manage instant in-app campaigns
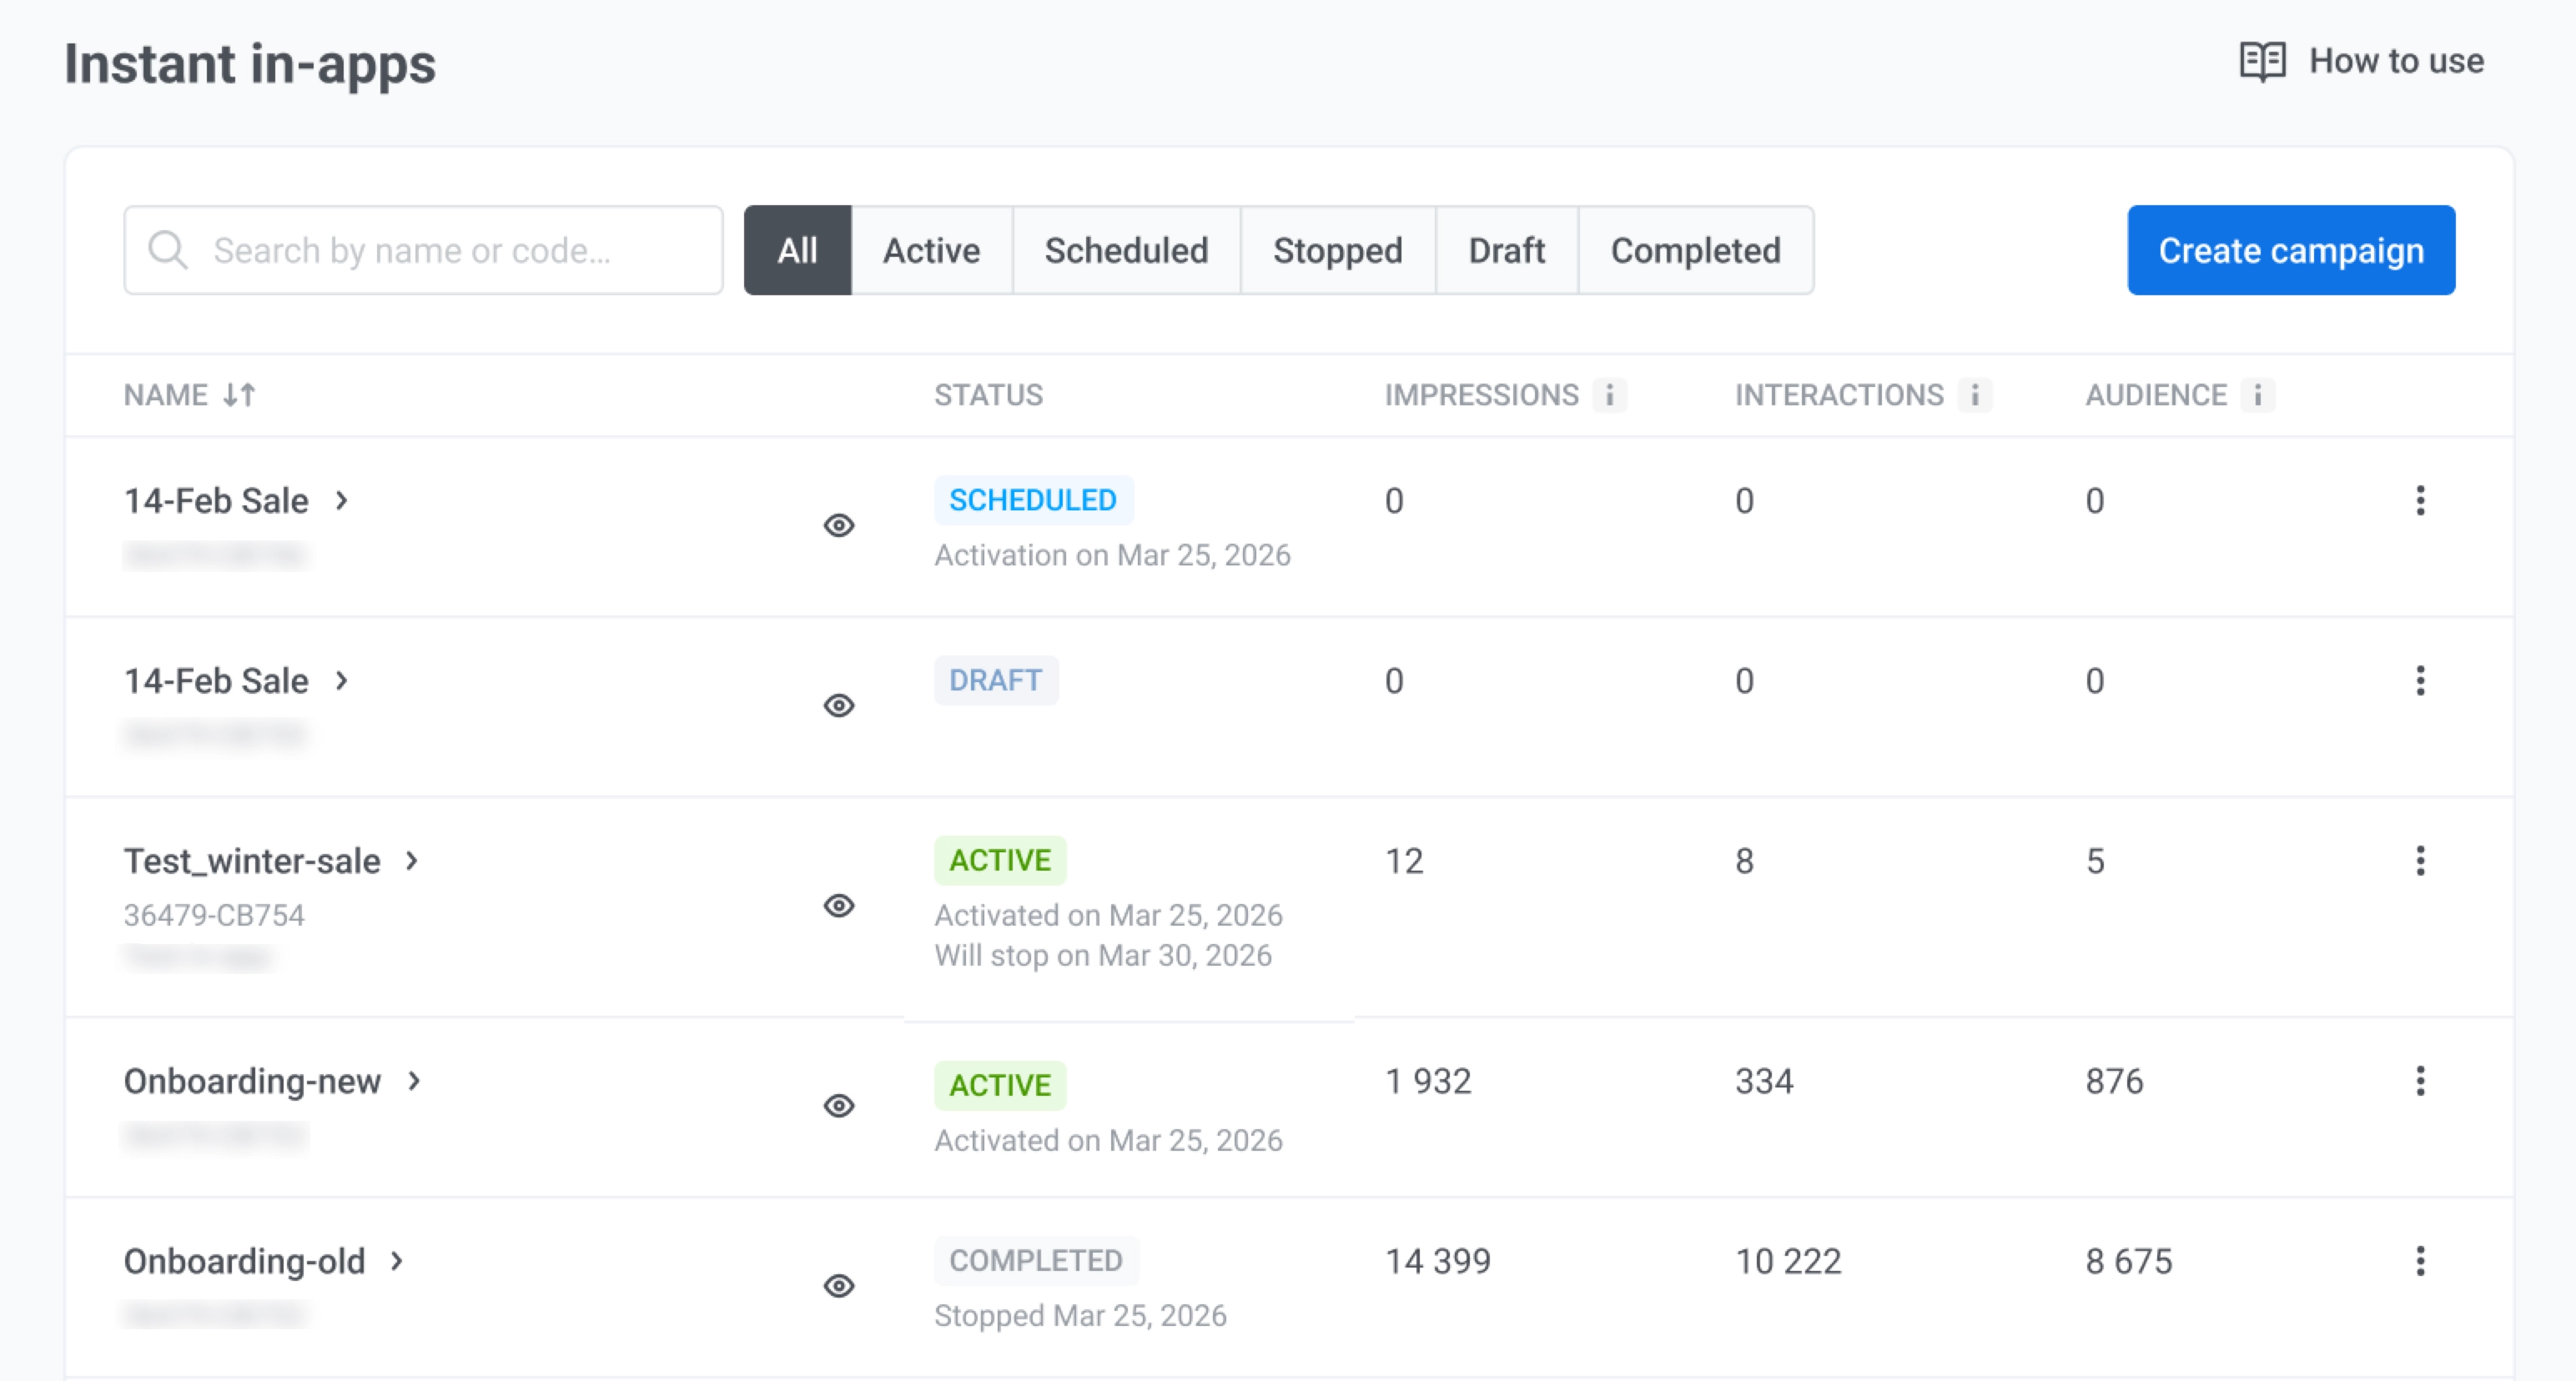
Anchor link toGo to Campaigns → Instant in-apps to find campaigns, review performance, and edit, clone, resume, or delete them from one list.
Use Search by name or code… to find a campaign by name or message code, or filter the list by All, Active, Scheduled, Stopped, Draft, or Completed.
Monitor your campaigns
Anchor link toUse the table to check whether a campaign is running and how it performs. Click the campaign name or the arrow to open details.
- Status: The current campaign state. Stopped campaigns also show when they were stopped (for example, Stopped on 27 May 2026).
- Impressions: How many times users saw the in-app.
- Interactions: How many times users interacted with the in-app.
- Audience: The number of user devices the in-app was displayed to (reach) over the last 30 days.
- Preview: Hover over the eye icon to preview the in-app message without opening the wizard.
Take action on a campaign
Anchor link toClick the three-dot menu (⋮) on a row to open the actions menu. The available actions depend on the campaign status.
- View statistics: Open delivery and engagement metrics for the campaign.
- Edit campaign: Open the campaign wizard and change content, target users, or display settings.
- Clone campaign: Create a copy with the same creative, trigger event, audience, and display settings. Adjust settings in the wizard, then launch or save the copy as a draft.
- Resume campaign: Relaunch a stopped campaign so it can deliver in-apps again.
- Change schedule: Adjust the start and end dates for a completed campaign.
- Stop campaign: End a running or scheduled campaign. You can update and relaunch it later.
- Delete: Permanently remove the campaign. This action cannot be undone. Stop the campaign first if it is still running or scheduled.
Example scenario: Sending an in-app message using in-app campaigns
Anchor link toImagine you run a fashion retail app and want to increase conversions with a limited-time discount when users engage with push notifications. You set up an instant in-app campaign for active users in the U.S.
Prepare the in-app message
Anchor link toCreate an in-app template with a discount offer and a CTA button leading to checkout.
Configure target users
Anchor link toSelect PW_NotificationOpen as the trigger to catch users at peak intent, right after they engage with a push. Enable Match users by behavior and limit to users who triggered the event once in the last 5 days. This keeps the audience recently active without being too broad. Select Active Users as the base segment.
Configure display settings
Anchor link toSet a start and end date to keep the campaign time-bound. Set frequency capping to 1 impression per day with a 1-day interval to prevent the message from feeling intrusive if a user opens multiple push notifications in a short period.
Review and complete setup
Anchor link toOn the Review step, check all settings, click Complete setup, and select Launch campaign.