Dynamic Content and Liquid Templates in journeys
Overview
Anchor link toFor greater relevance of your messages to users in the journey, you can add personalized content based on users’ behavior. For example, when sending an Abandoned Cart push, add the product name for better conversion – remind users of what exactly they wanted to purchase to make your message more convincing.
When a user triggers some Event within the journey, i.e. performs some action in the app (e.g., adds a product to their cart or reaches a specific game level), use this Event’s attributes in your follow-up message’s content instead of inserting Tag values.
Dynamic Content personalization
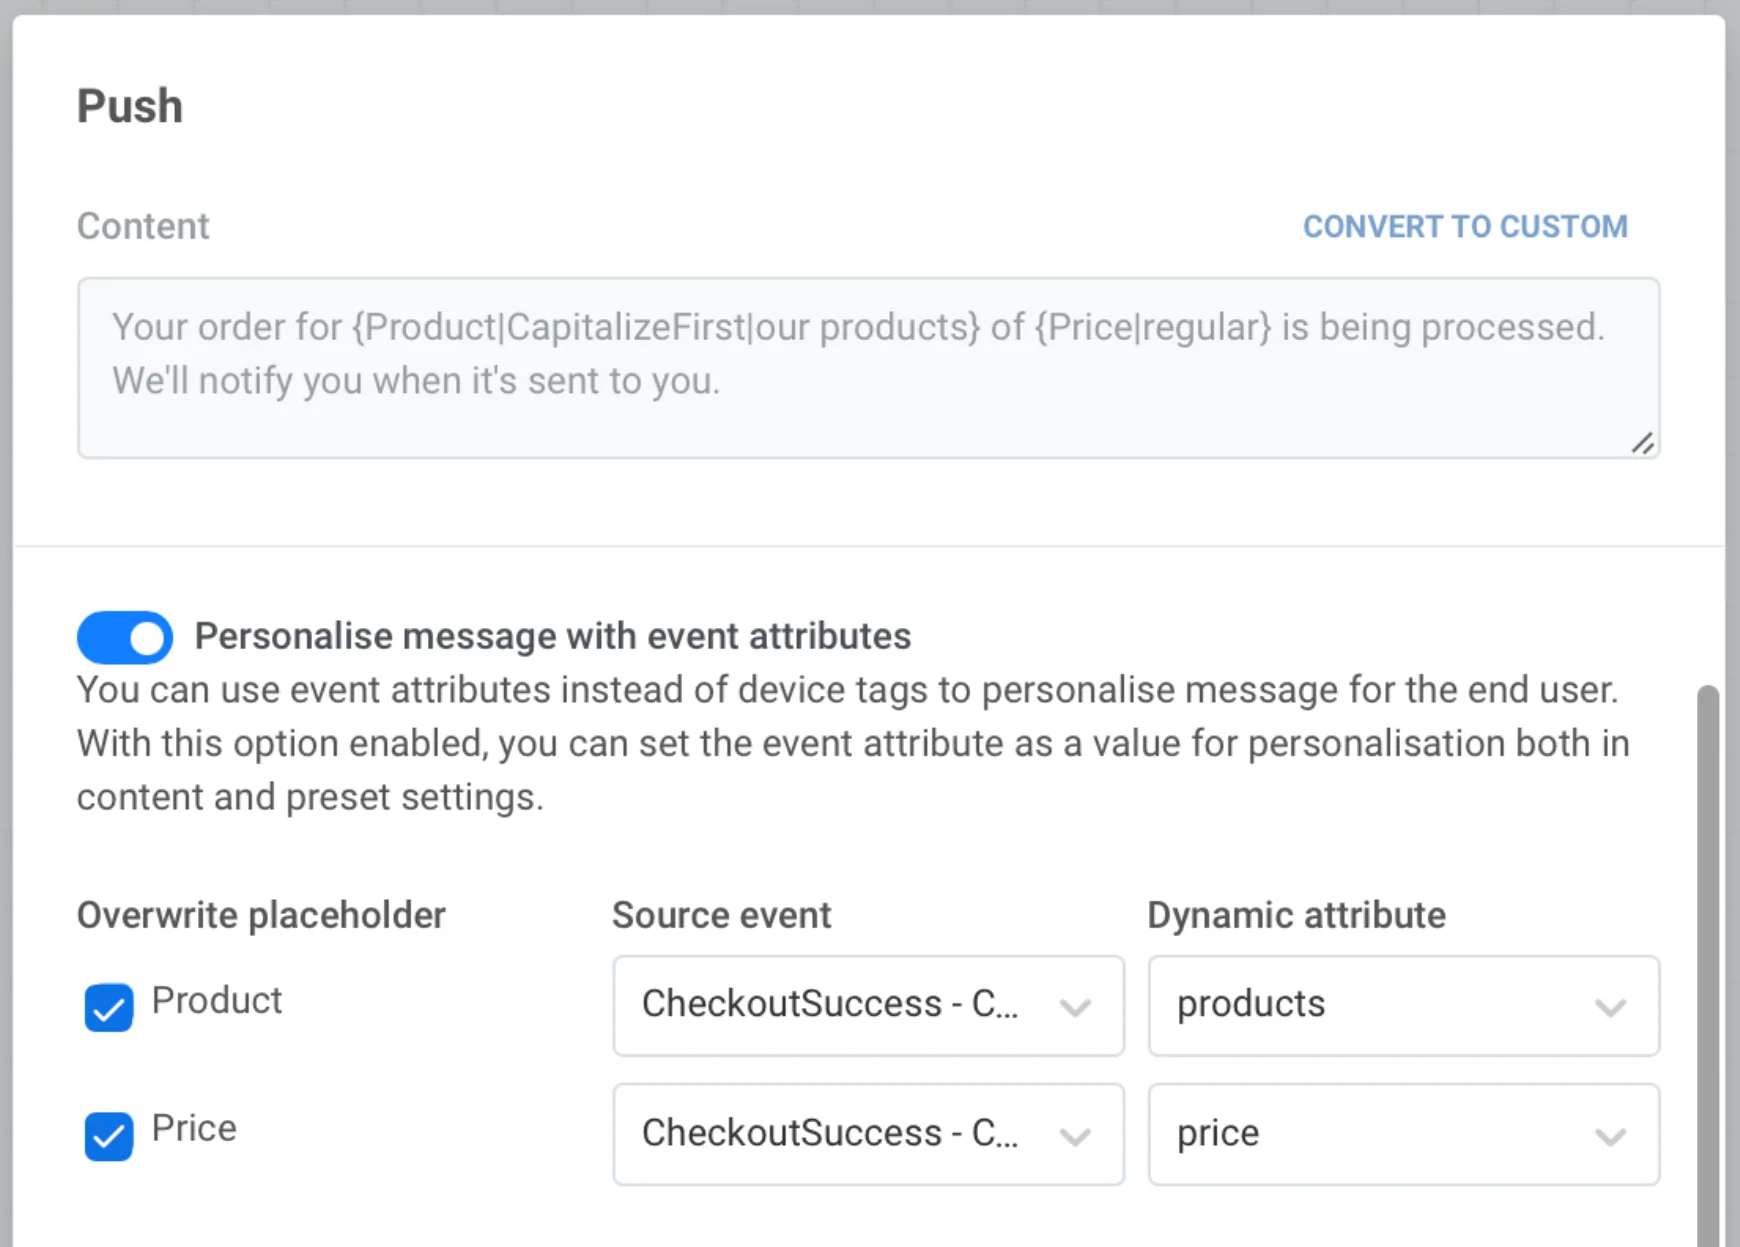
Anchor link toTo personalize the message using Dynamic Content, toggle Personalize message with event attributes while setting the Push or Email element on your journey canvas. Choose the personalization placeholder (or several placeholders) to populate with the Event attributes.
Liquid Templates personalization
Anchor link toTo personalize the message using Liquid Templates, enable the Overwrite Liquid placeholders option and select the desired Event. If the attribute name matches the tag name in the message, the attribute value will be added to the message text.
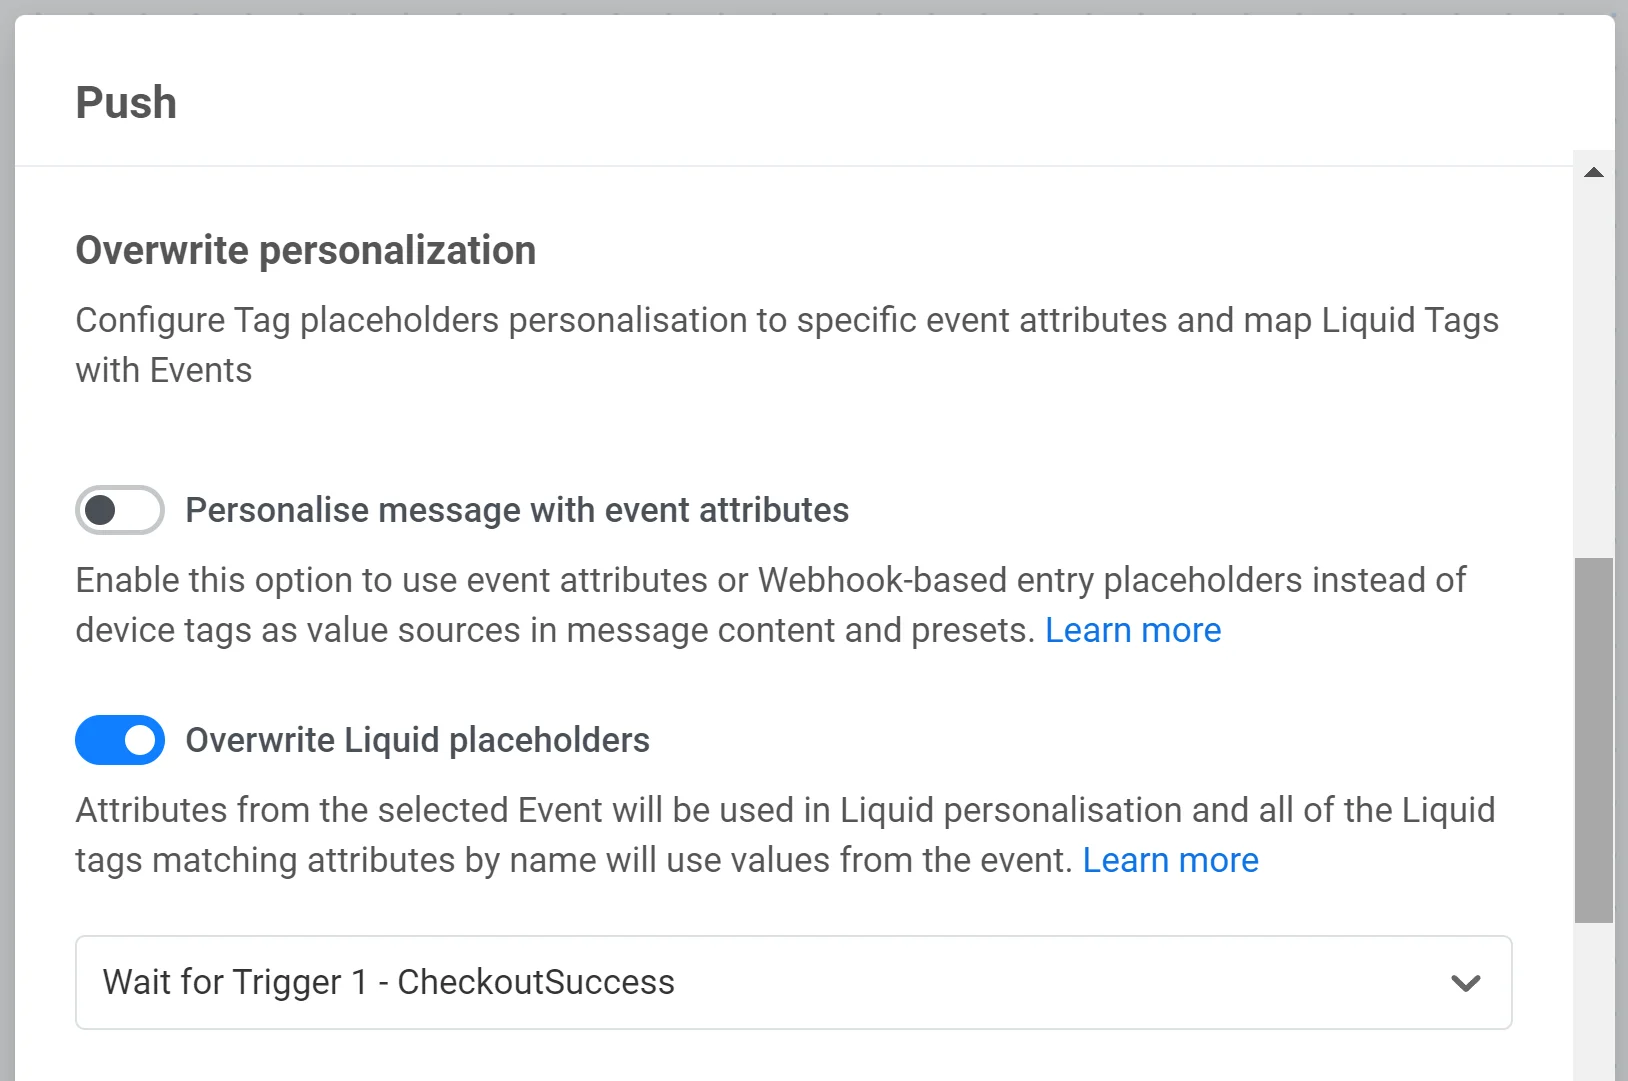
Use Liquid placeholders if you need more flexibility when setting up message personalization. For example, you can add a list of purchased items and their price in the email text instead of a single value.
Use cases
Anchor link toAbandoned cart
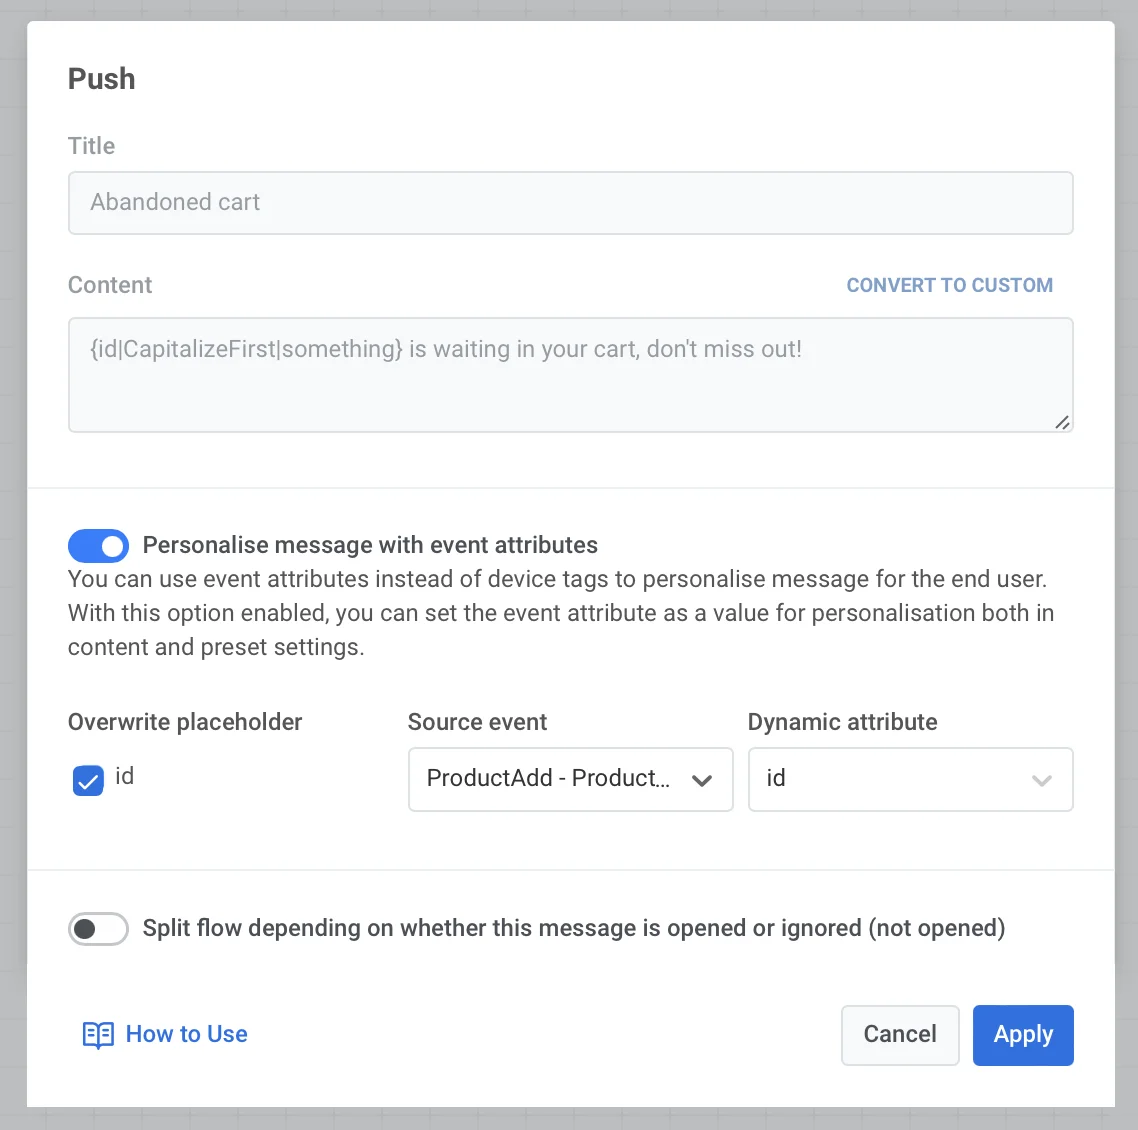
Anchor link toAnything can distract users from their journey through your app: sudden phone call, work email, or push from a messenger. Notice your users add products to their carts and do not complete the purchases? Send the personalized Abandoned Cart reminder to bring them back!
For better conversion, add the product name to a push or email message – remind users what exactly they want to purchase to make your message more convincing.

To build an Abandoned Cart campaign,
- Start the journey with the Add product event triggered when a user adds something to their cart.
- Then, place the Wait for event element next to the start event and choose Checkout success (or any other event triggered when a user completes their purchase).
- Split the following journey into two branches based on whether the purchase is completed. To those who don’t checkout in a few minutes/hours, send a push or email message with their cart details.
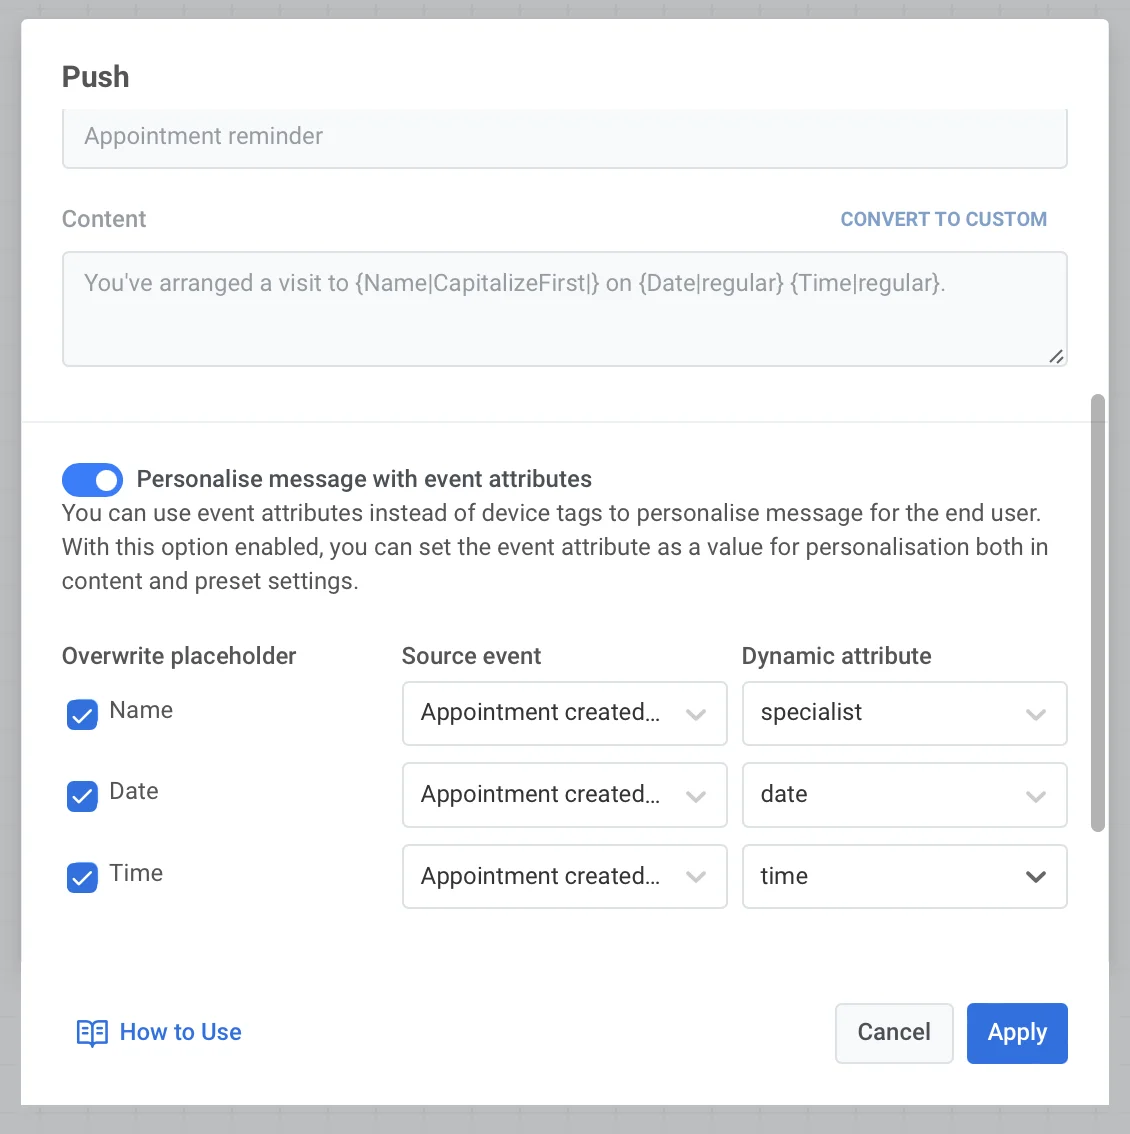
Appointment confirmation
Anchor link toBuilding personal relationships with every client makes businesses successful, so you might want to provide your clients with all the help they need and all the care you can give.
Send the appointment confirmation with all the details directly to the user’s inbox so that they can check it further not to miss their visit.
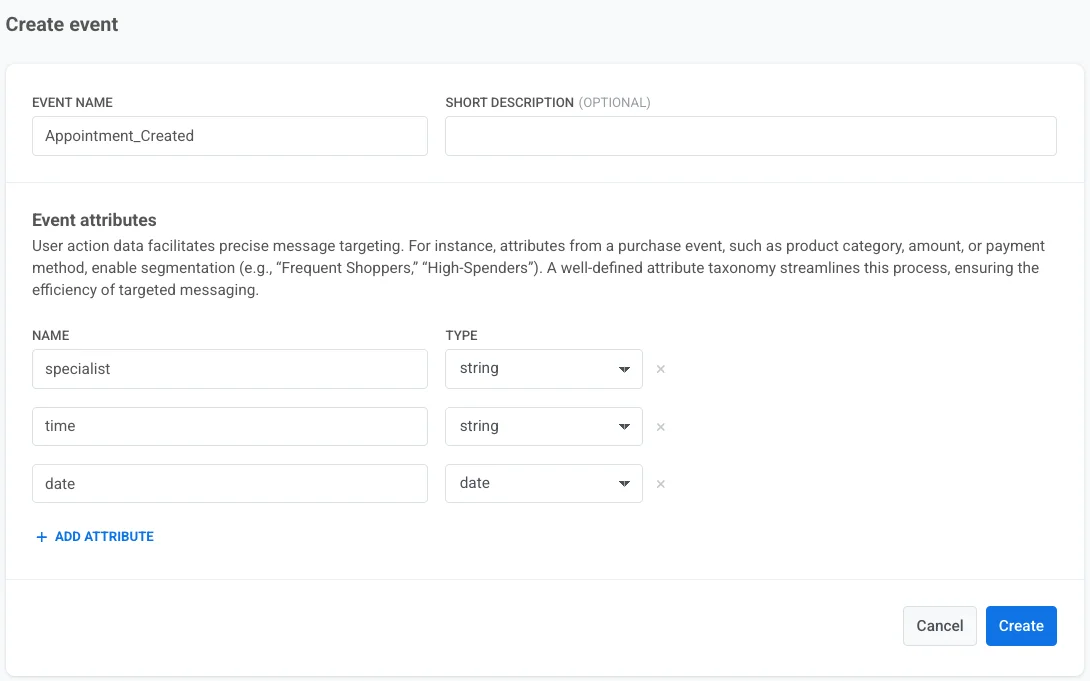
- Create an Event with the attributes needed: specialist, date, and time
-
Prepare the message’s content and save it as a preset. Choose Save to Inbox to let users get back to your push whenever they want.
-
Start the journey with the Event you’ve created.
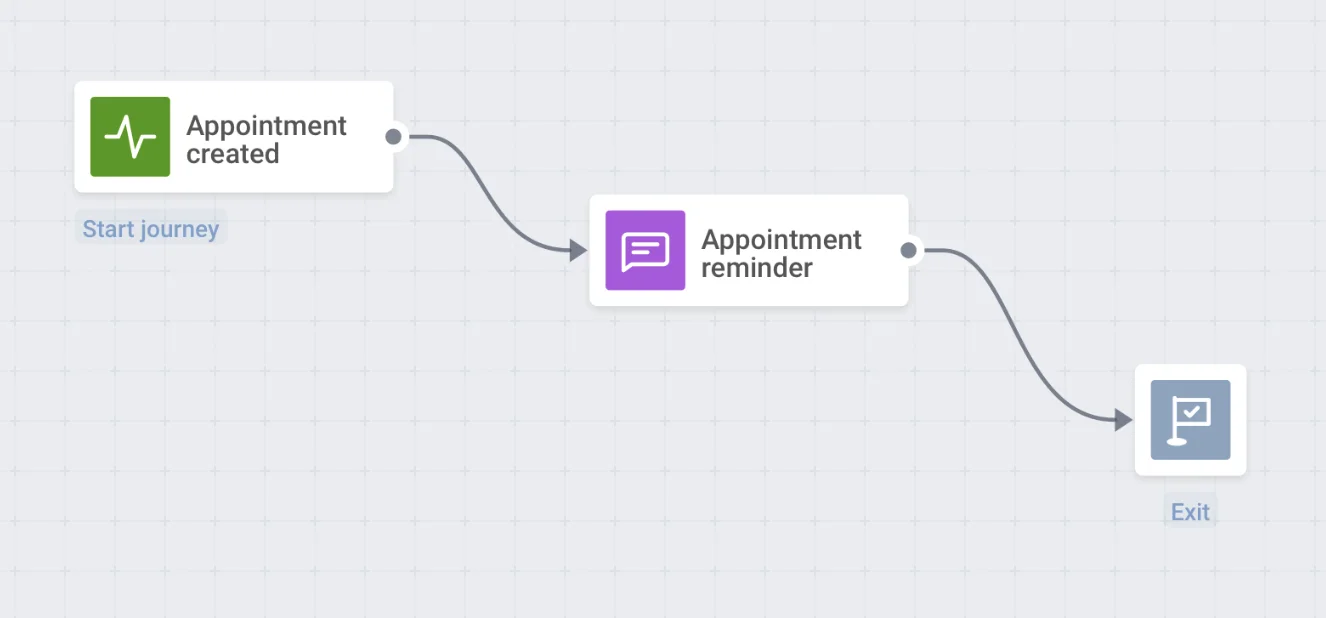
- Set the push notification following the entry Event. Personalize the preset’s content with the Appointment created Event’s attributes.