Dynamics 365: create or update record
Use Dynamics 365: create or update record to upsert one Dataverse row from a journey step, matched on an alternate key column: it updates the row when the value is already there and creates it when it isn’t. Dataverse has no static API key, so this point authenticates through an Entra ID application registered once for the whole account. There’s no token field on the point itself.
Typical uses:
- Keep Dynamics 365 in sync: create or update a row as the traveler moves through the journey, so your CRM sees current data.
- Sync journey activity into CRM: set a column when a traveler reaches a milestone, so your team can filter or report on it.
- Avoid duplicate rows: matching by alternate key means a traveler who passes through this point again updates the same row instead of creating a new one.
Before you start
Anchor link toRegister an application in Entra ID and connect it under Settings > 3rd-party integrations > Microsoft Dynamics 365:
- In the Microsoft Entra admin center, register an application and create a client secret for it.
- In the Power Platform admin center, open your target environment, add the application as an Application user, and assign it a security role that can create and update rows on the table you plan to write to.
- In Pushwoosh, in Environment URL, enter the environment’s URL with
https://and no trailing path, for examplehttps://acme.crm4.dynamics.com. - In Directory (tenant) ID and Application (client) ID, enter the application’s IDs from its Entra ID overview page.
- In Client secret, paste the secret’s value. It’s stored write-only: Pushwoosh never shows it again, so paste a new one to replace it.
- Click Connect Dynamics 365.
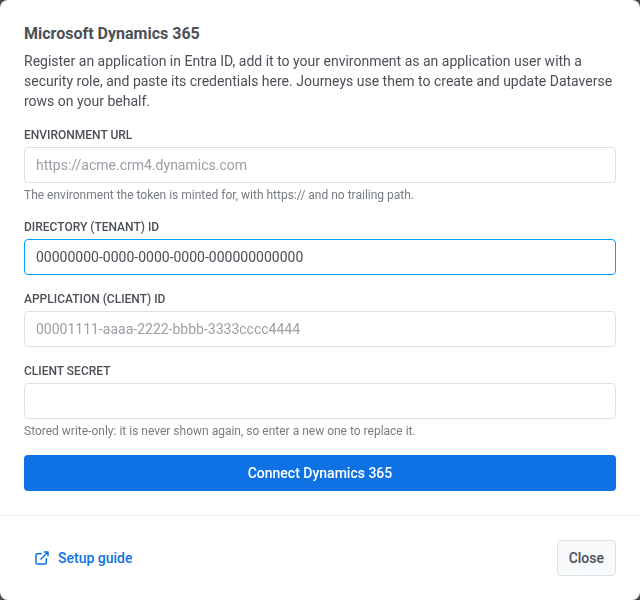
After you connect Dynamics 365, install the integration so the point appears in the journey builder.
Configure the point
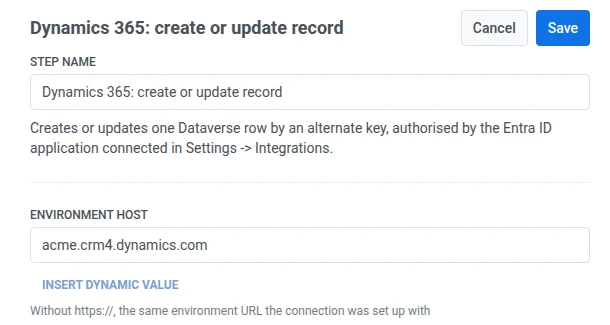
Anchor link to- Drag Dynamics 365: create or update record from the Integrations section of the left panel onto the canvas.
- Double-click the point and enter a Step Name.
- In Environment host, enter the same environment’s host without
https://, for exampleacme.crm4.dynamics.com.
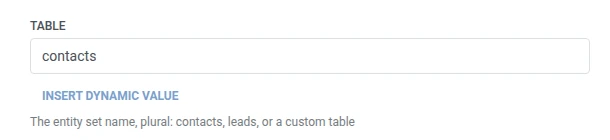
- In Table, enter the entity set name, plural —
contacts,leads, or a custom table’s set name.
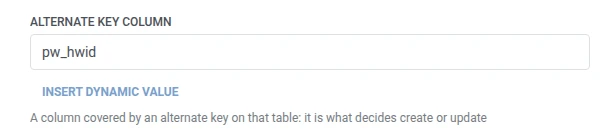
- In Alternate key column, enter the column covered by an alternate key on that table, for example
pw_hwid.
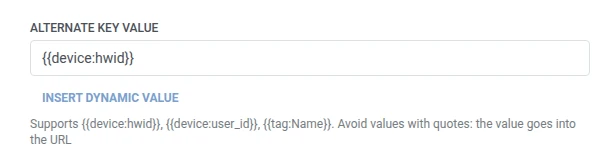
- In Alternate key value, enter the value to match on, usually a macro like
{{device:hwid}}. Avoid values with quotes, since the value goes into the request URL.
- In Columns, add one row per Dataverse column to write. Enter the column name and the value. Names must be non-empty and unique. A value can be fixed text or a traveler macro such as
{{device:hwid}}, the same macros as in a Webhook body. Or click Insert Dynamic Value to pick an attribute an earlier step in this journey produced, for example an LLM response or a mapped Webhook value.

- Click Save.
Response
Anchor link toThe traveler continues to whatever step you connect next on the canvas.
Attributes after the step runs
Anchor link toUnlike Salesforce: create or update record, this point doesn’t return the row’s ID into a traveler attribute. If a later step needs it, look the row up again by the same alternate key value.
Failures and unexpected responses
Anchor link toOpen Calls log in the point’s drawer and check the response:
- 401 — the connection’s client secret was rejected or has expired; reconnect under Settings > 3rd-party integrations.
- 403 — the application user’s security role doesn’t grant create or update access on that table.
- 404 — Environment host or Table doesn’t match anything in that environment.
- 400 — Alternate key column isn’t defined as an alternate key on that table, or a name in Columns isn’t a real column.
A failed request drops the traveler from the journey. See Errors and failed requests.
Example scenario: Syncing an enterprise pricing request into Dynamics 365
Anchor link toA B2B SaaS app lets a user tap Request enterprise pricing in-app. The team wants that request upserted into Dynamics 365, matched so a repeat tap updates the same row instead of creating a duplicate.
- Add a Trigger-based entry element and set it to fire on an
EnterprisePricingRequestedevent. - Add Dynamics 365: create or update record right after it. Set Table to
contacts, Alternate key column topw_hwid, and Alternate key value to{{device:hwid}}. In Columns, setemailaddress1to{{tag:Email}}. - Click Save.
Once this runs, the request exists as a Dynamics 365 contact matched by device, ready for the sales team to work from CRM instead of the app’s own data.