Update tags via CSV
Upload a CSV file to set the values of several Tags for many devices at once, for example to prepare data for segmentation.
You can only update Tags that already exist in your account. The import doesn’t create new ones.
1. Prepare CSV
Anchor link toExport a segment and edit it, or create the file yourself.
Export segment
Anchor link toGo to Segments, select the Segment you’d like to set tags for and export the segment. The file contains:
- HWIDs of devices complying with that Filter segment (in the first column of the .csv)
- Push Tokens of user’s devices (in the second column)
- types of devices (integer and humanized)
- all Tags from your Pushwoosh account (in the remaining columns)
Change Tag values or add missing ones in the file, then save it.
Create CSV
Anchor link toTo create the file yourself, set up these columns:
- Identifier column: name it
HWIDand fill it with device hardware IDs, or name itUser IDand fill it with user IDs. - Tag columns: name each one exactly as a Tag in your Pushwoosh account. Each cell holds the value to set for that device or user.
| HWID | Name | Age | Push Alerts Enabled | SDK Version | First Install | Preferences |
|---|---|---|---|---|---|---|
| XXXX-XXXX-XXXX-XXXX-XXXXXXXXXXXX | Paul | 25 | false | 6.4.12.0 | 2023-06-27 12:00:00 | sport, news |
| YYYY-YYYY-YYYY-YYYY-YYYYYYYYYYYY | Anne | 30 | true | 6.7.17.0 | 2025-11-14 16:00:00 | fashion, travel |
Representation of import.csv in plain text format:
HWID,Name,Age,Push Alerts Enabled,SDK Version,First Install,PreferencesXXXX-XXXX-XXXX-XXXX-XXXXXXXXXXXX,Paul,25,false,6.4.12.0,2023-06-27 12:00:00,"sport, news"YYYY-YYYY-YYYY-YYYY-YYYYYYYYYYYY,Anne,30,true,6.7.17.0,2025-11-14 16:00:00,"fashion, travel"List Tag values
Anchor link toA List Tag cell accepts two formats:
- Comma-separated list:
sport, news, as in the example above. This format is easier to produce in spreadsheet apps. Values are always split on the comma. - JSON array:
["sport","news"]. Use it when a single value contains a comma, for example["Sports, general","news"].
Leaving a List Tag’s cell empty keeps the subscriber’s existing value for that Tag unchanged. To clear the subscriber’s value for a List Tag, use an empty JSON array ([]) instead. For Tags of other types (String, Integer, Date), an empty cell is imported as-is and overwrites the subscriber’s existing value.
2. Upload CSV
Anchor link to-
Select the project. Tag values are updated in this project only. If an identifier isn’t registered in this project, its row gets no Tag values.
-
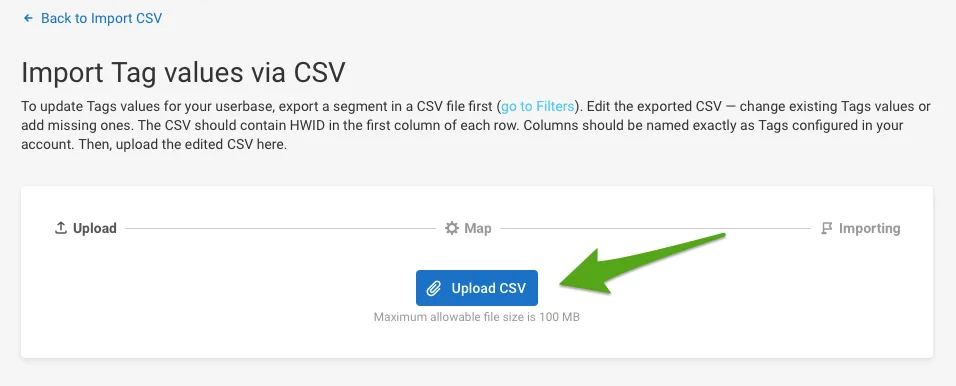
Go to Import CSV → Update Tag values.

-
Click Upload CSV and select your file.
3. Choose Tags to update
Anchor link to-
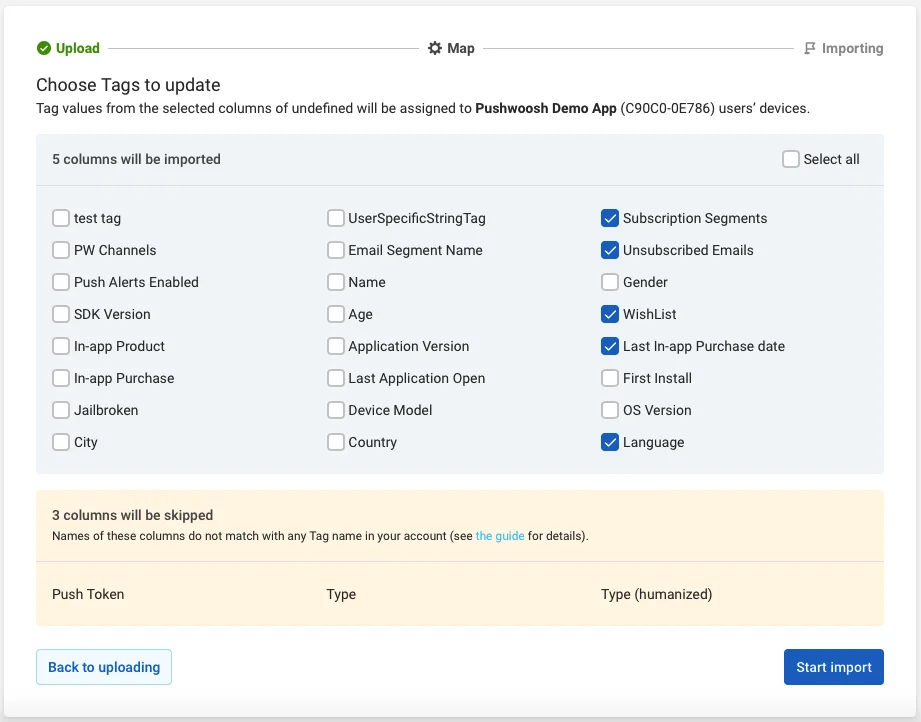
Choose the identifier type your CSV uses, HWID or User ID, and the column that contains it. The type decides which Tags can be updated:
- HWID: device-specific Tags, such as SDK Version.
- User ID: user-specific Tags, whose values belong to the user profile rather than a device.
Pushwoosh shows which Tags will be imported and which will be skipped for the type you picked.
-
Select the columns to import.
-
Click Start import.
4. Check the results
Anchor link toThe import status updates in real time. Large files can take a while, so you can leave the page and check back later.
When the import completes, the report confirms that tag values from the selected columns were updated. Check its counts:
- Matched: CSV rows, not devices, whose identifier found at least one device.
- Updated: devices, not rows. In a User ID import, one row can match several of the user’s devices, so this number can be higher than Matched.
- Updated users: in a User ID import only, the number of distinct users with at least one updated device. Two rows for the same user count as one.
A row is skipped for one of two reasons:
- No device matches the identifier. Pushwoosh checks it against HWID, User ID, or push token, regardless of which identifier type you chose in step 3.
- The identifier column is empty. The row never reaches device matching.
Matched rows plus skipped rows should add up to the total rows in the file.
