Mixpanel: track event
Use Mixpanel: track event to send one event to a Mixpanel project from a journey step, through the Import API, with the properties you list. This point authenticates with its own Mixpanel service account. It doesn’t use any account-level Mixpanel integration configured elsewhere in Settings.
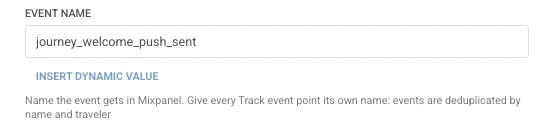
Pushwoosh sets Mixpanel’s $insert_id for you from the traveler. That means the same traveler passing through this exact point twice, for example on a second lap of a looping journey, lands as one deduplicated event in Mixpanel, not two. Deduplication is scoped to insert ID and event name together, so give every Track event point on the canvas its own Event name: reusing one across two different points can drop one traveler’s event as a duplicate of the other’s.
Typical uses:
- Log journey milestones: send an event when a traveler reaches a step, so it shows up next to your product events in Mixpanel funnels.
- Feed a cross-channel funnel: log push, email, or SMS milestones alongside in-app events for one funnel view in Mixpanel.
- Track a looping journey safely: the built-in deduplication means a traveler who loops back through this step still lands as one event, as long as each Track event point has its own Event name.
Configure the point
Anchor link to- Drag Mixpanel: track event from the Integrations section onto the canvas.
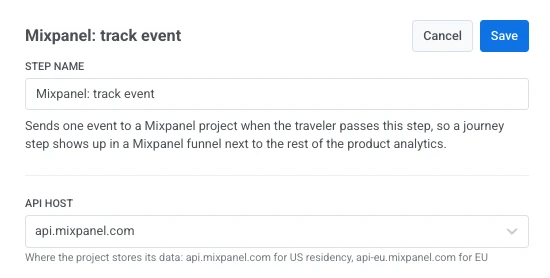
- Double-click the point and enter a Step Name.
- In API host, pick the region the Mixpanel project stores its data in:
api.mixpanel.comfor a US project,api-eu.mixpanel.comfor an EU one.
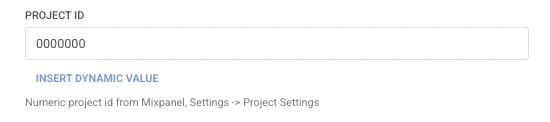
- In Project ID, enter the numeric project ID from Mixpanel: Settings > Project Settings.
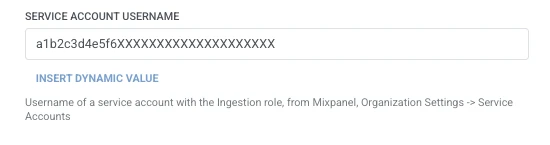
- In Service account username, enter the username of a Mixpanel service account with the Ingestion role, from Organization Settings > Service Accounts.
- In Service account secret, enter that service account’s secret. Pushwoosh combines the username and secret into the request’s Basic Authorization header for you. The secret is stored masked, like a webhook secret header, and Mixpanel only ever shows it once, when the service account is created. Copy it then.

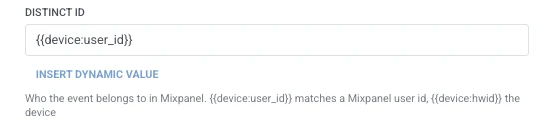
- In Distinct ID, enter who the event belongs to in Mixpanel. Defaults to
{{device:user_id}}; use{{device:hwid}}instead to key events by device.
- In Event name, enter the event name Mixpanel should show, for example
journey_welcome_push_sent.
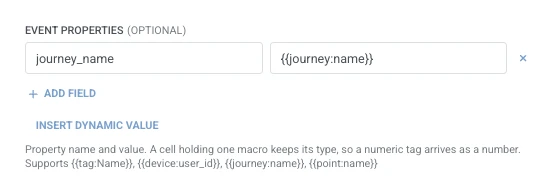
- In Event properties, add one row per property to send with the event. Enter the property name and the value. Names must be non-empty and unique. A value that’s a single traveler macro keeps its own type in Mixpanel (
{{tag:Age}}arrives as a number,{{tag:Trial Ends}}as a date). Any other text is sent as a string. Macros use the same syntax as a Webhook body. Or click Insert Dynamic Value to pick an attribute an earlier step in this journey produced, for example an LLM response or a mapped Webhook value.
- Click Save.
Response
Anchor link toThe traveler continues to whatever step you connect next on the canvas.
Attributes after the step runs
Anchor link toThis point doesn’t map any response data back into the journey.
Failures and unexpected responses
Anchor link toA failed request drops the traveler from the journey. See Errors and failed requests.
Example scenario: Logging journey sends into a Mixpanel funnel
Anchor link toA team wants a welcome push send to show up in the same Mixpanel funnel as their other product events.
- Add Mixpanel: track event right after the step that sends the welcome push. Set Distinct ID to
{{device:user_id}}and Event name tojourney_welcome_push_sent. In Event properties, setjourney_nameto{{journey:name}}. - Click Save.
Once this runs, the send shows up in Mixpanel next to other product events, so the funnel reflects the full picture instead of a gap where the journey step doesn’t report.