Webhook
Webhooks let you send journey data to external services such as analytics, CRM systems, and marketing tools. You can:
- Notify external systems when a customer takes an action in the journey
- Send customer data to analytics tools
- Trigger third-party emails, SMS, or WhatsApp on specific journey events
How to set up the Webhook element
Anchor link toAdd the Webhook element
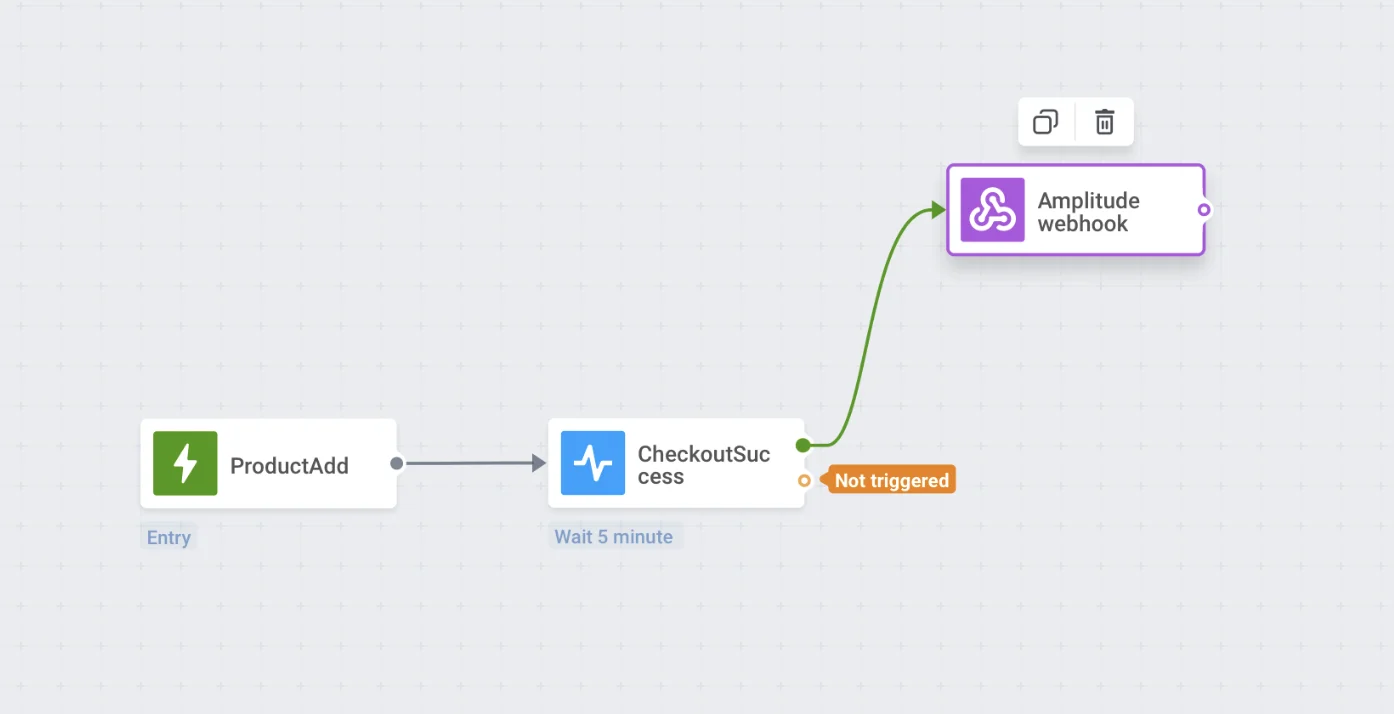
Anchor link toDrag-and-drop the Webhook element to the canvas. Place Webhook anywhere you’d like, keeping in mind what journey info you’re going to send to a third-party service.
Name the Webhook step and specify the request URL and type
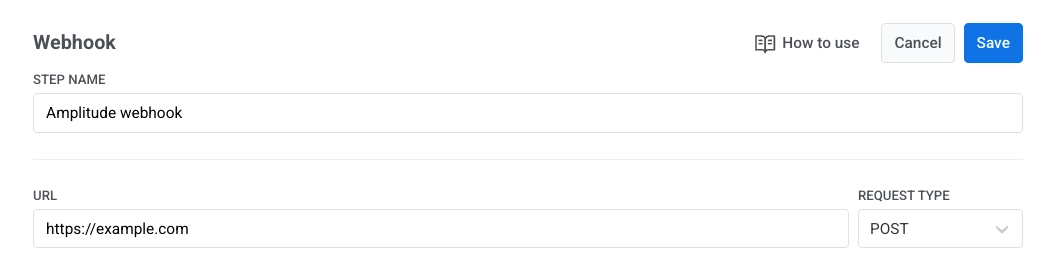
Anchor link toIn the STEP NAME field, enter a name for the webhook. It might be handy to name webhooks according to the services they send data to or the use case.
Next, in the URL field, specify the request URL to which the data should be sent. Next to the URL field, select the request type from the REQUEST TYPE dropdown: GET or POST.
Configure headers
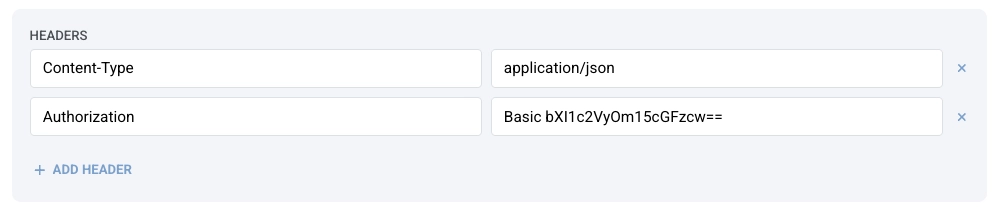
Anchor link toIn the HEADERS section, set the content type.
By default, the content type is application/json. If the service you’re sending the webhook to requires another content type, enter the appropriate one in the Content-Type header value.
Examples of content types are:
x-www-form-urlencodedtext/plaintext/xml
Add additional headers if needed by clicking + ADD HEADER. You can remove any header by clicking the ‘x’ icon next to it.
Add whatever authentication header your endpoint requires, for example:
Authorization: Bearer <token>X-Api-Key: <key>Authorization: Basic <base64(user:pass)>
Only a static secret in a header is supported. OAuth2 token-exchange flows, mTLS, and request signing on the Pushwoosh side aren’t supported. You can also restrict the endpoint to Pushwoosh’s IP addresses instead of, or in addition to, a header secret. See Pushwoosh IP addresses.
For HTTP Basic authentication specifically, do the following:
- Open a plain text editor and type your username and password with no spaces, separated by a colon. For example:
<username>:<password> - Encode this string into Base64.
- Copy the resulting Base64 string (for example,
<base64-encoded-string>). - In the webhook settings, add an Authorization header with the value:
Basic <base64-encoded-string>. Make sure there is a space after the word “Basic”.
Mark a header value as secret
Anchor link toClick the eye icon next to a header’s value to mask it. Pushwoosh hides that value everywhere it would otherwise leave the service: in the UI, in API responses, and in the journey’s version history.

- Automatic masking. Headers whose names look like credentials are masked automatically, even if you never click the eye icon. This includes
Authorization,Proxy-Authorization,Cookie,Set-Cookie, and any name containingtoken,secret,password,credential,auth, orapi-key/api_key/apikey(with a hyphen, an underscore, or no separator). - Change a masked value. Click into the field showing
••••••••and type the new value. There’s no button to reveal the stored value. The eye icon stays locked while the mask is shown. To remove the secret flag from a header, type a new value first, then click the icon. - Rename a masked header. Renaming a header whose value is currently shown as the mask clears that value. Enter it again under the new name. Renaming a header that currently holds a value you just typed keeps that value.
Add the JSON request body
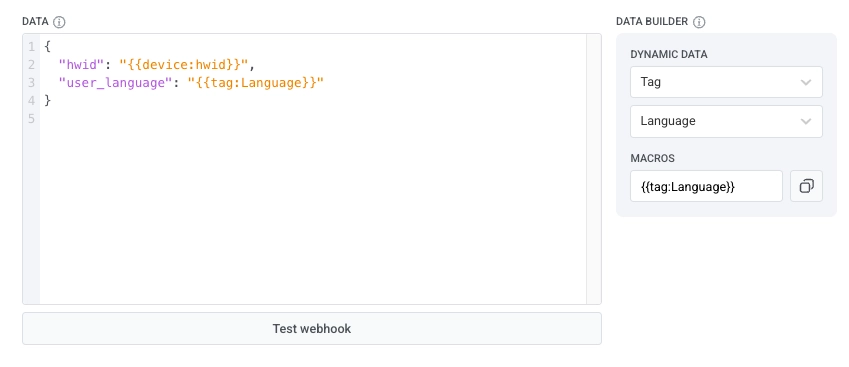
Anchor link toIn the DATA section, enter your JSON request body. Make sure the request body is in correct JSON format.
Example:
{ "hwid": "{{device:hwid}}"}Use dynamic data and macros
Anchor link toThe DATA BUILDER panel allows you to insert dynamic information (such as user, device, tag, or event data) directly into your JSON request body. With Dynamic Data, you can include values specific to the individual user progressing through the journey.
For this:
- Select a category. You can pull data from three categories:
-
Device: Use Device data when you need technical information tied to the user’s device.
-
Tag: Use Tag data when you want to send information stored in the user profile.
-
Event: Use Event data when the webhook should send values from the triggering event of the journey.
- Select a parameter (for example, HWID, favourite category, etc.).
- Pushwoosh generates a macro that looks like this:
{{tag:Language}}- Copy the macro and paste it into your JSON body in the DATA section.
When the webhook runs in a live journey, Pushwoosh automatically replaces the macro with the actual value for that user.
Type additional placeholders manually
Anchor link toA placeholder is a macro you type by hand instead of generating it from a DATA BUILDER category. The DATA BUILDER panel only covers Device, Tag, and Event data. Type these placeholders directly into the URL, HEADERS, or DATA section instead. They don’t appear in the panel:
| Placeholder | Value |
|---|---|
{{application_code}} | The application code of the app the traveler belongs to. |
{{traveler:id}} | The ID Pushwoosh assigns to this traveler for this journey run. |
{{journey:uuid}} | This journey’s UUID. |
{{journey:name}} | This journey’s name. |
{{point:uuid}} | This Webhook step’s UUID. |
{{point:name}} | This Webhook step’s STEP NAME. |
{{event:name}} | The name of the event that triggered this traveler’s entry into the journey. |
{{device:platform}} | The device’s platform, for example Android or iOS. |
{{device:push_subscribed}} | Whether the traveler is subscribed to push notifications — true or false. |
{{now}} | The current date and time, ISO 8601, UTC. |
{{now:unix_ms}} | The current time as Unix milliseconds. |
{{tags:all}} | Every tag value for the traveler’s device, as one JSON object. Use it unquoted, for example "user_properties": {{tags:all}}. Quoting it turns the object into an escaped string instead. |
Keep a placeholder’s type in the JSON body
Anchor link toA placeholder inside quotes always becomes a JSON string, whatever type the value actually is. The same placeholder on its own, with no quotes around it, keeps the value’s own type instead: a number stays a number, true/false stays a boolean, and a list becomes a JSON array. An unquoted placeholder must be the field’s entire value — "age": {{tag:Age}} works, but "note": prefix{{tag:Age}}suffix doesn’t, because everything outside quotes is written out exactly as typed and the extra characters break the JSON.
{ "age": {{tag:Age}}, "age_as_text": "{{tag:Age}}"}Here age sends the tag’s numeric value (34), while age_as_text sends the string "34". Use whichever the field on the receiving end expects. If the tag has no value, an unquoted placeholder still resolves to an empty string, not a number or false. See the note under Add the JSON request body.
Map webhook response data to variables
Anchor link toBesides sending data out, the Webhook step can keep values from the reply your service sends back. You give each value a name (Attribute). Later steps can use that name the same way they use other webhook response values. For example, set a Tag with Update user profile, or schedule a Time Delay from a date the service returned. For a full journey example, see Using webhook response data in your journey.
Example: the CRM returns a user ID. You store it as Attribute crm_user_id. Then Update user profile writes it to a Tag.
Before you map anything, get one sample response from the service. Ask your developer, or open a successful call in Calls log after a test and look at the response body. You need the field names from that reply to build Path.
In the RESPONSE MAPPING section, click + ADD MAPPING and fill in two fields for each value you want to capture:
- Path: the location of the value inside the response JSON body, with dots between levels
- Attribute: the name you will use later in the journey
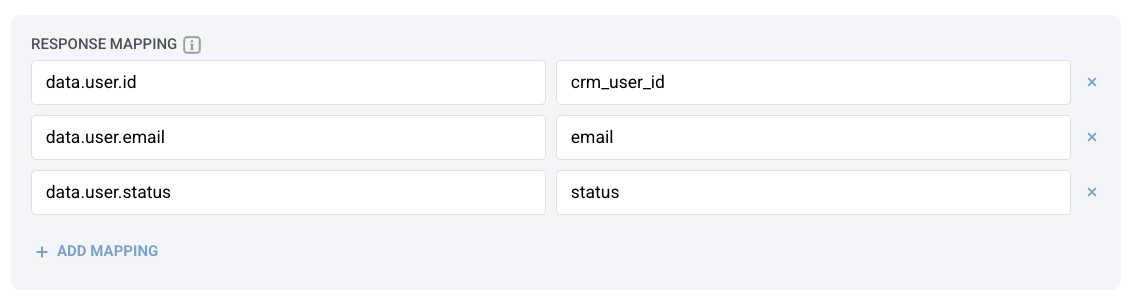
For example, if your CRM responds with:
{ "data": { "user": { "id": "789xyz" } }}- Set Path to
data.user.id. - Set Attribute to
crm_user_id.
After a user passes this step, later elements can pick Attribute crm_user_id the same way they pick other webhook response values.
Condition split cannot use them directly. Mapped webhook values have no type. Save the value as a Tag first, then branch on that Tag. See Compare a webhook value in Condition split.
For a single field, Path and values work like this:
Map every element of an array
Anchor link toSometimes a webhook response doesn’t have just one value. It has a list, like every product in an order, every item in a cart, or every result from a search. Response mapping normally captures one value per field, so without this you’d only get one mapped value from that list, and the rest would be lost.
Put * in the Path field where the list is. Pushwoosh then grabs a value from every item in the list, not just one position. For example, if the list is called items and each item has item_name, set Path to items.*.item_name.
In RESPONSE MAPPING, click + ADD MAPPING and fill in the two fields as usual, with * marking the list:
- Path: the location of the value inside the response, with
*where the list is. Example:items.*.item_name. - Attribute: the name you’ll use later. What you write here decides how you get the results back:
- Include
{n}in the name, for exampleitem_{n}, to get each item as its own value, numbered from 1:item_1,item_2,item_3, and so on.{n}can sit anywhere in the name, for exampleitem_{n}_sku. - Leave
{n}out, for exampleitem_names, to join every item into one value, separated by commas:Sofa, Lamp, Rug.
- Include

Path list positions start at 0 (items.0.item_name is the first item). Attribute names built with {n} start at 1 (item_1 is that first item). These are two different numberings.
If you only need one item from the list, use a number in Path instead of *, for example items.0.item_name.
Example
Anchor link toIf your CRM responds with:
{ "items": [ { "item_name": "Sofa" }, { "item_name": "Lamp" }, { "item_name": "Rug" } ]}- Set Path to
items.*.item_nameand Attribute toitem_{n}to get three separate values:item_1is Sofa,item_2is Lamp,item_3is Rug. - Set Attribute to
item_namesinstead to get one value:item_namesisSofa, Lamp, Rug.
You can use the mapped values later in the journey like any other webhook response attribute:
- Update user profile: save a value to a Tag
- Time Delay: wait until a date from the response
- Dynamic Content: personalize message content
Condition split cannot use them directly. Mapped webhook values have no type. Save the value as a Tag first, then branch on that Tag. See Compare a webhook value in Condition split.
Timeout, retries, and failed requests
Anchor link toPushwoosh waits up to 10 seconds for a response. The whole Webhook step, including sending the request and processing the response, is capped at 30 seconds.
Retries
Anchor link toOn a 500, 502, 503, or 504 response, or a network error such as a connection failure, Pushwoosh retries the request once before giving up. A request that times out is not retried — see What happens when a request fails below. Any other non-2xx response is not retried either.
Rate limits
Anchor link toPushwoosh limits how many webhook requests an account can send per second. The limit is sized well above real traffic peaks, so normal journeys aren’t affected. A burst that exceeds it waits briefly for room before failing.
Endpoint cooldown
Anchor link toIf an endpoint fails several times in a row, Pushwoosh stops sending it requests for a while instead of retrying a broken endpoint on every traveler, starting at 30 seconds and doubling on further failures up to 5 minutes. A single successful request clears this and resumes normal delivery.
What happens when a request fails
Anchor link toThe Webhook element has no separate branch for failed requests. Any of the following drops the traveler from the journey at this step:
| Cause | What triggers it |
|---|---|
| Blocked endpoint address | The URL is private, internal, loopback, or link-local, including cloud metadata endpoints |
| Rate limit | The account’s per-second webhook request limit is exceeded and no room opens up during the brief wait |
| Endpoint cooldown | The endpoint failed several times in a row and Pushwoosh is temporarily skipping it |
| Timeout | No response within 10 seconds, or the step exceeds its 30-second cap |
| Network error | The request couldn’t reach the endpoint at all |
| Non-2xx response | The endpoint returned an error status that isn’t retried, or was retried once and failed again |
See Request error.
If you can’t afford to lose travelers here, have your endpoint always return a 2xx response and put any failure state in the response body instead, for example as a value your Response mapping can pick up.
This applies to every Webhook step, including ones created earlier. An endpoint address that now matches the blocked-address rule above will start failing the same way.
Unlike a failed request, a response that arrives but doesn’t map cleanly, such as invalid JSON, an unresolved Path, or a body over 64 KB, does not drop the traveler. See the note under Response mapping above.
Test the Webhook
Anchor link toClick Test webhook to verify that your webhook configuration is correct and the request is sent successfully.
If a header still shows the stored mask, Pushwoosh fills in the real, saved value for the test request. The value never appears in your browser.
This substitution only works for a header already saved on this exact step. A step you haven’t saved yet, or one you just copied, has no saved value behind the mask, so Pushwoosh sends the test request without that header.
After a successful test (or a live call), open Calls log, expand the row, and compare the response body with each Path. The field must exist exactly as in Path. If the request succeeds but a later step has no value, Path usually does not match the response. The Webhook step will not show an error for that.
Save your configuration
Anchor link toClick Save to save your webhook configuration.
Calls log
Anchor link toOpen the Calls log tab in the point’s drawer to see what Pushwoosh actually sent for this step: time, user, result, and duration, going back 30 days.
Filter by result (Success, HTTP error, No response) or search by the exact User ID or HWID. Click a row to expand it and see the request (method, URL, and body) and, depending on the outcome, either the response (status and body) or the error text. Duration covers the whole step, including time spent on an automatic retry.