Viber
Use the Viber element to send Viber messages in a Customer Journey. Drag Viber onto the canvas, then choose the content and delivery settings below.
Select message content
Anchor link toChoose how to define the message content.
Template
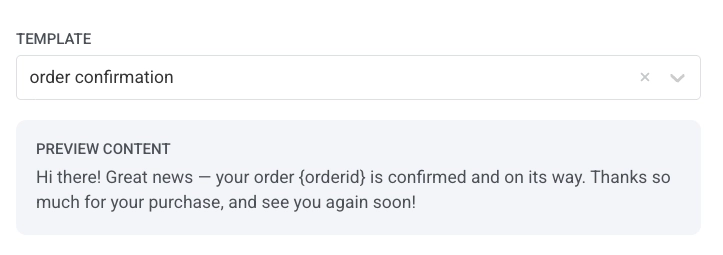
Anchor link toSelect a Viber template from your Omni Messaging account. You create templates in Omni Messaging, not in Pushwoosh, and Rakuten Viber approves transactional templates. Messages sent with an approved transactional template are billed at the lower Transactional rate.
In the template list, pick:
- Transactional template: keeps an approved template attached. Only approved transactional templates appear in the list.
- Promo template: a saved campaign template that doesn’t need approval. It loads its content as editable Freeform content, either text with an image and a button (set up under Add an image and a button) or text with carousel cards (set up under Send a carousel).
The list shows only promo templates with text, an image, a button, or carousel cards. Promo templates with other content, for example a video, don’t appear. If you don’t see a template, check its content in Omni Messaging.
To change the order of templates in the list, click the sort button above the dropdown and choose Name A→Z or Name Z→A. Until you pick an order, the list is sorted by Name A→Z. Pushwoosh remembers your choice and applies it to every Viber template picker you open, in one-time messages and journeys alike.
Freeform
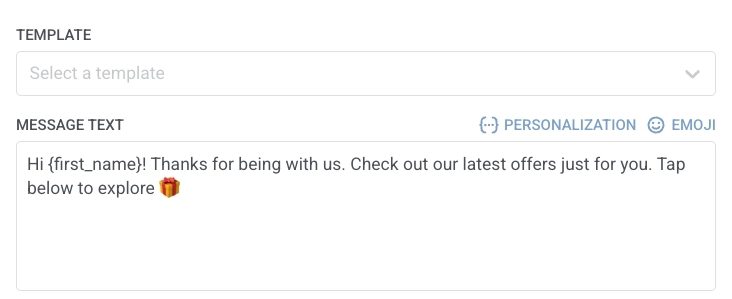
Anchor link toEnter plain-text content directly into the message field. Freeform messages don’t require template approval, but are billed at the Promotional rate.
For transactional and OTP messages, Rakuten Viber requires an approved template. Freeform content sent for these messages is billed at the Promotional rate.
Add an image and a button
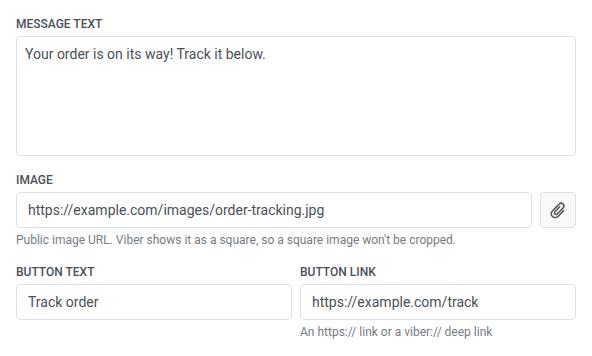
Anchor link toOn Freeform content (typed from scratch or loaded from a promo template), add an image and a button if you need them:
- Image: enter a public image URL (
http://orhttps://), or click the attachment icon and choose a JPG or PNG from your media library (up to 10 MB). For a typed URL, Pushwoosh checks that it’s a validhttp://orhttps://URL with a host, but not the file format or size. Viber shows the image as a square, so a square image won’t be cropped. - Button text: enter up to 30 characters. Requires message text and a button link. A button can’t appear on its own.
- Button link: enter an
http://orhttps://URL, aviber://deep link, or an Omni token (a placeholder your Viber provider resolves at send time, for example{lp-100}).
Send a carousel
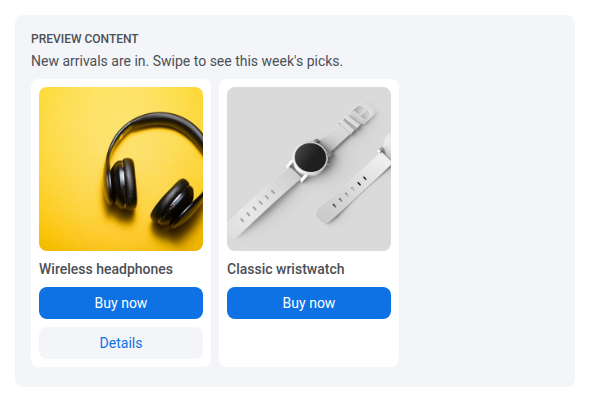
Anchor link toA carousel is a row of 2 to 5 cards that the recipient swipes through under the message text. Each card has a title, an image, and one or two buttons. You can’t build a carousel from scratch in the journey element. Start from a carousel promo template in Omni Messaging, the platform that holds your account’s Viber templates.
- In Template, choose a carousel template from Promo templates. The list shows template names only, so you can tell a carousel template only once you choose it. Its message text and cards load into the element, and the Carousel section appears.
- Check the message text. A carousel requires it.
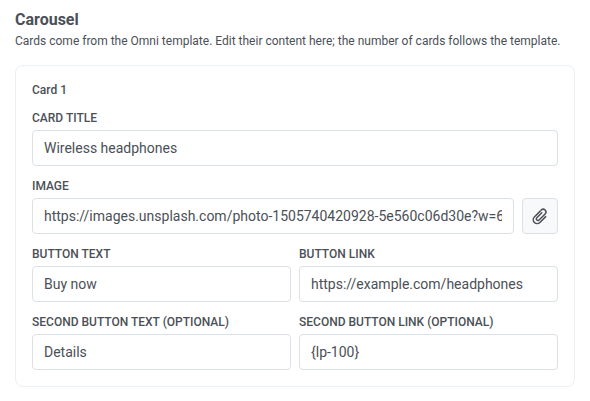
- Edit each card:
- Card title: 2 to 38 characters.
- Image: enter a public image URL (
http://orhttps://), or click the attachment icon and choose a JPG or PNG from your media library (up to 10 MB). As with a single image, a typed URL isn’t checked for format or size. The preview crops each card image to a square, so a square image shows in full. - Button text and Button link: required on every card. Button text is up to 10 characters. The link takes the same values as a single button.
- Second button text (optional) and Second button link (optional): fill in both or leave both empty. Second button text is up to 12 characters.
If a card value goes over a limit, the field shows an error, for example Card title must be 2 to 38 characters, and the element can’t be saved until you fix it.
You can’t add or remove cards in the element, because their number comes from the template. To change the number, edit the template in Omni Messaging and choose it again.
To check how the carousel looks, open Preview content. The cards appear in a row under the message text. Scroll sideways to see all of them.
To send a carousel through the API instead, see the carousel field of the Messaging API.
Personalize message with event attributes
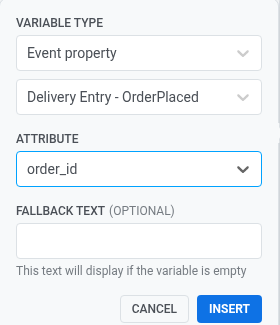
Anchor link toWhen your Template includes placeholders (for example an order ID or a verification code), map each one so every recipient sees their own values.
Click a placeholder to open the variable picker. Set Variable type to Event property, choose the event, then pick the Attribute that supplies the value. Optionally add Fallback text for when the value is missing. You can also map placeholders from attributes on an API-based journey entry. Learn more
Set message type
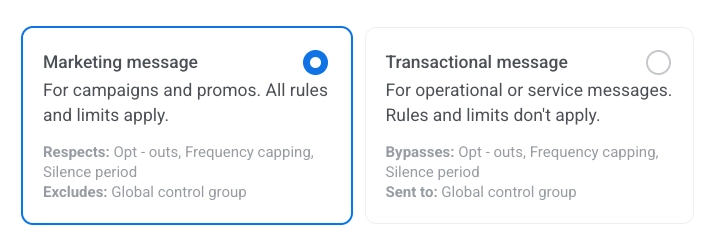
Anchor link toChoose Marketing message or Transactional message. Message type sets delivery rules. It does not change the Viber rate from Template or Freeform.
- Marketing message: use for campaigns and promos. Frequency capping applies. Users in the control group don’t receive the message.
- Transactional message: use for operational or service messages. Frequency capping does not apply. Users in the control group still receive the message.
No message type is preselected. Until you choose one, the element shows a Message type not selected warning. If the element is reached only from an Audience-based entry, Marketing message is shown with a Default badge. Choose Transactional message if the message is a service one.
Learn how message type affects delivery.
Set frequency capping
Anchor link toUse Frequency capping to limit how often users receive Viber messages, preventing over-messaging and reducing churn. Choose one of the following options:
-
Use global frequency capping settings
Apply the project-wide limits configured in your Global frequency capping settings.
For example, if the global limit is set to 3 Viber messages in 9 days, additional messages exceeding this limit will be skipped.
-
Send messages without global frequency capping
The user will receive this message even if they’ve exceeded the channel’s message limits. Use this option with caution to avoid over-messaging.
-
Use custom frequency capping
Set a custom message limit for this message. If the user exceeds this custom cap, the message will be skipped, and the user will proceed to the next step.
Choose a counting mode for this custom limit: Rolling window or Calendar day.
Split flow by delivery status
Anchor link toTo split the journey by Viber delivery status:
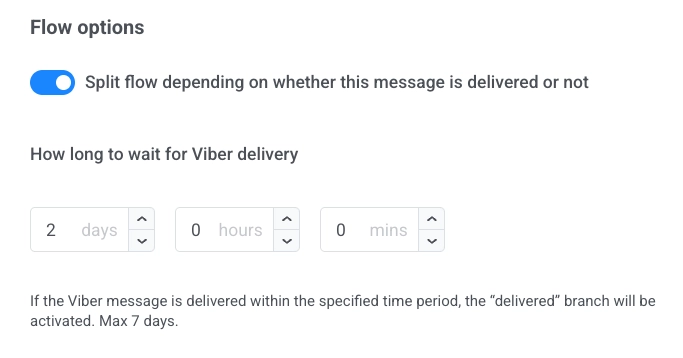
- Enable Split flow depending on whether this message is delivered or not.
- Set how long to wait for delivery (maximum 7 days).
If the message is delivered within the wait period, users follow the delivered branch. Otherwise, they follow the not delivered branch.
Use vouchers
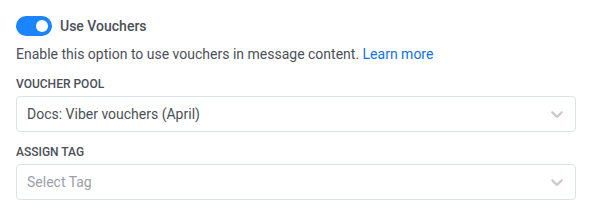
Anchor link toTo include a unique voucher code from a pool in the Viber message:
- Ensure your Viber message content includes the placeholder
{{voucher}}. - In the Viber message step, toggle Use Vouchers to ON.
- Select the appropriate Voucher Pool that contains your voucher codes. Make sure the pool is created in advance.
- (Optional) Use the Assign Tag field to apply a tag to users who receive a voucher. This helps with segmentation and reporting.
After configuring the Viber element, click Save to apply your settings.