Mixpanel: set profile
Use Mixpanel: set profile to update the Mixpanel profile of the traveler from a journey step, through the Engage API, authenticating with a project token. No separate connection or service account is needed.
Typical uses:
- Sync tags into Mixpanel segments: push plan, email, or another tag onto the Mixpanel profile so Mixpanel cohorts match Pushwoosh audiences.
- Keep profiles current without a separate sync job: update the profile at the exact journey step where the tag changed.
- Pair with Track event: use the same Distinct ID as the paired Mixpanel: track event point so events and profile updates land on the same Mixpanel person.
Configure the point
Anchor link to- Drag Mixpanel: set profile from the Integrations section onto the canvas.
- Double-click the point and enter a Step Name.
- In API host, pick the region the Mixpanel project stores its data in:
api.mixpanel.comfor a US project,api-eu.mixpanel.comfor an EU one.
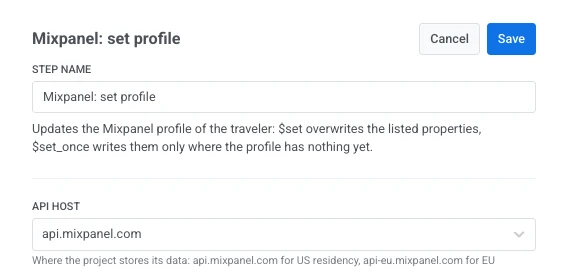
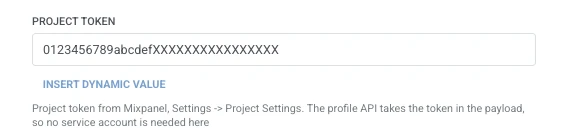
- In Project token, enter the project token from Mixpanel: Settings > Project Settings. The profile API takes the token in the request body, so, unlike Mixpanel: track event, no service account is required here.
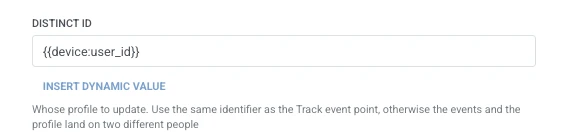
- In Distinct ID, enter whose profile to update. Use the same identifier as the paired Mixpanel: track event point, since both default to
{{device:user_id}}. A mismatch sends events and profile updates to two different Mixpanel people.
- In Update mode, choose $set to overwrite the listed properties every time, or $set_once to write them only where the profile doesn’t already have a value.

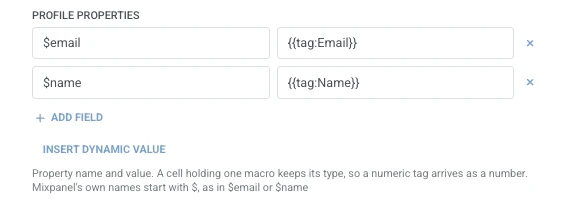
- In Profile properties, add one row per property to set on the Mixpanel profile. Enter the property name and the value. Names must be non-empty and unique. Use Mixpanel’s own reserved names where they apply, for example
$emailor$name. A value that’s a single traveler macro keeps its own type ({{tag:Age}}arrives as a number). Any other text is sent as a string. Macros use the same syntax as a Webhook body. Or click Insert Dynamic Value to pick an attribute an earlier step in this journey produced, for example an LLM response or a mapped Webhook value.
- Click Save.
Response
Anchor link toThe traveler continues to whatever step you connect next on the canvas.
Attributes after the step runs
Anchor link toThis point doesn’t map any response data back into the journey.
Failures and unexpected responses
Anchor link toA failed request drops the traveler from the journey. See Errors and failed requests.
Example scenario: Keeping a Mixpanel profile in sync with a journey update
Anchor link toA team wants a traveler’s plan tier to update on their Mixpanel profile as soon as it changes in Pushwoosh.
- Add Mixpanel: set profile right after the step where the plan tier changes. Set Distinct ID to
{{device:user_id}}(matching the paired Mixpanel: track event point) and Update mode to $set. In Profile properties, set$emailto{{tag:Email}}. - Click Save.
Once this runs, the Mixpanel profile reflects the plan change without a separate sync job.