LINE
The LINE element allows you to send LINE messages to users as part of your Customer Journey. You can choose between using a message preset for advanced formatting or entering simple free-form content.
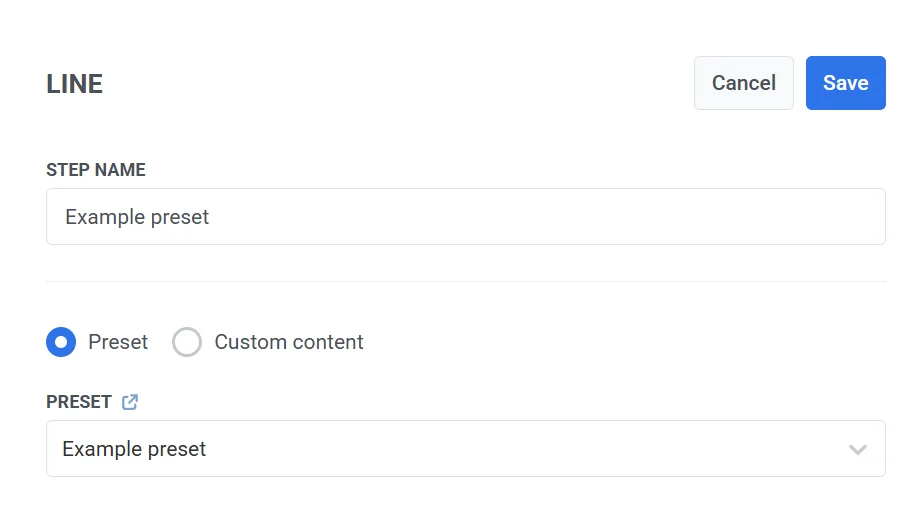
To configure the LINE element, enter a step name and choose how you want to define the message content:
-
Preset
Select from the LINE message presets you’ve created under Content > LINE Presets. Learn more about creating LINE presets -
Custom content
Enter plain-text content directly into the Custom content field.
To change the order of presets in the dropdown, click the sort button above it. The dropdown is sorted by Newest first until you pick another order, and Pushwoosh remembers the order you pick and uses it in every LINE preset dropdown, in one-time messages and journeys alike.
Note: When using custom content, no additional settings are available. Users will only receive the plain text you enter. To access advanced configuration options, use a preset.
Use vouchers
Anchor link toYou can personalize LINE messages by including a unique voucher code from a predefined pool. This is ideal for delivering promotions, discounts, or loyalty incentives through one-on-one communication.
To use vouchers in your LINE message:
- Ensure your LINE message template includes the placeholder
{{voucher}}. - In the LINE message step, toggle Vouchers to ON.
- Select the appropriate Voucher Pool that contains your voucher codes. Make sure the pool is created in advance.
- (Optional) Use the Assign Tag field to apply a tag to users who receive a voucher. This helps with segmentation and reporting.
Branch on reply buttons
Anchor link toWhen the selected preset has quick reply buttons, for example a LINE copy of a rich message, the element gets a branch for each button, labeled with the button text, plus a Not match branch.
- The user waits up to 24 hours for a tap. A tap sends the user down that button’s branch. If there’s no tap within 24 hours, the user goes to Not match.
- The Split flow depending on whether this message is delivered or not toggle isn’t available, because the buttons branch the element.
- Only quick reply buttons get branches. A button that opens a link or calls a phone number doesn’t.
If you switch to a preset with different buttons and save the element, its arrows are removed. Reconnect the branches on the canvas.
Branch when the provider rejects the message
Anchor link toTo send users whose LINE message the provider rejected to a separate branch, for example to try another channel:
- In the element settings, turn on Branch when the provider rejects the message.
- Save the element.
- On the canvas, connect the Rejected by provider branch to the next element.
A user goes to Rejected by provider when LINE refuses the message at sending. Errors that Pushwoosh retries don’t lead to this branch.
- With quick reply buttons: a rejected message goes to Rejected by provider at once. Other users wait for a tap.
- With the delivery split: the element waits for the time set there.
- Otherwise: the element holds the user for up to 1 hour, and the canvas shows Wait for refusal: 1 hour. If the provider doesn’t reject the message within that time, the user continues through Sent.
Without a connected Rejected by provider arrow, a user whose message was rejected follows the element’s other branches. Turning the setting off removes the branch and its arrow.
Delivery-based flow control (optional)
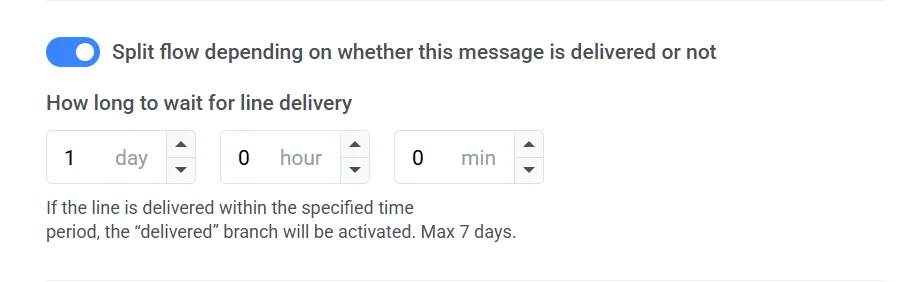
Anchor link toUse the Split flow depending on whether this message is delivered or not toggle to define how the journey should proceed based on delivery status:
-
Enabled: The journey splits into two paths—one for successful delivery and one for delivery failure.
-
Disabled: The journey continues along a single path, regardless of delivery outcome.
After configuring the LINE element, click Save to apply your settings.