Canva integration
The Canva integration links your Canva account to the Media storage of your Pushwoosh applications. Import pages of your Canva designs as images, open a stored image in the Canva editor, or start a new design sized for a push, in-app, or email image. When you finish in Canva, the result is saved back to the Media storage.
Integration overview
Anchor link toIntegration type
Anchor link toSource: Images come from your Canva designs and are saved to the Pushwoosh Media storage.
Prerequisites
Anchor link to- The Modify applications permission for the application whose Media storage you import into. See Multi-login accounts.
- A Canva account.
How does the integration work?
Anchor link toEach Pushwoosh user connects their own Canva account. The connection works for every application you can modify, and it sees only the designs in your Canva account. Teammates who want to import from Canva connect their own accounts.
Pushwoosh exports the pages you select from Canva and stores them in the Media storage like any other image. An image edited in Canva is saved as a new version of the original, so you don’t end up with duplicates.
Connect Canva
Anchor link toConnect Canva on the 3rd-party integrations page or right from the Media storage.
Connect from 3rd-party integrations
Anchor link to-
Go to Settings > 3rd-party integrations.
-
On the Canva card in Available services, click Connect.
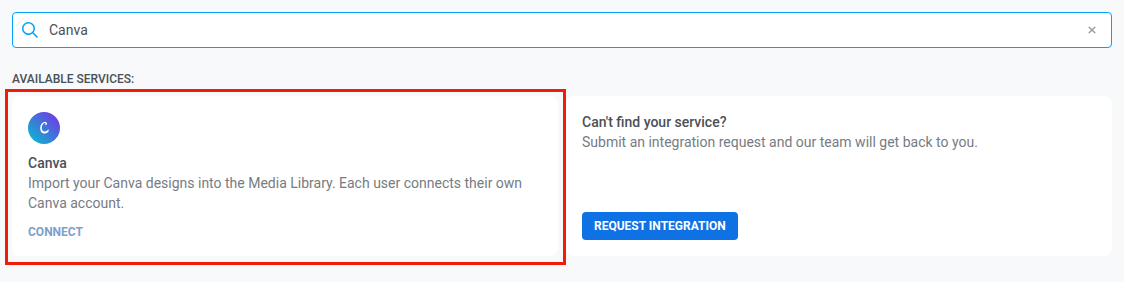
-
In the pop-up window, sign in to Canva and allow access for Pushwoosh.
Connect from the Media storage
Anchor link to- Go to Content > Media storage.
- Click Import from Canva.
- Click Connect Canva.
- In the pop-up window, sign in to Canva and allow access for Pushwoosh.
If the Canva window doesn’t open
Anchor link toIf your browser blocks the Canva window, allow pop-ups for the Control Panel and try again.
Import designs into the Media storage
Anchor link to- Go to Content > Media storage.
- Click Import from Canva next to the upload area.
- Find the design: type in Search designs, or click Load more below the list to see more designs.
- Click the design.
- If the design has several pages, select the pages to import. You can import up to 10 pages at a time. The first page is selected by default.
- In Format, select PNG or JPG.
- Click Import.
When the import finishes, the images appear in the Media storage with the Canva badge.
Each image is named after the design. When you import several pages, the page number is added to the name, for example Summer sale, page 2.
While the import runs:
- Stay on the Media storage page. If you leave it, the import stops.
- You can close the Import from Canva panel.
If the import stopped, the pages saved before that stay in the Media storage. Import the remaining pages again.
Edit an image in Canva
Anchor link toYou can open any image from the Media storage in the Canva editor: images imported from Canva, uploaded from your device, or added from other sources.
- Go to Content > Media storage.
- On the image, click the Edit in Canva icon. The Canva editor opens in a new tab.
- Edit the design in Canva.
- Within 24 hours, return to Pushwoosh from Canva. See Return to Pushwoosh in time.
Wait for Saved from Canva. The edited image is stored as a new version of the original and keeps the original’s format.
What you see in Canva:
- An image you imported from Canva: the original Canva design opens, on the page you imported.
- Any other image, or a Canva design you no longer have access to: Pushwoosh copies the image into a new design in your Canva account, and the Control Panel shows a message that you’re editing a copy.
Versions after editing
Anchor link toEach edit in Canva saves a new version of the image:
- The Media storage shows the latest version. A badge such as 2 ver. shows how many versions the image has.
- Each version has its own URL.
- Content that uses the previous URL keeps showing the previous version. To change the image there, copy the new URL and update the content.
Return to Pushwoosh in time
Anchor link toWhen you finish in Canva, click the Return to button in the top bar of the Canva editor, next to Share. Only then does Pushwoosh save your design to the Media storage. This works the same way when you edit an image and when you create a new design.
The design is saved if:
- You return within 24 hours. After that, the return link expires and your changes stay only in Canva. To save them, open the image in Canva again.
- You are signed in to Pushwoosh as the same user who opened Canva.
After you return, the Media storage page opens, even if you opened Canva from the image picker in an editor.
Create a new design in Canva
Anchor link toTo start a design from scratch at a size that fits your content:
- Go to Content > Media storage.
- Click Create in Canva.
- Select a size:
- Push big picture · 1024×512
- In-app / Rich Media · 1080×1920
- Email header · 600×300
- Design the image in the Canva tab that opens.
- Within 24 hours, return to Pushwoosh from Canva. See Return to Pushwoosh in time.
The design is saved to the Media storage as a new PNG image with the Canva badge. The image is named after the size, for example Pushwoosh 1024×512.
Create in Canva and Edit in Canva appear only after you connect Canva.
Image limits and errors
Anchor link toImage limits
Anchor link toEvery image saved from Canva follows the Media storage limits, whether you import it, edit it, or create it in Canva.
| Limit | What happens when an image exceeds it | Message in the Control Panel |
|---|---|---|
| 10 MB | A PNG is saved as JPG, and its transparent areas become white. A JPG isn’t saved. | file too large (max 10 MB) for a JPG |
| 25 megapixels | The image isn’t saved. | image resolution exceeds limit (max 25 MP) |
To save an image that exceeds a limit, reduce its size in Canva and import it again.
If an import fails
Anchor link toIf one page of an import fails, the import stops at that page:
- Pages saved before it stay in the Media storage.
- Pages after it aren’t imported.
Other messages
Anchor link toThese messages can appear when you connect Canva or import and edit designs.
| Message | Cause | What to do |
|---|---|---|
| Could not connect Canva | You declined access in the Canva window, or the connection didn’t complete. If you close the Canva window without answering, nothing changes. | Connect Canva again. |
| the Canva connection is no longer valid, connect Canva again | Canva no longer accepts your connection. | Connect Canva again. |
| the design is not found or no longer shared with you | The design was deleted, or its owner stopped sharing it with you. | Choose another design. |
| Canva rate limit, retry in… | Canva is temporarily limiting requests. | Wait for the time shown and try again. |
To connect Canva again, click Connect on the Canva card, or Connect Canva in the Import from Canva panel.
Disconnect Canva
Anchor link to- Go to Settings > 3rd-party integrations.
- On the Canva card in Connected services, click Disconnect.
You can also click Disconnect next to your Canva account name in the Import from Canva panel of the Media storage.
Disconnecting removes only your own connection. Images you already imported stay in the Media storage, and other users’ connections keep working.
If the Canva card shows Reconnect required, Canva no longer accepts your connection. Click Connect and allow access again.
Can I import from Canva with an API token?
Anchor link toNo. Canva is connected per Pushwoosh user, so importing and editing work only when you’re signed in to the Control Panel.
Which formats can I import?
Anchor link toPNG or JPG, up to 10 MB and 25 megapixels per image. An image edited in Canva keeps the format of the original: a JPG stays JPG, any other format is saved as PNG.
Can my teammates use my Canva connection?
Anchor link toNo. Each teammate connects their own Canva account and sees only their own designs.