การผสานรวมกับ Google Analytics
ฟีเจอร์ User ID ของ Google Analytics ช่วยให้คุณสามารถรวบรวมและใช้ข้อมูลผู้ใช้ที่ครอบคลุมโดยการเชื่อมต่อแหล่งข้อมูลหลายแห่งเข้ากับผู้ใช้คนเดียวกัน เชื่อมต่อ Pushwoosh กับ Google Analytics และใช้ข้อมูล GA สำหรับการแบ่งกลุ่มเป้าหมายและการกำหนดเป้าหมายแคมเปญ push notifications ของคุณ มาดูกันว่ามันทำงานอย่างไร
เปิดใช้งาน User ID
Anchor link toหากต้องการเปิดใช้งานฟีเจอร์ User ID ใน บัญชี Google Analytics ของคุณ ให้ทำตามคู่มือของ Google: https://support.google.com/analytics/answer/3123666
ตั้งค่า User ID ในโค้ดติดตามของคุณ
Anchor link toผสานรวม Pushwoosh Web SDK
Anchor link toหากต้องการผสานรวม Pushwoosh SDK ใน Google Tag Manager ของคุณ ให้ทำตาม คู่มือ Web Push SDK
สร้างแท็ก User ID ใน GTM
Anchor link toสร้าง Custom HTML Tag ที่ทำงานบนทริกเกอร์ All Pages
ใช้โค้ดต่อไปนี้เพื่อตั้งค่า User ID ที่ตรงกับข้อมูลผู้ใช้ระหว่าง Pushwoosh และ Google Analytics
ในตัวอย่างด้านล่าง เราใช้ Pushwoosh Hardware ID (HWID) เพื่อตั้งค่า User ID คุณสามารถใช้ตัวระบุอื่นได้ แต่โปรดระวังอย่าใส่อีเมลแอดเดรสหรือข้อมูลที่สามารถระบุตัวบุคคลอื่นใด (PII) ลงใน User ID เนื่องจากไม่เป็นไปตาม นโยบายความเป็นส่วนตัวของ Google Analytics
<script>  var registrationStatus = localStorage.deviceRegistrationStatus;  var registrationId = localStorage.deviceRegistrationId;  var gaRegistered = registrationStatus === 'registered' ? registrationId : false;
  if (!gaRegistered) {    var Pushwoosh = Pushwoosh || [];    Pushwoosh.push(['onPermissionGranted', function(api) {      api.getParams()        .then(function(params) {          var hwid = params.hwid;          ga('set', 'userId', hwid);          ga('send', 'pageview');          localStorage.setItem('deviceRegistrationId', hwid);          api.registerUser(hwid);        })    }])};</script>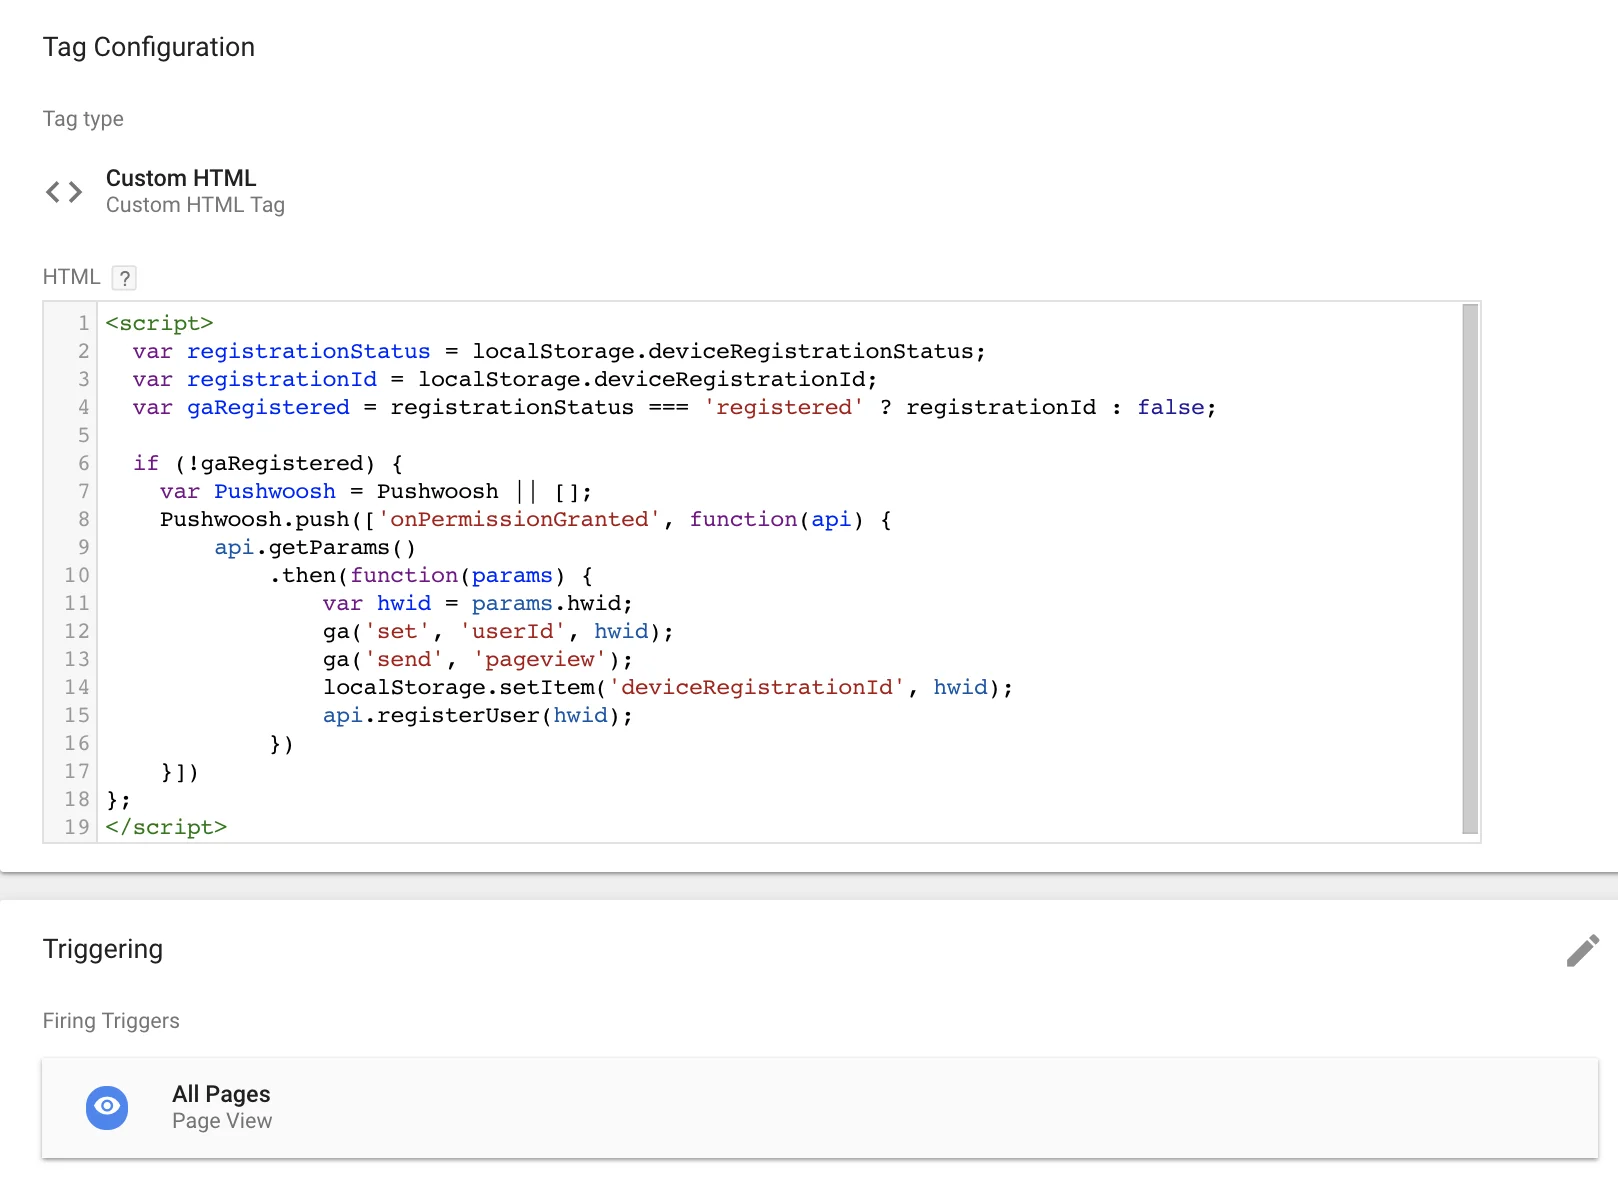
เพิ่ม User ID ไปยังแท็ก Page View
Anchor link toแก้ไข แท็ก Page View ของคุณเพื่อรวม User ID หากผู้ใช้มีข้อมูลดังกล่าว:
<script>  var hwid = localStorage.deviceRegistrationId;  var registrationStatus = localStorage.deviceRegistrationStatus;  var isNeedToTrackUser = hwid && registrationStatus === "registered";
  if (isNeedToTrackUser) {    ga('set', 'userId', hwid);  };  ga('send', 'pageview');</script>
ทดสอบด้วยรายงานความครอบคลุมของ User ID
Anchor link toหากต้องการทดสอบการผสานรวม ให้ใช้ “รายงานความครอบคลุมของ User ID”:
https://support.google.com/analytics/answer/3123670
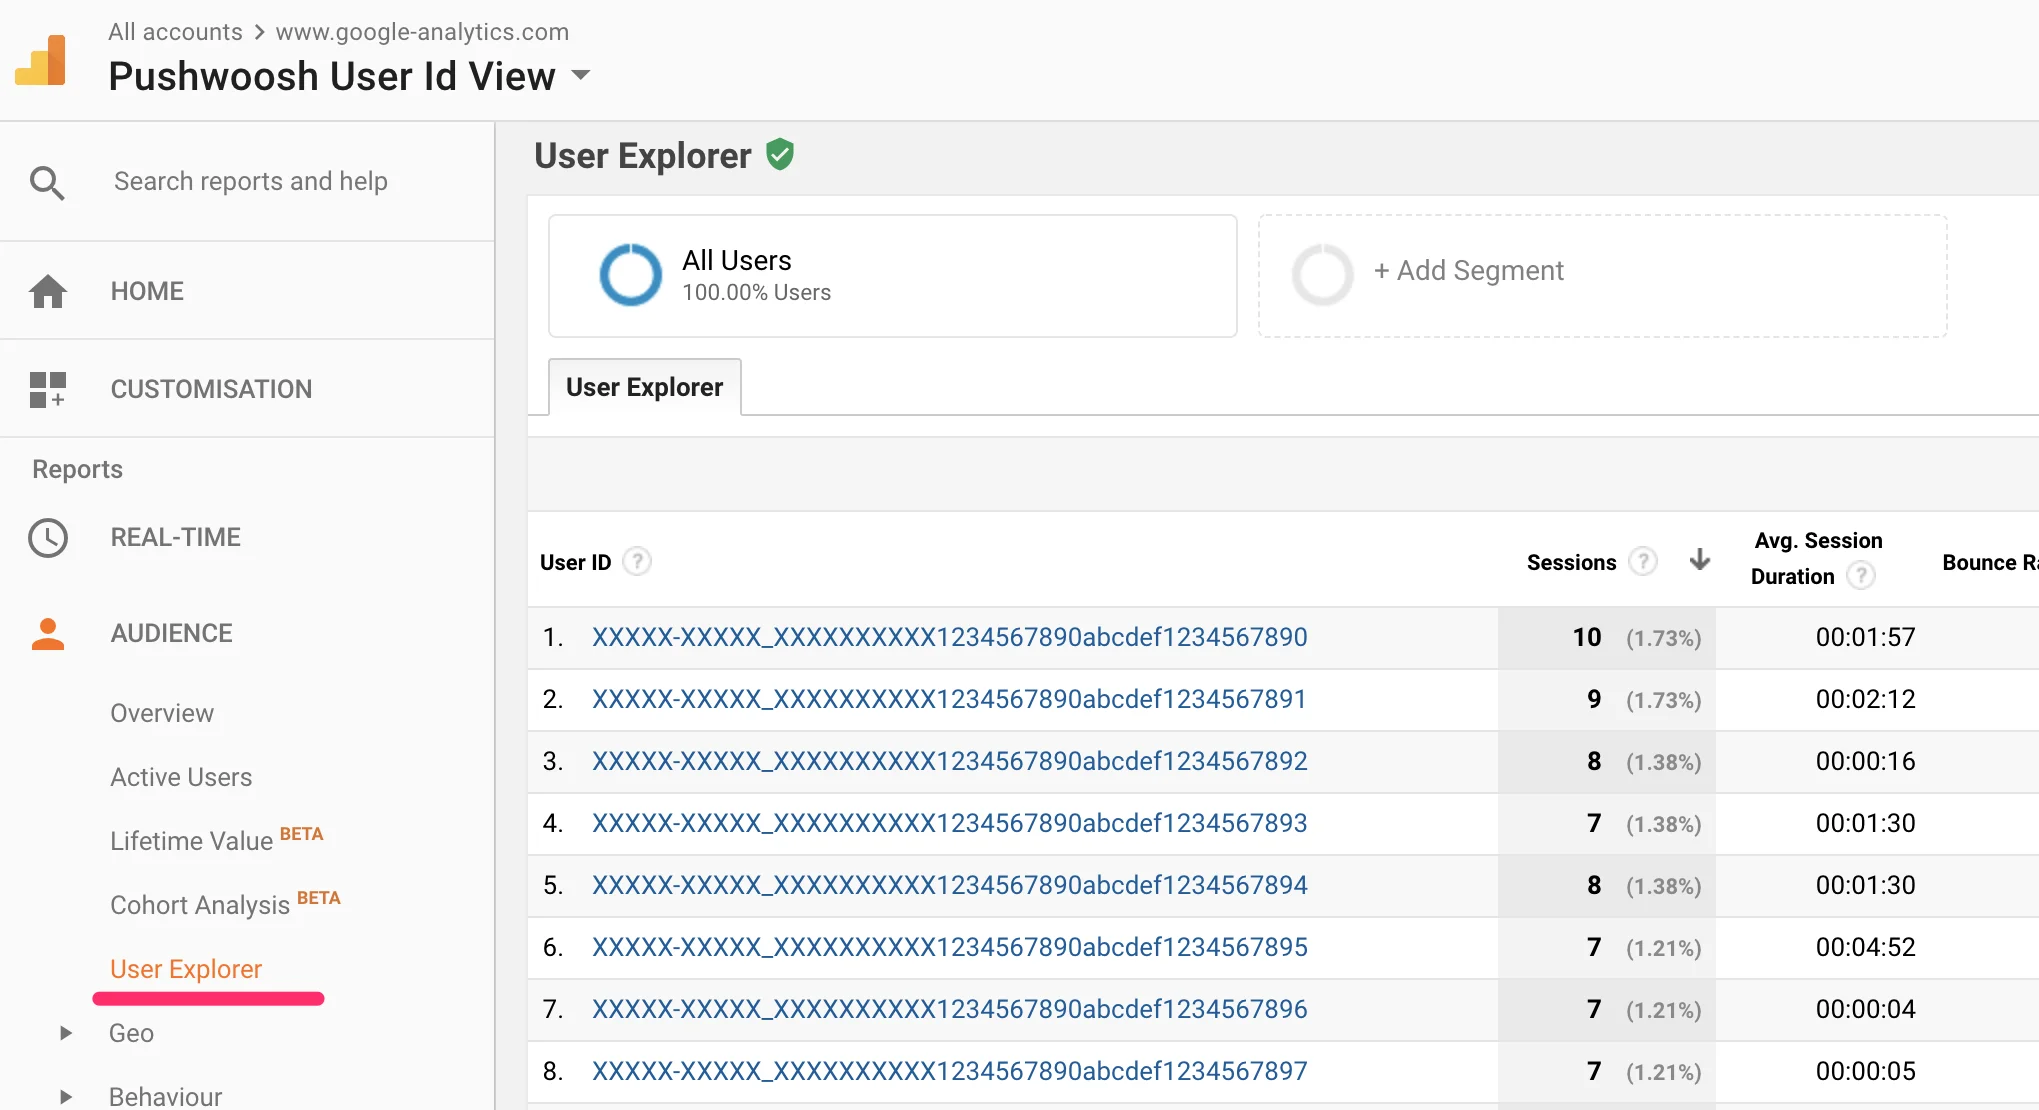
User Explorer
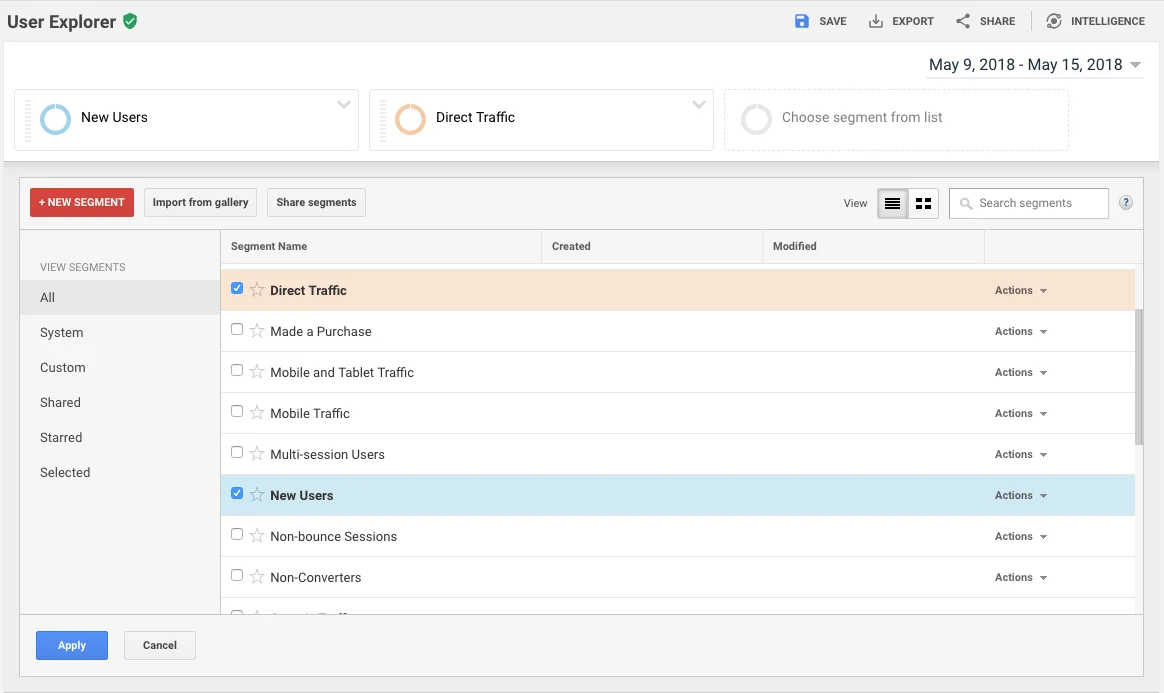
Anchor link toเลือกมุมมองการรายงาน User ID ของคุณใน Google Analytics เพิ่มเซกเมนต์ใดๆ ที่นั่นเพื่อแบ่งกลุ่มเป้าหมายของคุณ
คุณจะเห็น User ID ของคุณแสดงอยู่ในคอลัมน์ “User ID” ใช้ปุ่ม Export และเลือกตัวเลือก CSV เพื่อดาวน์โหลดรายการ User ID
ส่ง push notifications ไปยัง User ID ของ GA
Anchor link toหากต้องการส่งพุชไปยังผู้ใช้จากกลุ่มเป้าหมาย GA ของคุณ ให้ใช้ One-Time Push และในขั้นตอน Audience ให้เลือก Import segment อัปโหลดไฟล์ CSV ที่คุณส่งออกจาก Google Analytics และจับคู่คอลัมน์ที่มี User ID กับฟิลด์ User ID เรียนรู้เพิ่มเติม