Web push SDK 3.0
การผสานรวม
Anchor link toรับ Pushwoosh Web Push SDK และแตกไฟล์ คุณควรมีไฟล์ต่อไปนี้:
Anchor link to- pushwoosh-service-worker.js
วางไฟล์ทั้งหมดนี้ไว้ที่ไดเรกทอรีราก (root) ระดับบนสุดของเว็บไซต์ของคุณ
Anchor link toเริ่มต้น SDK:
Anchor link to- รวม SDK จาก CDN ของเราแบบ asynchronously
<script type="text/javascript" src="//cdn.pushwoosh.com/webpush/v3/pushwoosh-web-notifications.js" async></script>- เริ่มต้น Web Push SDK และตรวจสอบให้แน่ใจว่าได้จัดคิวการเริ่มต้นจนกว่า SDK จะโหลดเต็มที่
<script type="text/javascript">var Pushwoosh = Pushwoosh || [];Pushwoosh.push(['init', { logLevel: 'info', // ค่าที่เป็นไปได้: error, info, debug applicationCode: 'XXXXX-XXXXX', // application code ของคุณจาก Pushwoosh Control Panel apiToken: 'XXXXXXX', // Device API Token safariWebsitePushID: 'web.com.example.domain', // สตริง reverse-domain ที่ไม่ซ้ำกัน ซึ่งได้รับจาก Apple Developer Portal ของคุณ จำเป็นเฉพาะเมื่อคุณส่ง push notifications ไปยังเบราว์เซอร์ Safari defaultNotificationTitle: 'Pushwoosh', // ตั้งค่าชื่อเริ่มต้นสำหรับ push notifications defaultNotificationImage: 'https://yoursite.com/img/logo-medium.png', // URL ไปยังรูปภาพการแจ้งเตือนที่กำหนดเอง autoSubscribe: false, // หรือ true หากเป็น true จะแจ้งให้ผู้ใช้สมัครรับ push เมื่อเริ่มต้น SDK subscribeWidget: { enable: true }, userId: 'user_id', // ไม่บังคับ, ตั้งค่า User ID ที่กำหนดเอง tags: { 'Name': 'John Smith' // ไม่บังคับ, ตั้งค่า Tags ที่กำหนดเอง }}]);</script>การกำหนดค่า
Anchor link toเพื่อให้การใช้งาน push notifications บนเว็บไซต์ของคุณเสร็จสมบูรณ์ คุณต้องกำหนดค่าแพลตฟอร์มเว็บใน Pushwoosh Control Panel ของคุณตามคำแนะนำทีละขั้นตอนของเรา:
การลงทะเบียน service worker ในขอบเขตที่แตกต่างกัน
Anchor link toบางครั้งคุณไม่สามารถวางไฟล์ service worker ในไดเรกทอรีรากของเว็บไซต์ได้ แต่ต้องวางในไดเรกทอรีย่อย
ในกรณีนี้ ให้แก้ไขการกำหนดค่า (ขั้นตอนที่ 4.3) โดยเพิ่มพารามิเตอร์
serviceWorkerUrl: “/push-notifications/pushwoosh-service-worker.js”
โดยที่ /push-notifications/pushwoosh-service-worker.js คือพาธไปยังไฟล์ pushwoosh-service-worker.js
ตัวจัดการเหตุการณ์ (Event handlers)
Anchor link toใน Pushwoosh Web SDK 3.0 คุณสามารถสมัครรับเหตุการณ์บางอย่างเพื่อติดตามหรือยกเลิกการสมัครรับเหตุการณ์หากไม่ต้องการติดตามอีกต่อไป
ในการติดตามการโหลดของ Web SDK 3.0 ให้เรียกเหตุการณ์ onLoad ดังนี้:
// Load EventPushwoosh.push(['onLoad', (api) => { console.log('Pushwoosh load!');}]);ในการติดตามการเริ่มต้น Web SDK ที่ถูกต้อง ให้เรียกเหตุการณ์ onReady:
// Ready EventPushwoosh.push((api) => { console.log('Pushwoosh ready!');});ในการสมัครหรือยกเลิกการสมัครรับเหตุการณ์ SDK ใดๆ ให้ใช้ตัวจัดการหลังจากที่ SDK โหลดแล้ว:
Pushwoosh.push(['onLoad', (api) => {  function onEventNameHandler() {    console.log('Triggered event: event-name!');  }
  // หากต้องการสมัครรับเหตุการณ์:  Pushwoosh.addEventHandler('event-name', onEventNameHandler)
  // หากต้องการยกเลิกการสมัครรับเหตุการณ์:  Pushwoosh.removeEventHandler('event-name', onEventNameHandler)}]);
เหตุการณ์ SDK
Anchor link toเหตุการณ์ Subscribe
Anchor link toทำงานหลังจากผู้ใช้ตกลงที่จะรับ push notifications
Pushwoosh.push(['onLoad', (api) => { Pushwoosh.addEventHandler('subscribe', (payload) => { console.log('Triggered event: subscribe'); });}]);เหตุการณ์ Unsubscribe
Anchor link toทำงานหลังจากอุปกรณ์ถูกยกเลิกการลงทะเบียนจากการแจ้งเตือน
Pushwoosh.push(['onLoad', (api) => { Pushwoosh.addEventHandler('unsubscribe', (payload) => { console.log('Triggered event: unsubscribe'); });}]);เหตุการณ์วิดเจ็ตการสมัครสมาชิก
Anchor link toติดตามการแสดงผลของวิดเจ็ต Subscription Prompt
Pushwoosh.push(['onLoad', (api) => {  // ทำงานเมื่อแสดงวิดเจ็ต Subscription Prompt  Pushwoosh.addEventHandler('show-subscription-widget', (payload) => {    console.log('Triggered event: show-subscription-widget');  });
  // ทำงานเมื่อซ่อนวิดเจ็ต Subscription Prompt  Pushwoosh.addEventHandler('hide-subscription-widget', (payload) => {    console.log('Triggered event: hide-subscription-widget');  });}]);
เหตุการณ์ไดอะล็อกการอนุญาตการแจ้งเตือน
Anchor link toติดตามการแสดงผลของไดอะล็อกการสมัครสมาชิกแบบเนทีฟ
Pushwoosh.push(['onLoad', function (api) {  // ทำงานเมื่อแสดงไดอะล็อกการอนุญาต  Pushwoosh.addEventHandler('show-notification-permission-dialog', (payload) => {    console.log('Triggered event: show-notification-permission-dialog');  });
  // ทำงานเมื่อซ่อนไดอะล็อกการอนุญาตด้วยหนึ่งในสามสถานะที่เป็นไปได้:  // 1. default - ไดอะล็อกถูกปิด  // 2. granted - ได้รับการอนุญาต  // 3. denied - การอนุญาตถูกปฏิเสธ  Pushwoosh.addEventHandler('hide-notification-permission-dialog', (payload) => {    console.log('Triggered event: hide-notification-permission-dialog', payload.permission);  });}]);
เหตุการณ์การอนุญาต
Anchor link toตรวจสอบสถานะการอนุญาต push notifications เมื่อเริ่มต้น SDK; ติดตามการอัปเดตสถานะนี้เมื่อใดก็ตามที่เกิดขึ้น
Pushwoosh.push(['onLoad', (api) => {  // ทำงานระหว่างการเริ่มต้น SDK หาก 'autoSubscribe: false' และ/หรือหากผู้ใช้ละเว้นการแจ้งเตือน push  Pushwoosh.addEventHandler('permission-default', (payload) => {    console.log('Triggered event: permission-default');  });
  // ทำงานระหว่างการเริ่มต้น SDK หากการแจ้งเตือนถูกบล็อก หรือเมื่อผู้ใช้บล็อก push notifications  Pushwoosh.addEventHandler('permission-denied', (payload) => {    console.log('Triggered event: permission-denied');  });
  // ทำงานระหว่างการเริ่มต้น SDK หากการแจ้งเตือนได้รับอนุญาต หรือเมื่อผู้ใช้อนุญาต push notifications  Pushwoosh.addEventHandler('permission-granted', (payload) => {    console.log('Triggered event: permission-granted');  });}]);
เหตุการณ์รับ push
Anchor link toติดตามการส่ง push ไปยังอุปกรณ์
Pushwoosh.push(['onLoad', (api) => { // ทำงานเมื่อมีการแสดง push notification Pushwoosh.addEventHandler('receive-push', (payload) => { console.log('Triggered event: receive-push', payload.notification); });}]);เหตุการณ์การแจ้งเตือน
Anchor link toติดตามว่า push notification ถูกเปิดหรือปิดโดยผู้ใช้
Pushwoosh.push(['onLoad', (api) => {  // ทำงานเมื่อผู้ใช้คลิกที่การแจ้งเตือน  Pushwoosh.addEventHandler('open-notification', (payload) => {    console.log('Triggered event: open-notification', payload.notification);  });
  // ทำงานเมื่อผู้ใช้ปิด push notification  Pushwoosh.addEventHandler('hide-notification', (payload) => {    console.log('Triggered event: hide-notification', payload.notification);  });}]);
เหตุการณ์ Inbox
Anchor link toติดตามการแจ้งเตือนที่ส่งไปยัง Inbox
Pushwoosh.push(['onLoad', (api) => {  // ทำงานโดย ServiceWorker หลังจากได้รับข้อความ Inbox และบันทึกลงใน indexedDB  Pushwoosh.addEventHandler('receive-inbox-message', (payload) => {    console.log('Triggered event: receive-inbox-message', payload.message);  });
  // ทำงานหลังจาก Inbox ได้รับการอัปเดตโดยอัตโนมัติขณะที่หน้ากำลังโหลด  Pushwoosh.addEventHandler('update-inbox-messages', (payload) => {    console.log('Triggered event: receive-inbox-message', payload.messages);  });}]);
เหตุการณ์ป๊อปอัปการสมัครสมาชิกที่กำหนดเอง
Anchor link toสำหรับรายละเอียดเกี่ยวกับการจัดการเหตุการณ์ป๊อปอัปการสมัครสมาชิกที่กำหนดเอง โปรดดูที่ คู่มือเหตุการณ์ป๊อปอัปการสมัครสมาชิกที่กำหนดเอง
หลังจากที่ Web Push SDK เริ่มต้นแล้ว คุณสามารถเรียกใช้ Pushwoosh API ต่อไปนี้ได้ เมธอดทั้งหมดจะคืนค่าอ็อบเจกต์ Promise
Pushwoosh.push((api) => {  // ตั้งค่า tags สำหรับผู้ใช้  api.setTags({    'Tag Name 1': 'value1',    'Tag Name 2': 'value2'  });
  // รับ tags สำหรับผู้ใช้จากเซิร์ฟเวอร์  api.getTags();
  // ลงทะเบียน User ID  api.registerUser('user123');
    // ลงทะเบียนอีเมลผู้ใช้  api.registerEmail('user@example.com');
  // ลงทะเบียนหมายเลข SMS  api.registerSmsNumber('+15551234567');
  // ลงทะเบียนหมายเลข WhatsApp  api.registerWhatsappNumber('+1234567890');
  // โพสต์ Event  api.postEvent('myEventName', {attributeName: 'attributeValue'});
  //ยกเลิกการลงทะเบียนจากการแจ้งเตือน  api.unregisterDevice();
  // หรือลงทะเบียนผู้ใช้หลายรายการพร้อมอุปกรณ์และช่องทาง  api.multiRegisterDevice({    user_id: 'user123',    email: 'user@example.com',    sms_phone_number: '+1234567890',    tags: {      'UserType': { operation: TTagOperationSet, value: 'Premium' },      'Interests': { operation: TTagOperationAppend, values: ['sports', 'technology'] }    }  });});
multiRegisterDevice
Anchor link toเมธอดการลงทะเบียนที่ปรับปรุงใหม่ซึ่งช่วยให้สามารถลงทะเบียนโปรไฟล์ผู้ใช้กับอุปกรณ์และช่องทางการส่งข้อความหลายรายการได้ในการเรียก API เพียงครั้งเดียว เมธอดนี้มีประโยชน์อย่างยิ่งสำหรับแอปพลิเคชันข้ามแพลตฟอร์มหรือเมื่อใช้กลยุทธ์การส่งข้อความแบบ omnichannel
Pushwoosh.push((api) => { api.multiRegisterDevice({ user_id: 'user123', // ไม่บังคับ: ตัวระบุผู้ใช้ email: 'user@example.com', // ไม่บังคับ: อีเมลสำหรับการส่งข้อความทางอีเมล sms_phone_number: '+1234567890', // ไม่บังคับ: หมายเลขโทรศัพท์ SMS (รูปแบบ E.164) whatsapp_phone_number: '+1234567890', // ไม่บังคับ: หมายเลข WhatsApp (รูปแบบ E.164) kakao_phone_number: '+1234567890', // ไม่บังคับ: หมายเลข KakaoTalk (รูปแบบ E.164) language: 'en', // ไม่บังคับ: รหัสภาษา (ISO 639-1) timezone: 'America/New_York', // ไม่บังคับ: ตัวระบุเขตเวลา city: 'New York', // ไม่บังคับ: เมืองสำหรับการกำหนดเป้าหมาย country: 'US', // ไม่บังคับ: ประเทศสำหรับการกำหนดเป้าหมาย state: 'NY', // ไม่บังคับ: รัฐสำหรับการกำหนดเป้าหมาย tags: { // ไม่บังคับ: ค่า Tag พร้อมการดำเนินการ 'UserType': { operation: TTagOperationSet, // ตั้งค่า Tag (0) value: 'Premium' }, 'Interests': { operation: TTagOperationAppend, // เพิ่มค่าใน Tag (1) values: ['sports', 'technology'] }, 'LoginCount': { operation: TTagOperationIncrement, // เพิ่มค่า Tag (3) value: '1' } }, push_devices: [ // ไม่บังคับ: อาร์เรย์ของอุปกรณ์ push { hwid: 'web-device-456', platform: TPlatformChrome, // แพลตฟอร์ม Chrome (11) push_token: 'fcm-token-here', app_version: '2.1.0', platformData: { public_key: 'web-push-public-key', auth_token: 'web-push-auth-token', browser: 'chrome' } } ] }) .then((response) => { console.log('Multi-registration successful:', response); }) .catch((error) => { console.error('Multi-registration failed:', error); });});ประเภทแพลตฟอร์ม:
TPlatformSafari(10): แพลตฟอร์ม SafariTPlatformChrome(11): แพลตฟอร์ม ChromeTPlatformFirefox(12): แพลตฟอร์ม Firefox
ประเภทการดำเนินการของ Tag:
TTagOperationSet(0): ตั้งค่า Tag (แทนที่ค่าที่มีอยู่)TTagOperationAppend(1): เพิ่มค่าใน Tag (เพิ่มในรายการ)TTagOperationRemove(2): ลบค่า Tag (ลบออกจากรายการ)TTagOperationIncrement(3): เพิ่มค่า Tag (เพิ่มค่าตัวเลข)
ประโยชน์:
- การเรียก API ครั้งเดียว: ลงทะเบียนอุปกรณ์และช่องทางหลายรายการพร้อมกัน
- การดำเนินการแบบอะตอม: การลงทะเบียนทั้งหมดสำเร็จหรือล้มเหลวพร้อมกัน
- เน้นผู้ใช้เป็นศูนย์กลาง: เชื่อมโยงอุปกรณ์ทั้งหมดกับโปรไฟล์ผู้ใช้เดียว
- การแท็กขั้นสูง: รองรับการดำเนินการแท็กที่ซับซ้อน
- ข้ามแพลตฟอร์ม: จัดการหลายแพลตฟอร์มพร้อมกัน
ตัวอย่างการส่ง Tags ไปยัง Pushwoosh:
Pushwoosh.push((api) => { var myCustomTags = { 'Tag 1': 123, 'Tag 2': 'some string' }; api.setTags(myCustomTags) .then((res) => { var skipped = res && res.skipped || []; if (!skipped.length) { console.log('success'); } else { console.warn('skipped tags:', skipped); } }) .catch((err) => { console.error('setTags error:', err); });});เพิ่มค่า Tag
Anchor link toในการเพิ่มค่าของ Number Tag ให้ใช้พารามิเตอร์ operation ที่มีค่า ‘increment’ ดังนี้:
Pushwoosh.push((api) => { api.setTags({ 'Tag 1': { operation: 'increment', value: 1 } })});เพิ่มค่า Tag
Anchor link toในการเพิ่มค่าใหม่ลงใน List Tag ที่มีอยู่ ให้ใช้พารามิเตอร์ operation ที่มีค่า ‘append’ ดังนี้:
Pushwoosh.push((api) => { api.setTags({ 'Tag 3': { operation: 'append', value: ['Value3'] } })});ลบค่า Tag
Anchor link toในการลบค่าออกจาก List Tag ให้ใช้พารามิเตอร์ operation ที่มีค่า ‘remove’ ดังนี้:
Pushwoosh.push((api) =>{ api.setTags({ 'Tag 3': { operation: 'remove', value: ['Value2'] } })});เมธอดสาธารณะ
Anchor link toPushwoosh.subscribe()
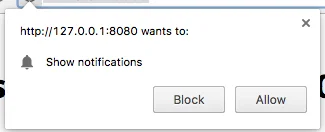
เมธอดนี้ใช้เพื่อขออนุญาตจากผู้ใช้สำหรับ push notifications หากผู้ใช้สมัครรับข้อมูลอยู่แล้ว เมธอดจะหยุดทำงาน
หากผู้ใช้ยังไม่ได้สมัครรับ push:
- จะมีการขออนุญาตสำหรับ push notifications
- หากผู้ใช้อนุญาตการแจ้งเตือน เหตุการณ์
onSubscribeจะถูกเรียก
Pushwoosh.subscribe() จะทำงานโดยอัตโนมัติหากตั้งค่า autoSubscribe: true ระหว่างการเริ่มต้น SDK
เรียกเมธอดนี้หากคุณเลือกที่จะแจ้งให้ผู้ใช้สมัครรับ push ด้วยตนเองโดยใช้พารามิเตอร์ autoSubscribe: false ระหว่างการเริ่มต้น:
<button onclick="Pushwoosh.subscribe()">Subscribe</button><script> Pushwoosh.push(['onSubscribe', (api) => { console.log('User successfully subscribed'); }]);</script>Pushwoosh.unsubscribe()
- เมธอด
/unregisterDeviceจะทำงาน - เหตุการณ์
onUnsubscribeจะถูกเรียก
<button onclick="Pushwoosh.unsubscribe()">Unsubscribe</button><script type="text/javascript"> Pushwoosh.push(['onUnsubscribe', (api) => { console.log('User successfully unsubscribed'); }]);</script>Pushwoosh.isSubscribed()
ตรวจสอบว่าผู้ใช้สมัครรับข้อมูลหรือไม่ และคืนค่าแฟล็ก true/false
Pushwoosh.isSubscribed().then((isSubscribed) => { console.log('isSubscribed', isSubscribed);});Pushwoosh.getHWID()
คืนค่า Pushwoosh HWID
Pushwoosh.getHWID().then((hwid) => { console.log('hwid:', hwid);});Pushwoosh.getPushToken()
คืนค่า push token หากมี
Pushwoosh.getPushToken().then((pushToken) => { console.log('pushToken:', pushToken);});Pushwoosh.getUserId()
คืนค่า User ID หากมี
Pushwoosh.getUserId().then((userId) => { console.log('userId:', userId);});Pushwoosh.getParams()
คืนค่ารายการพารามิเตอร์ต่อไปนี้:
Pushwoosh.getParams().then((params) => { params = params || {}; var hwid = params.hwid; var pushToken = params.pushToken; var userId = params.userId;});Pushwoosh.isAvailableNotifications()
ตรวจสอบว่าเบราว์เซอร์รองรับ Pushwoosh WebSDK 3.0 หรือไม่ คืนค่า ‘true’ หรือ ‘false’
Pushwoosh.isAvailableNotifications() // true/falseเมธอด InboxMessages
Anchor link tomessagesWithNoActionPerformedCount(): Promise<number>
คืนค่าจำนวนข้อความที่เปิดแล้ว
Pushwoosh.pwinbox.messagesWithNoActionPerformedCount() .then((count) => { console.log(`${count} messages opened`); });unreadMessagesCount()
คืนค่าจำนวนข้อความที่ยังไม่ได้อ่าน
Pushwoosh.pwinbox.unreadMessagesCount() .then((count) => { console.log(`${count} messages unread`); });messagesCount(): Promise<number>
คืนค่าจำนวนข้อความทั้งหมด
Pushwoosh.pwinbox.messagesCount() .then((count) => { console.log(`${count} messages`); });loadMessages(): Promise<Array>
โหลดรายการข้อความที่ยังไม่ถูกลบ
Pushwoosh.pwinbox.loadMessages() .then(() => { console.log('Messages have been loaded'); });readMessagesWithCodes(codes: Array<string>): Promise<void>
ทำเครื่องหมายข้อความว่าอ่านแล้วโดยใช้ Inbox_Ids
Pushwoosh.pwinbox.readMessagesWithCodes(codes) .then(() => { console.log('Messages have been read'); });performActionForMessageWithCode(code: string): Promise<void>
ดำเนินการที่กำหนดให้กับข้อความและทำเครื่องหมายข้อความว่าอ่านแล้ว
Pushwoosh.pwinbox.performActionForMessageWithCode(code) .then(() => { console.log('Action has been performed'); });deleteMessagesWithCodes(codes: Array<string>): Promise<void>
ทำเครื่องหมายข้อความว่าถูกลบแล้ว
Pushwoosh.pwinbox.deleteMessagesWithCodes([code]) .then(() => { console.log('Messages have been deleted'); });syncMessages(): Promise<void>
ซิงโครไนซ์ข้อความกับเซิร์ฟเวอร์
Pushwoosh.pwinbox.syncMessages() .then(() => { console.log('Messages have been synchronized'); });การรองรับ Progressive Web App
Anchor link toในการผสานรวม Pushwoosh เข้ากับ Progressive Web Application (PWA) ของคุณ ให้ทำตามขั้นตอนที่อธิบายไว้ด้านล่าง
1. คัดลอกพาธไปยังไฟล์ Service Worker ของคุณ:
if ('serviceWorker' in navigator) { window.addEventListener('load', () => { navigator.serviceWorker.register('/service-worker.js') // <- your service worker url });}จากนั้น ใช้พารามิเตอร์ serviceWorkerUrl ขณะเริ่มต้น WebSDK ดังนี้:
var Pushwoosh = Pushwoosh || [];Pushwoosh.push(['init', { logLevel: 'error', applicationCode: 'XXXXX-XXXXX', safariWebsitePushID: 'web.com.example.domain', defaultNotificationTitle: 'Pushwoosh', defaultNotificationImage: 'https://yoursite.com/img/logo-medium.png', serviceWorkerUrl: '/service-worker.js', // <- your service worker url}]);WebSDK ไม่ได้ลงทะเบียน Service Worker ใหม่ทันที Service Worker จะถูกลงทะเบียนเมื่อจำเป็น:
- เมื่ออุปกรณ์ได้รับ push token (ในการลงทะเบียนอุปกรณ์หรือการสมัครรับข้อมูลใหม่)
- เมื่อ push token ถูกลบ (เมื่อลบอุปกรณ์ออกจากฐานผู้ใช้)
ซึ่งจะช่วยให้หน้าเว็บของคุณโหลดเร็วขึ้นโดยลดจำนวนคำขอไปยังเซิร์ฟเวอร์
เบราว์เซอร์ไม่อนุญาตให้ลงทะเบียน Service Worker สองตัวที่แตกต่างกันในเวลาเดียวกัน (อ่านเพิ่มเติม: https://github.com/w3c/ServiceWorker/issues/921) ดังนั้นเพื่อให้ PWA ของคุณทำงานได้อย่างถูกต้อง ควรลงทะเบียน Service Worker ร่วมกันสำหรับ codebase ของคุณและ codebase ของ Pushwoosh
2. เพิ่มสตริงต่อไปนี้ลงใน Service Worker ของคุณ (ที่จุดเริ่มต้นหรือตอนท้าย ไม่สำคัญ):
importScripts('https://cdn.pushwoosh.com/webpush/v3/pushwoosh-service-worker.js' + self.location.search);ดังนั้นคุณจึงเปิดใช้งานการรับและประมวลผล push notifications ที่ส่งผ่านบริการของ Pushwoosh สำหรับ Service Worker ของคุณ
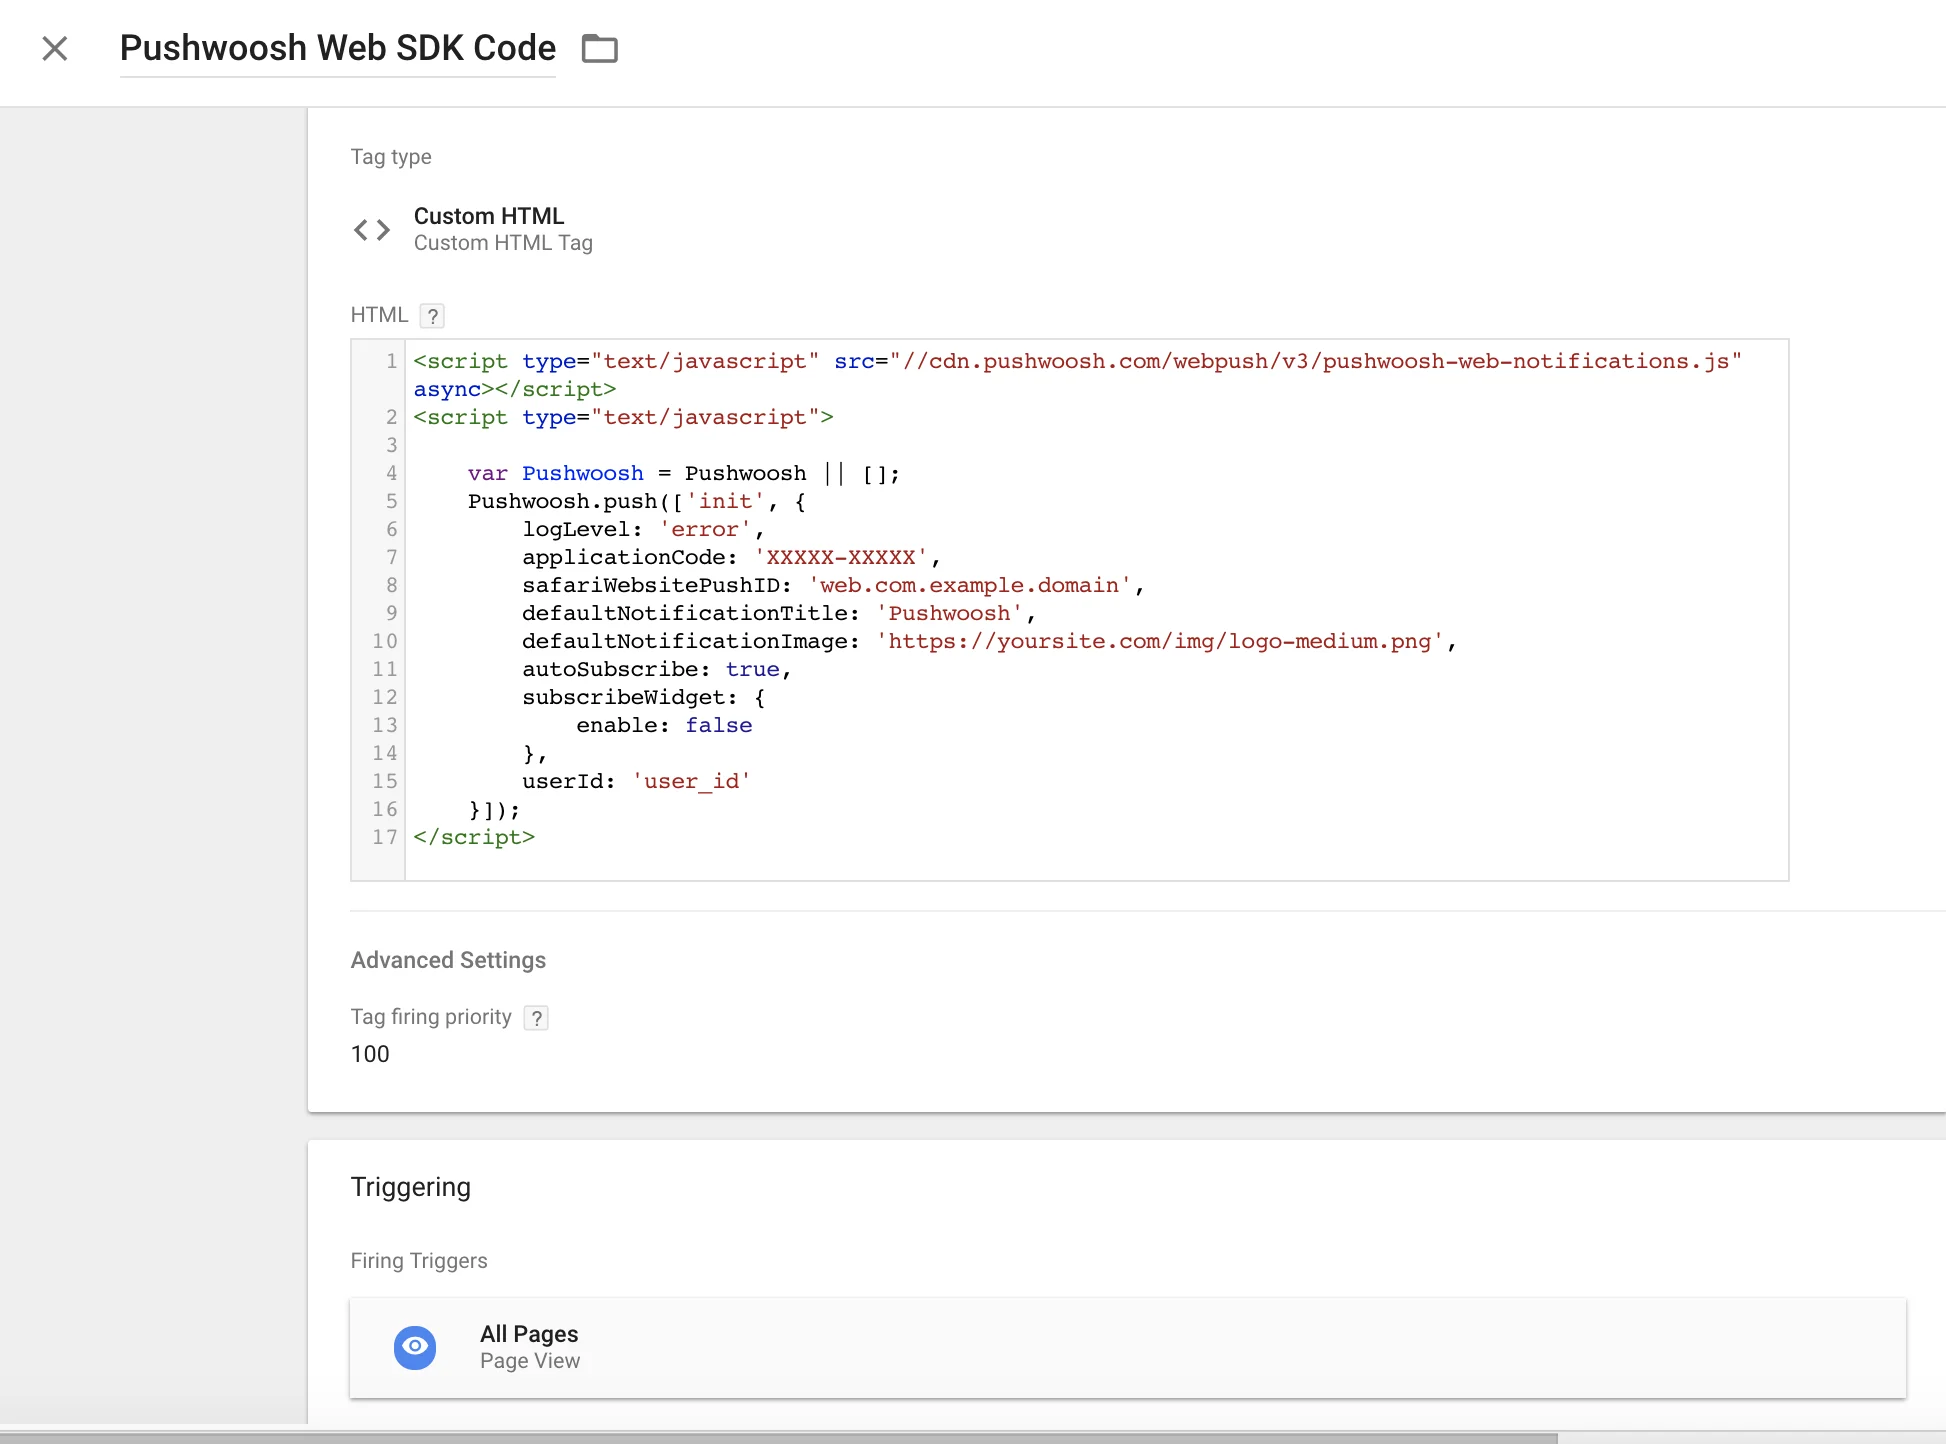
การติดตั้งจาก Google Tag Manager
Anchor link toใช้โค้ดต่อไปนี้ใน Google Tag Manager ของคุณเพื่อเริ่มต้น Pushwoosh SDK สร้าง Custom HTML Tag และวางโค้ดด้านล่าง ตรวจสอบให้แน่ใจว่าได้เปลี่ยน Pushwoosh Application Code, Safari Website ID และ URL รูปภาพการแจ้งเตือนเริ่มต้นของคุณ
นอกจากนี้ให้ตั้งค่าลำดับความสำคัญของ Tag Firing ให้สูง (เช่น 100) และให้ทำงานบน All Pages ดูภาพหน้าจอด้านล่างคัดลอก
<script type="text/javascript" src="//cdn.pushwoosh.com/webpush/v3/pushwoosh-web-notifications.js" async></script><script type="text/javascript"> var Pushwoosh = Pushwoosh || []; Pushwoosh.push(['init', { logLevel: 'error', applicationCode: 'XXXXX-XXXXX', safariWebsitePushID: 'web.com.example.domain', defaultNotificationTitle: 'Pushwoosh', defaultNotificationImage: 'https://yoursite.com/img/logo-medium.png', autoSubscribe: true, subscribeWidget: { enable: false }, userId: 'user_id' }]);</script>