Push แบบกำหนดเป้าหมาย
ขั้นตอนการทำงานนี้แสดงวิธีส่ง push notification แบบกำหนดเป้าหมายไปยังกลุ่มเป้าหมายที่เฉพาะเจาะจง วิธีการสร้าง segment ของคุณสำหรับ push แบบกำหนดเป้าหมายจะแตกต่างกันไป ขึ้นอยู่กับว่า push notification นั้นเริ่มต้นขั้นตอนการสื่อสารหรือดำเนินการต่อจากขั้นตอนที่มีอยู่แล้ว
หาก push notification เริ่มต้นขั้นตอนการสื่อสาร
Anchor link toเมื่อคุณสร้าง ขั้นตอน push พื้นฐาน แล้ว คุณสามารถตั้งค่า push แบบกำหนดเป้าหมายของคุณได้
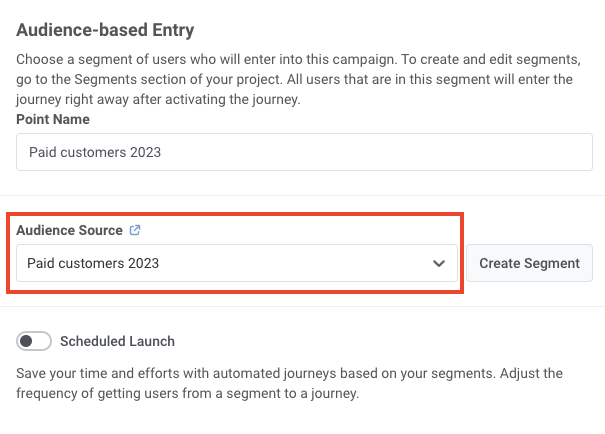
ดับเบิลคลิกที่องค์ประกอบ Audience-based Entry เพื่อเลือกกลุ่มเป้าหมายสำหรับ push notification ของคุณ สร้าง segment ตั้งแต่ต้น เลือกจาก segment ที่มีอยู่ของคุณ หรือนำเข้าไฟล์ segment
1. สร้าง segment ตั้งแต่ต้น
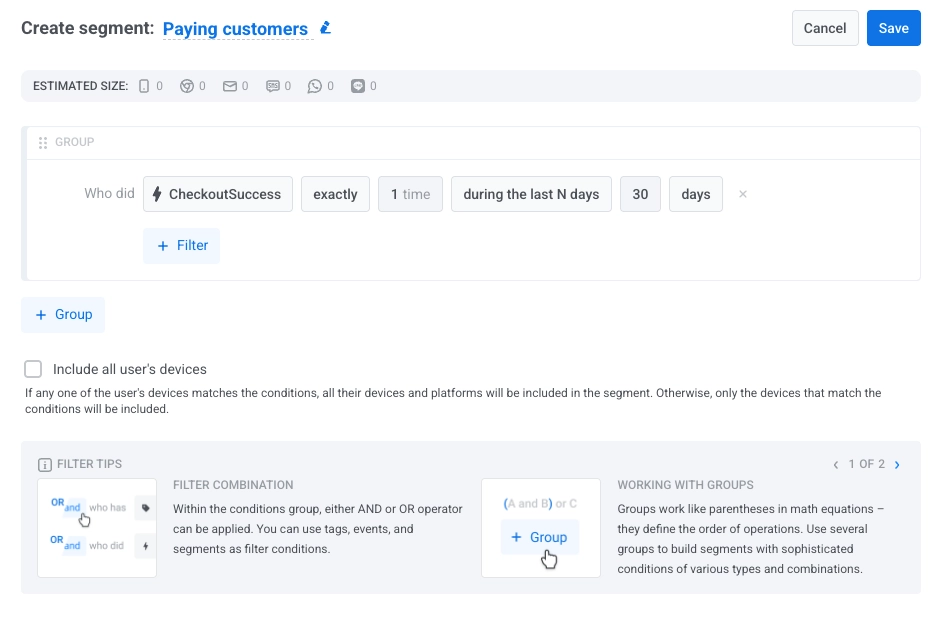
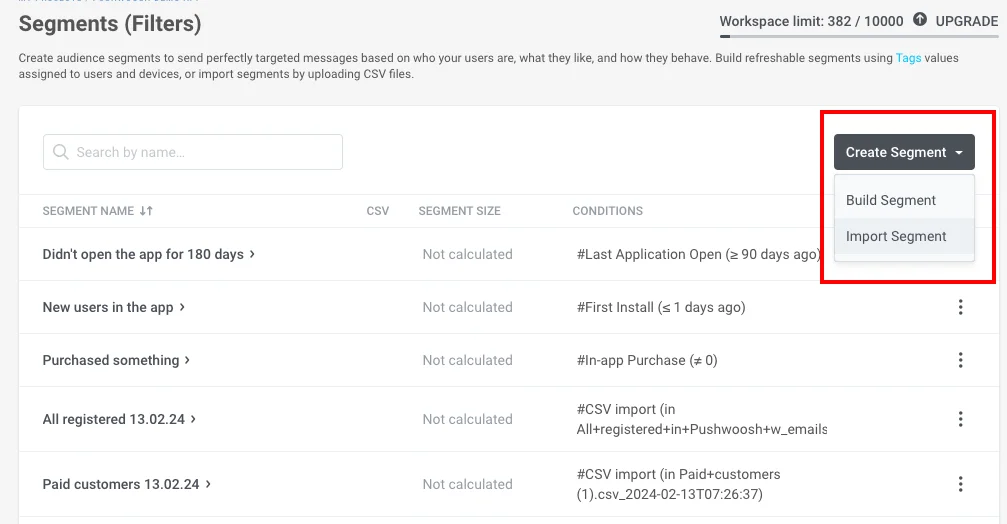
Anchor link toคลิก Create segment และเลือก Build segment จากเมนูดรอปดาวน์
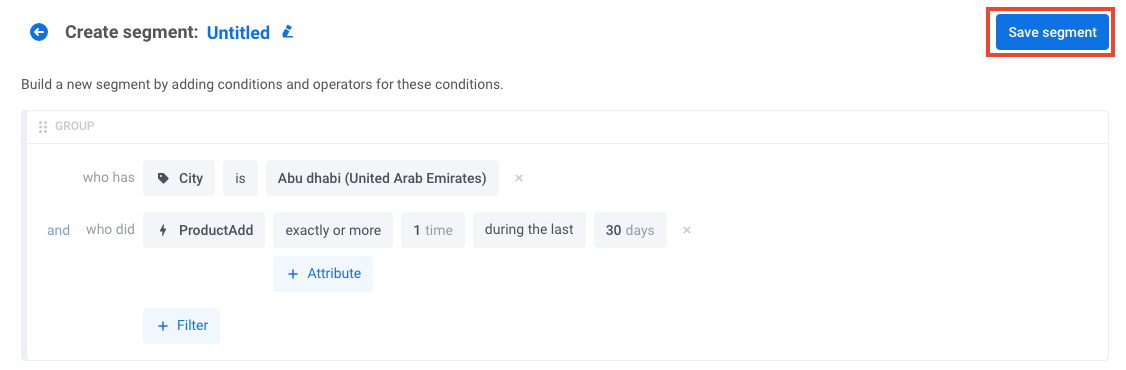
ใน drawer ที่เปิดขึ้นมา ให้สร้าง segment เรียนรู้วิธีสร้าง segment
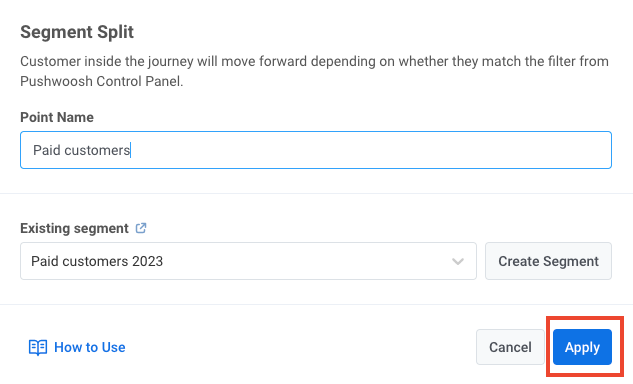
2. เลือก segment ที่มีอยู่
Anchor link toเลือก segment ที่มีอยู่ของคุณในช่อง Audience source ในตัวอย่างต่อไปนี้ push จะถูกกำหนดเป้าหมายไปยังลูกค้าที่ชำระเงินแล้ว:
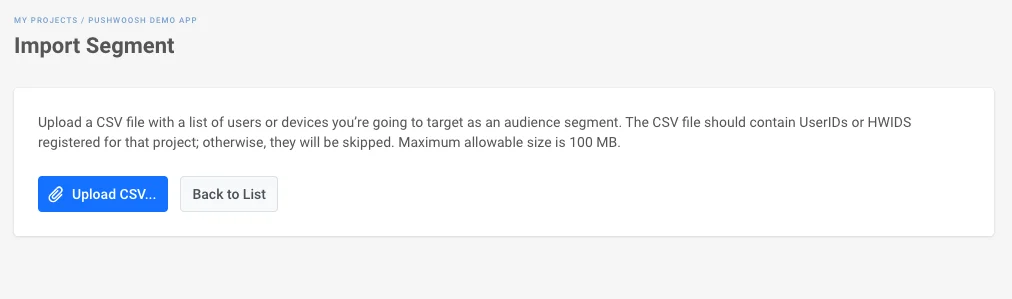
3. นำเข้าไฟล์ segment
Anchor link toในส่วน Audience source คลิก Create segment และเลือก Import segment จากเมนูดรอปดาวน์:
จากนั้นนำเข้าไฟล์ของคุณในรูปแบบ CSV สำหรับคำแนะนำทีละขั้นตอนและข้อกำหนดของไฟล์ ดู วิธีการนำเข้า segment
เมื่อคุณเลือกแหล่งที่มาของกลุ่มเป้าหมายและตั้งค่าองค์ประกอบแล้ว คลิก Save
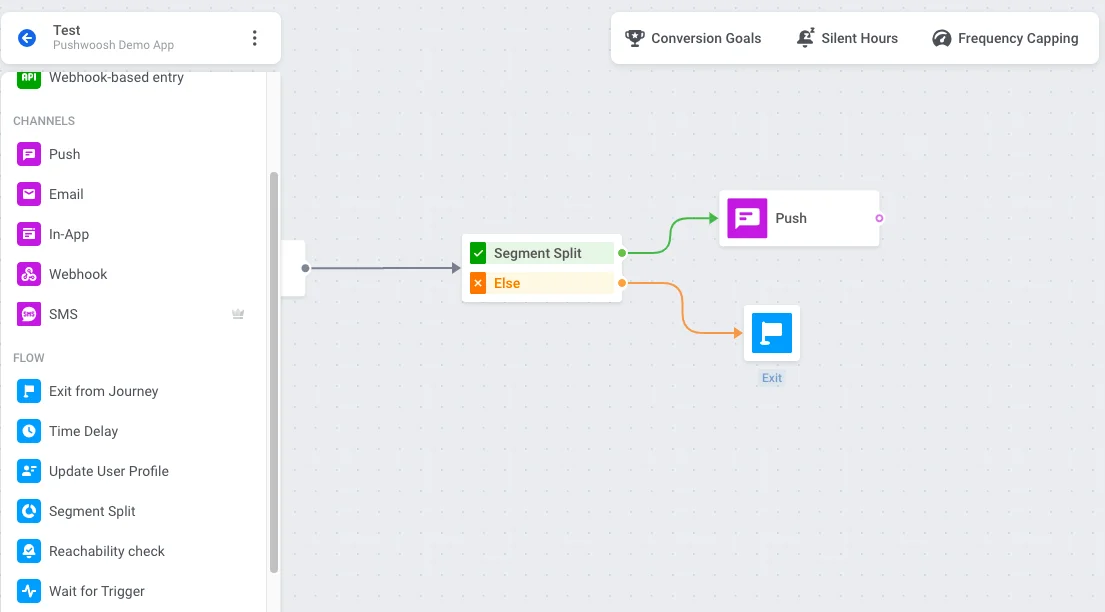
หาก push notification ดำเนินการต่อจากขั้นตอนการสื่อสาร
Anchor link toแทรกองค์ประกอบ Condition split ระหว่างองค์ประกอบการสื่อสารก่อนหน้าและ push notification ที่คุณต้องการกำหนดเป้าหมาย ดับเบิลคลิกที่องค์ประกอบเพื่อเปิดการกำหนดค่า
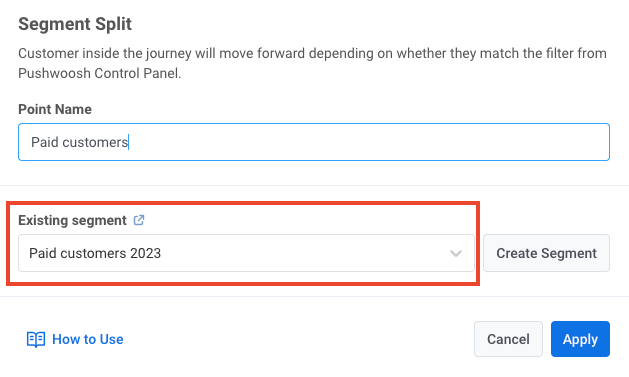
กำหนด segment
Anchor link toใต้หัวข้อ What defines the user flow? เลือก Segment
จากนั้นคุณสามารถตั้งค่า segment ได้สามวิธี:
เลือก segment ที่มีอยู่
Anchor link toใช้ช่อง Existing segment เพื่อเลือก segment ของคุณ
สร้าง segment ตั้งแต่ต้น
Anchor link toคลิก Create segment ถัดจากส่วน Branches และเลือก Build segment จากเมนูดรอปดาวน์ drawer จะเปิดขึ้นเพื่อให้คุณสร้าง segment
นำเข้าไฟล์ segment
Anchor link toคลิก Create segment และเลือก Import segment จากเมนูดรอปดาวน์ จากนั้นนำเข้าไฟล์ของคุณในรูปแบบ CSV
สำหรับคำแนะนำทีละขั้นตอนและข้อกำหนดของไฟล์ ดู วิธีการนำเข้า segment
กำหนดค่า branches
Anchor link toส่วน Branches จะแสดงเส้นทางที่มีอยู่ เช่น Users in a segment (ผู้ใช้ที่ตรงกับ segment ที่คุณตั้งค่า) และ All other users
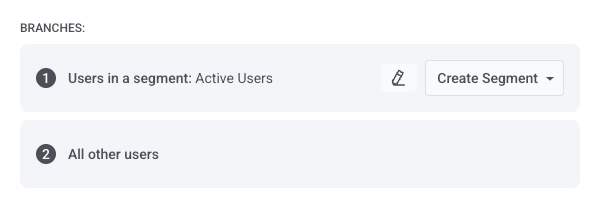
บน journey canvas เพิ่ม push notification ไปยัง branch Users in a segment เพิ่ม exit หรือองค์ประกอบอื่นไปยัง branch All other users เพื่อให้เส้นทางนั้นถูกกำหนด
เมื่อเสร็จแล้ว คลิก Save