Geplanter Push
Über das Formular für einmalige Pushes planen
Anchor link toUm eine einmalige Push-Benachrichtigung in Pushwoosh zu senden, gehen Sie zum Abschnitt Campaigns. Wählen Sie One-time messaging und klicken Sie auf Send message → One-time push.

Inhalt der Push-Nachricht auswählen oder erstellen
Anchor link toErstellen Sie zunächst neuen Inhalt oder wählen Sie vorhandenen Inhalt für Ihre Push-Benachrichtigung aus. Wenn Sie ein vorgefertigtes Push-Preset verwenden möchten, wählen Sie es aus dem Dropdown-Menü der verfügbaren Optionen aus.

Um eine neue Nachricht zu erstellen, klicken Sie auf Create new und folgen Sie dieser Anleitung, um ein neues Push-Preset einzurichten.
Wenn Sie ein vorhandenes Preset bearbeiten müssen, klicken Sie auf Edit Content, um die Nachricht zu ändern.
Eine Vorschau der Benachrichtigung wird auf der rechten Seite angezeigt und zeigt, wie sie den Benutzern angezeigt wird.
Sobald Sie mit dem Inhalt und dem Erscheinungsbild zufrieden sind, klicken Sie auf Next, um zum Schritt der Zielgruppeneinrichtung fortzufahren.
Zielgruppe für die Push-Benachrichtigung auswählen
Anchor link toWählen Sie als Nächstes die Zielgruppe für Ihre Push-Benachrichtigung aus. Sie können die Benachrichtigung entweder an alle Benutzer senden oder ein bestimmtes Segment basierend auf dem Benutzerverhalten oder demografischen Merkmalen ansprechen.
An Segment senden
Anchor link toWählen Sie diese Option, um ein bestimmtes Zielgruppensegment anzusprechen. Wählen Sie ein vorgefertigtes Segment aus dem Dropdown-Menü oder erstellen Sie ein neues Segment, indem Sie auf Create Segment klicken. Weitere Details finden Sie in der Anleitung zum Erstellen von Segmenten.
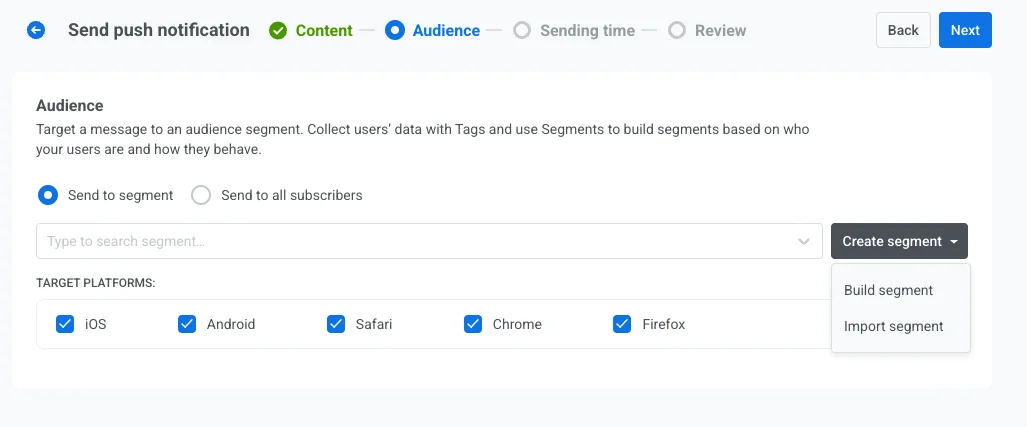
An alle Benutzer senden
Anchor link toWählen Sie diese Option, um die Benachrichtigung an alle Ihre Abonnenten zu senden. Dies ist ideal für allgemeine Ankündigungen oder Werbeaktionen, die für Ihre gesamte Benutzerbasis gelten.

Zielplattformen
Anchor link toWählen Sie die Plattformen aus, auf denen die Benachrichtigung zugestellt werden soll. Verfügbare Plattformen sind:
- iOS
- Android
- Safari
- Chrome
- Firefox
Die Auswahl der Zielplattformen stellt sicher, dass Ihre Nachricht die Benutzer auf den entsprechenden Geräten erreicht. Nur Benutzer auf den ausgewählten Plattformen erhalten die Benachrichtigung.
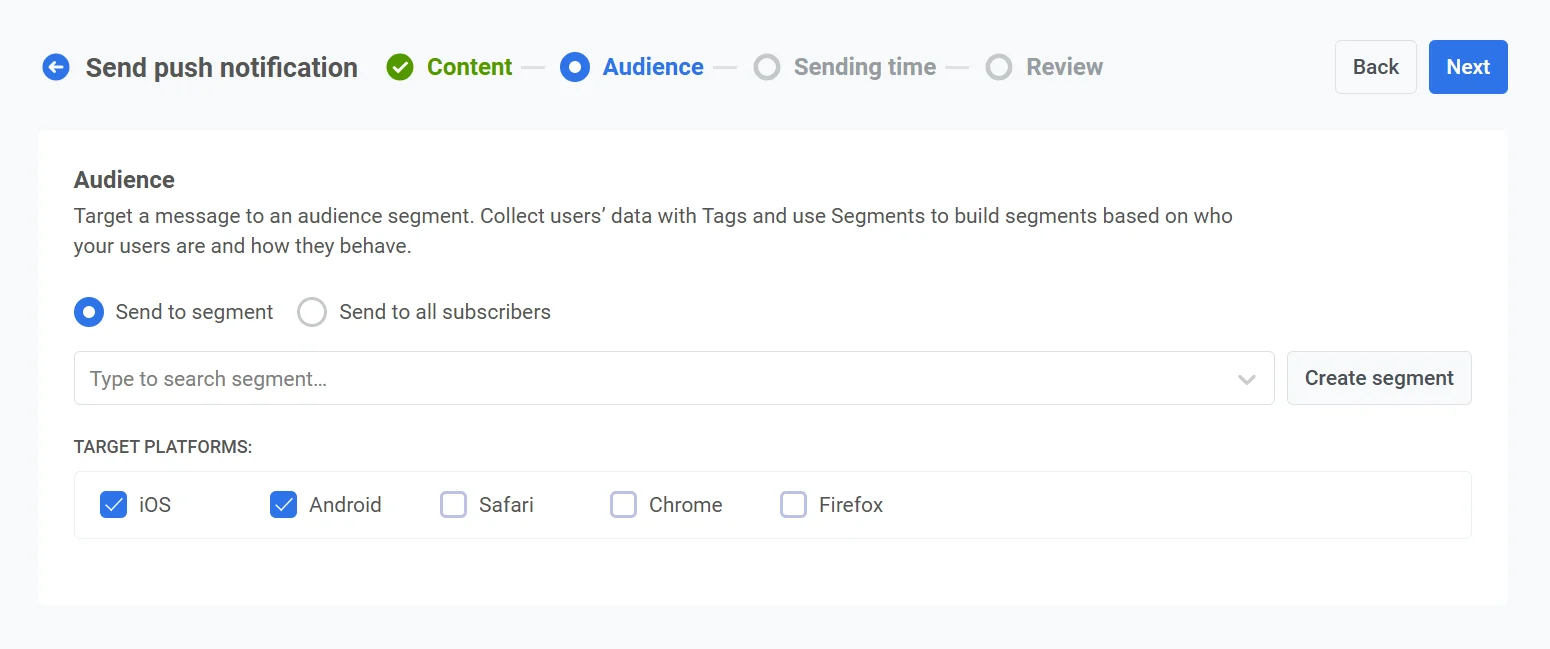
Sobald Sie Ihre Zielgruppe konfiguriert und die Zielplattformen ausgewählt haben, klicken Sie auf Next, um mit der Einrichtung Ihrer Push-Benachrichtigung fortzufahren.
Push-Benachrichtigung planen
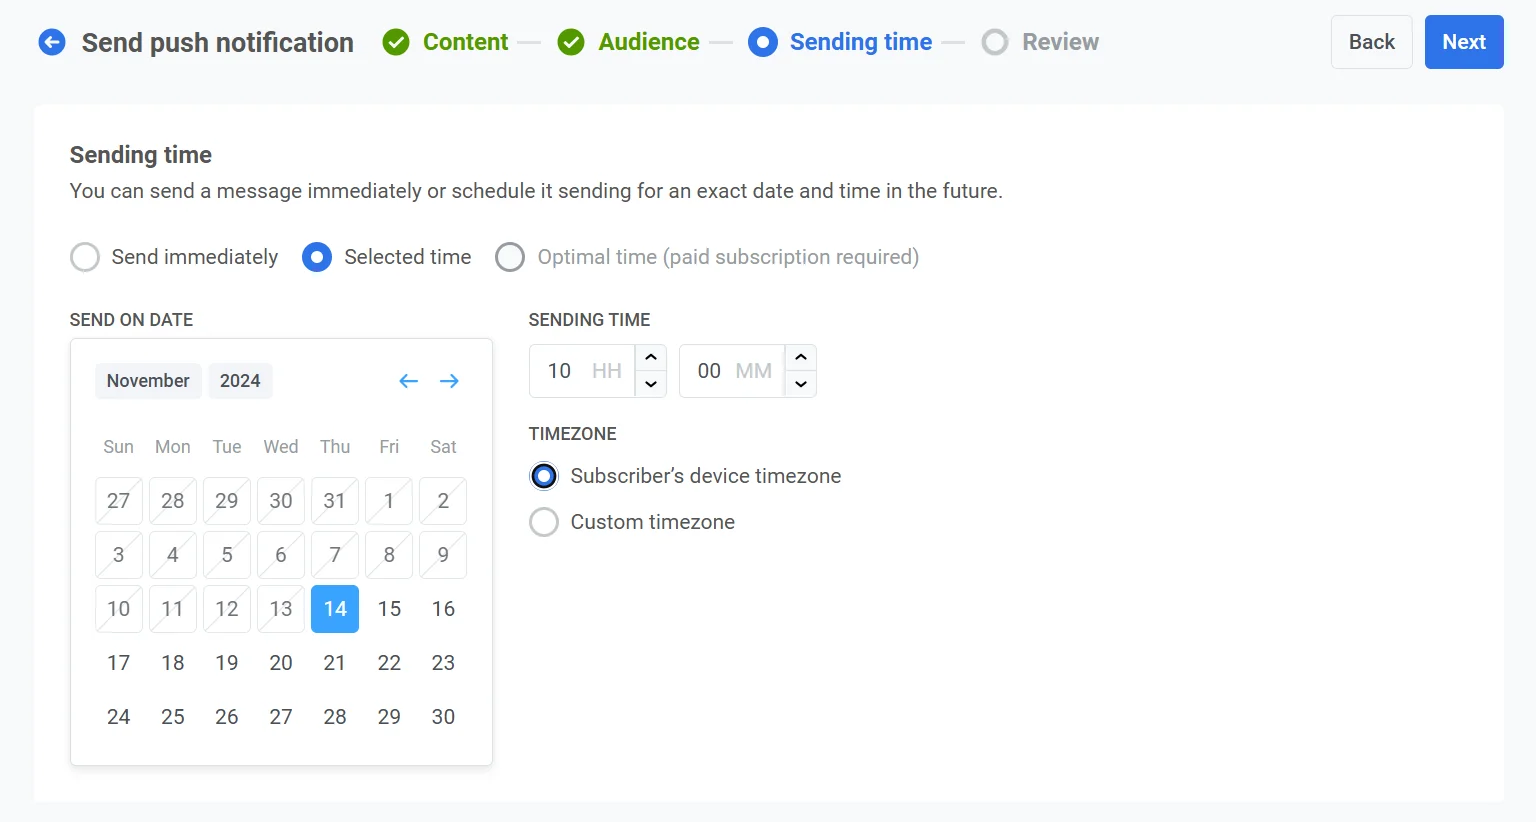
Anchor link toWählen Sie als Nächstes Selected time, um Ihre Push-Benachrichtigung für ein bestimmtes Datum und eine bestimmte Uhrzeit zu planen.
- Verwenden Sie den Kalender, um das genaue Datum für Ihre Benachrichtigung auszuwählen.
- Stellen Sie die Uhrzeit in Stunden und Minuten (im 24-Stunden-Format) ein, zu der die Benachrichtigung gesendet werden soll.
- Wählen Sie die entsprechende Zeitzone:
- Subscriber’s device timezone: Die Benachrichtigung wird basierend auf der lokalen Zeit des Empfängers gesendet, um die Zustellung zur angegebenen Zeit in seiner Zeitzone sicherzustellen.
- Custom timezone: Wählen Sie eine bestimmte Zeitzone, um die Benachrichtigung für alle Empfänger zu planen, was nützlich ist, um Benutzer in einer bestimmten Region anzusprechen.
Ihren Inhalt überprüfen und bearbeiten
Anchor link toÜberprüfen Sie vor dem Abschluss den Inhalt, die On-Click-Aktionen, die Zielgruppe, die Plattform und die Planungsoptionen, um sicherzustellen, dass alles korrekt konfiguriert ist. Sie sehen auch eine Vorschau Ihrer Push-Benachrichtigung in jeder ausgewählten Sprache. Sie können alle Einstellungen nach Bedarf anpassen.

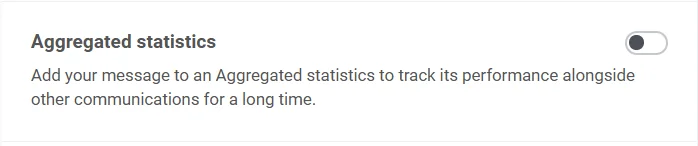
Optional können Sie Ihre Push-Benachrichtigung mit einer Aggregated Campaign verknüpfen, sodass Sie diese Nachricht mit einer größeren, laufenden Kampagne in Verbindung bringen und ihre Leistung im Laufe der Zeit zusammen mit verwandten Benachrichtigungen verfolgen können.
Sobald alles bestätigt ist, klicken Sie auf Schedule push, um sie für eine spätere Zustellung festzulegen, oder auf Send now, um sie sofort zu senden.
Eine geplante Nachricht abbrechen oder bearbeiten
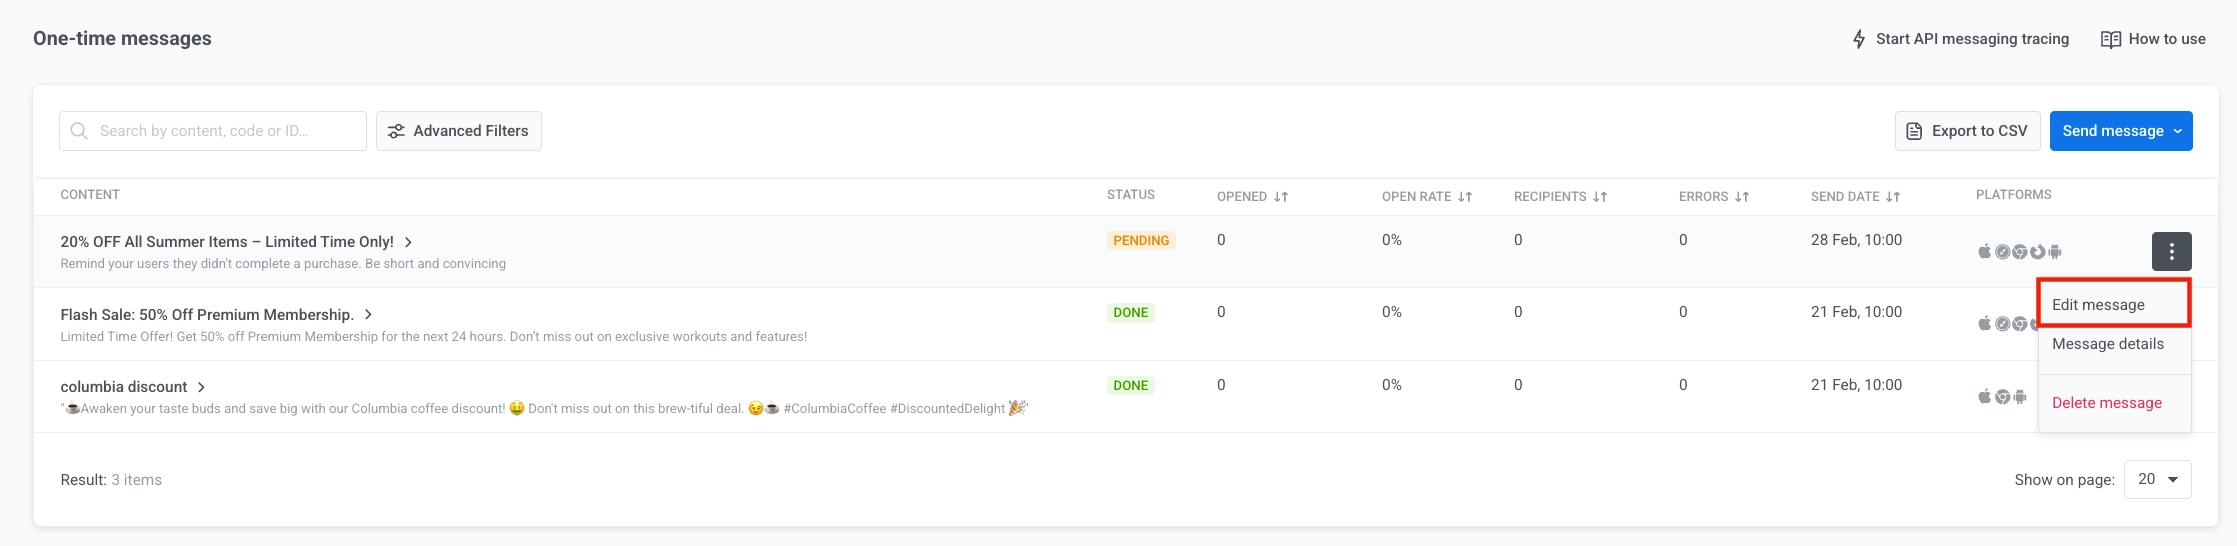
Anchor link toFür Nachrichten, die geplant und noch nicht gesendet wurden (Status PENDING), können Sie diese ändern oder abbrechen. Öffnen Sie das Aktionsmenü (⋮) für die Nachricht in der Liste der einmaligen Nachrichten:
- Delete message: bricht die geplante Zustellung ab und ändert den Status auf Canceled.

- Edit message: öffnet das Formular für einmalige Pushes mit den Nachrichtendaten. Sie können den Inhalt oder die Zielgruppe ändern (die geplante Sendezeit kann nicht geändert werden).
Einen Push mit dem Customer Journey Builder planen
Anchor link toDer Prozess ist für mobile und Web-Push-Benachrichtigungskampagnen derselbe. Diese Anleitung erklärt, wie Sie die Zustellung von Push-Benachrichtigungen für ein bestimmtes Datum und eine bestimmte Uhrzeit planen.
Die Planungseinrichtung kann variieren, je nachdem, ob die Push-Benachrichtigung einen neuen Kommunikationsfluss startet oder einen bestehenden fortsetzt.
Wenn eine Push-Benachrichtigung einen Kommunikationsfluss initiiert
Anchor link toSobald Sie einen grundlegenden Push-Flow eingerichtet haben, können Sie die Planung im Entry-Element hinzufügen.
Stellen Sie im Element Audience-based entry den Entry schedule auf One-time entry ein und wählen Sie dann Schedule for a specific day. Legen Sie Datum, Uhrzeit und Zeitzone fest.

Wählen Sie die Zeitzone aus. Es gibt zwei Optionen:
- Subscriber’s device timezone (default): Benutzer treten basierend auf der Zeitzone ihres Geräts ein. Wenn die Zeitzone fehlt, wird ein Fallback verwendet. Klicken Sie auf Change fallback, um ihn zu ändern.
- Specific timezone: Wählen Sie eine Zeitzone aus dem Dropdown-Menü für eine feste Eintrittszeit.
Sobald die Planung festgelegt ist, klicken Sie auf Apply.
Wenn eine Push-Benachrichtigung einen Kommunikationsfluss fortsetzt
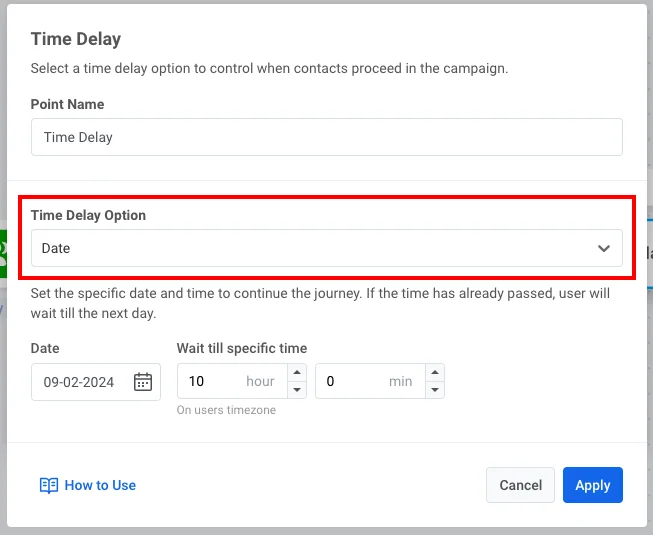
Anchor link toFügen Sie das Element Time Delay zwischen den vorhergehenden Kommunikationselementen und der Push-Benachrichtigung ein, die Sie planen möchten:
Doppelklicken Sie auf das Time Delay-Element. Wählen Sie im Feld Time Delay Option entweder Specific time:
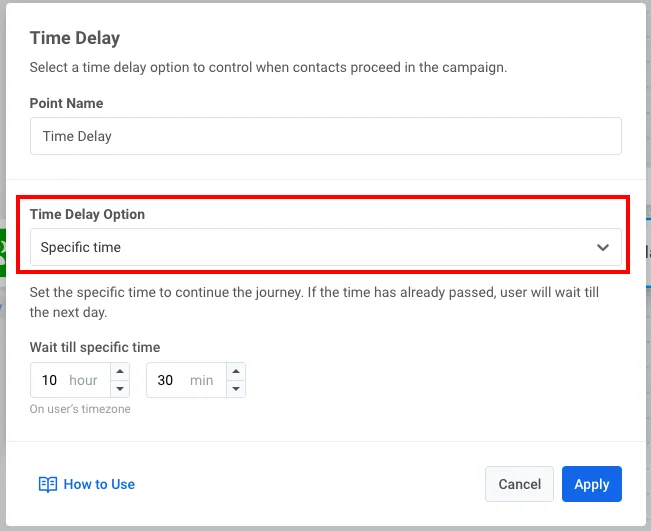
oder Date: