Webhook
Les webhooks vous permettent d’envoyer des données de parcours à des services externes tels que des outils d’analyse, des systèmes CRM et des outils marketing. Vous pouvez :
- Notifier les systèmes externes lorsqu’un client effectue une action dans le parcours
- Envoyer les données client aux outils d’analyse
- Déclencher des e-mails, SMS ou WhatsApp tiers lors d’événements de parcours spécifiques
Comment configurer l’élément Webhook
Anchor link toAjouter l’élément Webhook
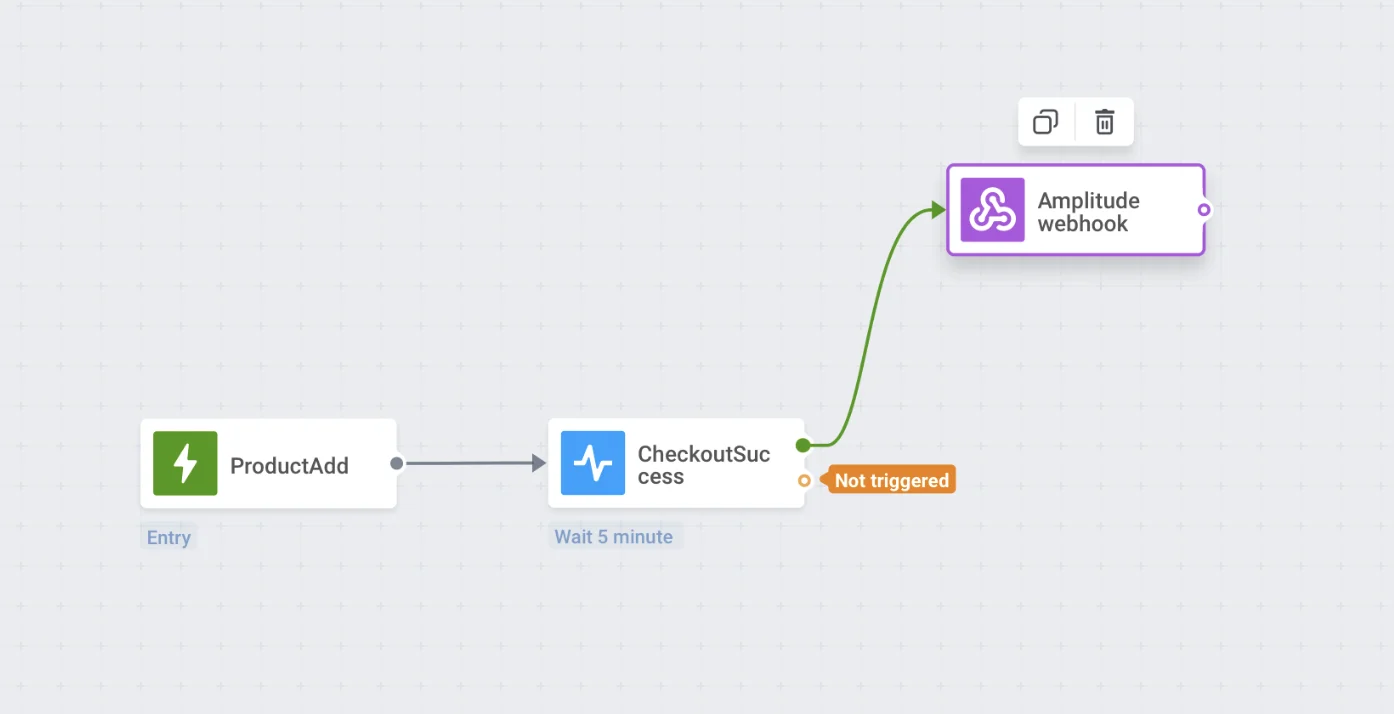
Anchor link toFaites glisser et déposez l’élément Webhook sur le canevas. Placez le Webhook où vous le souhaitez, en gardant à l’esprit les informations de parcours que vous allez envoyer à un service tiers.
Nommer l’étape Webhook et spécifier l’URL et le type de la requête
Anchor link toDans le champ STEP NAME, saisissez un nom pour le webhook. Il peut être pratique de nommer les webhooks en fonction des services auxquels ils envoient des données ou du cas d’utilisation.
Ensuite, dans le champ URL, spécifiez l’URL de la requête à laquelle les données doivent être envoyées. À côté du champ URL, sélectionnez le type de requête dans le menu déroulant REQUEST TYPE : GET ou POST.

Configurer les en-têtes
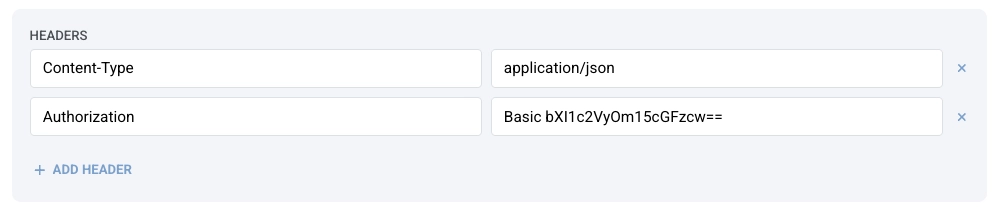
Anchor link toDans la section HEADERS, définissez le type de contenu.
Par défaut, le type de contenu est application/json. Si le service auquel vous envoyez le webhook nécessite un autre type de contenu, saisissez celui qui convient dans la valeur de l’en-tête Content-Type.
Exemples de types de contenu :
x-www-form-urlencodedtext/plaintext/xml
Ajoutez des en-têtes supplémentaires si nécessaire en cliquant sur + ADD HEADER. Vous pouvez supprimer n’importe quel en-tête en cliquant sur l’icône « x » à côté.
Par exemple, certaines API peuvent nécessiter une authentification HTTP de base. Pour authentifier de telles requêtes, procédez comme suit :
- Ouvrez un éditeur de texte brut et tapez votre nom d’utilisateur et votre mot de passe sans espaces, séparés par un deux-points. Par exemple :
myuser:mypass - Encodez cette chaîne en Base64.
- Copiez la chaîne Base64 résultante (par exemple,
bXl1c2VyOm15cGFzcw==). - Dans les paramètres du webhook, ajoutez un en-tête Authorization avec la valeur :
Basic <VOTRE CHAÎNE BASE64>. Assurez-vous qu’il y a un espace après le mot « Basic ».
Ajouter le corps de la requête JSON
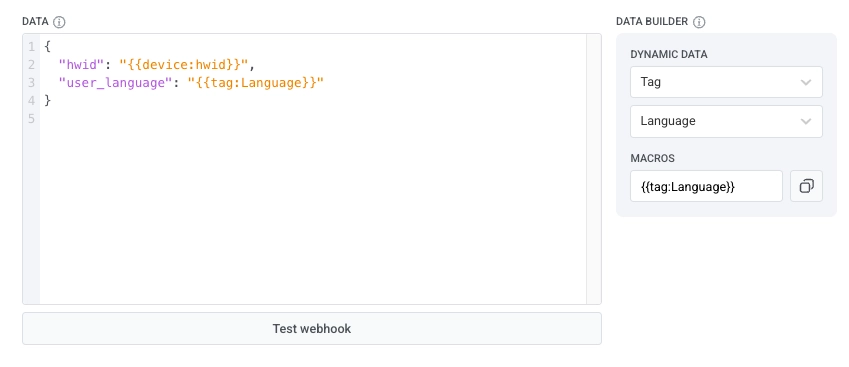
Anchor link toDans la section DATA, saisissez le corps de votre requête JSON. Assurez-vous que le corps de la requête est au format JSON correct.
Exemple :
{ "hwid": "{{device:hwid}}"}Utiliser les données dynamiques et les macros
Anchor link toLe panneau DATA BUILDER vous permet d’insérer des informations dynamiques (telles que des données d’utilisateur, d’appareil, de tag ou d’événement) directement dans le corps de votre requête JSON. Avec les Données Dynamiques, vous pouvez inclure des valeurs spécifiques à l’utilisateur individuel progressant dans le parcours.
Pour cela :
- Sélectionnez une catégorie. Vous pouvez extraire des données de trois catégories :
-
Device : Utilisez les données de l’appareil lorsque vous avez besoin d’informations techniques liées à l’appareil de l’utilisateur.
-
Tag : Utilisez les données de tag lorsque vous souhaitez envoyer des informations stockées dans le profil de l’utilisateur.
-
Event : Utilisez les données d’événement lorsque le webhook doit envoyer des valeurs de l’événement déclencheur du parcours.
- Sélectionnez un paramètre (par exemple, HWID, catégorie préférée, etc.).
- Pushwoosh génère une macro qui ressemble à ceci :
{{tag:Language}}- Copiez la macro et collez-la dans votre corps JSON dans la section DATA.
Lorsque le webhook s’exécute dans un parcours en direct, Pushwoosh remplace automatiquement la macro par la valeur réelle pour cet utilisateur.
Tester le Webhook
Anchor link toCliquez sur Test webhook pour vérifier que la configuration de votre webhook est correcte et que la requête est envoyée avec succès.
Enregistrer votre configuration
Anchor link toCliquez sur Apply pour enregistrer la configuration de votre webhook.