Entrée basée sur un déclencheur
Une Entrée basée sur un déclencheur démarre le parcours lorsqu’un utilisateur effectue un événement spécifique (par exemple, réalise une action spécifique).
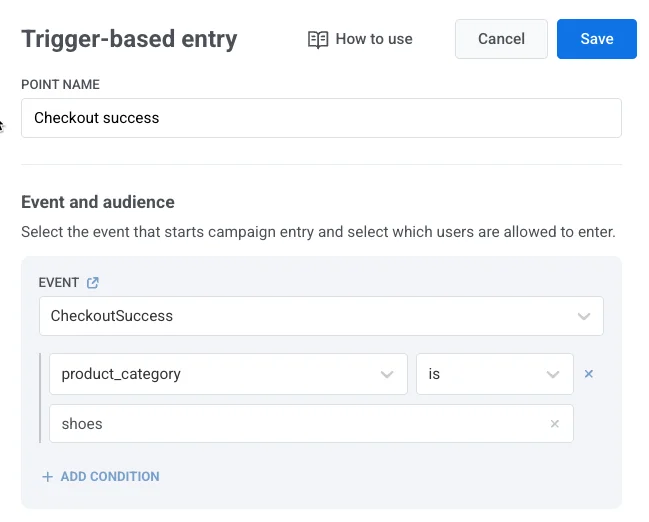
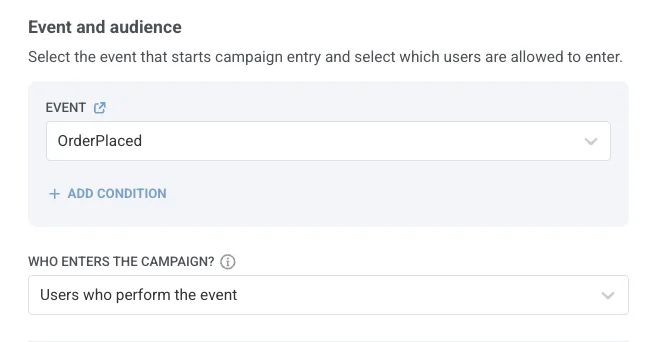
Pour configurer une entrée basée sur un déclencheur, localisez l’élément d’entrée sur le canevas et sélectionnez l’Événement qui servira de déclencheur.
Pour plus d’informations sur la configuration des événements, consultez la documentation sur les Événements.
Si l’Événement sélectionné a des attributs, vous pouvez affiner les conditions d’entrée en utilisant ces attributs. Cliquez sur Ajouter une condition lors de la modification de l’élément, puis choisissez un attribut dans la liste déroulante et définissez son opérateur et sa valeur.
Définir qui entre dans la campagne
Anchor link toDéfinissez quel(s) utilisateur(s) doi(ven)t entrer dans le parcours lorsqu’un événement spécifique se produit.
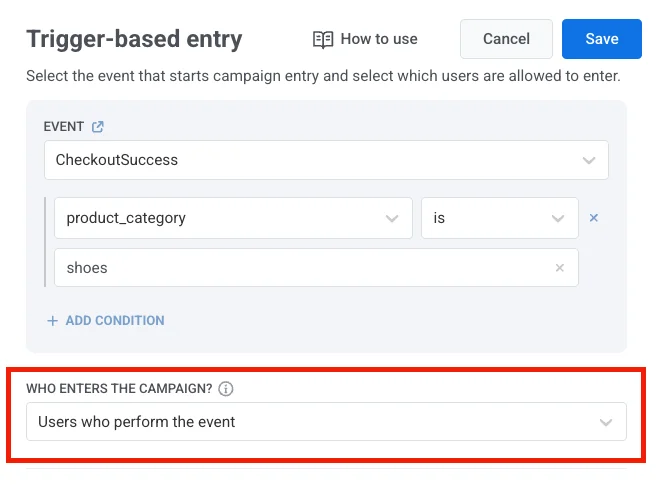
Utilisez la liste déroulante Qui entre dans la campagne ? pour choisir entre les deux modes disponibles :
Utilisateurs qui effectuent l’événement (par défaut)
Anchor link toL’utilisateur qui déclenche l’événement est celui qui entre dans le parcours.
Exemple
Un utilisateur finalise un achat (événement CheckoutSuccess). Ce même utilisateur (par ex., User ID : 123) entre dans un parcours post-achat qui inclut un message de remerciement, des recommandations de produits ou une enquête de satisfaction.
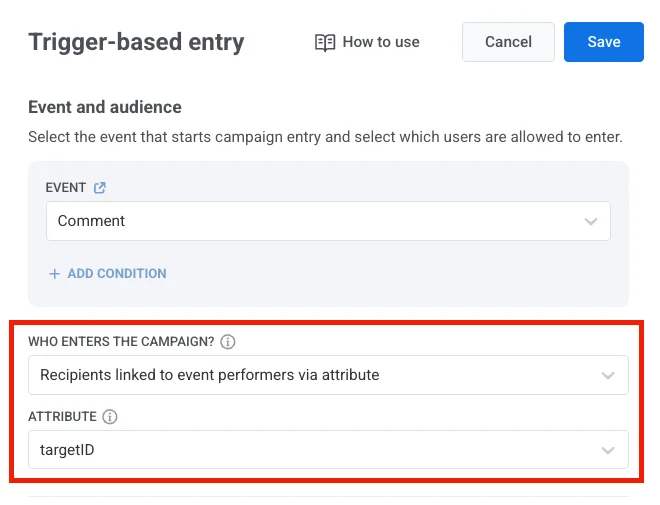
Utilisateurs à partir d’un attribut d’événement
Anchor link toAu lieu d’inscrire l’utilisateur qui a déclenché l’événement, vous pouvez passer un ou plusieurs User IDs dans un attribut d’événement personnalisé. Les utilisateurs listés dans cet attribut entreront dans le parcours.
Pour cela, sélectionnez Utilisateurs à partir d’un attribut d’événement et choisissez une clé d’attribut (par ex., recipient_ids, target_user_id). Cette clé doit correspondre à la structure de votre payload d’événement.
Exemple de payload (utilisateur unique)
Anchor link to{ "application": "XXXXX-XXXXX", "event": "invitation", "attributes": { "targetId": 321 }, "userId": 123}L’utilisateur 321 (de targetId) entre dans le parcours.
Exemple de payload (utilisateurs multiples)
Anchor link toSi vous fournissez plusieurs ID utilisateur, utilisez un tableau JSON de chaînes de caractères.
{ "application": "XXXXX-XXXXX", "event": "invitation", "attributes": { "targetIds": [1,2,3,4] }, "userId": 123}Les utilisateurs 1, 2, 3 et 4 entreront dans le parcours.
Cas d’utilisation
Anchor link toNotifications de commentaires
Lorsque quelqu’un commente la publication d’un utilisateur, le propriétaire de la publication est notifié.
Exemple : Un événement de commentaire inclut l’ID du propriétaire de la publication dans un attribut target_user_id. Cet utilisateur entre dans un parcours pour recevoir la notification.
Programmes de parrainage
Lorsqu’un utilisateur parrainé s’inscrit ou effectue un achat, la personne qui l’a parrainé est ajoutée au parcours.
Exemple : L’utilisateur 123 déclenche l’événement, et le parrain 456 (de l’attribut referrer_id) entre dans une campagne de récompense.
Achats de cadeaux
Lorsqu’un utilisateur achète un cadeau, le destinataire est ajouté à un parcours en utilisant le recipient_user_id du payload de l’événement.
Exemple L’utilisateur 123 achète un cadeau pour l’utilisateur 456, qui reçoit alors une notification, un parcours d’intégration ou un message de remerciement.
Définir la disponibilité de l’entrée
Anchor link toContrôlez quand les utilisateurs peuvent entrer dans un parcours via une entrée basée sur un déclencheur. Vous avez deux options :
- Autoriser l’entrée à tout moment : Les utilisateurs peuvent entrer dans le parcours chaque fois que l’événement déclencheur se produit.
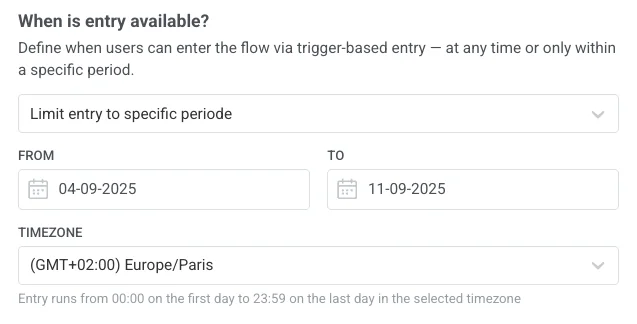
- Limiter l’entrée à une période spécifique : Les utilisateurs ne peuvent entrer dans le parcours que si l’événement déclencheur se produit dans la plage de dates sélectionnée.
Lorsque vous limitez l’entrée, sélectionnez la date de début, la date de fin et le fuseau horaire. La fenêtre d’entrée commence à 00:00 à la date de début et se termine à 23:59 à la date de fin, en fonction du fuseau horaire choisi.
Contrôler le nombre de sessions qu’un utilisateur peut avoir en même temps
Anchor link toDécidez si chaque utilisateur ne peut rejoindre qu’un seul parcours à la fois, ou participer à plusieurs parcours en parallèle.
Choisissez l’une des options suivantes dans la liste déroulante :
- Une session active par utilisateur
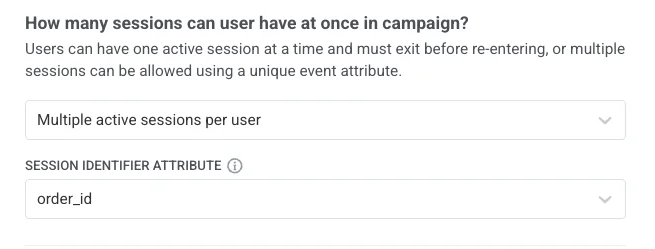
- Plusieurs sessions actives par utilisateur
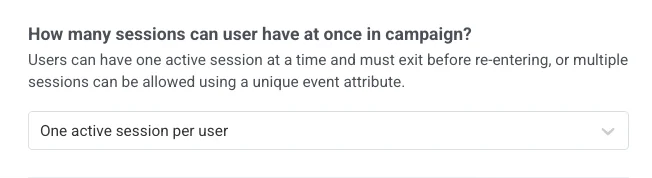
Une session active par utilisateur
Anchor link toChaque utilisateur ne peut avoir qu’une seule session active dans la campagne. Il doit terminer ou quitter la session en cours avant d’en commencer une nouvelle.
Cas d’utilisation
Anchor link to- Parcours d’intégration où un utilisateur ne devrait pas recommencer avant d’avoir terminé le parcours actuel
- Rappels de renouvellement d’abonnement où les utilisateurs ne devraient pas recevoir de notifications qui se chevauchent
- Offres à durée limitée ou essais où une seule exécution de campagne active est autorisée par utilisateur
- Campagnes de collecte de commentaires pour s’assurer que chaque utilisateur donne son avis une seule fois avant de réintégrer
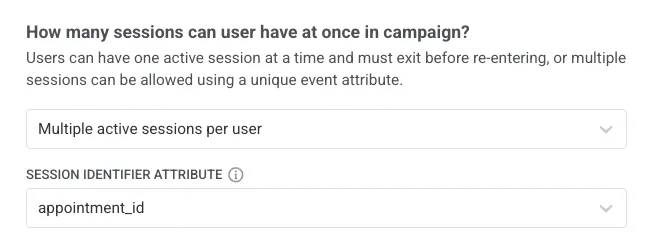
Plusieurs sessions actives par utilisateur
Anchor link toLes utilisateurs peuvent avoir plus d’une session active dans une campagne. Chaque session doit être identifiée par un attribut d’événement unique (par ex., order_id, product_id).
Pour configurer cela :
-
Sélectionnez Plusieurs sessions actives par utilisateur dans la liste déroulante.
-
Choisissez un attribut d’identifiant de session (par ex.,
order_id,product_id). Cet attribut distinguera une session d’une autre.
Exemple
-
OrderPlacedavecorder_id = "1001"→ démarre la Session 1 -
OrderPlacedavecorder_id = "1002"→ démarre la Session 2
Si un événement OrderReady est envoyé sans order_id, les sessions 1 et 2 seront toutes deux marquées comme « prêtes », même si une seule commande l’est réellement.
Cas d’utilisation
Anchor link to- Achats e-commerce : chaque commande démarre son propre parcours, de sorte que plusieurs commandes d’un même utilisateur peuvent être suivies indépendamment. (attribut :
order_id) - Programmes de parrainage : chaque parrainage crée une nouvelle session, permettant à un utilisateur de parrainer plusieurs amis. (attribut :
referral_id) - Programmes de fidélité : suivez les points ou les récompenses de différentes transactions s’exécutant en parallèle. (attribut :
transaction_id) - Réservations de billets : chaque réservation lance son propre parcours, afin que les utilisateurs puissent gérer plusieurs billets à la fois. (attribut :
booking_id) - Planification de rendez-vous : chaque rendez-vous est traité comme une session distincte. (attribut :
appointment_id)
Une fois que vous avez configuré l’élément d’entrée, cliquez sur Appliquer pour enregistrer les modifications.
Scénario d’exemple : Parcours de commande e-commerce avec plusieurs sessions
Anchor link toImaginez que vous souhaitiez envoyer des notifications pour chaque commande passée par un utilisateur. Chaque commande doit avoir sa propre session de parcours. Pour ce faire, vous utiliserez l’événement OrderPlaced comme déclencheur et l’attribut order_id comme identifiant de session.
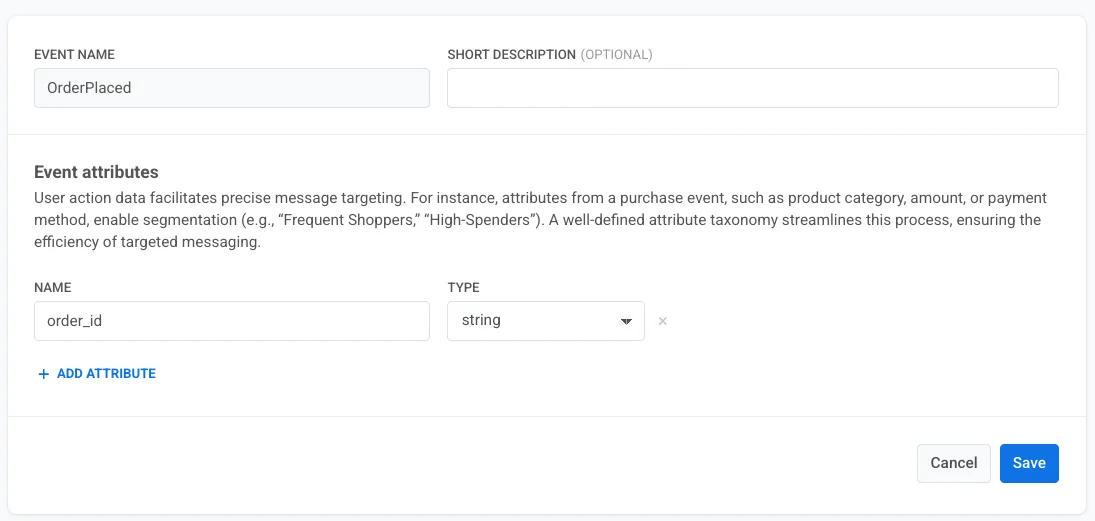
- Créez l’événement
OrderPlacedet assurez-vous qu’il inclut l’attributorder_id. En savoir plus sur la création d’événements
- Dans les paramètres de session, sélectionnez Plusieurs sessions actives par utilisateur et choisissez
order_idcomme identifiant de session.
Dans cette configuration, chaque nouvelle commande démarre une session de parcours distincte.
OrderPlacedavecorder_id = 1001démarre la Session 1OrderPlacedavecorder_id = 1002démarre la Session 2
- Ensuite, ajoutez un élément Attendre un déclencheur pour suivre quand une commande est prête à être récupérée ou livrée. Utilisez l’événement
OrderReady, qui doit également inclure le mêmeorder_id. Cela garantit que chaque commande est mise à jour dans la bonne session :
OrderReadyavecorder_id = 1001s’applique uniquement à la Session 1OrderReadyavecorder_id = 1002s’applique uniquement à la Session 2

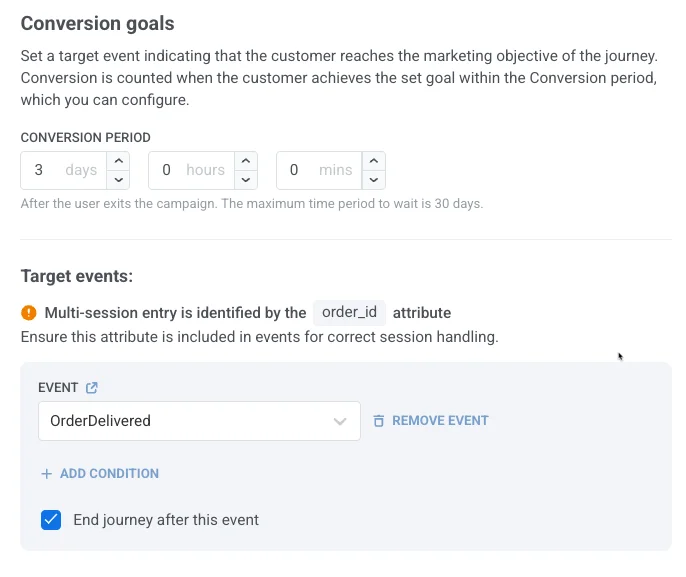
- Enfin, ajoutez un objectif de conversion, par exemple l’événement
OrderDelivered. Cet événement doit également inclure le mêmeorder_idafin qu’il puisse être associé à la bonne session.
-
Si
OrderDeliveredinclutorder_id = "1001", il enregistre une conversion pour la Session 1. -
Si
OrderDeliveredinclutorder_id = "1002", il enregistre une conversion pour la Session 2.