টার্গেটেড পুশ
এই ফ্লোটি দেখায় কীভাবে একটি নির্দিষ্ট অডিয়েন্স সেগমেন্টে একটি টার্গেটেড পুশ নোটিফিকেশন পাঠাতে হয়। টার্গেটেড পুশের জন্য আপনি যেভাবে আপনার সেগমেন্ট তৈরি করবেন তা নির্ভর করে পুশ নোটিফিকেশনটি একটি কমিউনিকেশন ফ্লো শুরু করছে নাকি বিদ্যমান একটি ফ্লো চালিয়ে যাচ্ছে তার উপর।
যদি একটি পুশ নোটিফিকেশন একটি কমিউনিকেশন ফ্লো শুরু করে
Anchor link toএকবার আপনি একটি বেসিক পুশ ফ্লো তৈরি করলে, আপনি আপনার টার্গেটেড পুশ সেট আপ করতে পারেন।
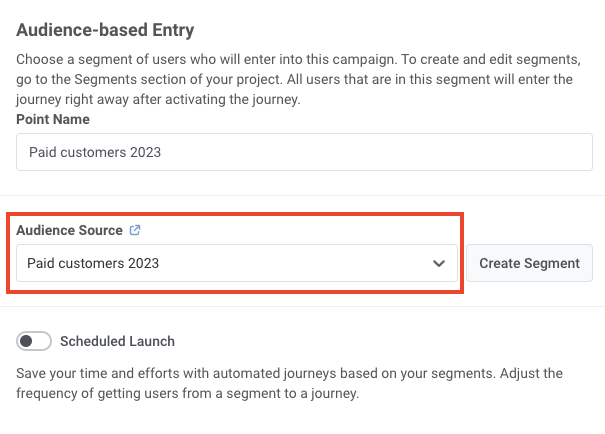
আপনার পুশ নোটিফিকেশনের জন্য অডিয়েন্স নির্বাচন করতে Audience-based Entry এলিমেন্টে ডাবল-ক্লিক করুন। স্ক্র্যাচ থেকে একটি সেগমেন্ট তৈরি করুন, আপনার বিদ্যমান সেগমেন্টগুলো থেকে বেছে নিন, অথবা একটি সেগমেন্ট ফাইল ইম্পোর্ট করুন।
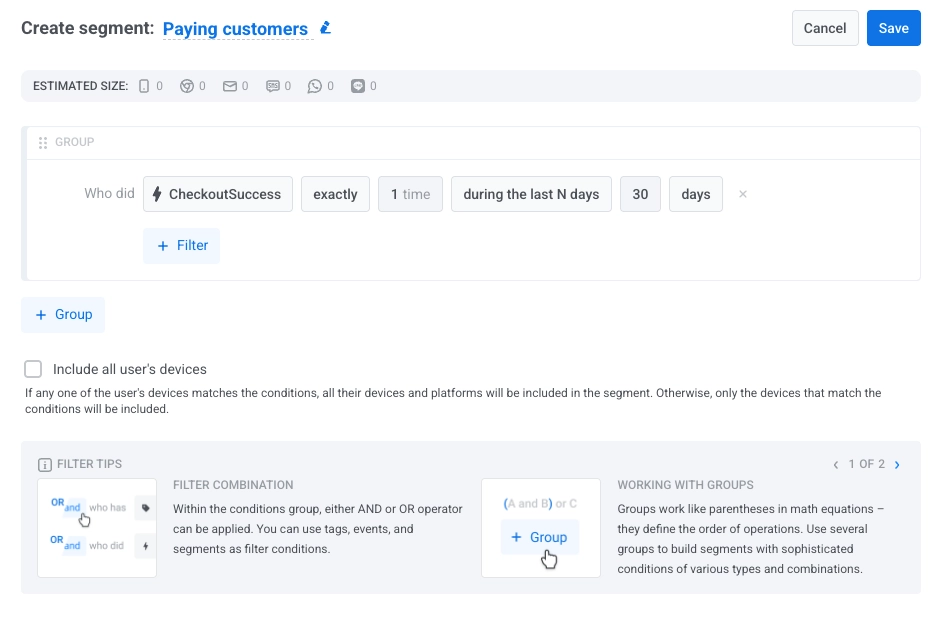
১. স্ক্র্যাচ থেকে একটি সেগমেন্ট তৈরি করুন
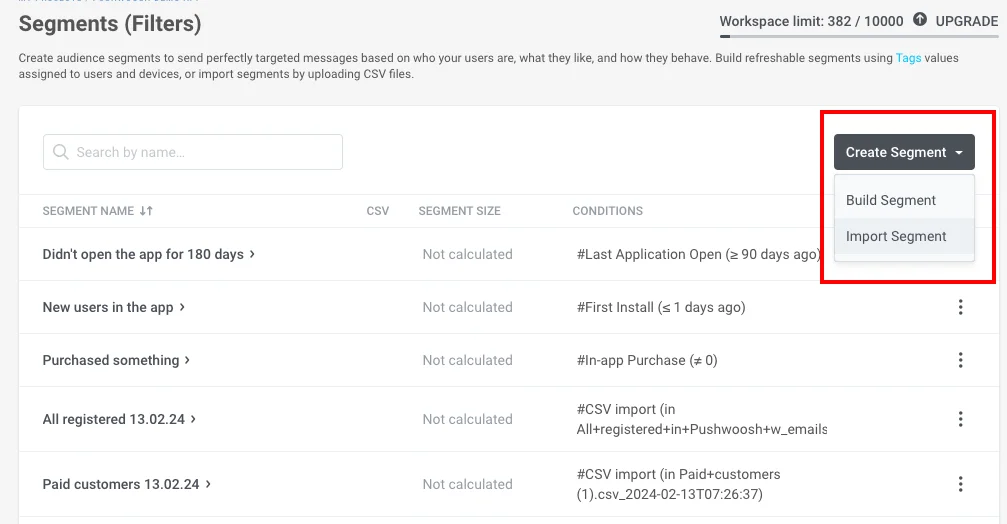
Anchor link toCreate segment-এ ক্লিক করুন এবং ড্রপডাউন থেকে Build segment নির্বাচন করুন।
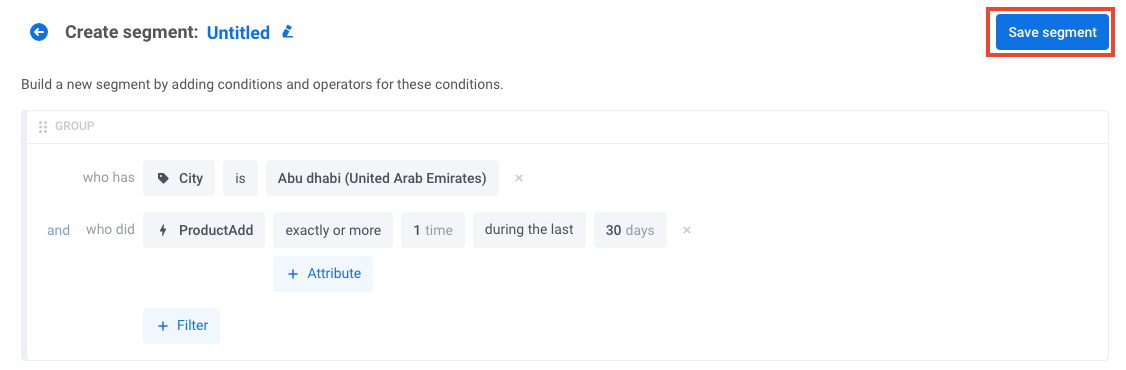
যে ড্রয়ারটি খুলবে, সেখানে সেগমেন্ট তৈরি করুন। কীভাবে সেগমেন্ট তৈরি করতে হয় তা জানুন।
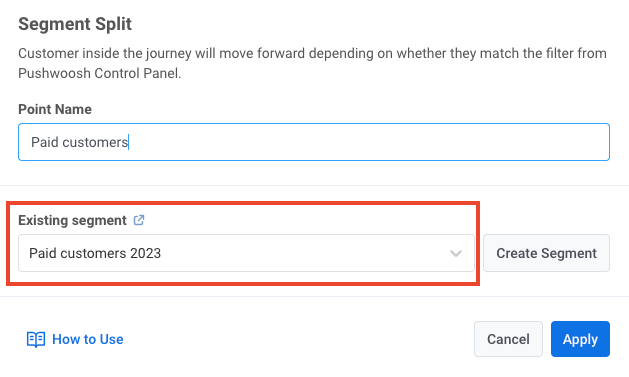
২. একটি বিদ্যমান সেগমেন্ট নির্বাচন করুন
Anchor link toAudience source ফিল্ডে আপনার বিদ্যমান সেগমেন্টগুলোর মধ্যে একটি নির্বাচন করুন। নিম্নলিখিত উদাহরণে, একটি পুশ পেইড গ্রাহকদের লক্ষ্য করে পাঠানো হবে:
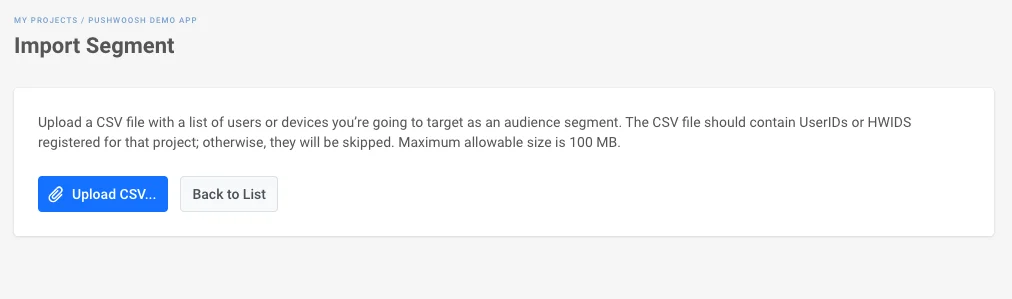
৩. একটি সেগমেন্ট ফাইল ইম্পোর্ট করুন
Anchor link toAudience source বিভাগে, Create segment-এ ক্লিক করুন এবং ড্রপডাউন থেকে Import segment নির্বাচন করুন:
তারপর আপনার ফাইলটি CSV ফরম্যাটে ইম্পোর্ট করুন। ধাপে ধাপে নির্দেশাবলী এবং ফাইলের প্রয়োজনীয়তার জন্য, দেখুন কীভাবে একটি সেগমেন্ট ইম্পোর্ট করতে হয়।
একবার আপনি অডিয়েন্স সোর্স নির্বাচন করে এবং এলিমেন্টটি সেট আপ করে ফেললে, Save-এ ক্লিক করুন।
যদি একটি পুশ নোটিফিকেশন একটি কমিউনিকেশন ফ্লো চালিয়ে যায়
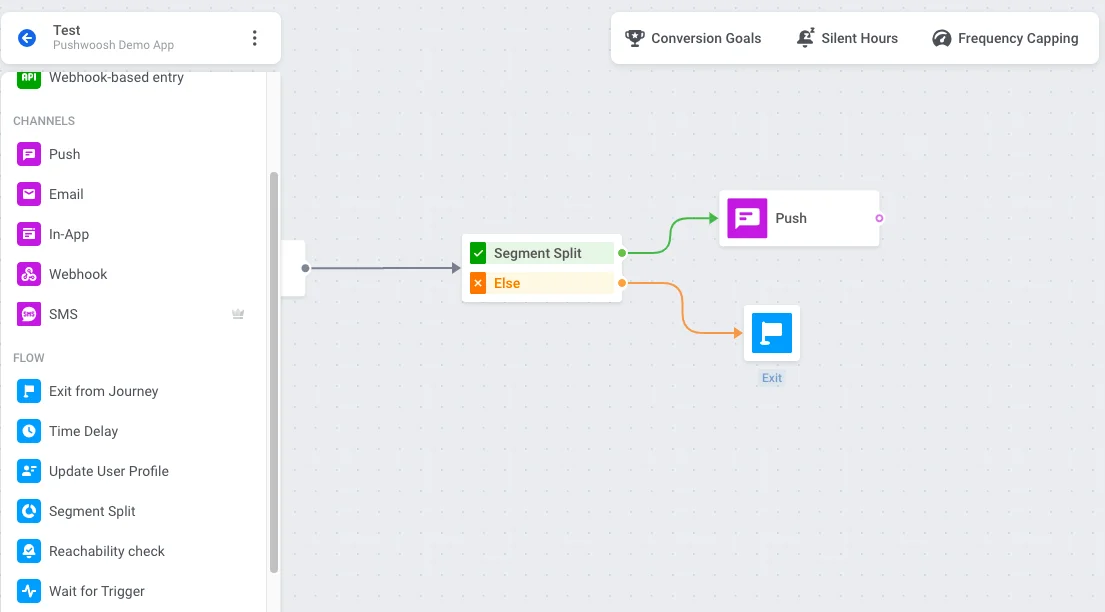
Anchor link toপূর্ববর্তী কমিউনিকেশন এলিমেন্ট এবং যে পুশ নোটিফিকেশনটি আপনি টার্গেট করতে চান তার মধ্যে Condition split এলিমেন্টটি প্রবেশ করান। এর কনফিগারেশন খুলতে এলিমেন্টটিতে ডাবল-ক্লিক করুন।
সেগমেন্টটি সংজ্ঞায়িত করুন
Anchor link toWhat defines the user flow?-এর অধীনে, Segment নির্বাচন করুন।
তারপর আপনি তিনটি উপায়ে সেগমেন্ট সেট করতে পারেন:
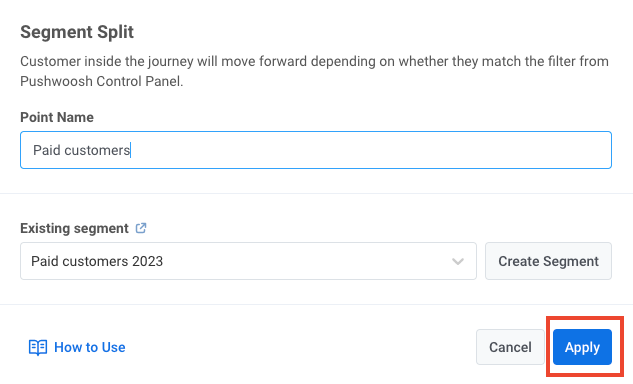
একটি বিদ্যমান সেগমেন্ট নির্বাচন করুন
Anchor link toআপনার সেগমেন্টগুলোর মধ্যে একটি বেছে নিতে Existing segment ফিল্ডটি ব্যবহার করুন।
স্ক্র্যাচ থেকে একটি সেগমেন্ট তৈরি করুন
Anchor link toBranches বিভাগের পাশে Create segment-এ ক্লিক করুন এবং ড্রপডাউন থেকে Build segment নির্বাচন করুন। একটি ড্রয়ার খুলবে যেখানে আপনি সেগমেন্ট তৈরি করতে পারবেন।
কীভাবে সেগমেন্ট তৈরি করতে হয় তা জানুন
একটি সেগমেন্ট ফাইল ইম্পোর্ট করুন
Anchor link toCreate segment-এ ক্লিক করুন এবং ড্রপডাউন থেকে Import segment নির্বাচন করুন। তারপর আপনার ফাইলটি CSV ফরম্যাটে ইম্পোর্ট করুন।
ধাপে ধাপে নির্দেশাবলী এবং ফাইলের প্রয়োজনীয়তার জন্য, দেখুন কীভাবে একটি সেগমেন্ট ইম্পোর্ট করতে হয়।
ব্রাঞ্চগুলো কনফিগার করুন
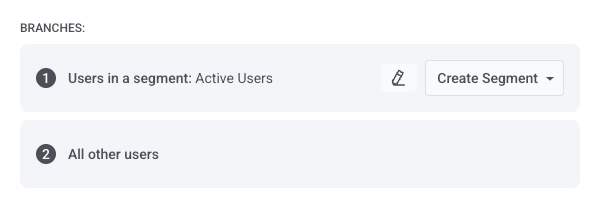
Anchor link toBranches বিভাগটি উপলব্ধ পাথগুলো দেখায়, যেমন Users in a segment (যে ব্যবহারকারীরা আপনার সেট করা সেগমেন্টের সাথে মেলে) এবং All other users।
জার্নি ক্যানভাসে, Users in a segment ব্রাঞ্চে পুশ নোটিফিকেশন যোগ করুন। All other users ব্রাঞ্চে একটি এক্সিট বা অন্য কোনো এলিমেন্ট যোগ করুন যাতে সেই পাথটি সংজ্ঞায়িত হয়।
সম্পন্ন হলে, Save-এ ক্লিক করুন।