Trigger-based entry
A Trigger-based entry starts the journey when a user performs a specific event (for example, takes a specific action).
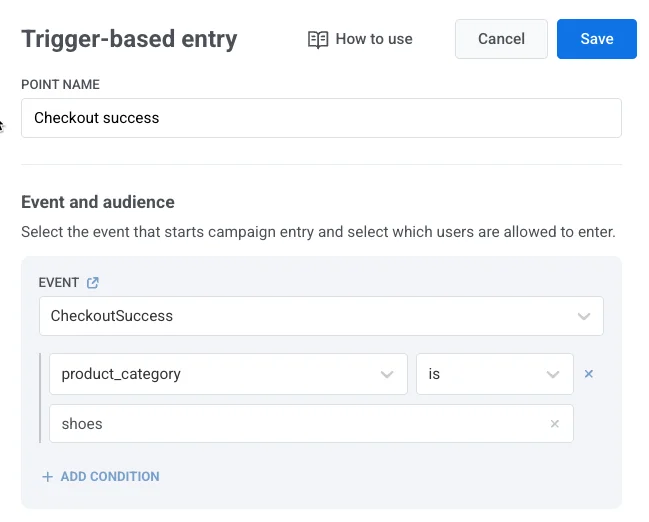
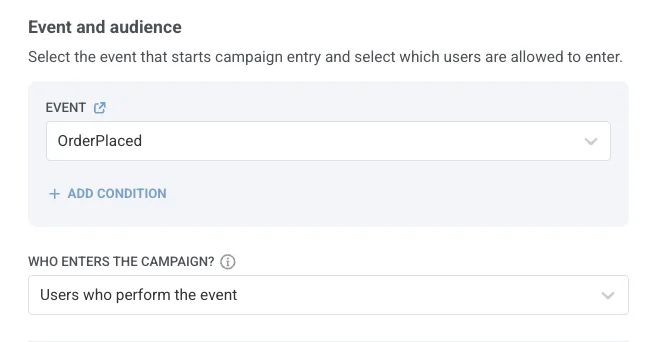
To set up a Trigger-based entry, locate the entry element on the canvas and select the Event that will serve as the trigger.
For more information on how to configure events, see Events documentation.
If the selected Event has attributes, you can narrow the entry conditions using those attributes. Click Add condition when editing the element, then choose an attribute from the drop-down list and define its operator and value.
Define who enters the campaign
Anchor link toDefine which user(s) should enter the journey when a specific event occurs.
Use the Who enters the campaign? dropdown to choose between the two available modes:
Users who perform the event (default)
Anchor link toThe user who triggers the event is the one who enters the journey.
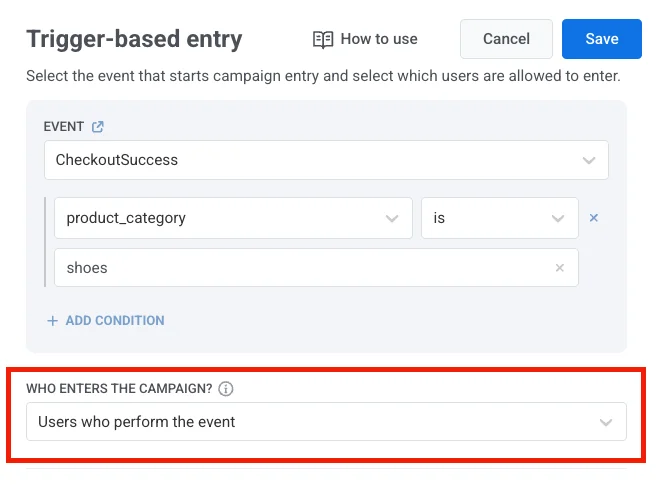
Example
A user completes a purchase (CheckoutSuccess event). That same user (e.g., User ID: 123) enters a post-purchase journey that includes a thank-you message, product recommendations, or a satisfaction survey.
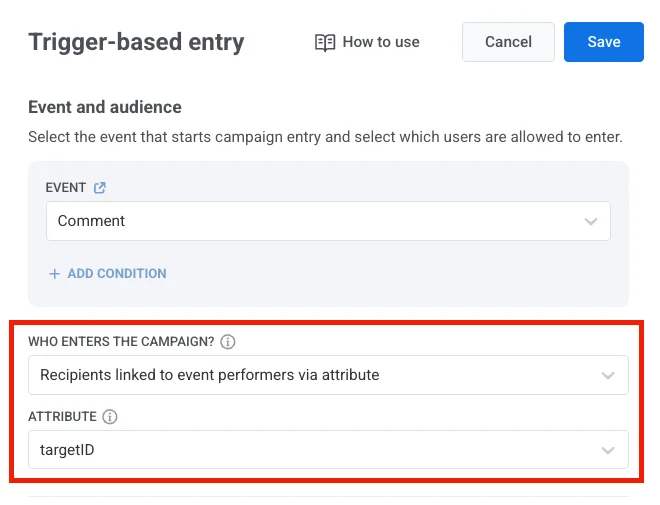
Users from an event attribute
Anchor link toInstead of enrolling the user who triggered the event, you can pass one or more User IDs in a custom event attribute. The users listed in that attribute will enter the journey.
For this, select Users from an event attribute and choose an attribute key (e.g., recipient_ids, target_user_id). This key should match your event payload structure.
Example payload (single user)
Anchor link to{ "application": "XXXXX-XXXXX", "event": "invitation", "attributes": { "targetId": 321 }, "userId": 123}User 321 (from targetId) enters the journey.
Example payload (multiple users)
Anchor link toIf you provide multiple user IDs, use a JSON array of strings.
{ "application": "XXXXX-XXXXX", "event": "invitation", "attributes": { "targetIds": [1,2,3,4] }, "userId": 123}Users 1, 2, 3, and 4 will enter the journey.
Use cases
Anchor link toComment notifications
When someone comments on a user’s post, the post owner is notified.
Example: A comment event includes the post owner’s ID in a target_user_id attribute. That user enters a journey to receive the notification.
Referral programs
When a referred user signs up or makes a purchase, the person who referred them is added to the journey.
Example: User 123 triggers the event, and the referrer 456 (from the referrer_id attribute) enters a reward campaign.
Gift purchases
When a user purchases a gift, the recipient is added to a journey using the recipient_user_id from the event payload.
Example User 123 buys a gift for user 456, who then receives a notification, onboarding flow, or thank-you message.
Set entry availability
Anchor link toControl when users can enter a journey via a trigger-based entry. You have two options:
-
Allow entry at any time: Users can enter the journey whenever the trigger event occurs.
-
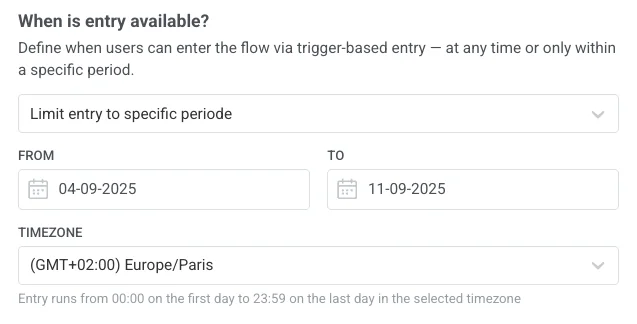
Limit entry to a specific period: Users can only enter the journey if the trigger event happens within the selected date range.
When limiting entry, select the start date, end date, and the timezone. The entry window begins at 00:00 on the start date and ends at 23:59 on the end date, based on the chosen timezone.
Control how many sessions a user can have at the same time
Anchor link toDecide whether each user can join only one journey at a time, or take part in several journeys in parallel.
Choose one of the following options from the dropdown:
- One active session per user
- Multiple active sessions per user
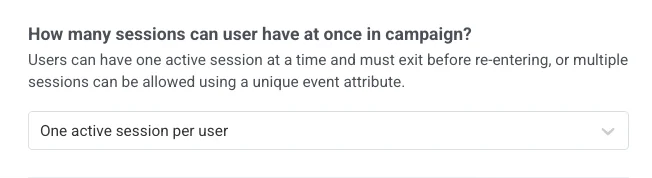
One active session per user
Anchor link toEach user can only have one active session in the campaign. They must complete or exit the current session before starting a new one.
Use cases
Anchor link to- Onboarding flows where a user should not restart until they finish the current journey
- Subscription renewal reminders where users should not receive overlapping notifications
- Limited-time offers or trials where only one active campaign run is allowed per user
- Feedback collection campaigns to ensure each user provides input once before re-entering
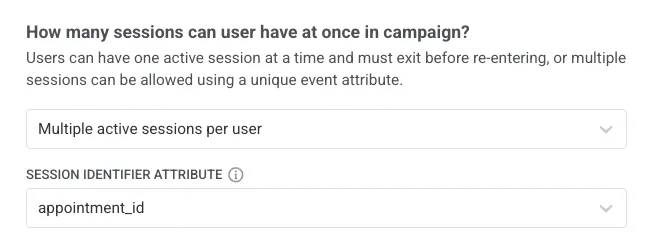
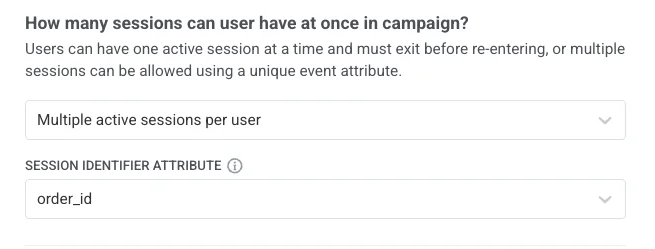
Multiple active sessions per user
Anchor link toUsers can have more than one active session in a campaign. Each session must be identified by a unique event attribute (e.g., order_id, product_id).
To set this up:
-
Select Multiple active sessions per user in the dropdown.
-
Choose a session identifier attribute (e.g.,
order_id,product_id). This attribute will distinguish one session from another.
Example
-
OrderPlacedwithorder_id = "1001"→ starts Session 1 -
OrderPlacedwithorder_id = "1002"→ starts Session 2
If an OrderReady event is sent without order_id, both Session 1 and Session 2 will be marked as “ready,” even if only one order actually is.
Use cases
Anchor link to- E-commerce purchases: each order starts its own journey, so multiple orders from one user can be tracked independently. (attribute:
order_id) - Referral programs: each referral creates a new session, allowing one user to refer multiple friends. (attribute:
referral_id) - Loyalty programs: track points or rewards from different transactions running in parallel. (attribute:
transaction_id) - Ticket bookings: each booking launches its own journey, so users can manage multiple tickets at once. (attribute:
booking_id) - Appointment scheduling: every appointment is handled as a separate session. (attribute:
appointment_id)
Once you’ve configured the entry element, click Apply to save the changes.
Example scenario: E-commerce order journey with multiple sessions
Anchor link toImagine you want to send notifications for every order a user places. Each order should have its own journey session. To do this, you’ll use the OrderPlaced event as the trigger and the attribute order_id as the session identifier.
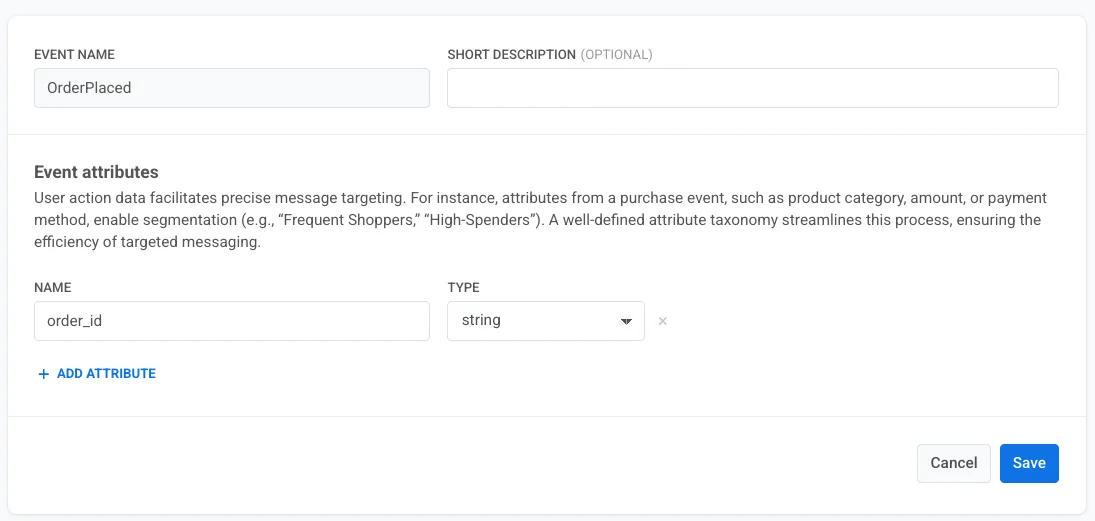
- Create the event
OrderPlacedand make sure it includes the attributeorder_id. Learn more about creating events
- In the session settings, select Multiple active sessions per user and choose
order_idas the session identifier.
In this setup, each new order starts a separate journey session.
OrderPlacedwithorder_id = 1001starts Session 1OrderPlacedwithorder_id = 1002starts Session 2
- Next, add a Wait for Trigger element to track when an order is ready for pickup or delivery. Use the event
OrderReady, which must also include the sameorder_id.
This ensures that each order is updated in the correct session:
OrderReadywithorder_id = 1001applies only to Session 1OrderReadywithorder_id = 1002applies only to Session 2

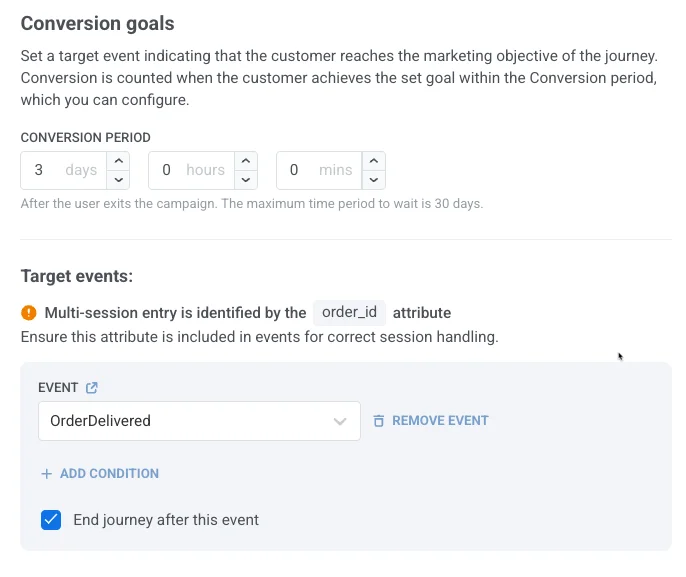
- Finally, add a conversion goal, for example the
OrderDeliveredevent. This event must also include the sameorder_idso it can be matched to the correct session.
-
If
OrderDeliveredincludesorder_id = "1001", it records a conversion for Session 1. -
If
OrderDeliveredincludesorder_id = "1002", it records a conversion for Session 2.