Recurring push
Recurring push sends the same push notification repeatedly at a chosen interval (e.g. daily, weekly) or on selected dates. The flow is the same for mobile and web push.
Prerequisites
- Recurring schedule is only available with Audience-based entry.
- Build a journey with Audience-based Entry, Push, and Exit. See One-time push for the basic flow, then configure the entry schedule below.
Configure recurring entry
Anchor link toDouble-click the Audience-based entry element. Set Entry schedule to Recurring entry, then choose:
- On specific dates: users enter on the dates you pick (e.g. webinar or event dates).
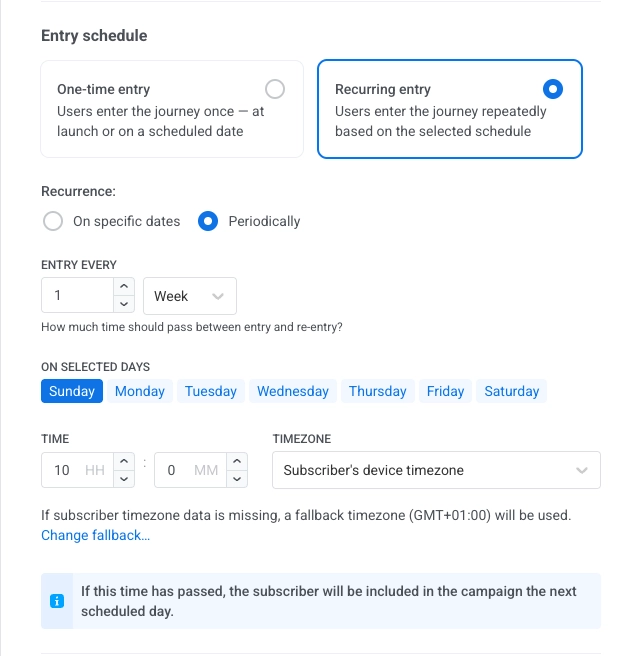
- Periodically: users enter at a fixed interval (e.g. every 1 day, every 1 week).
Set the time and timezone as for a one-time scheduled send. Learn more about recurring entry.
On specific dates
Anchor link toSchedule the journey so users enter on multiple specific dates.
- Select On specific dates and pick the dates in the calendar. Click + Add Date to add more dates.
- Set the time and timezone.
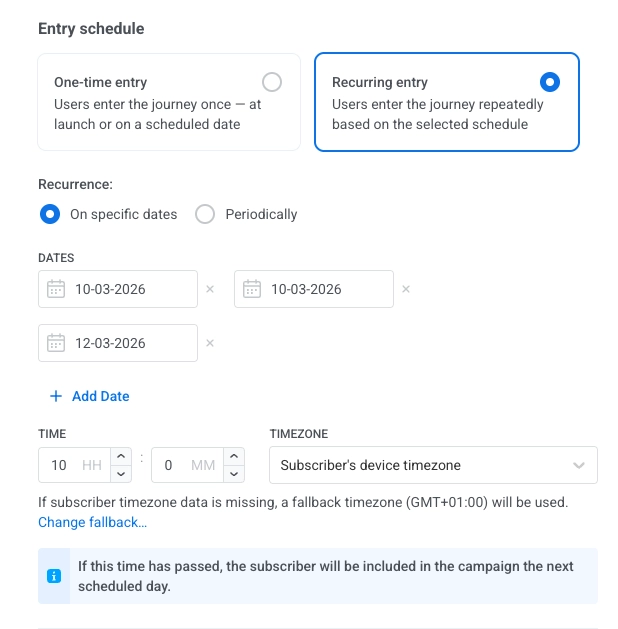
Timezone options:
- Subscriber’s device timezone (default): entry uses each subscriber’s device timezone. If timezone is missing, a fallback is used. Click Change fallback to change it.
- Specific timezone: pick a timezone from the dropdown for a fixed entry time.
Periodically
Anchor link toSet up a journey that runs at a fixed interval (e.g. every Monday at 9:00 AM).
- Select Periodically.
- In ENTRY EVERY, set the interval (e.g. every 1 day, every 2 weeks).
- Pick the days (of the week or month, depending on the interval).
- Set the time and timezone the same way as for On specific dates.
Next steps
Anchor link to- Configure the Push element (message content).
- Configure any other journey elements you need.
- Add the Exit element.
Learn more about Journey elements.
Example: Weekly reminder for a fitness app
Anchor link toSend the same motivational push every Monday at 9:00 AM in each user’s local timezone.
- Create a basic push flow. Add Audience-based Entry to the canvas and select an Audience Source.
- Set recurring entry. In the element, set Entry schedule to Recurring entry → Periodically, ENTRY EVERY to every 1 week, day Monday.
- Set time and timezone. Set time to 9:00 AM and Subscriber’s device timezone.
- Add Push and Exit. Add Push (create the message) and Exit. Review and click Launch campaign.