Segments
What are Segments?
Segments are pools of app subscribers complying with the conditions you specify – those who have the specific tags’ values assigned to their devices and/or user IDs.
Creating Segments
Having set up all the necessary Tags that identify your target app users, we can now create a Segment and send a push notification to specific users.
Build Segment
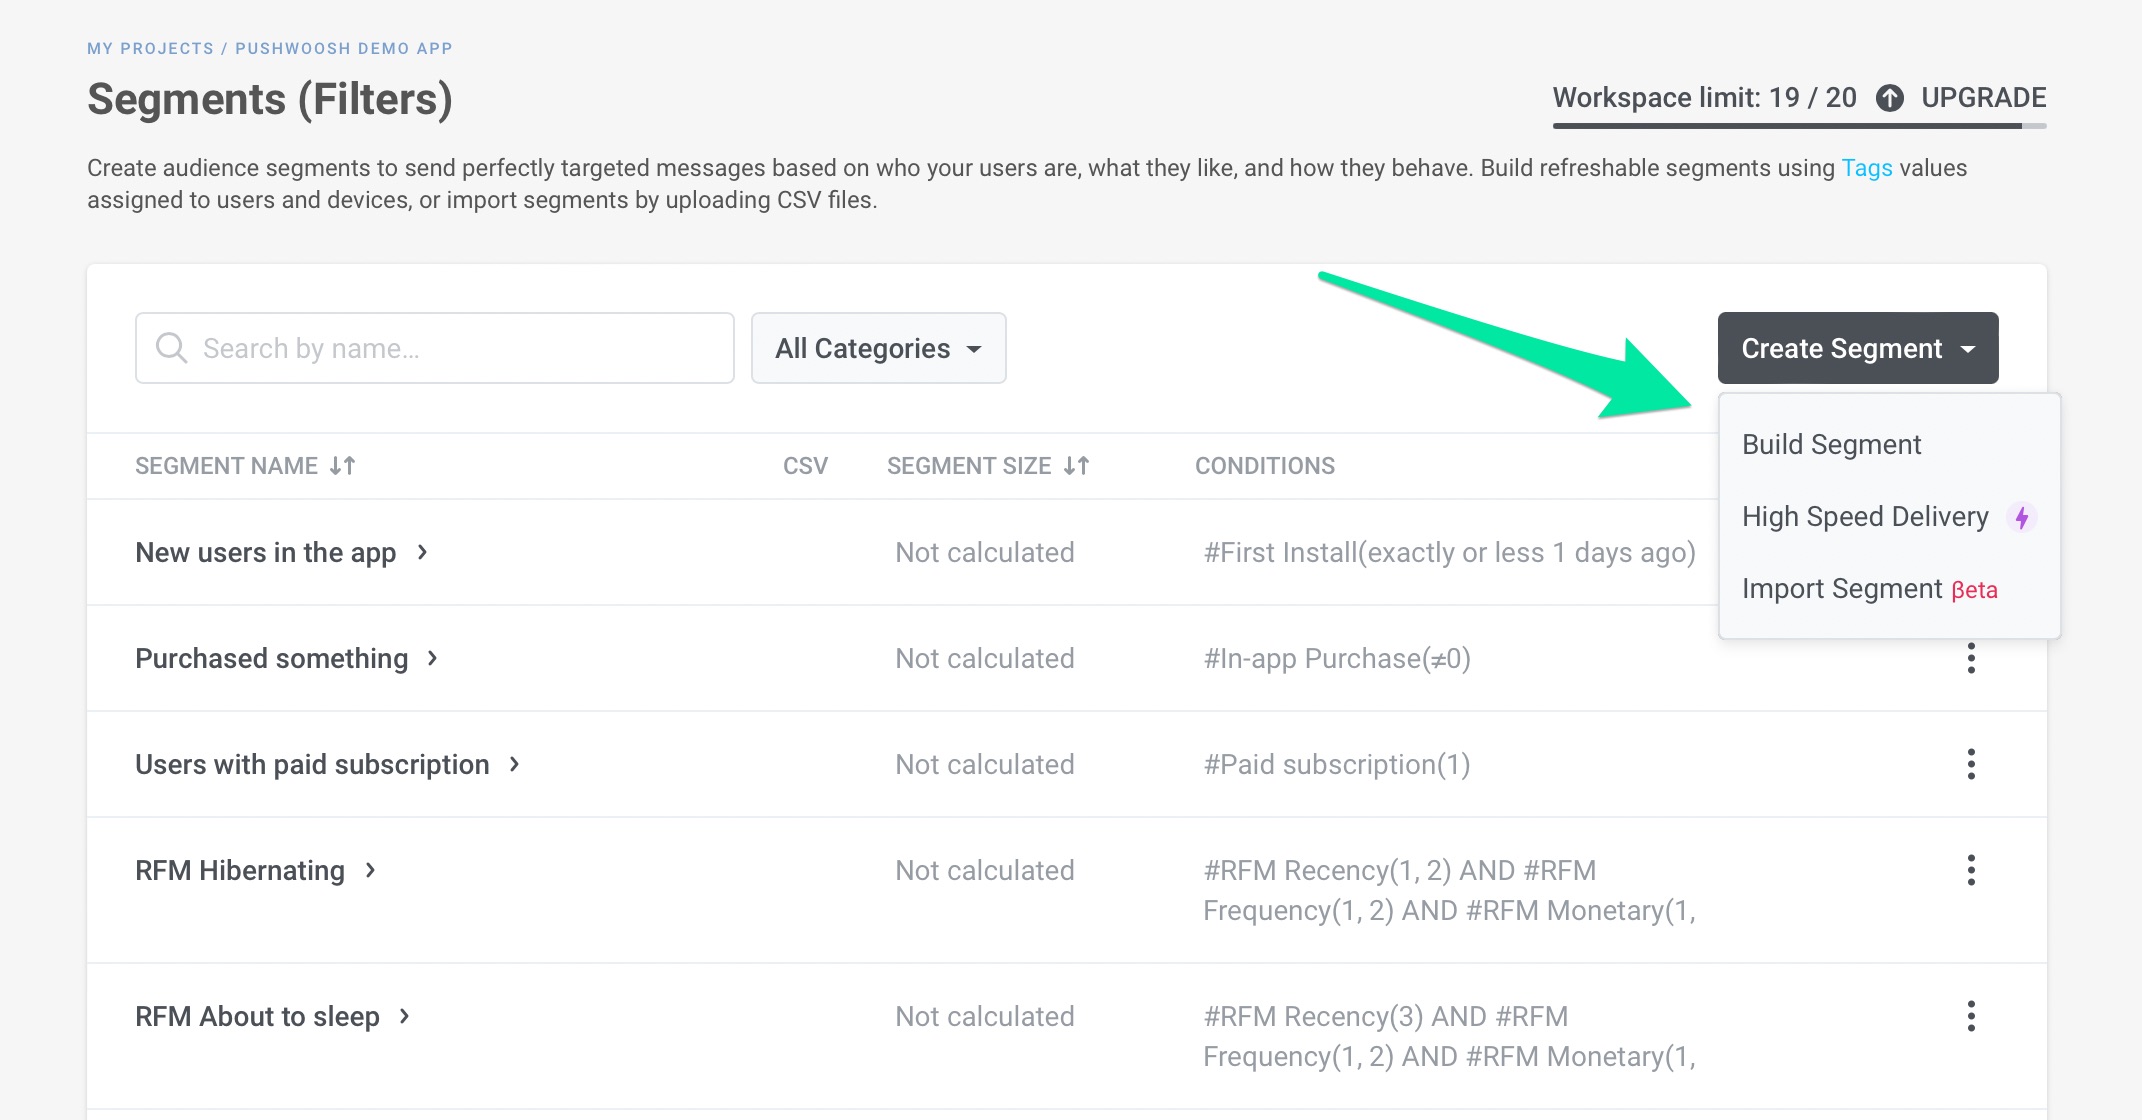
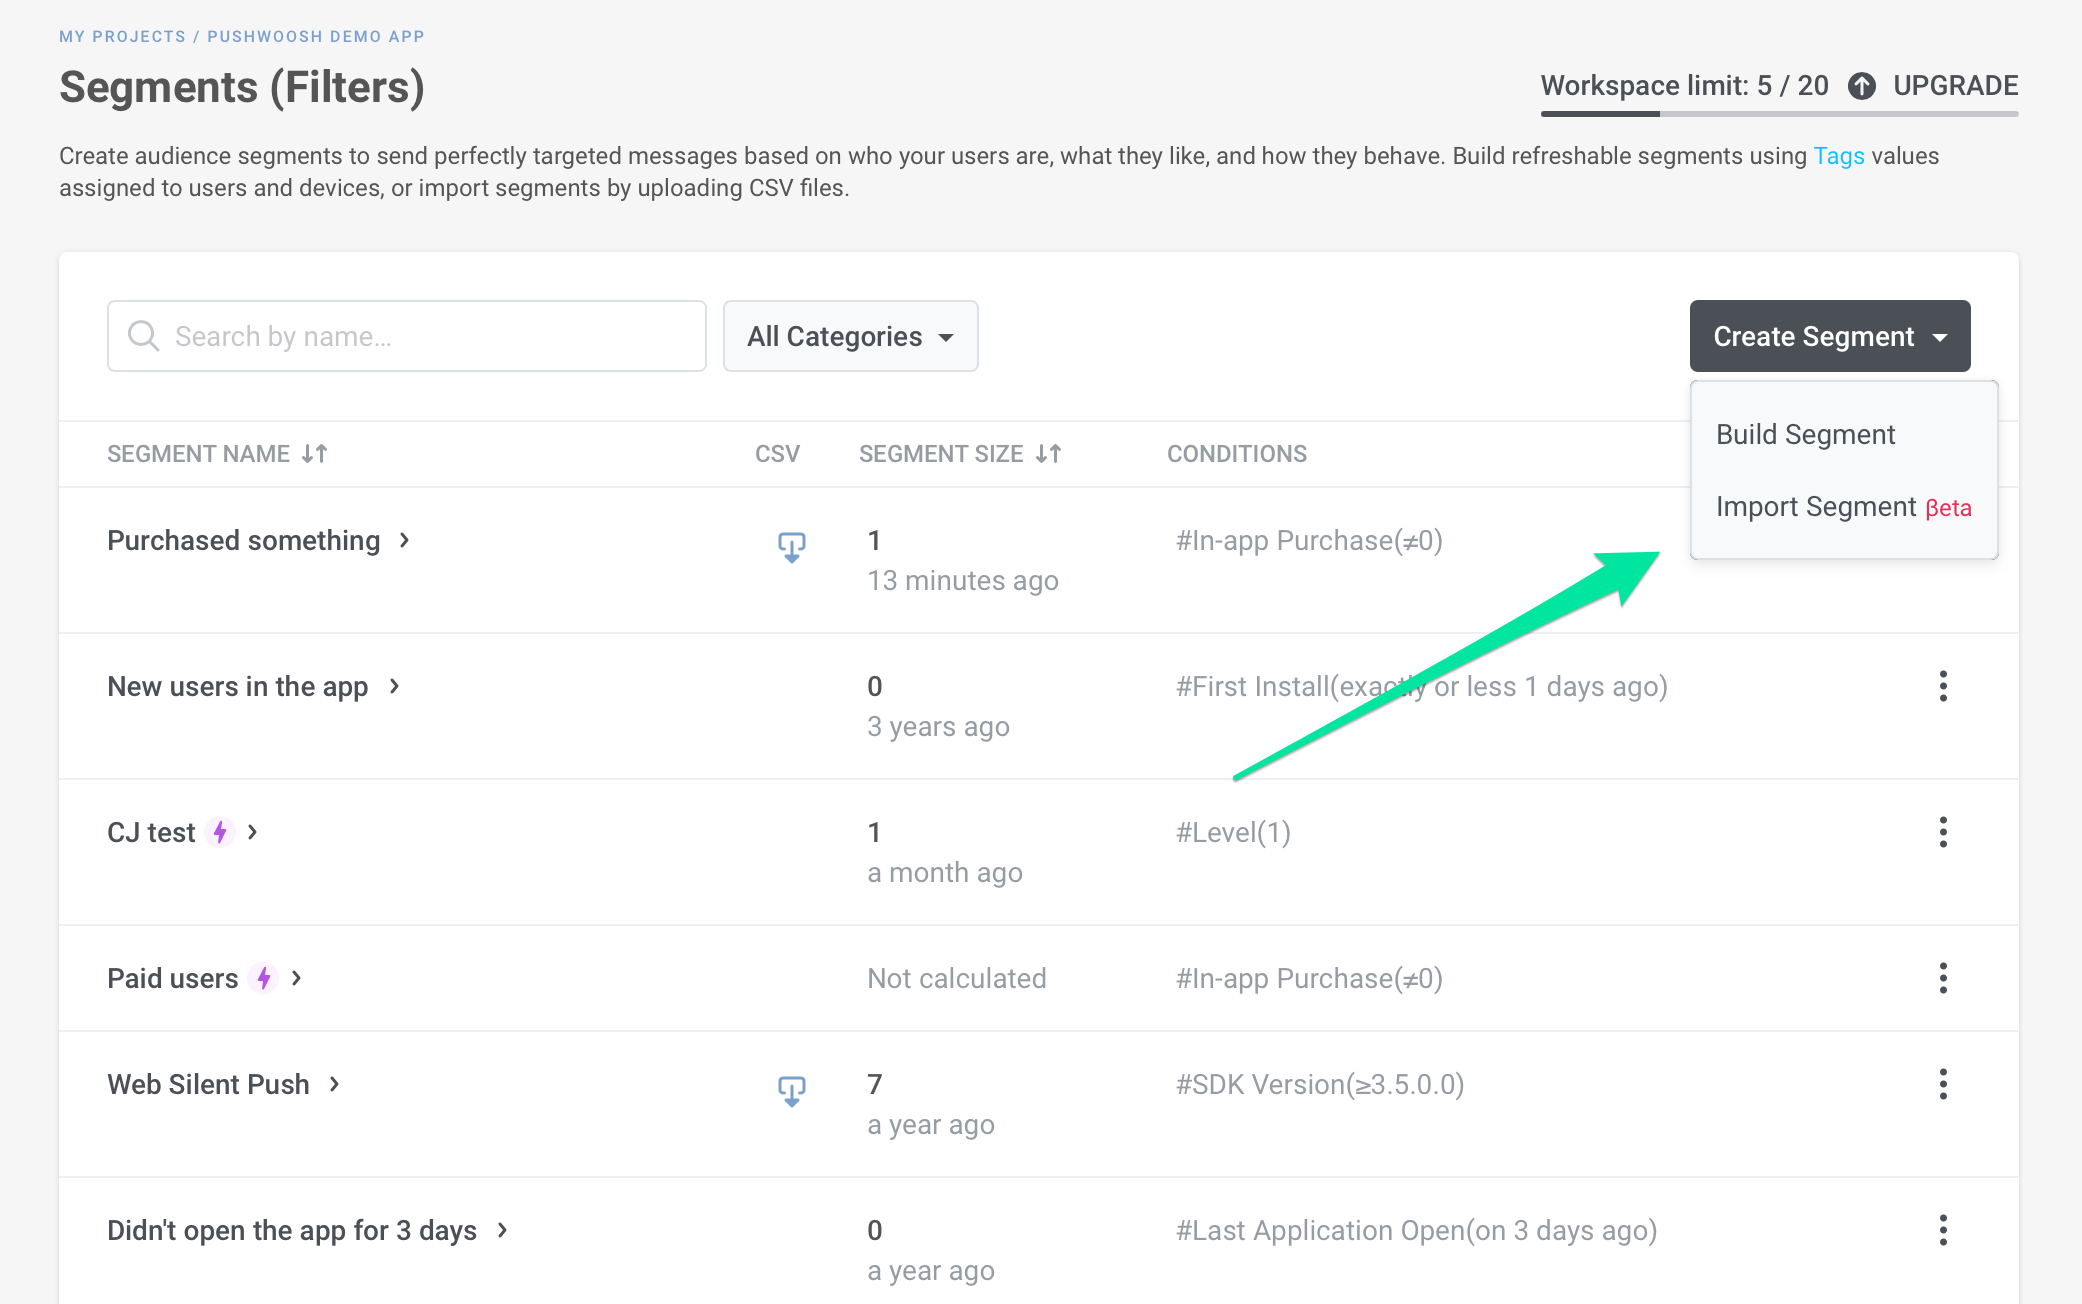
To build a Segment by setting up the conditions (Tags/Events/Filter Group to apply), go to the Segments (Filters) section of Pushwoosh Control Panel and press Create Segment button; then, choose the Build Segment option from the dropdown menu.
Each segment is described by a set of Filters that can be represented by:
- Tags and their values;
- Events;
- Filter Group (compound filters including Tags and/or Events).
When creating a Filter Group, you should add logical operators:
- AND (intersection) – users who comply with all the conditions will be included in the segment;
- OR (union) – users who comply with any of the conditions will be included in the segment.
1. Build segments by Tags
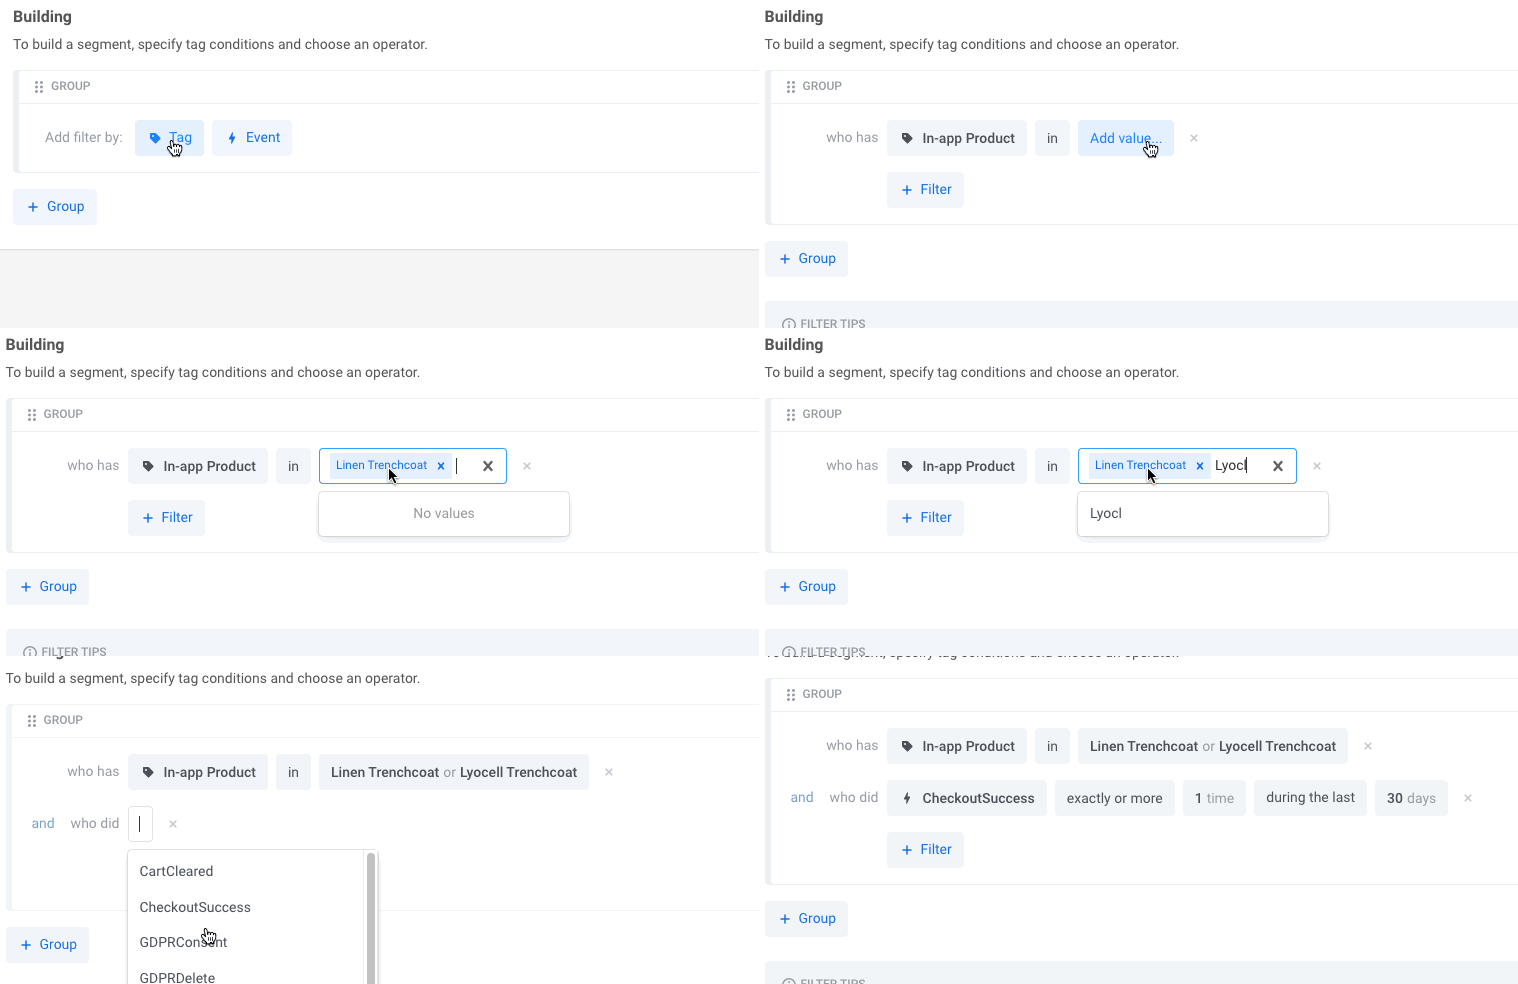
To build a segment by Tags, hit “Tag” in the “Add filter by” section.
Select a tag you’d like to use (pick it from the drop-down list or start typing).
Then, hit “Add value” and select the value you’d like to use as a segment condition (you can pick it from the drop-down list or start typing).
If you set several Tags as a segment condition, select an operator you’d like to use (AND/OR):

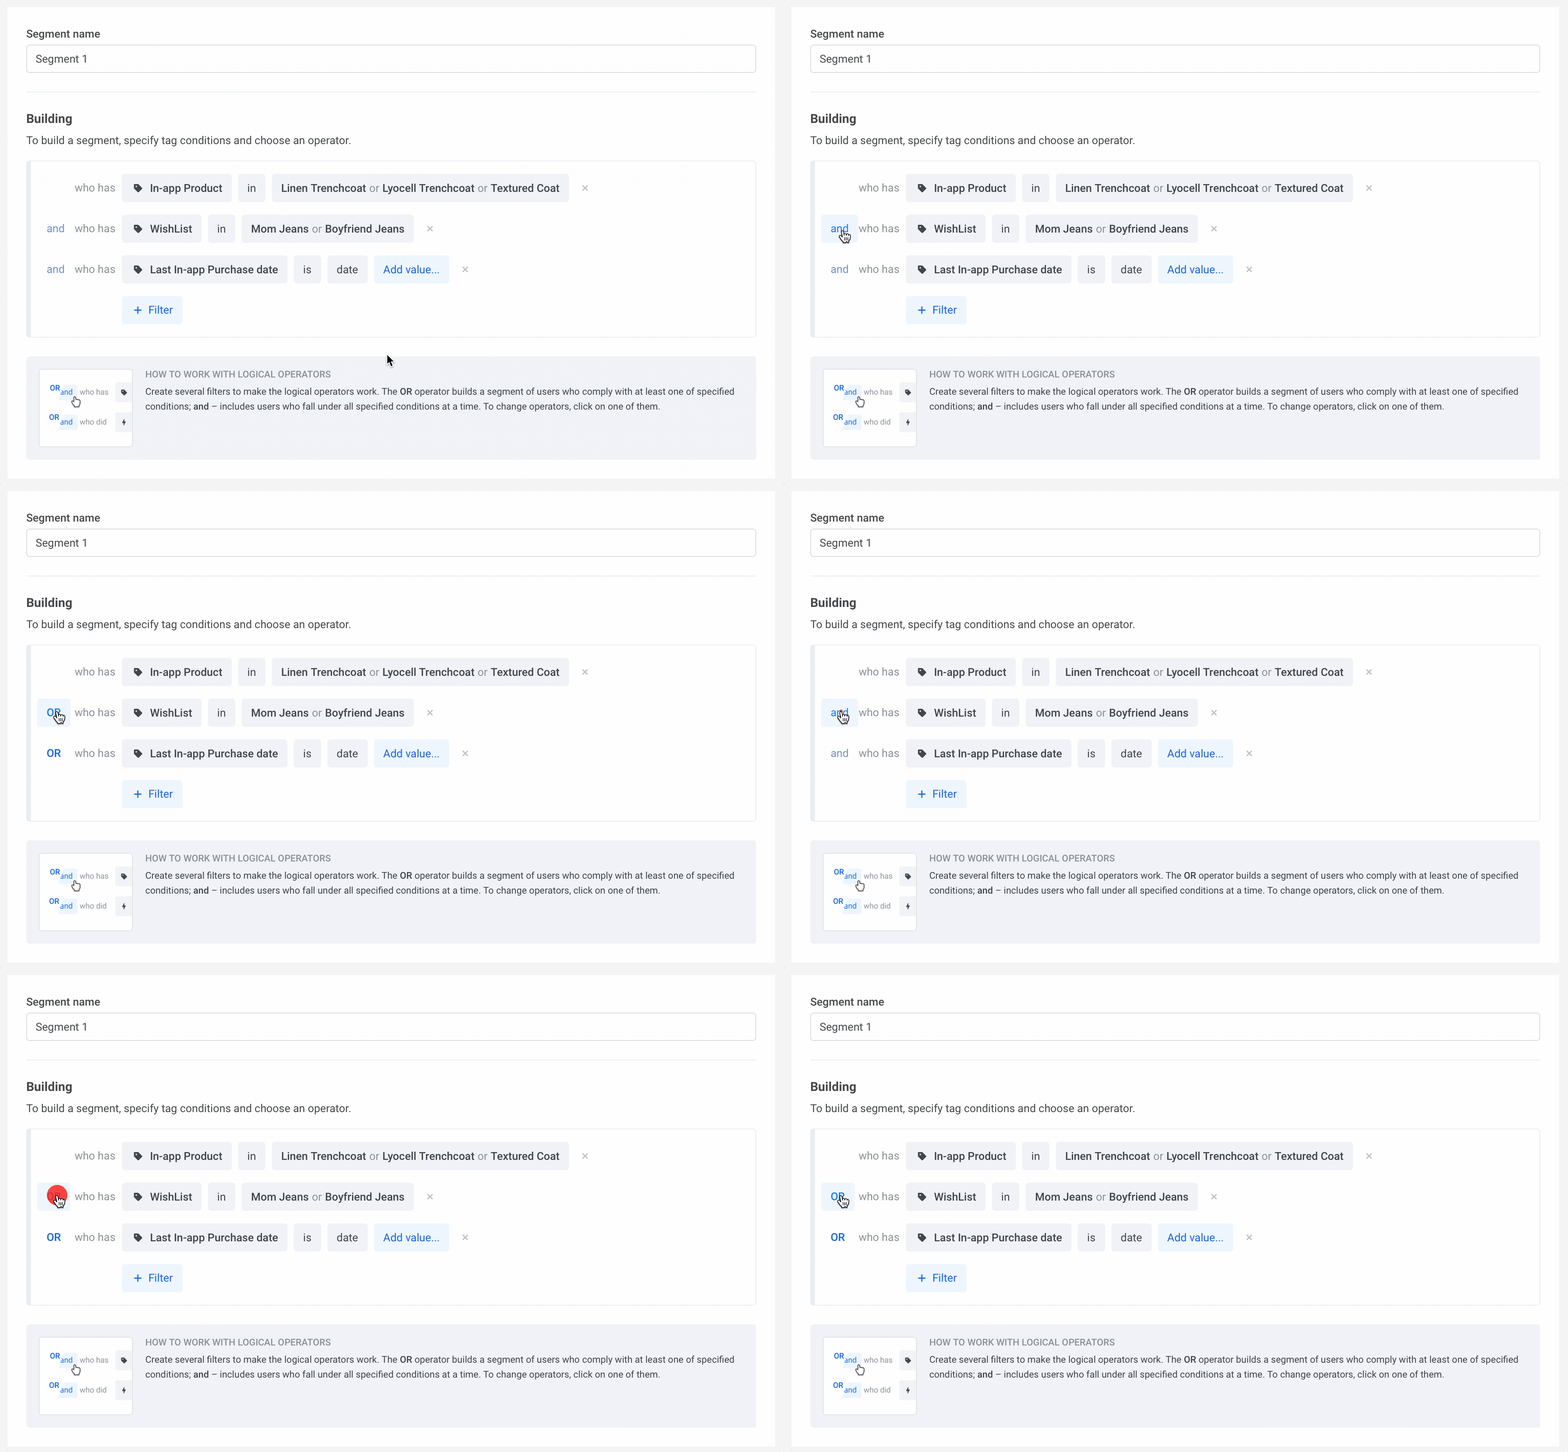
By setting several filters within one segment, you create a Filter Group. Within it, the operator should be the same (=either AND or OR is applied to all filters). To change operators, click on one of them:
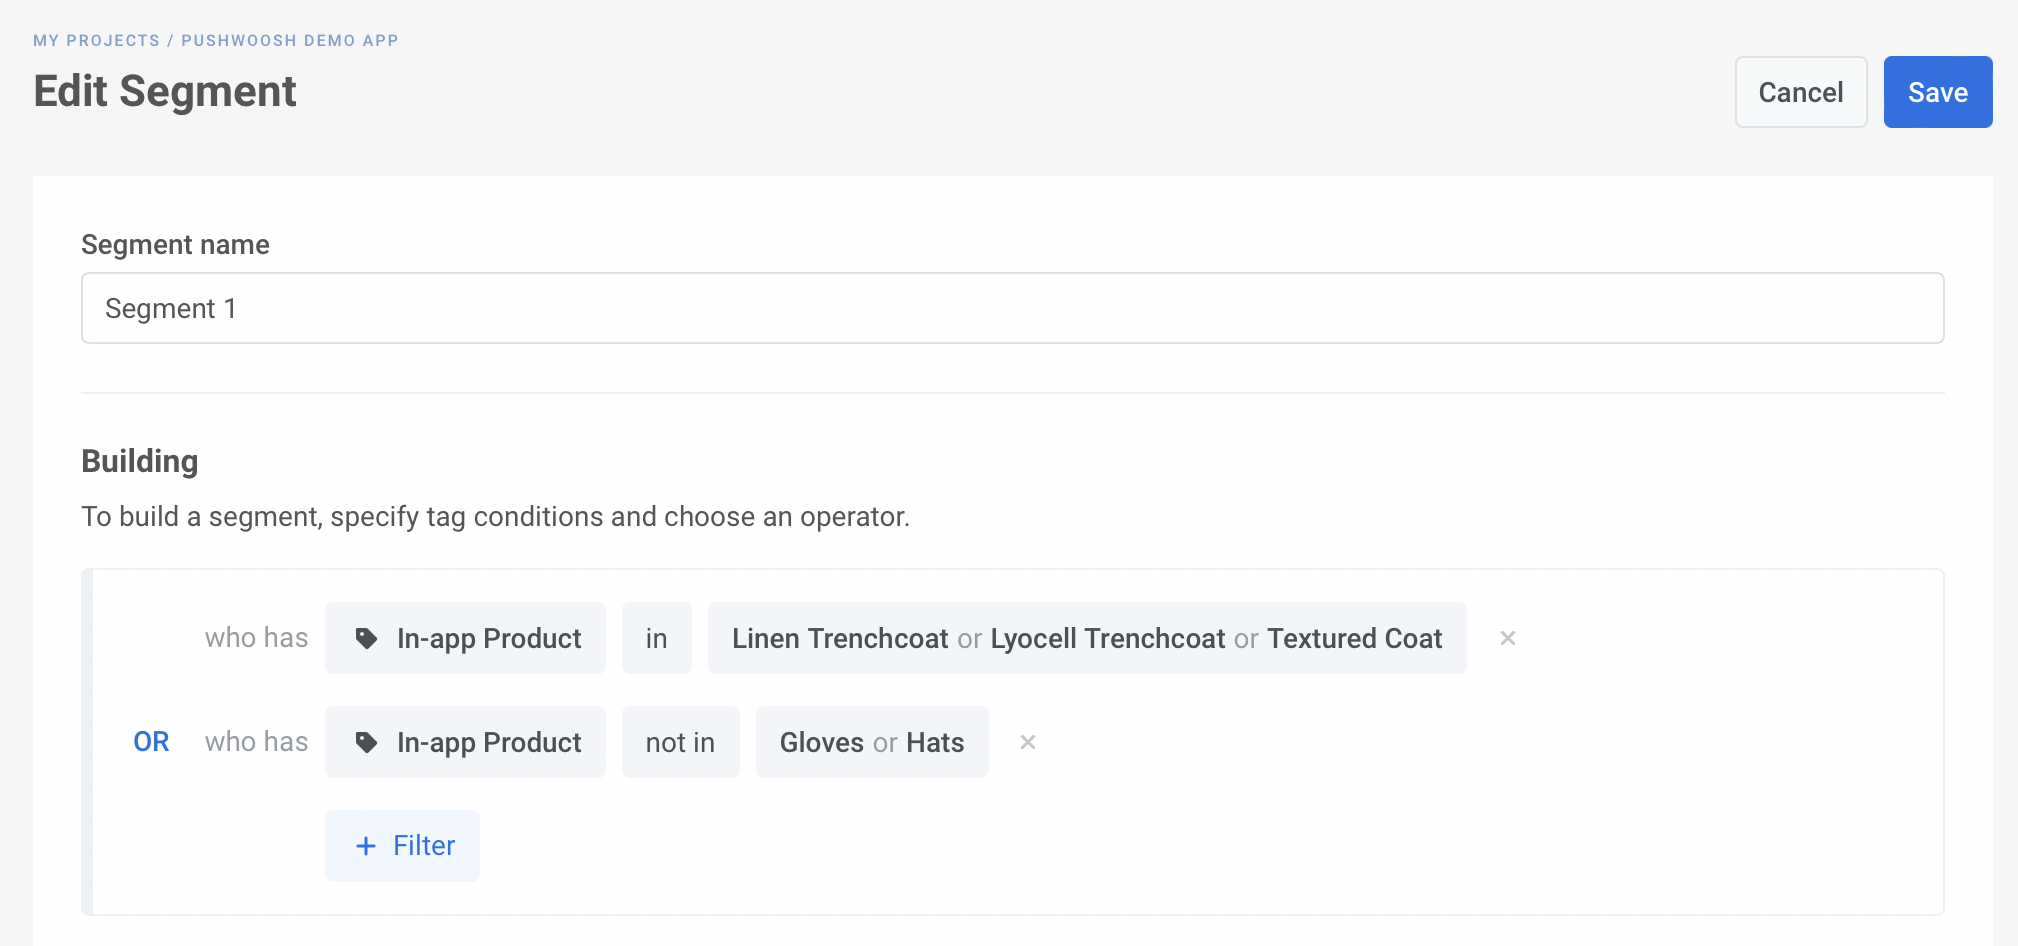
You can use one tag several times to build more sophisticated segments based on various combinations of conditions. For example, you might need a segment of users who have bought a coat in your app and haven’t bought gloves – so add the In-App Product tag with the corresponding operators and values, and here they are.
Please refer to the Tags guide for more detail on Tags.
Create an anniversary segment
Pushwoosh enables you to create segments based on the anniversary of a specific date tag. This allows you to target users whose significant dates, like birthdays or first installs, occur on the same day each year.
For this do the following:
- Navigate to the Segments section and click Create Segment → Build Segment
- Select the tag relevant to your anniversary (e.g., First Install or user’s birthday).
- Choose the condition Anniversary and specify the date condition: Choose the condition Anniversary and specify the date condition:
-
Today: Users whose anniversary date matches today’s date.
-
Is in N days: Users whose anniversary is in N days.
-
Is N days past: Users whose anniversary is N days past.
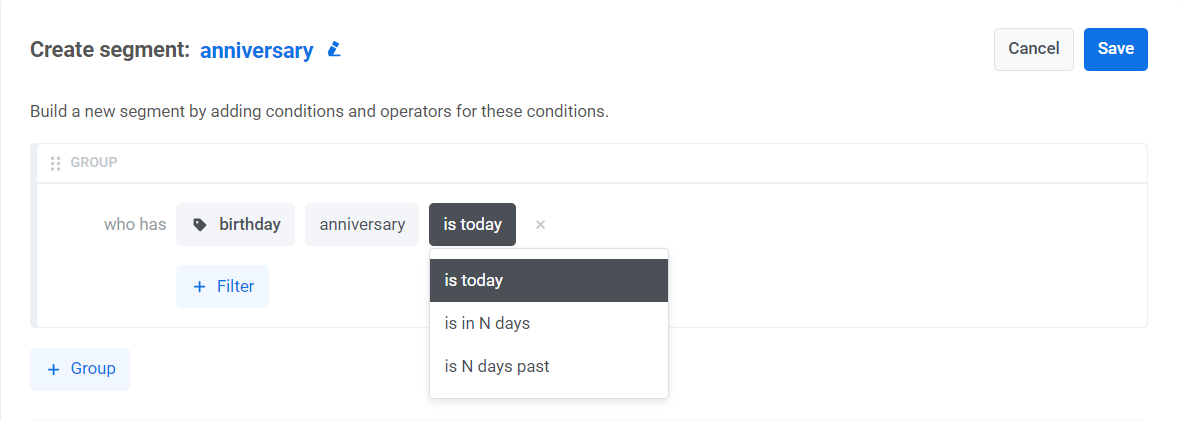
Configuring a segment to include users a certain number of days before or after the anniversary date allows for pre- or post-anniversary engagements.
- Refine your segment further by adding more filters.
Once you’ve created a segment, you can set up a recurring customer journey based on this segment to celebrate your users’ special dates. Learn more
2. Build segments by Events
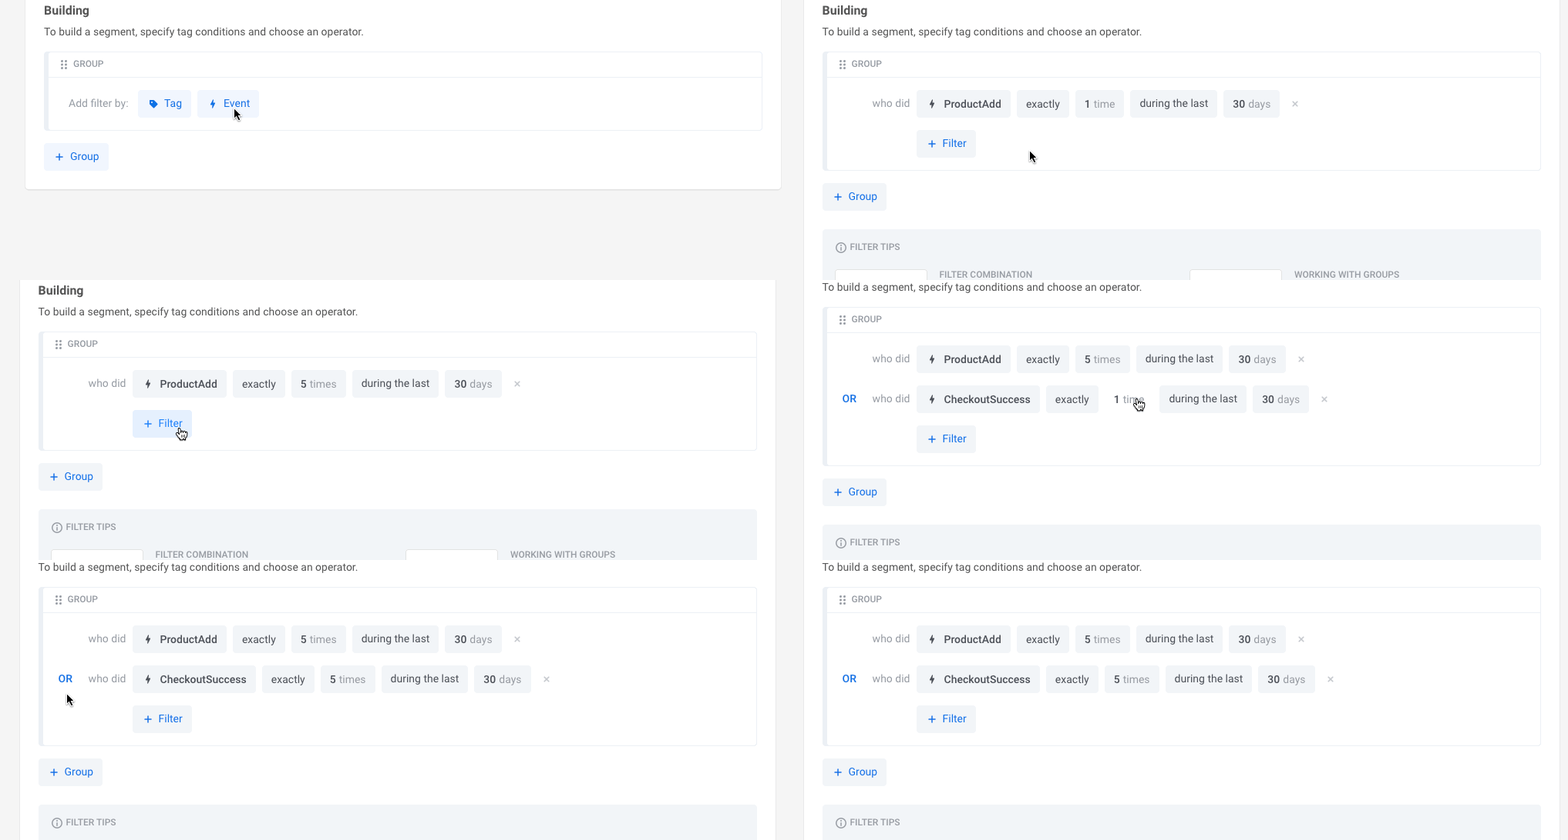
To build a segment by Events, hit “Event” in the “Add filter by” section.
Select an event from the drop-down list.
Then indicate conditions for the selected event: the number of times it happened and a time frame.
If you set several Events as a segment condition, select an operator you’d like to use (AND/OR).
3. Build segments with compound filters
For advanced segmentation, you can use compound filters:
Individual Tags + Events
You can set both Tags and Events at the same time and choose an operator (AND/OR) for them. In this example, the segment includes all the users who bought linen or lyocell trenchcoat in the app and successfully checked out (with any purchase) more than once in the last 30 days:
Several Filter Groups combined
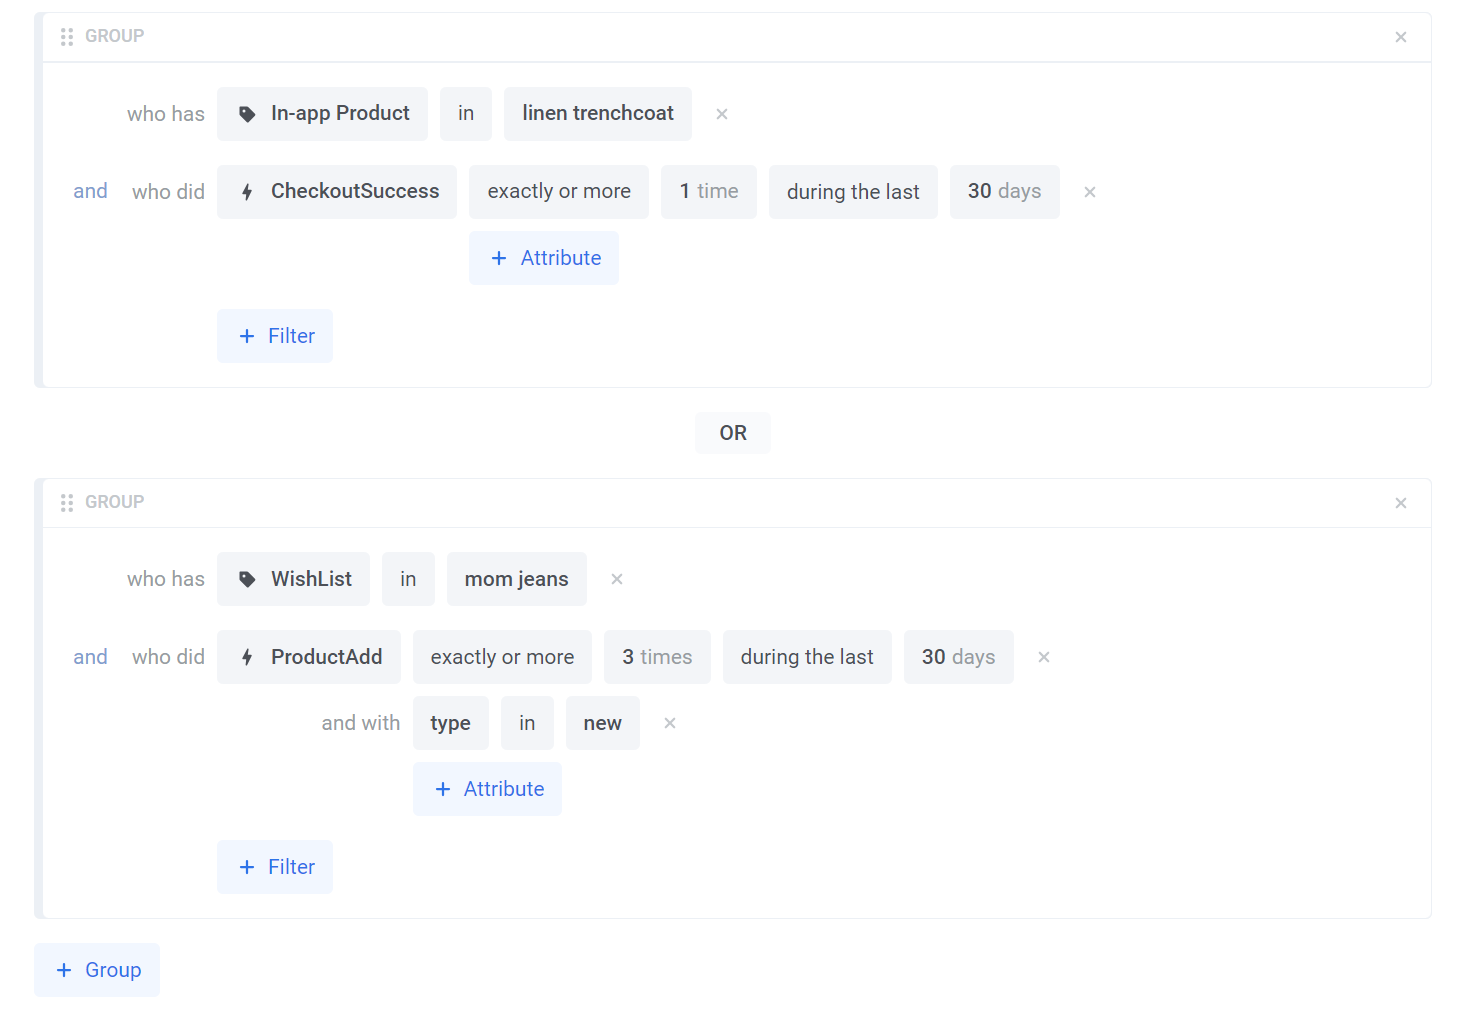
You can set several Filter Groups including any combinations of Tags and Events. In this case, you choose whether you perform intersection (operator AND) or union (operator OR) with defined groups.
In the example below, the segment includes either:
- users who bought a linen trenchcoat in the app at least one time during the last 30 days
OR
- users who included mom jeans in their wishlist AND added new items to their shopping cart at least 3 times during the last 30 days
Additionally, segments can be created using the
createFilterAPI method. For this, you will need assistance from your development team. Please share this guide with them for detailed instructions.
Import Segment
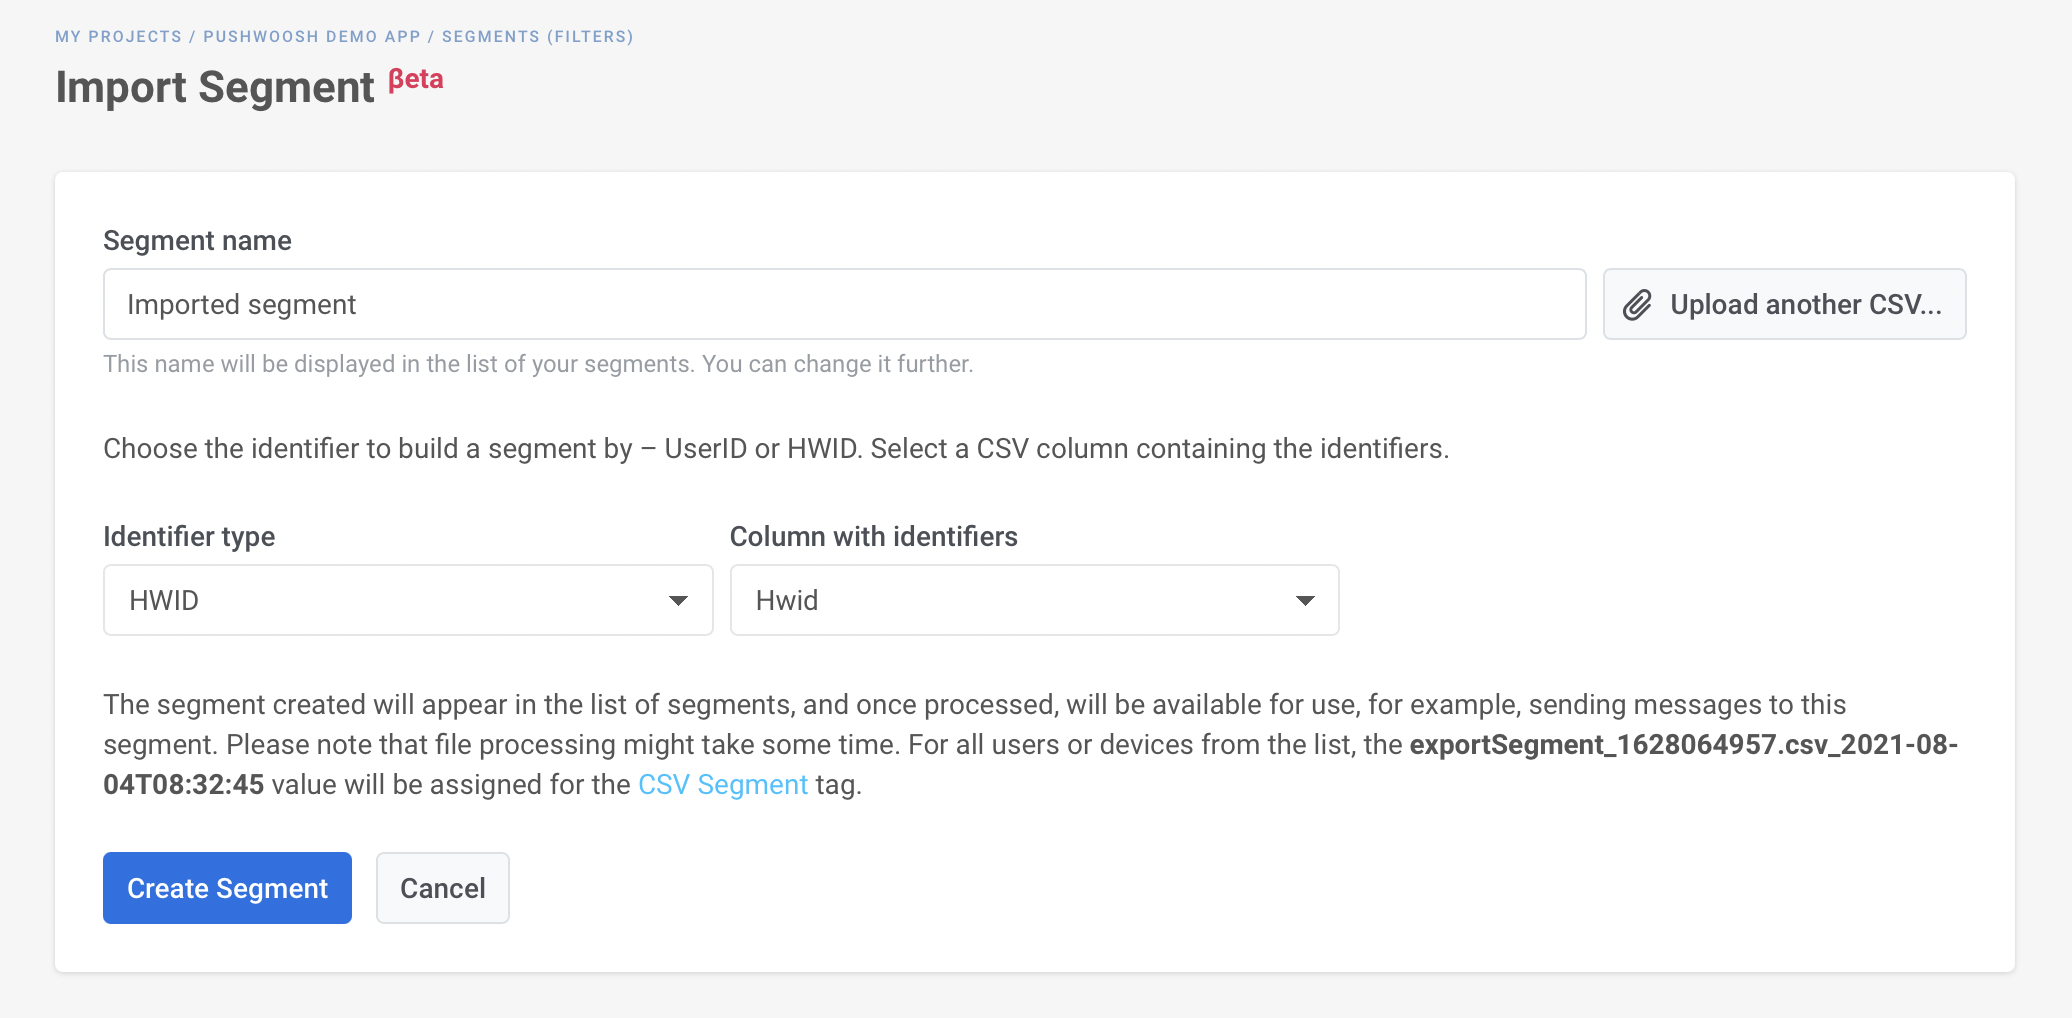
You can upload the CSV file to create a Segment of users with no need to specify filtering conditions.
The CSV file you’re uploading should contain UserIDs or HWIDs registered for the project you’re creating a Segment for. If the CSV file does not contain any User ID or HWIDs, it won’t create any Segment. If User IDs or HWIDs contained in the CSV are not registered for the project, they will be skipped while importing the Segment.
In the Tags section, you can find the CSV import default tag. To all the user IDs or HWIDs contained in the CSV, the name of the CSV file is assigned as a value for that tag.
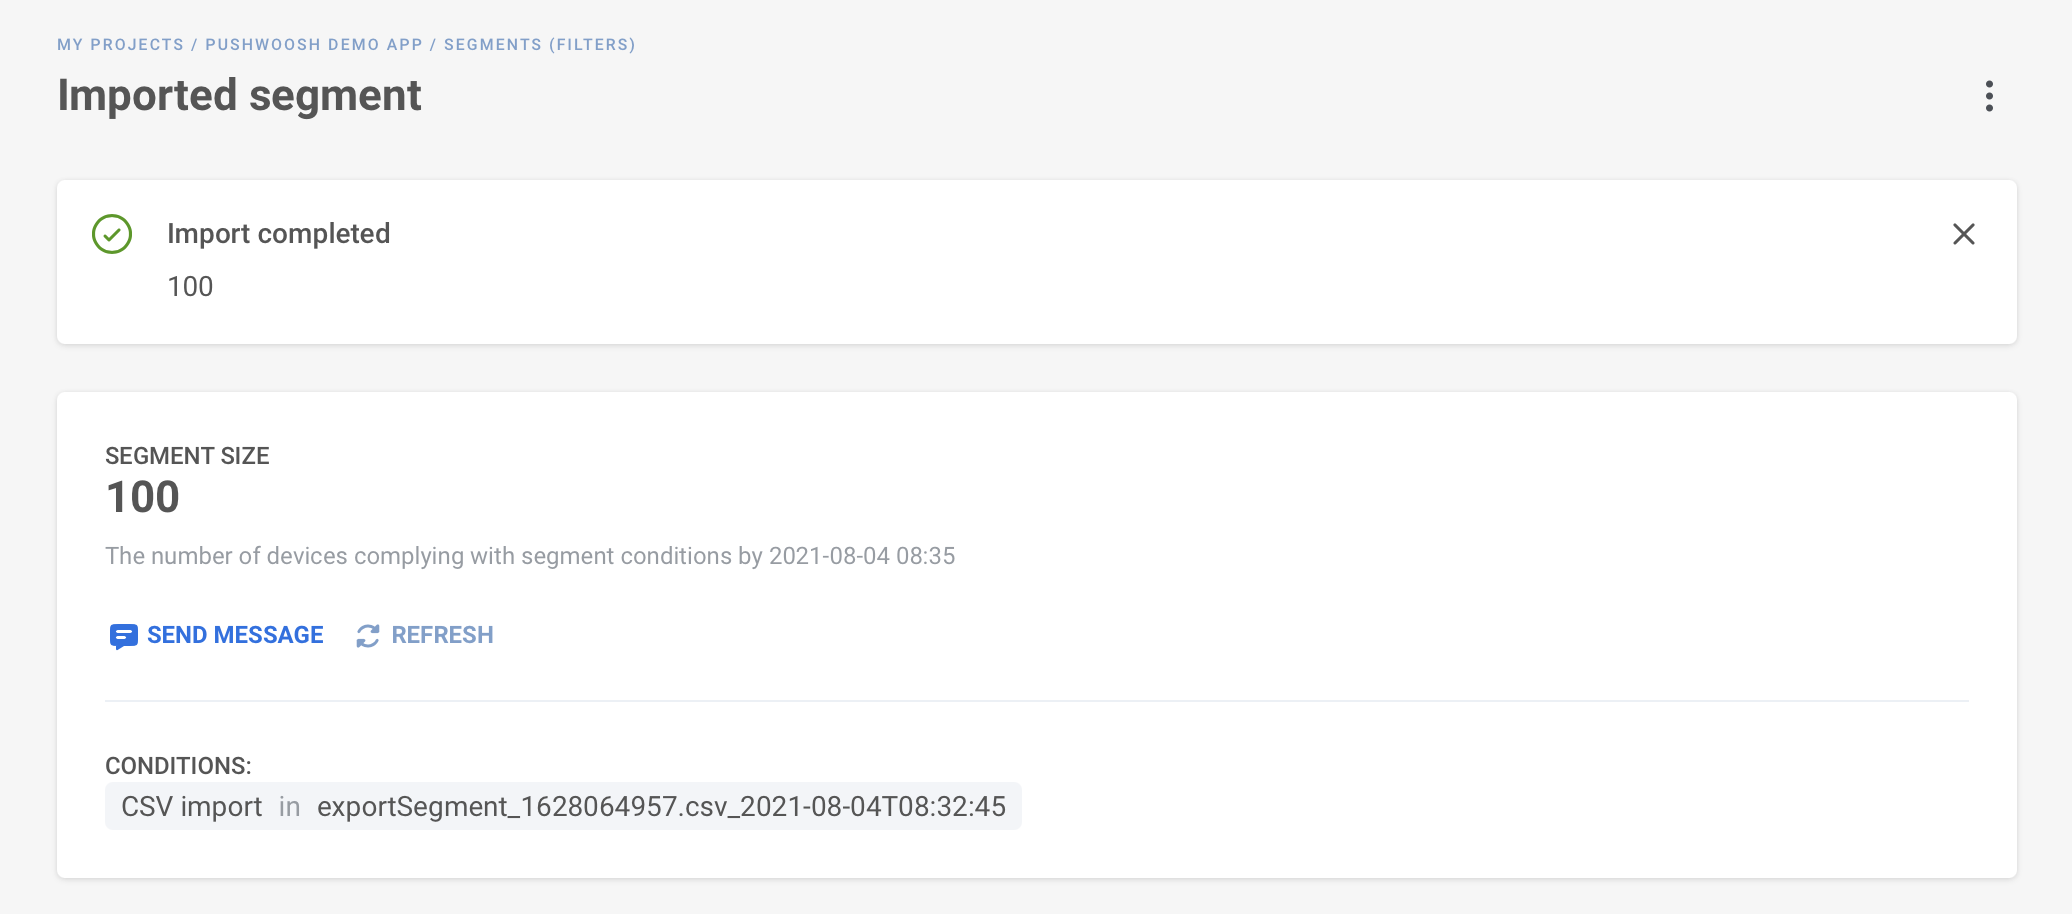
In the Segments list, you’ll see the number of users in a Segment, the last time the Segment size was refreshed, and the conditions the Segment is built with.
Refresh & export to CSV
To get the up-to-date Segment size, choose the Refresh Segment Size option of the three-dots menu. If you’d like to download the CSV of the segment, press Refresh & Export to CSV; when the CSV is ready to download, the download icon appears in the CSV column.

The downloaded CSV file will contain the Tag values assigned to every device in that segment, as well as Push Tokens and devices’ types:
| Hwid | Push Token | Type | Type (humanized) | Age | Application Version | City | Country | Device Model | Email Segment Name | First Install | Gender | In-app Product | In-app Purchase | Jailbroken | Language | Last Application Open | Last In-app Purchase date | Name | OS Version | PW Channels | Push Alerts Enabled | SDK Version | Subscription Segments | Unsubscribed Emails | WishList |
|---|---|---|---|---|---|---|---|---|---|---|---|---|---|---|---|---|---|---|---|---|---|---|---|---|---|
| 146…Hl23f | 146…Hl23f | 10 | Safari | 27 | us, new york | us | Safari 12.0.1 | 2020-02-19 | en | 2020-07-15 | 1 | 3.15.1.0 | true | ||||||||||||
| 01D…3C8 | eeeb2fd…fc3547 | 1 | iOS | 18 | 1.11.1.0 | in, bengaluru | in | iPhone SE | 2018-11-26 | outwear_01 | 24 | 0 | en | 2018-11-26 | 2018-11-26 | Anna | 12.1.0.0 | 5.8.0.0 | 2D732-BB981, 7EC43-1531A | ||||||
| C90…79ae5 | eQFKk…DwJSv | 11 | Chrome | 36 | us, chicago | us | Chrome 81 | 2020-08-24 | en | 2020-08-24 | 1 | 3.15.1.0 |
Copy Segmentation language
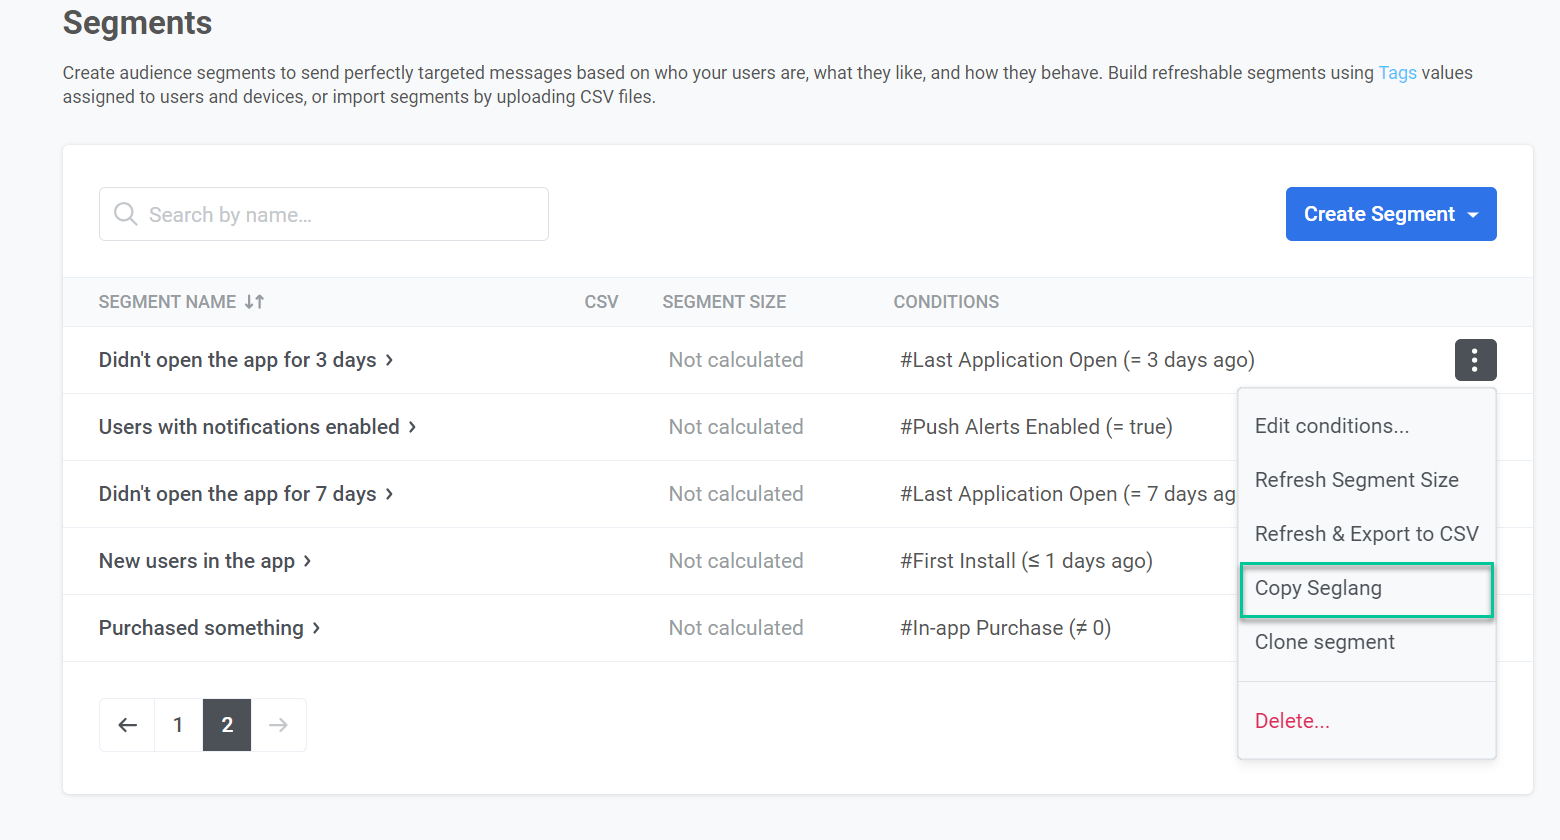
Segmentation Language is a syntax to define and apply specific conditions or filters when segmenting your audience.
The Copy Seglang option allows you to copy the underlying logic of a segment you’ve created. The copied Segmentation Language can then be used in API calls, such as the createmessage API method or API-based customer journey entries, to replicate the same segmentation logic.
Clone Segment
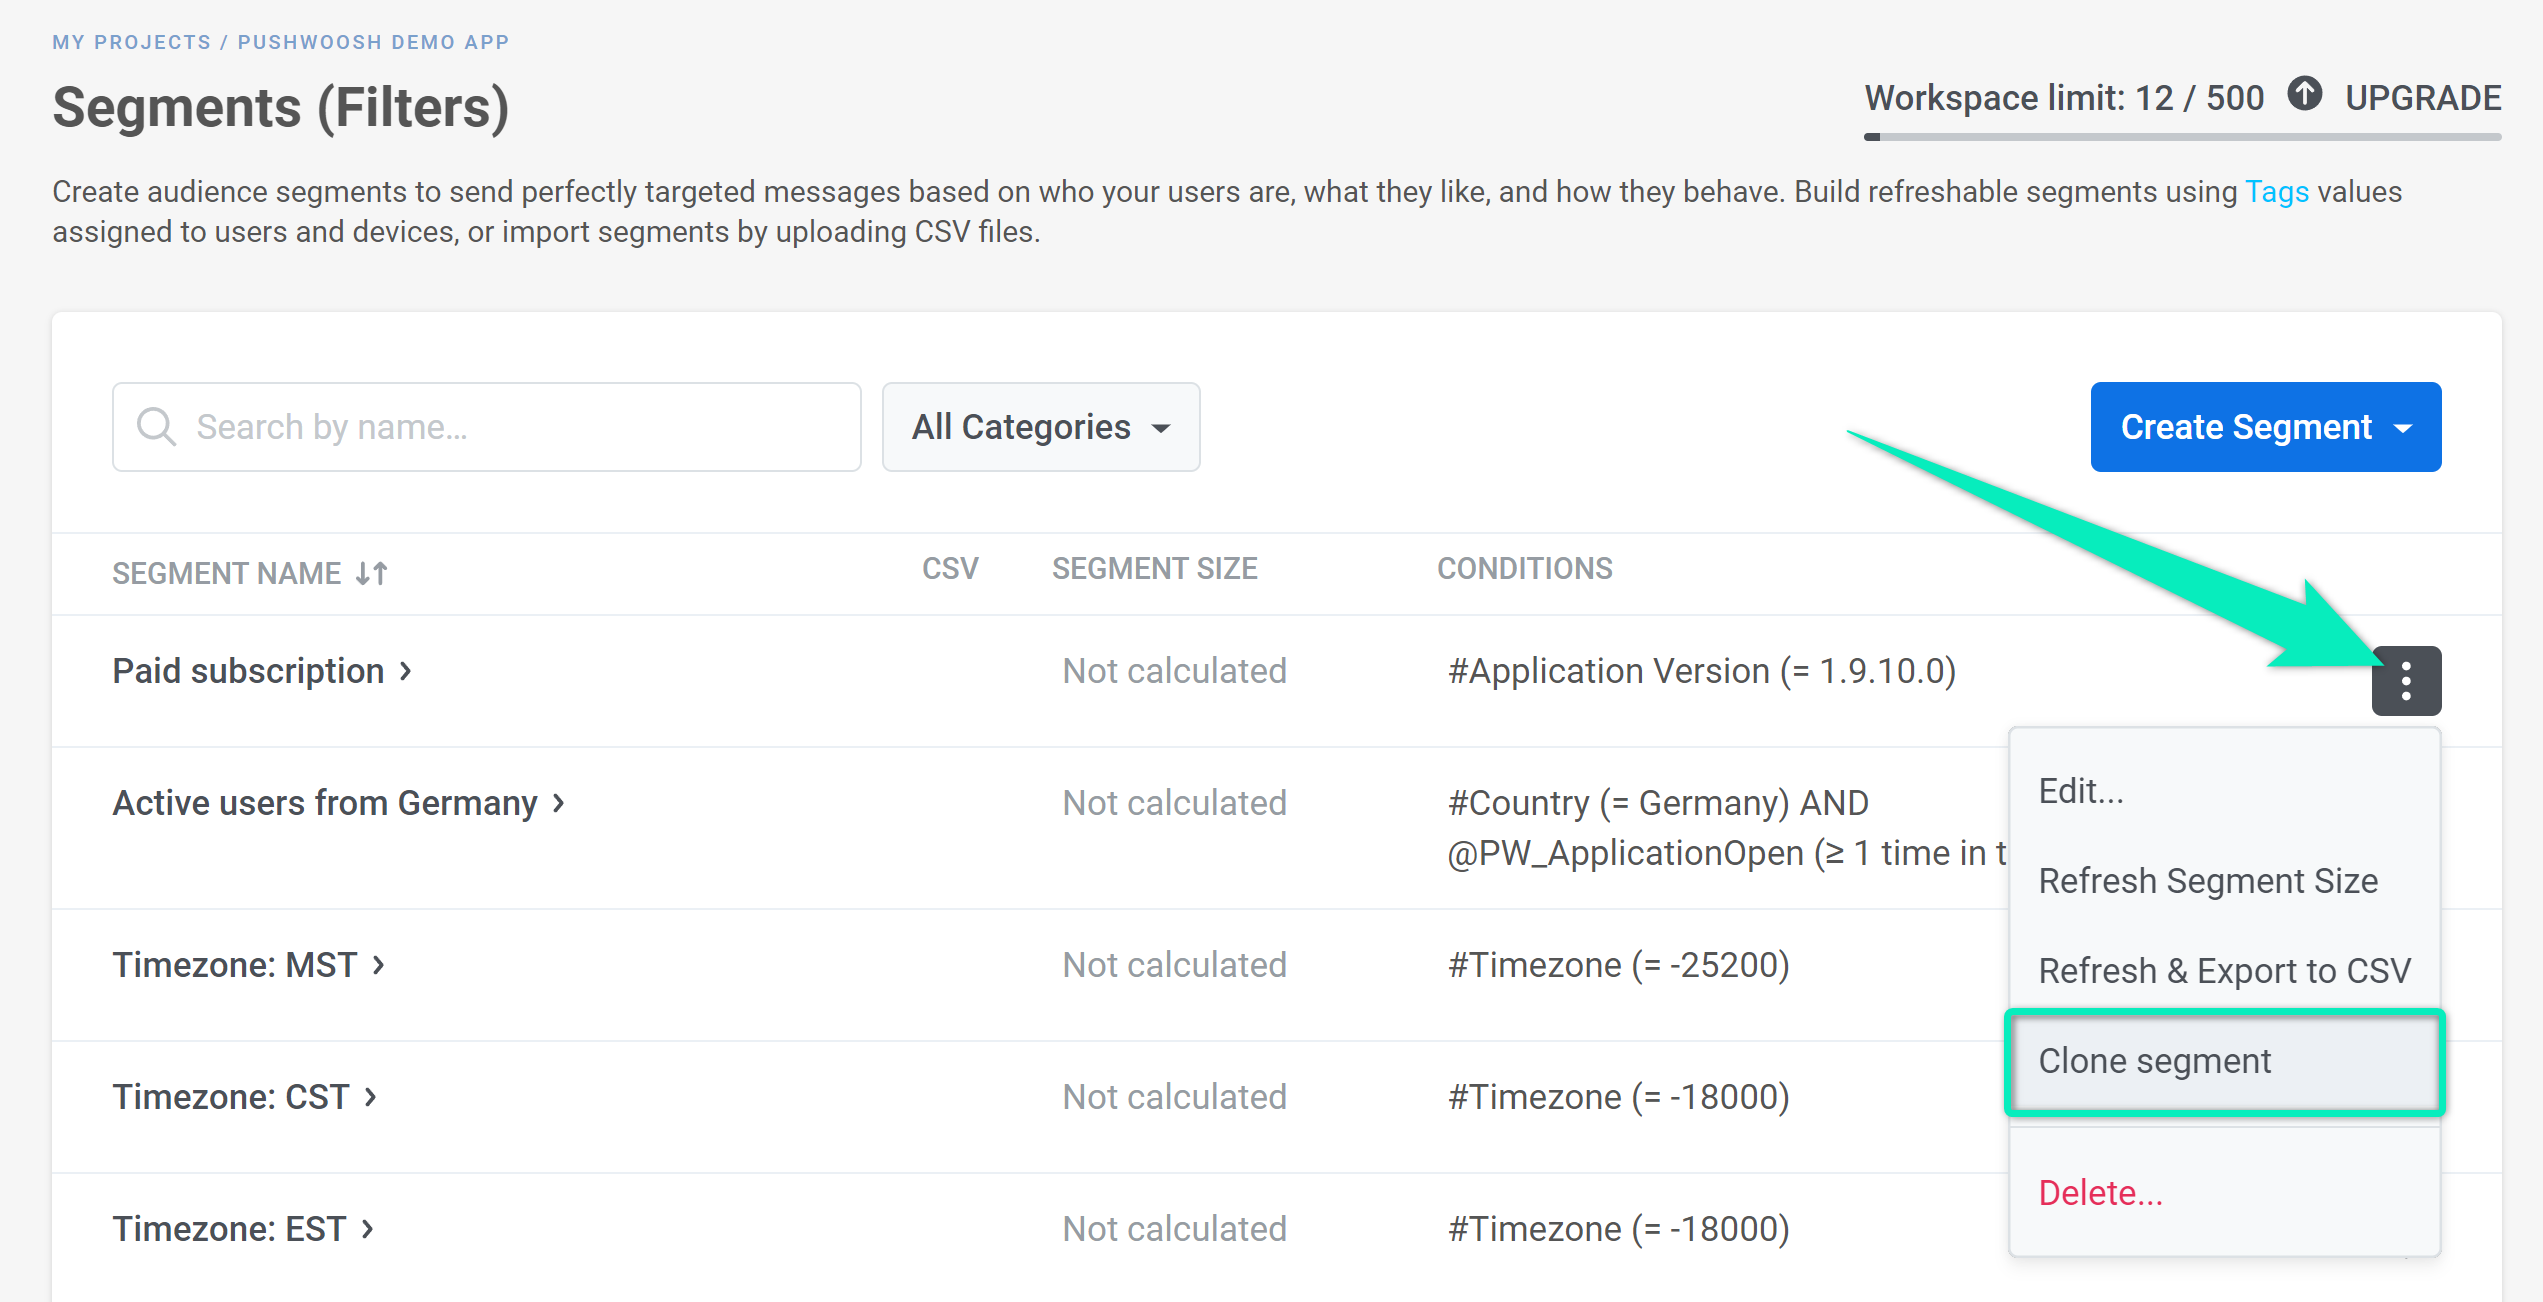
If you want to create a new segment similar to an existing one, use the Clone segment option:
High-Speed Delivery segments
To deliver your messages as rapidly as possible, you might need High-Speed Delivery segments. High-Speed Delivery segments keep updated every 10 minutes so that at the moment you launch messages to such a segment, that segment doesn’t need to be refreshed; thus, no extra time is spent on preparing the message launch.