웹 푸시 SDK 3.0
Pushwoosh 웹 푸시 SDK를 받아 압축을 풉니다. 다음과 같은 파일이 있어야 합니다:
Anchor link to아직 받지 않았다면 Pushwoosh 웹 푸시 SDK를 다운로드하세요.
- pushwoosh-service-worker.js
이 모든 파일을 웹사이트 디렉토리의 최상위 루트에 배치하세요.
Anchor link toSDK 초기화:
Anchor link to- CDN에서 SDK를 비동기적으로 포함하세요.
<script type="text/javascript" src="//cdn.pushwoosh.com/webpush/v3/pushwoosh-web-notifications.js" async></script>- 웹 푸시 SDK를 초기화하고 SDK가 완전히 로드될 때까지 초기화를 큐에 넣어야 합니다.
<script type="text/javascript">var Pushwoosh = Pushwoosh || [];Pushwoosh.push(['init', { logLevel: 'info', // 가능한 값: error, info, debug applicationCode: 'XXXXX-XXXXX', // Pushwoosh 제어판의 애플리케이션 코드 apiToken: 'XXXXXXX', // Device API 토큰 safariWebsitePushID: 'web.com.example.domain', // Apple 개발자 포털에서 얻은 고유한 역도메인 문자열. 애플리케이션에 Safari Configuration 섹션이 있는 경우에만 사용됩니다(위의 전제 조건 참조) defaultNotificationTitle: 'Pushwoosh', // 푸시 알림의 기본 제목 설정 defaultNotificationImage: 'https://yoursite.com/img/logo-medium.png', // 사용자 지정 알림 이미지 URL autoSubscribe: false, // 또는 true. true인 경우 SDK 초기화 시 사용자에게 푸시 구독을 요청합니다. subscribeWidget: { enable: true }, userId: 'user_id', // 선택 사항, 사용자 지정 사용자 ID 설정 tags: { 'Name': 'John Smith' // 선택 사항, 사용자 지정 태그 설정 }}]);</script>웹 팝업
Anchor link to웹 팝업 캠페인은 기본적으로 로드됩니다 — init 객체에 webPopups 항목이 필요하지 않습니다. 옵트아웃하거나 기본값을 변경하려는 경우에만 추가하세요:
webPopups: { // enable: false, // 선택 사항, 완전히 옵트아웃: 번들이 로드되지 않음 autoShow: true, // 선택 사항, 팝업을 자동으로 표시하지 않고 로드하려면 false로 설정 — 아래 WebPopups 메서드 참조 colorScheme: 'auto', // 선택 사항, 'auto'(기본값) | 'light' | 'dark'},웹 팝업 캠페인은 프로모션, 공지 또는 리드 캡처 양식과 같이 제어판에서 구성한 오버레이를 표시합니다. 웹 푸시 옵트인만 처리하는 사용자 지정 구독 팝업(subscribePopup)과 달리, 웹 팝업 캠페인은 구성한 모든 콘텐츠를 표시할 수 있습니다.
제어판에서의 설정은 웹 팝업 이해하기를 참조하세요.
스니펫을 변경하지 않고 사이트에서 웹 팝업을 중지하려면 Control Panel에서 끄세요:
- Settings → Configure platforms → Web으로 이동하여 Web popups 카드를 찾습니다.
- Turn off를 클릭합니다.

배지가 Set in the snippet에서 Off로 바뀝니다. 다음 페이지 로드부터 1분 이내에, 스니펫이 webPopups.enable: true를 설정하더라도 SDK는 팝업을 로드하지 않습니다. autoShow와 colorScheme는 여전히 스니펫에서 가져옵니다. 다시 스니펫이 결정하도록 하려면 같은 카드에서 Return to snippet을 클릭하세요.
이 카드는 Settings source와 관계없이 작동하지만, 필요한 SDK 버전은 해당 소스에 따라 다릅니다:
- 사이트의 init 스니펫: Web SDK 3.93.1 이상. 이전 SDK는 이 스위치를 무시하고 스니펫 설정대로 팝업을 계속 로드합니다.
- 이 페이지: Web SDK 3.93.0 이상.
colorScheme은 다크 모드가 구성된 팝업이 렌더링될 팔레트를 선택합니다:
'auto'(기본값): 방문자의 OS 수준 색 구성표(prefers-color-scheme)를 따릅니다.'light'또는'dark': 방문자의 OS 설정과 관계없이 항상 해당 팔레트를 렌더링합니다.
편집기에서 다크 모드가 구성되지 않은 팝업은 항상 라이트 모드로 렌더링됩니다 — colorScheme은 영향을 미치지 않습니다.
프로그래밍 방식 제어는 WebPopups 메서드 및 웹 팝업 이벤트를 참조하세요.
구독 프롬프트
Anchor link to사용자에게 푸시 알림 구독을 요청하려면 구독 위젯을 사용하세요. 프롬프트와 런처 벨을 함께 구성하는 위젯입니다. 이 위젯은 기존의 푸시 구독 버튼과 사용자 정의 구독 팝업을 대체합니다. 두 기능은 이미 사용 중인 사이트에서는 그대로 유지되지만, 새로운 통합의 시작점으로는 권장되지 않습니다.
웹사이트에 푸시 알림 구현을 완료하려면, 단계별 가이드에 따라 Pushwoosh 제어판에서 웹 플랫폼을 구성해야 합니다:
동일한 구성 화면에는 Web SDK configuration 카드도 포함되어 있습니다.
다른 범위에서 서비스 워커 등록하기
Anchor link to때로는 서비스 워커 파일을 웹사이트의 루트 디렉토리가 아닌 하위 디렉토리에 배치해야 할 수도 있습니다.
이 경우, serviceWorkerUrl: “/push-notifications/pushwoosh-service-worker.js” 매개변수를 추가하여 구성(4.3단계)을 수정하세요.
여기서 /push-notifications/pushwoosh-service-worker.js는 pushwoosh-service-worker.js 파일의 경로입니다.
이벤트 핸들러
Anchor link toPushwoosh 웹 SDK 3.0에서는 특정 이벤트를 구독하여 추적하거나, 더 이상 추적이 필요하지 않은 경우 이벤트 구독을 취소할 수 있습니다.
웹 SDK 3.0 로드를 추적하려면 다음과 같이 onLoad 이벤트를 발생시키세요:
// Load EventPushwoosh.push(['onLoad', (api) => { console.log('Pushwoosh load!');}]);올바른 웹 SDK 초기화를 추적하려면 onReady 이벤트를 발생시키세요:
// Ready EventPushwoosh.push((api) => { console.log('Pushwoosh ready!');});SDK 이벤트 중 하나를 구독하거나 구독 취소하려면 SDK 로드 후 핸들러를 사용하세요:
Pushwoosh.push(['onLoad', (api) => {  function onEventNameHandler() {    console.log('Triggered event: event-name!');  }
  // 이벤트 구독하기:  Pushwoosh.addEventHandler('event-name', onEventNameHandler)
  // 이벤트 구독 취소하기:  Pushwoosh.removeEventHandler('event-name', onEventNameHandler)}]);
SDK 이벤트
Anchor link to구독 이벤트
Anchor link to사용자가 푸시 알림 수신에 동의한 후 실행됩니다.
Pushwoosh.push(['onLoad', (api) => { Pushwoosh.addEventHandler('subscribe', (payload) => { console.log('Triggered event: subscribe'); });}]);구독 취소 이벤트
Anchor link to기기가 알림에서 등록 해제된 후 실행됩니다.
Pushwoosh.push(['onLoad', (api) => { Pushwoosh.addEventHandler('unsubscribe', (payload) => { console.log('Triggered event: unsubscribe'); });}]);구독 위젯 이벤트
Anchor link to구독 프롬프트 위젯 표시를 추적합니다.
Pushwoosh.push(['onLoad', (api) => {  // 구독 프롬프트 위젯이 표시될 때 실행됩니다.  Pushwoosh.addEventHandler('show-subscription-widget', (payload) => {    console.log('Triggered event: show-subscription-widget');  });
  // 구독 프롬프트 위젯이 숨겨질 때 실행됩니다.  Pushwoosh.addEventHandler('hide-subscription-widget', (payload) => {    console.log('Triggered event: hide-subscription-widget');  });}]);
알림 권한 대화 상자 이벤트
Anchor link to네이티브 구독 대화 상자 표시를 추적합니다.
Pushwoosh.push(['onLoad', function (api) {  // 권한 대화 상자가 표시될 때 실행됩니다.  Pushwoosh.addEventHandler('show-notification-permission-dialog', (payload) => {    console.log('Triggered event: show-notification-permission-dialog');  });
  // 세 가지 가능한 상태 중 하나로 권한 대화 상자가 숨겨질 때 실행됩니다:  // 1. default - 대화 상자가 닫힘  // 2. granted - 권한이 부여됨  // 3. denied - 권한이 거부됨  Pushwoosh.addEventHandler('hide-notification-permission-dialog', (payload) => {    console.log('Triggered event: hide-notification-permission-dialog', payload.permission);  });}]);
권한 이벤트
Anchor link toSDK 초기화 시 푸시 알림 권한 상태를 확인하고, 이 상태가 변경될 때마다 추적합니다.
Pushwoosh.push(['onLoad', (api) => {  // 'autoSubscribe: false'이거나 사용자가 푸시 알림 프롬프트를 무시할 경우 SDK 초기화 중에 실행됩니다.  Pushwoosh.addEventHandler('permission-default', (payload) => {    console.log('Triggered event: permission-default');  });
  // 알림이 차단되었거나 사용자가 푸시 알림을 차단하면 SDK 초기화 중에 실행됩니다.  Pushwoosh.addEventHandler('permission-denied', (payload) => {    console.log('Triggered event: permission-denied');  });
  // 알림이 허용되었거나 사용자가 푸시 알림을 허용하면 SDK 초기화 중에 실행됩니다.  Pushwoosh.addEventHandler('permission-granted', (payload) => {    console.log('Triggered event: permission-granted');  });}]);
푸시 수신 이벤트
Anchor link to기기로의 푸시 전달을 추적합니다.
Pushwoosh.push(['onLoad', (api) => { // 푸시 알림이 표시될 때 실행됩니다. Pushwoosh.addEventHandler('receive-push', (payload) => { console.log('Triggered event: receive-push', payload.notification); });}]);알림 이벤트
Anchor link to사용자가 푸시 알림을 열거나 닫았는지 추적합니다.
Pushwoosh.push(['onLoad', (api) => {  // 사용자가 알림을 클릭할 때 실행됩니다.  Pushwoosh.addEventHandler('open-notification', (payload) => {    console.log('Triggered event: open-notification', payload.notification);  });
  // 사용자가 푸시 알림을 닫을 때 실행됩니다.  Pushwoosh.addEventHandler('hide-notification', (payload) => {    console.log('Triggered event: hide-notification', payload.notification);  });}]);
받은 편지함 이벤트
Anchor link to받은 편지함으로 전송된 알림을 추적합니다.
Pushwoosh.push(['onLoad', (api) => {  // 받은 편지함 메시지가 수신되고 indexedDB에 저장된 후 ServiceWorker에 의해 실행됩니다.  Pushwoosh.addEventHandler('receive-inbox-message', (payload) => {    console.log('Triggered event: receive-inbox-message', payload.message);  });
  // 페이지 로딩 중 받은 편지함이 자동으로 업데이트된 후 실행됩니다.  Pushwoosh.addEventHandler('update-inbox-messages', (payload) => {    console.log('Triggered event: receive-inbox-message', payload.messages);  });}]);
사용자 지정 구독 팝업 이벤트
Anchor link to사용자 지정 구독 팝업 이벤트 처리에 대한 자세한 내용은 사용자 지정 구독 팝업 이벤트 가이드를 참조하세요.
웹 팝업 이벤트
Anchor link toPushwoosh.push(['onLoad', (api) => { // 웹 팝업이 로드되고 현재 페이지에 대한 자동 표시 파이프라인이 실행되면 실행됩니다. Pushwoosh.addEventHandler('web-popups-ready', () => { console.log('Triggered event: web-popups-ready'); });
// 웹 팝업이 자동으로 또는 webPopups.show()를 통해 표시될 때 실행됩니다. Pushwoosh.addEventHandler('show-web-popup', (payload) => { console.log('Triggered event: show-web-popup', payload.code, payload.trigger); // trigger: 'auto' | 'api' });
// 웹 팝업이 숨겨질 때 실행됩니다. Pushwoosh.addEventHandler('hide-web-popup', (payload) => { console.log('Triggered event: hide-web-popup', payload.code, payload.reason); // reason: 'user' | 'api' | 'preempted' });}]);웹 푸시 SDK가 초기화된 후, Pushwoosh API에 다음 호출을 할 수 있습니다. 모든 메서드는 Promise 객체를 반환합니다.
Pushwoosh.push((api) => {  // 사용자에 대한 태그 설정  api.setTags({    'Tag Name 1': 'value1',    'Tag Name 2': 'value2'  });
  // 서버에서 사용자에 대한 태그 가져오기  api.getTags();
  // 사용자 ID 등록  api.registerUser('user123');
    // 사용자 이메일 등록  api.registerEmail('user@example.com');
  // SMS 번호 등록  api.registerSmsNumber('+15551234567');
  // WhatsApp 번호 등록  api.registerWhatsappNumber('+1234567890');
  // 이벤트 게시  api.postEvent('myEventName', {attributeName: 'attributeValue'});
  //알림에서 등록 해제  api.unregisterDevice();
  // 기기 언어 설정("Language" 태그의 값을 덮어씁니다)  api.setLanguage('es');
  // 또는 사용자를 기기 및 채널과 다중 등록  api.multiRegisterDevice({    user_id: 'user123',    email: 'user@example.com',    sms_phone_number: '+1234567890',    tags: {      'UserType': { operation: TTagOperationSet, value: 'Premium' },      'Interests': { operation: TTagOperationAppend, values: ['sports', 'technology'] }    }  });});
multiRegisterDevice
Anchor link to단일 API 호출로 사용자 프로필을 여러 기기 및 메시징 채널에 등록할 수 있는 향상된 등록 메서드입니다. 이 메서드는 크로스 플랫폼 애플리케이션이나 옴니채널 메시징 전략을 구현할 때 특히 유용합니다.
Pushwoosh.push((api) => { api.multiRegisterDevice({ user_id: 'user123', // 선택 사항: 사용자 식별자 email: 'user@example.com', // 선택 사항: 이메일 메시징용 이메일 sms_phone_number: '+1234567890', // 선택 사항: SMS 전화번호 (E.164 형식) whatsapp_phone_number: '+1234567890', // 선택 사항: WhatsApp 번호 (E.164 형식) kakao_phone_number: '+1234567890', // 선택 사항: 카카오톡 번호 (E.164 형식) language: 'en', // 선택 사항: 언어 코드 (ISO 639-1) timezone: 'America/New_York', // 선택 사항: 시간대 식별자 city: 'New York', // 선택 사항: 타겟팅용 도시 country: 'US', // 선택 사항: 타겟팅용 국가 state: 'NY', // 선택 사항: 타겟팅용 주 tags: { // 선택 사항: 작업이 포함된 태그 값 'UserType': { operation: TTagOperationSet, // 태그 값 설정 (0) value: 'Premium' }, 'Interests': { operation: TTagOperationAppend, // 태그 값에 추가 (1) values: ['sports', 'technology'] }, 'LoginCount': { operation: TTagOperationIncrement, // 태그 값 증가 (3) value: '1' } }, push_devices: [ // 선택 사항: 푸시 기기 배열 { hwid: 'web-device-456', platform: TPlatformChrome, // Chrome 플랫폼 (11) push_token: 'fcm-token-here', app_version: '2.1.0', platformData: { public_key: 'web-push-public-key', auth_token: 'web-push-auth-token', browser: 'chrome' } } ] }) .then((response) => { console.log('Multi-registration successful:', response); }) .catch((error) => { console.error('Multi-registration failed:', error); });});플랫폼 유형:
TPlatformSafari(10): Safari 플랫폼. Safari 구성 섹션이 없는 애플리케이션은 Safari 기기를 대신TPlatformChrome(11)로 등록합니다.TPlatformChrome(11): Chrome 플랫폼TPlatformFirefox(12): Firefox 플랫폼
태그 작업 유형:
TTagOperationSet(0): 태그 값 설정 (기존 값 교체)TTagOperationAppend(1): 태그 값에 추가 (목록에 추가)TTagOperationRemove(2): 태그 값 제거 (목록에서 제거)TTagOperationIncrement(3): 태그 값 증가 (숫자 증가)
이점:
- 단일 API 호출: 여러 기기와 채널을 한 번에 등록
- 원자적 작업: 모든 등록이 함께 성공하거나 실패
- 사용자 중심: 모든 기기를 단일 사용자 프로필과 연결
- 고급 태깅: 복잡한 태그 작업 지원
- 크로스 플랫폼: 여러 플랫폼을 동시에 처리
Pushwoosh로 태그를 보내는 예시:
Pushwoosh.push((api) => { var myCustomTags = { 'Tag 1': 123, 'Tag 2': 'some string' }; api.setTags(myCustomTags) .then((res) => { var skipped = res && res.skipped || []; if (!skipped.length) { console.log('success'); } else { console.warn('skipped tags:', skipped); } }) .catch((err) => { console.error('setTags error:', err); });});태그 값 증가
Anchor link to숫자 태그의 값을 증가시키려면, operation 매개변수를 ‘increment’ 값과 함께 다음과 같이 사용하세요:
Pushwoosh.push((api) => { api.setTags({ 'Tag 1': { operation: 'increment', value: 1 } })});태그 값 추가
Anchor link to기존 목록 태그에 새 값을 추가하려면, operation 매개변수를 ‘append’ 값과 함께 다음과 같이 사용하세요:
Pushwoosh.push((api) => { api.setTags({ 'Tag 3': { operation: 'append', value: ['Value3'] } })});태그 값 제거
Anchor link to목록 태그에서 값을 제거하려면, operation 매개변수를 ‘remove’ 값과 함께 다음과 같이 사용하세요:
Pushwoosh.push((api) =>{ api.setTags({ 'Tag 3': { operation: 'remove', value: ['Value2'] } })});공개 메서드
Anchor link toPushwoosh.subscribe()
이 메서드는 사용자에게 푸시 알림 권한을 요청하는 데 사용됩니다. 사용자가 이미 구독한 경우, 메서드 실행이 중지됩니다.
사용자가 아직 푸시를 구독하지 않은 경우:
1. 푸시 알림 권한이 요청됩니다.
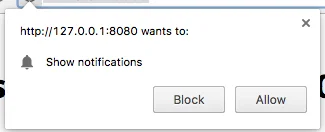
2. 사용자가 알림을 허용하면 onSubscribe 이벤트가 트리거됩니다.
SDK 초기화 중에 autoSubscribe: true가 설정된 경우 Pushwoosh.subscribe()가 자동으로 실행됩니다.
초기화 중에 autoSubscribe: false 매개변수를 사용하여 사용자에게 수동으로 푸시 구독을 요청하기로 선택한 경우 이 메서드를 호출하세요:
<button onclick="Pushwoosh.subscribe()">구독</button><script> Pushwoosh.push(['onSubscribe', (api) => { console.log('사용자가 성공적으로 구독했습니다'); }]);</script>Pushwoosh.unsubscribe()
/unregisterDevice메서드가 실행됩니다.onUnsubscribe이벤트가 트리거됩니다.
<button onclick="Pushwoosh.unsubscribe()">구독 취소</button><script type="text/javascript"> Pushwoosh.push(['onUnsubscribe', (api) => { console.log('사용자가 성공적으로 구독을 취소했습니다'); }]);</script>Pushwoosh.isSubscribed()
사용자가 구독했는지 확인하고 true/false 플래그를 반환합니다.
Pushwoosh.isSubscribed().then((isSubscribed) => { console.log('isSubscribed', isSubscribed);});Pushwoosh.getHWID()
Pushwoosh HWID를 반환합니다.
Pushwoosh.getHWID().then((hwid) => { console.log('hwid:', hwid);});Pushwoosh.getPushToken()
사용 가능한 경우 푸시 토큰을 반환합니다.
Pushwoosh.getPushToken().then((pushToken) => { console.log('pushToken:', pushToken);});Pushwoosh.getUserId()
사용 가능한 경우 사용자 ID를 반환합니다.
Pushwoosh.getUserId().then((userId) => { console.log('userId:', userId);});Pushwoosh.getParams()
다음 매개변수 목록을 반환합니다:
Pushwoosh.getParams().then((params) => { params = params || {}; var hwid = params.hwid; var pushToken = params.pushToken; var userId = params.userId;});Pushwoosh.isAvailableNotifications()
브라우저가 Pushwoosh WebSDK 3.0을 지원하는지 확인하고 ‘true’ 또는 ‘false’를 반환합니다.
Pushwoosh.isAvailableNotifications() // true/falseInboxMessages 메서드
Anchor link tomessagesWithNoActionPerformedCount(): Promise<number>
열린 메시지 수를 반환합니다.
Pushwoosh.pwinbox.messagesWithNoActionPerformedCount() .then((count) => { console.log(`${count} messages opened`); });unreadMessagesCount()
읽지 않은 메시지 수를 반환합니다.
Pushwoosh.pwinbox.unreadMessagesCount() .then((count) => { console.log(`${count} messages unread`); });messagesCount(): Promise<number>
총 메시지 수를 반환합니다.
Pushwoosh.pwinbox.messagesCount() .then((count) => { console.log(`${count} messages`); });loadMessages(): Promise<Array>
삭제되지 않은 메시지 목록을 로드합니다.
Pushwoosh.pwinbox.loadMessages() .then(() => { console.log('Messages have been loaded'); });readMessagesWithCodes(codes: Array<string>): Promise<void>
Inbox_Id로 메시지를 읽음으로 표시합니다.
Pushwoosh.pwinbox.readMessagesWithCodes(codes) .then(() => { console.log('Messages have been read'); });performActionForMessageWithCode(code: string): Promise<void>
메시지에 할당된 작업을 수행하고 메시지를 읽음으로 표시합니다.
Pushwoosh.pwinbox.performActionForMessageWithCode(code) .then(() => { console.log('Action has been performed'); });deleteMessagesWithCodes(codes: Array<string>): Promise<void>
메시지를 삭제됨으로 표시합니다.
Pushwoosh.pwinbox.deleteMessagesWithCodes([code]) .then(() => { console.log('Messages have been deleted'); });syncMessages(): Promise<void>
서버와 메시지를 동기화합니다.
Pushwoosh.pwinbox.syncMessages() .then(() => { console.log('Messages have been synchronized'); });WebPopups 메서드
Anchor link to프로그래밍 방식 웹 팝업 API는 위젯이 로드될 때마다 사용할 수 있으며, 이것이 기본값입니다(위 참조). web-popups-ready 이벤트가 발생하면 Pushwoosh.moduleRegistry.webPopups를 통해 접근하세요.
show(code: string): Promise<boolean>
모든 표시 조건(지연, 페이지 규칙, 기기/방문자 유형, 빈도 제한, 트리거 유형)을 무시하고 즉시 팝업을 표시합니다. 공간을 만들기 위해 이미 보이는 팝업을 닫습니다. 팝업을 표시할 수 없을 때 거부하는 대신 false를 반환합니다.
Pushwoosh.moduleRegistry.webPopups.show('popup_code') .then((shown) => console.log('Popup shown:', shown));hide(code?: string): boolean
보이는 팝업을 숨깁니다. code가 전달되면 보이는 팝업과 일치할 때만 숨깁니다. 숨겨진 것이 없으면 false를 반환합니다.
Pushwoosh.moduleRegistry.webPopups.hide();hideAll(): boolean
보이는 팝업을 숨기고 현재 페이지 로드에 대해 아직 보류 중인 모든 것을 해제합니다. 이후에도 show()는 계속 작동합니다.
Pushwoosh.moduleRegistry.webPopups.hideAll();isVisible(code?: string): boolean
팝업이 현재 보이는지 확인합니다. code가 없으면 어떤 팝업이든 보이는지 확인합니다.
Pushwoosh.moduleRegistry.webPopups.isVisible('popup_code');getVisibleCode(): string | null
현재 화면에 있는 팝업의 코드를 반환하거나, 보이는 것이 없으면 null을 반환합니다.
Pushwoosh.moduleRegistry.webPopups.getVisibleCode();getAvailableCodes(): Array<string>
서버가 이 기기에 대해 반환한 모든 팝업의 코드를 반환합니다.
Pushwoosh.moduleRegistry.webPopups.getAvailableCodes();getState(): object
웹 팝업 상태의 스냅샷을 반환합니다: visible(화면에 있는 코드 또는 null), queued(표시 슬롯을 기다리는 코드), waiting(지연 타이머가 설정된 코드), available(서버가 반환한 모든 코드).
Pushwoosh.moduleRegistry.webPopups.getState();프로그레시브 웹 앱 지원
Anchor link toPushwoosh를 프로그레시브 웹 애플리케이션(PWA)에 통합하려면 아래 설명된 단계를 따르세요. iPhone 및 iPad 사용자의 경우 iPhone 및 iPad의 웹 푸시도 참조하세요.
1. 서비스 워커 파일의 경로를 복사하세요:
if ('serviceWorker' in navigator) { window.addEventListener('load', () => { navigator.serviceWorker.register('/service-worker.js') // <- 서비스 워커 URL });}그런 다음, WebSDK를 초기화할 때 다음과 같이 serviceWorkerUrl 매개변수를 사용하세요:
var Pushwoosh = Pushwoosh || [];Pushwoosh.push(['init', { logLevel: 'error', applicationCode: 'XXXXX-XXXXX', safariWebsitePushID: 'web.com.example.domain', defaultNotificationTitle: 'Pushwoosh', defaultNotificationImage: 'https://yoursite.com/img/logo-medium.png', serviceWorkerUrl: '/service-worker.js', // <- 서비스 워커 URL}]);WebSDK는 새 서비스 워커를 즉시 등록하지 않습니다; 서비스 워커는 필요할 때 등록됩니다:
- 기기가 푸시 토큰을 받을 때 (기기 등록 또는 재구독 시),
- 푸시 토큰이 삭제될 때 (사용자 기반에서 기기 제거 시).
이는 서버 요청 수를 줄여 페이지 로딩 속도를 높입니다.
브라우저는 두 개의 다른 서비스 워커가 동시에 등록되는 것을 허용하지 않으므로(자세히 보기: https://github.com/w3c/ServiceWorker/issues/921), PWA가 올바르게 작동하려면 코드베이스와 Pushwoosh 코드베이스에 공통 서비스 워커를 등록해야 합니다.
2. 서비스 워커에 다음 문자열을 추가하세요(시작 또는 끝, 상관없음):
importScripts('https://cdn.pushwoosh.com/webpush/v3/pushwoosh-service-worker.js' + self.location.search);이렇게 하면 서비스 워커가 Pushwoosh 서비스를 통해 전송된 푸시 알림을 수신하고 처리할 수 있게 됩니다.
Google 태그 관리자에서 설치하기
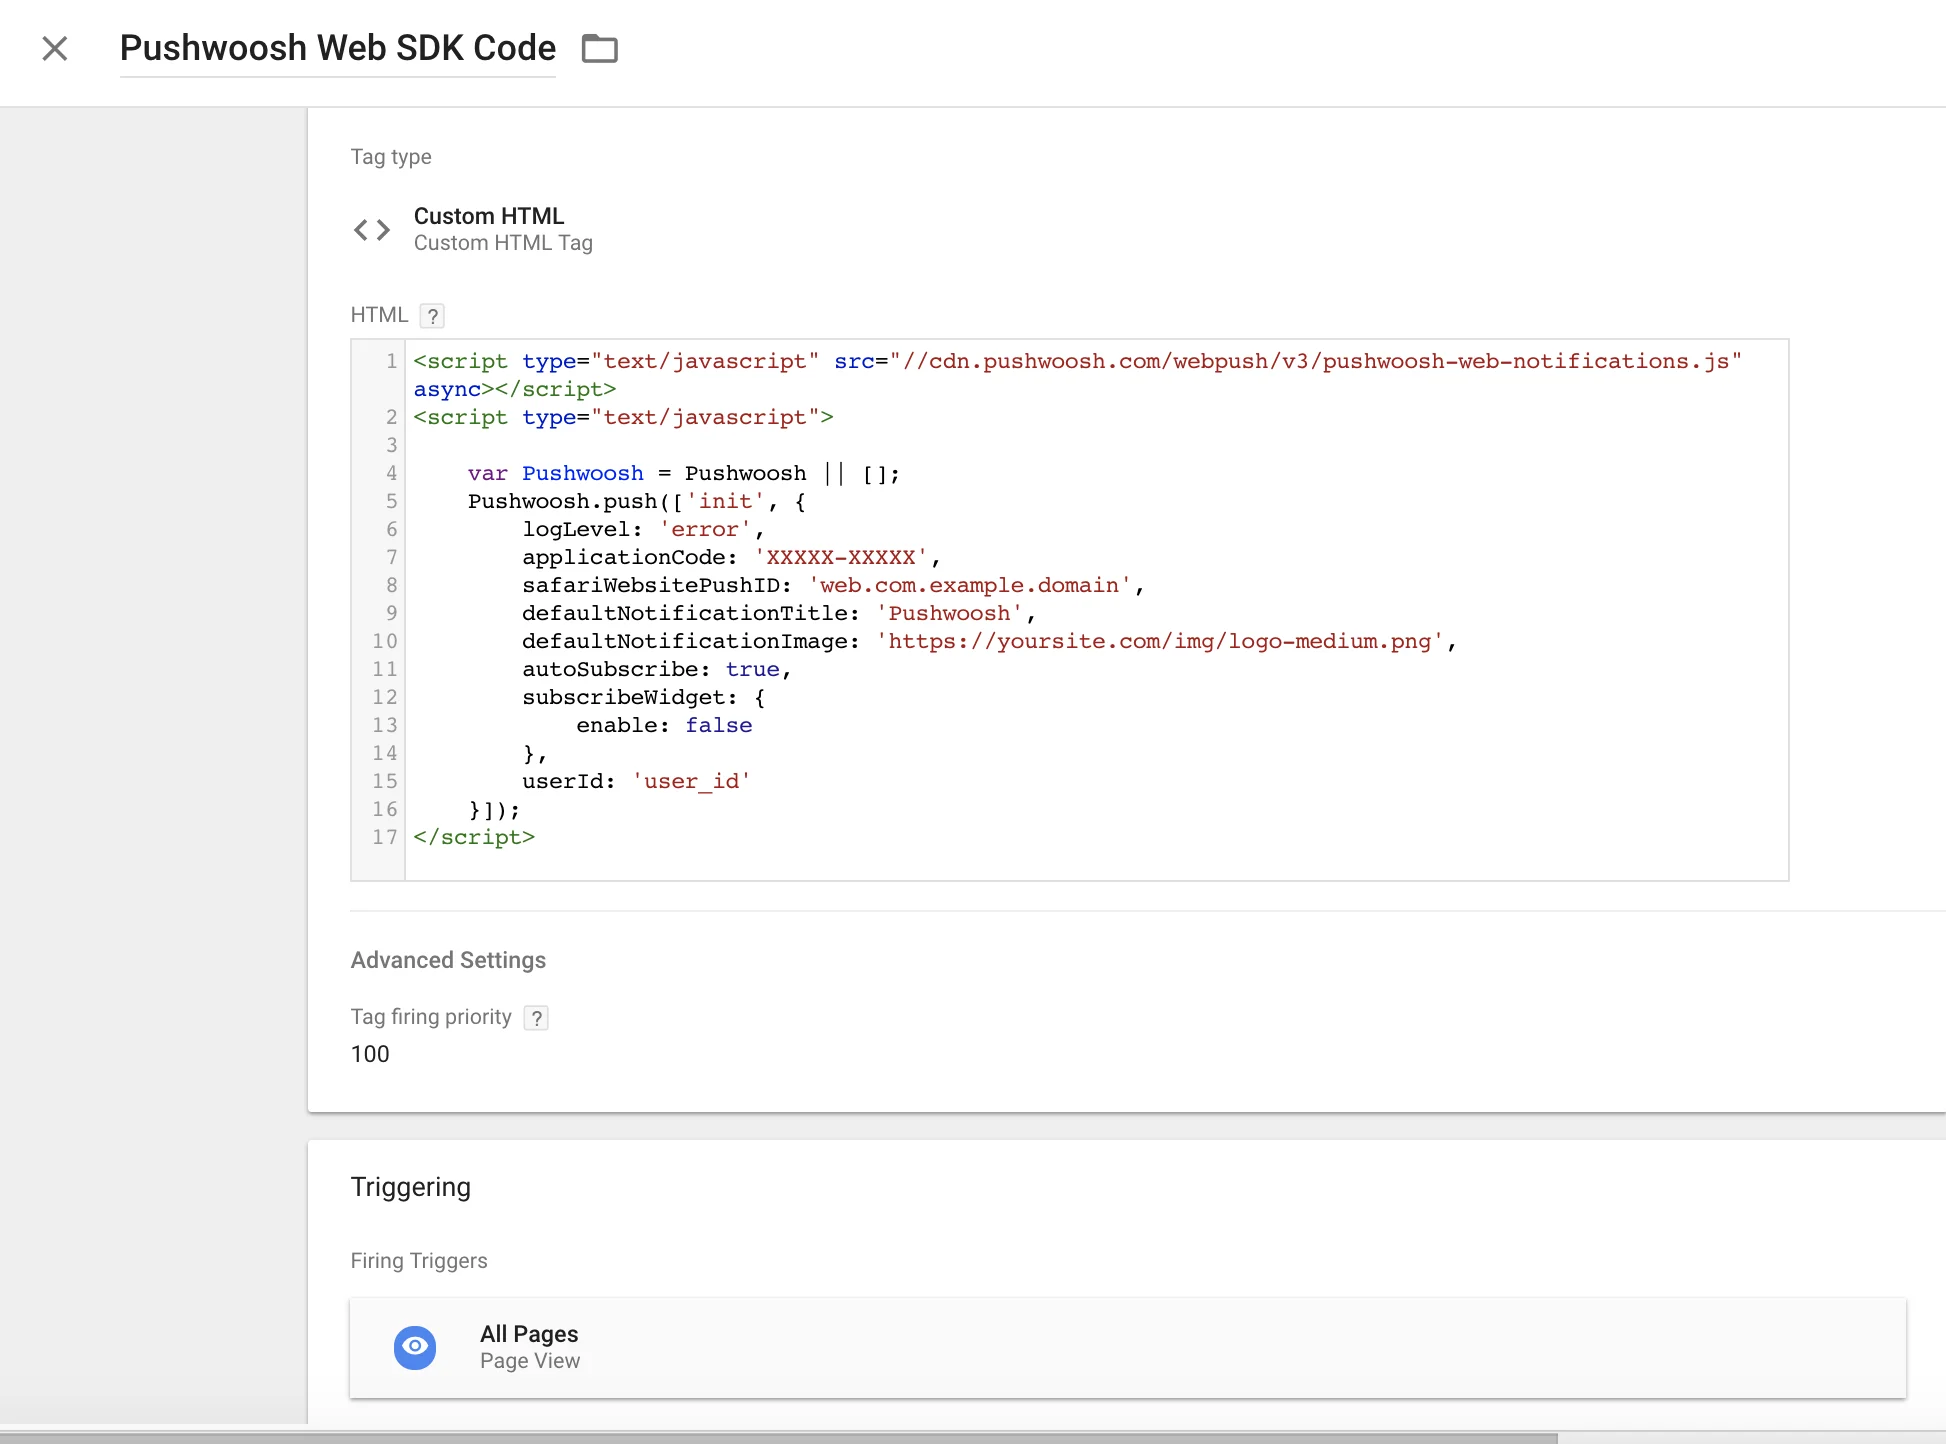
Anchor link toGoogle 태그 관리자에서 다음 코드를 사용하여 Pushwoosh SDK를 초기화하세요. 사용자 지정 HTML 태그를 만들고 아래 코드를 붙여넣으세요. Pushwoosh 애플리케이션 코드, Safari 웹사이트 ID 및 기본 알림 이미지 URL을 변경해야 합니다.
또한 높은 태그 실행 우선순위(예: 100)를 설정하고 모든 페이지에서 트리거하세요. 아래 스크린샷을 참조하세요.
<script type="text/javascript" src="//cdn.pushwoosh.com/webpush/v3/pushwoosh-web-notifications.js" async></script><script type="text/javascript"> var Pushwoosh = Pushwoosh || []; Pushwoosh.push(['init', { logLevel: 'error', applicationCode: 'XXXXX-XXXXX', safariWebsitePushID: 'web.com.example.domain', defaultNotificationTitle: 'Pushwoosh', defaultNotificationImage: 'https://yoursite.com/img/logo-medium.png', autoSubscribe: true, subscribeWidget: { enable: false }, userId: 'user_id' }]);</script>