मेंडिक्स मॉड्यूल बेसिक इंटीग्रेशन गाइड
यह गाइड एक मौजूदा मेंडिक्स नेटिव मोबाइल ऐप में Pushwoosh मॉड्यूल जोड़ने की प्रक्रिया बताती है, जिसमें इसे मार्केटप्लेस से इंस्टॉल करने से लेकर डिवाइस पर नोटिफिकेशन प्राप्त करने तक शामिल है।
आवश्यक शर्तें
Anchor link toअपने ऐप में Pushwoosh मॉड्यूल को इंटीग्रेट करने के लिए, आपको निम्नलिखित की आवश्यकता होगी:
ऊपर दी गई सूची में डिवाइस एपीआई टोकन की इस मॉड्यूल के लिए आवश्यकता नहीं है। विजेट केवल एप्लिकेशन कोड लेता है और कुछ नहीं।
आपको निम्नलिखित की भी आवश्यकता होगी:
- मेंडिक्स स्टूडियो प्रो 11.12.3 या नया। मॉड्यूल पैकेज उस संस्करण के साथ बनाया गया है, और स्टूडियो प्रो अपने से नए संस्करण द्वारा उत्पादित पैकेज को नहीं खोल सकता है।
- आपके ऐप में एक नेटिव मोबाइल नेविगेशन प्रोफाइल।
- नेटिव बिल्ड बनाने के लिए Xcode या Android Studio। Make It Native ऐप इस मॉड्यूल को नहीं चला सकता, क्योंकि इसमें थर्ड-पार्टी नेटिव कोड नहीं होता है।
1. मार्केटप्लेस से मॉड्यूल इंस्टॉल करें
Anchor link toस्टूडियो प्रो में, ऊपर दाईं ओर मार्केटप्लेस आइकन पर क्लिक करें, Pushwoosh खोजें, और डाउनलोड पर क्लिक करें। स्टूडियो प्रो आपके ऐप में Pushwoosh नामक एक मॉड्यूल जोड़ता है।
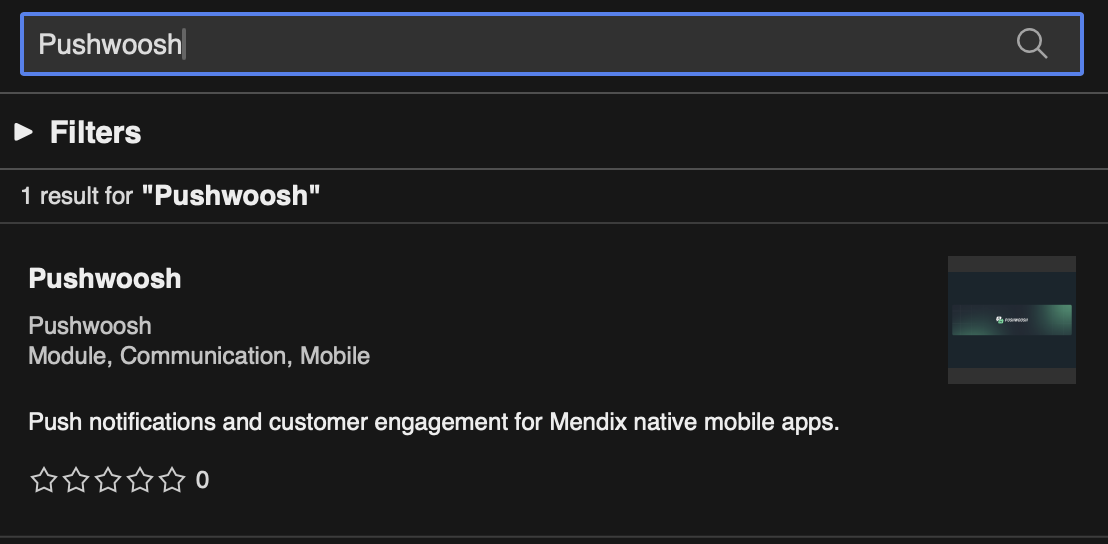
इंस्टॉल करने के लिए और कुछ नहीं है। नेटिव लाइब्रेरीज़ नेटिव बिल्ड के दौरान npm से आती हैं, जो उस सटीक संस्करण से पिन की गई होती हैं जिसके साथ मॉड्यूल का परीक्षण किया गया था।
2. अपने होम पेज पर Pushwoosh इवेंट्स विजेट जोड़ें
Anchor link toPushwoosh इवेंट्स विजेट SDK शुरू करता है और पुश नोटिफिकेशन को नैनोफ्लो इवेंट्स में बदलता है। यह कुछ भी रेंडर नहीं करता है, इसलिए इसे एक बार उस पेज पर रखें जो नेटिव मोबाइल नेविगेशन प्रोफाइल में सबसे पहले लोड होता है।
- अपने नेटिव मोबाइल नेविगेशन प्रोफाइल का होम पेज खोलें।
- Pushwoosh इवेंट्स विजेट को पेज पर खींचें। यह टूलबॉक्स की Pushwoosh श्रेणी में है।
- एप्लिकेशन कोड प्रॉपर्टी को Pushwoosh कंट्रोल पैनल से अपने ऐप के एप्लिकेशन कोड पर सेट करें। यह
XXXXX-XXXXXजैसा दिखता है।
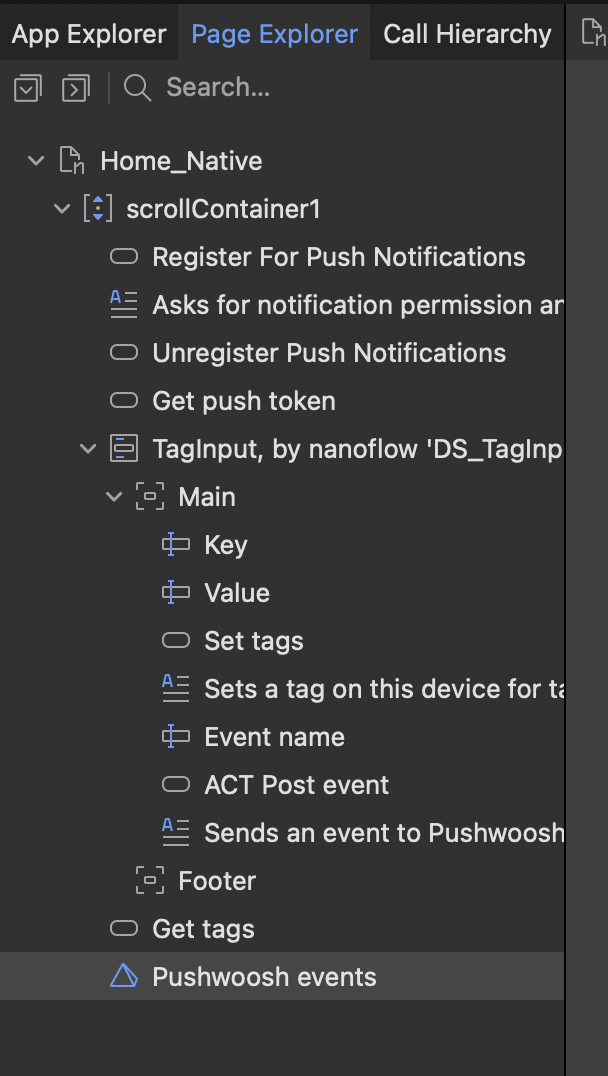
लोड पर रजिस्टर करें को सक्षम छोड़ दें ताकि ऐप खुलते ही डिवाइस रजिस्टर हो जाए। यदि आप बाद में नोटिफिकेशन की अनुमति मांगना चाहते हैं, तो इसे बंद कर दें, ऐप में उस बिंदु पर जहां अनुरोध उपयोगकर्ता के लिए अधिक मायने रखता है। नीचे डिवाइस रजिस्टर करें देखें।
3. नेटिव बिल्ड को कॉन्फ़िगर करें
Anchor link toPushwoosh एक मेंडिक्स ऐप के अंतर्निहित पुश नोटिफिकेशन को बदलने का काम करता है, न कि उनके साथ काम करने का। नेटिव मोबाइल बिल्डर में, क्षमताओं को इस प्रकार सेट करें:
- पुश नोटिफिकेशन: बंद।
- फायरबेस एंड्रॉइड: चालू, ताकि
google-services.jsonअभी भी उठाया जा सके।
com.google.firebase.MESSAGING_EVENT इवेंट के लिए पंजीकृत दो नोटिफिकेशन सेवाएं एक-दूसरे को ओवरलैप करती हैं, और नोटिफिकेशन आना बंद हो जाते हैं। एंड्रॉइड पर, FCM सेंडर आईडी google-services.json से आती है; यह मॉड्यूल को पास नहीं की जाती है।
iOS पर, साइनिंग और क्षमताएं में जेनरेट किए गए Xcode प्रोजेक्ट में पुश नोटिफिकेशन क्षमता जोड़ें, और अपनी APNs कुंजी को Pushwoosh कंट्रोल पैनल पर अपलोड करें जैसा कि आईओएस प्लेटफॉर्म कॉन्फ़िगरेशन गाइड में वर्णित है।
4. डिवाइस को रजिस्टर करें
Anchor link toएक डिवाइस को Pushwoosh के साथ पंजीकृत होने के बाद ही सूचनाएं प्राप्त होती हैं। पंजीकरण के दो तरीके हैं, और आपको उनमें से एक की आवश्यकता है।
लोड पर रजिस्टर करें। विजेट की लोड पर रजिस्टर करें प्रॉपर्टी को सक्षम छोड़ दें। विजेट लोड होते ही डिवाइस रजिस्टर हो जाता है, और iOS पर सिस्टम अनुमति प्रॉम्प्ट उसी क्षण दिखाई देता है।
नैनोफ्लो से रजिस्टर करें। लोड पर रजिस्टर करें को बंद करें और अपने स्वयं के नैनोफ्लो से RegisterForPushNotifications एक्शन को कॉल करें, उदाहरण के लिए उपयोगकर्ता के साइन इन करने या सहमति स्क्रीन स्वीकार करने के बाद। यह एक्शन पुश टोकन को एक स्ट्रिंग के रूप में लौटाता है।
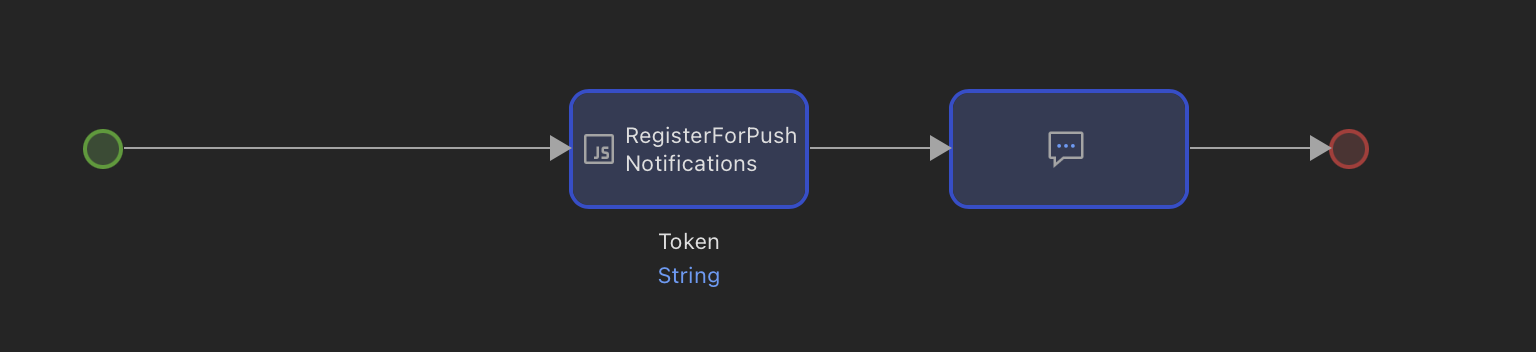
किसी डिवाइस पर डिलीवरी रोकने के लिए, UnregisterForPushNotifications को कॉल करें।
5. ऐप के खुले रहने पर आने वाले नोटिफिकेशन को हैंडल करें
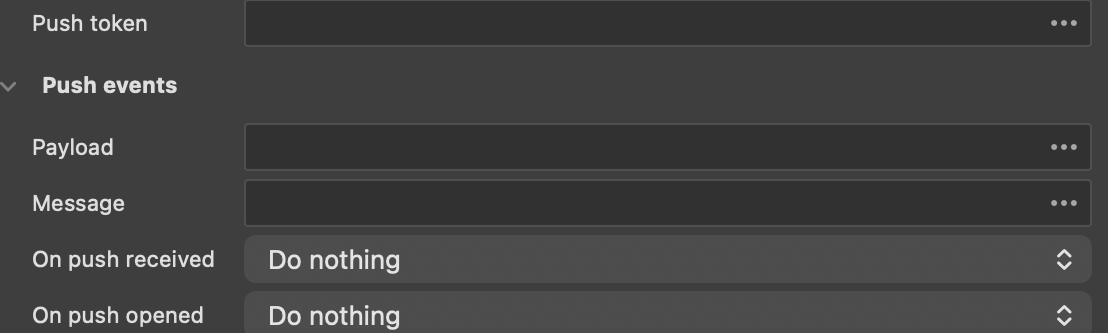
Anchor link toजब ऐप फोरग्राउंड में हो और कोई नोटिफिकेशन आए, तो विजेट उस नोटिफिकेशन को आपके द्वारा बताए गए एट्रिब्यूट्स में लिखता है, और फिर पुश प्राप्त होने पर में नैनोफ्लो को ट्रिगर करता है।
- संदेश को एक स्ट्रिंग एट्रिब्यूट पर सेट करें जो नोटिफिकेशन टेक्स्ट प्राप्त करता है।
- पेलोड को एक स्ट्रिंग एट्रिब्यूट पर सेट करें जो JSON के रूप में पूरा पेलोड प्राप्त करता है।
- पुश प्राप्त होने पर को एक नैनोफ्लो पर सेट करें जो इस पर प्रतिक्रिया करता है, उदाहरण के लिए जो एक संदेश दिखाता है या एक सूची को रीफ्रेश करता है।
नैनोफ्लो चलने से पहले एट्रिब्यूट्स भर दिए जाते हैं, इसलिए नैनोफ्लो उन्हें तुरंत पढ़ सकता है।
6. खोले गए नोटिफिकेशन और डीप लिंक को हैंडल करें
Anchor link toजब उपयोगकर्ता किसी नोटिफिकेशन पर टैप करता है, तो विजेट पुश खोले जाने पर में नैनोफ्लो को ट्रिगर करता है, जिसमें वही संदेश और पेलोड एट्रिब्यूट्स भरे होते हैं।
यदि नोटिफिकेशन में एक डीप लिंक है, तो विजेट डीप लिंक में सेट किए गए एट्रिब्यूट में लिंक भी लिखता है और डीप लिंक पर में नैनोफ्लो को ट्रिगर करता है। वह नैनोफ्लो पुश खोले जाने पर के अतिरिक्त चलता है, इसलिए इसका उपयोग उपयोगकर्ता को उस पेज पर रूट करने के लिए करें जिस पर लिंक इंगित करता है।
7. उपयोगकर्ता की पहचान करें और टैग सेट करें
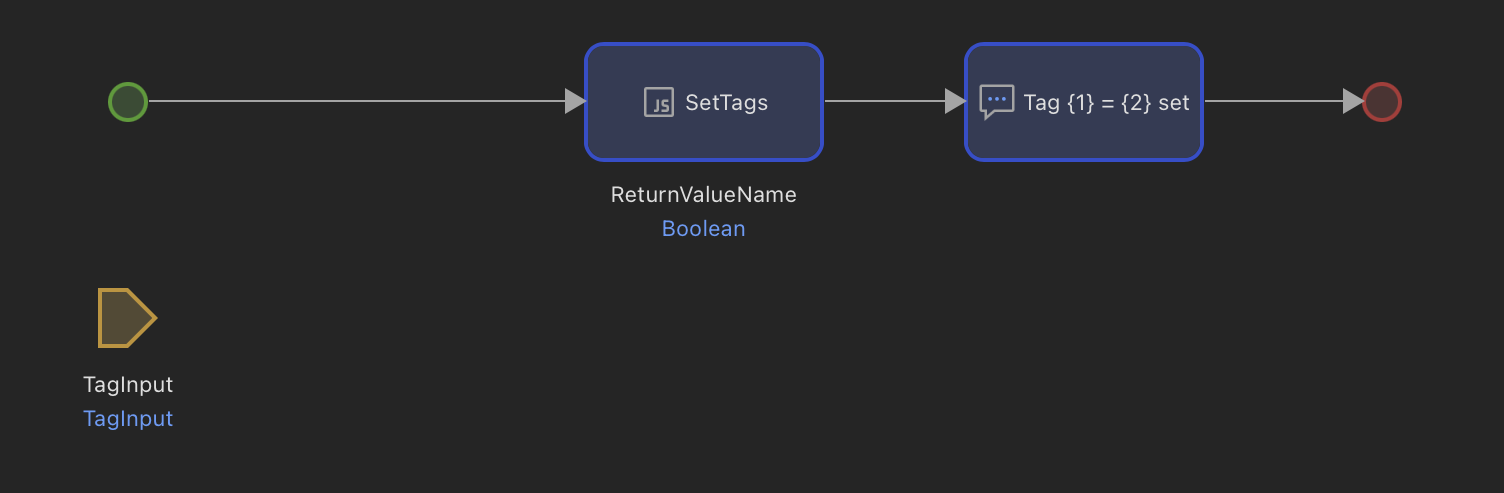
Anchor link toटैग वे हैं जो एक ब्रॉडकास्ट को एक लक्षित संदेश में बदलते हैं। किसी भी नैनोफ्लो से SetTags को एक JSON ऑब्जेक्ट के साथ उसके पैरामीटर के रूप में कॉल करें:
'{"Language":"en","Plan":"pro","Level":7}'SetUserId को अपने स्वयं के उपयोगकर्ता पहचानकर्ता के साथ कॉल करें ताकि डिवाइस को एक व्यक्ति के साथ जोड़ा जा सके न कि एक डिवाइस के साथ। एक ही यूजर आईडी के तहत पंजीकृत सभी डिवाइसों तक एक ही संदेश के साथ पहुंचा जा सकता है।
8. इवेंट्स पोस्ट करें
Anchor link toइवेंट्स ट्रिगर किए गए अभियानों और इन-ऐप संदेशों को चलाते हैं। PostEvent को इवेंट के नाम और, वैकल्पिक रूप से, एट्रिब्यूट्स के एक JSON ऑब्जेक्ट के साथ कॉल करें:
'{"product":"Coffee grinder","price":129}'इवेंट का नाम Pushwoosh कंट्रोल पैनल में कॉन्फ़िगर किए गए इवेंट से मेल खाना चाहिए।
9. एक परीक्षण नोटिफिकेशन भेजें
Anchor link toडिवाइस को एक परीक्षण डिवाइस के रूप में पंजीकृत करें और Pushwoosh कंट्रोल पैनल से इसे एक संदेश भेजें। चरणों के लिए अपने इंटीग्रेशन का परीक्षण करें देखें।
जब ऐप खुला हो और कोई नोटिफिकेशन आए, तो यह सिस्टम द्वारा एक अलर्ट के रूप में दिखाया जाता है, और पुश प्राप्त होने पर नैनोफ्लो भी चलता है। सिस्टम अलर्ट को दबाने और नोटिफिकेशन को केवल नैनोफ्लो में संभालने के लिए, SetShowForegroundAlert को false के साथ कॉल करें। यह एक्शन केवल iOS पर काम करता है।
10. जब कुछ भी न आए तो इंटीग्रेशन की जांच करें
Anchor link toजब डिवाइस को कोई नोटिफिकेशन न मिले तो इन्हें क्रम से देखें:
- पुष्टि करें कि ऐप एक कस्टम डेवलपर ऐप है या एक वास्तविक नेटिव बिल्ड है। Make It Native ऐप में मॉड्यूल नहीं होता है, इसलिए इसमें हर Pushwoosh एक्शन चुपचाप विफल हो जाता है।
- नेटिव बिल्ड की क्षमताओं की पुष्टि करें: पुश नोटिफिकेशन बंद, फायरबेस एंड्रॉइड चालू।
- पुष्टि करें कि डिवाइस पंजीकृत है।
GetPushTokenको कॉल करें और जांचें कि यह एक टोकन लौटाता है न कि एक खाली स्ट्रिंग। - पुष्टि करें कि प्लेटफॉर्म Pushwoosh कंट्रोल पैनल में कॉन्फ़िगर किया गया है, जिसमें iOS के लिए APNs कुंजी और Android के लिए फायरबेस सर्वर कुंजी अपलोड की गई है।
यदि डिवाइस अभी भी पहुंच योग्य नहीं है, तो GetHwid को कॉल करें और उस पहचानकर्ता के साथ एक समर्थन टिकट खोलें।
अगले कदम
Anchor link to- मॉड्यूल एक्शन संदर्भ - विजेट प्रॉपर्टीज़ और जावास्क्रिप्ट एक्शन, पैरामीटर और रिटर्न वैल्यू के साथ
- मेंडिक्स FAQ - पहले इंटीग्रेशन के दौरान आने वाले प्रश्न