适用于 iOS 的 Apple Wallet pass 配置
配置您的 Pass Type ID 签名证书,以便 Pushwoosh 可以为您的应用签署和更新 Apple Wallet pass (.pkpass)。这是一次性设置。一旦有效的证书就位,Apple Wallet pass 构建器 将为该应用解锁。
创建证书
Anchor link to-
注册一个 Pass Type ID。 在 Apple Developer Portal 中, 转到 Certificates, Identifiers & Profiles → Identifiers,点击 +,选择 Pass Type IDs, 然后输入一个反向 DNS 标识符,例如
pass.com.yourcompany.passtype。 -
在 Keychain Access 中 生成证书签名请求 (CSR)。 您将在下一步中上传此文件。
-
创建证书。 在 Apple Developer Portal 中打开您的 Pass Type ID,然后点击 Create Certificate。选择 Pass Type ID Certificate,上传您的 CSR 文件,并下载 生成的
.cer文件。双击该文件以将其添加到 Keychain Access。 请参阅 Apple 文档中的 创建证书。 -
从 Keychain Access 中将证书导出为 .p12 文件。在 My Certificates 部分, 找到您的 Pass Type ID 证书,右键单击它,然后选择 Export。选择
.p12格式 并设置一个导出密码。您在 Pushwoosh 中将需要此文件和密码。
在控制面板中配置证书
Anchor link to- 在控制面板中,转到 Settings → Configure platforms。
- 在 MOBILE PLATFORMS 下,找到 iOS 并点击 SET UP PASSKIT。

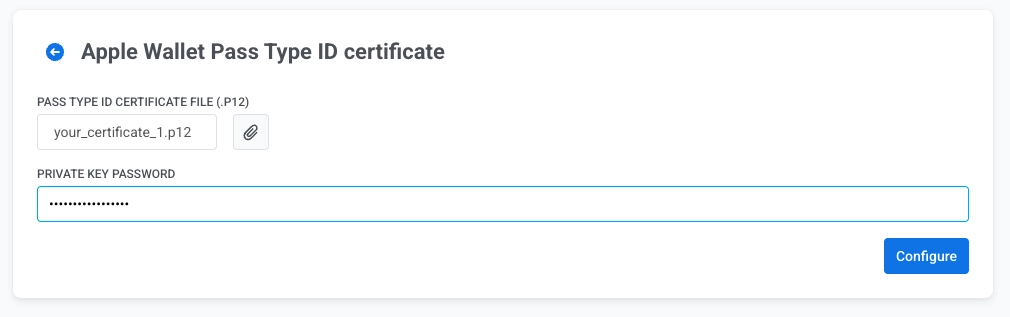
- 点击 PASS TYPE ID CERTIFICATE FILE (.P12) 旁边的附件图标,然后选择您的
.p12文件。 - 在 PRIVATE KEY PASSWORD 中,输入您从 Keychain Access 导出
.p12文件时设置的密码。 - 点击 Configure。