iOS SDK 사용자 정의
딥 링킹
Anchor link toInfo.plist 파일에 URL Identifier 및 URL Scheme을 포함하는 URL types 배열을 추가합니다.
아래 예시에서 URL Scheme은 _com.pushwoosh_이고 URL Identifier는 _promotion_입니다.

앱 델리게이트 파일(일반적으로 iOS 12 이하는 AppDelegate.m, iOS 13 이상은 SceneDelegate.m)에서 아래 예시에 설명된 대로 적절한 openURL 델리게이트 함수를 추가합니다. 이 예시는 올바른 페이지를 확인하고 URL에서 “id” 값을 파싱한 후 이에 응답하여 PromoPageViewController를 엽니다.
AppDelegate.swift
func application(_ app: UIApplication, open url: URL, options: [UIApplication.OpenURLOptionsKey : Any] = [:]) -> Bool {    let components = URLComponents(url: url, resolvingAgainstBaseURL: false)    let page = components?.host    var promotionId: String?
    if page == "promotion" {        return    }
    let items = components?.queryItems ?? []
    for item in items {        if item.name == "id" {            promotionId = item.value        }    }
    //show PromoPageViewController}
- (BOOL)application:(UIApplication *)application openURL:(NSURL *)url sourceApplication:(NSString *)sourceApplication annotation:(id)annotation { NSURLComponents *components = [NSURLComponents componentsWithURL:url resolvingAgainstBaseURL:NO]; NSString *page = components.host; NSString *promotionId = nil;
//return if this is not a promotion deep link if(![page isEqualToString:@"promotion"]) return NO;
for(NSURLQueryItem *item in components.queryItems) { if([item.name isEqualToString:@"id"]) promotionId = item.value; }
PromoPageViewController *vc = [[PromoPageViewController alloc] init]; vc.promotionId = promotionId [self presentViewController:vc animated:YES completion:nil];}SceneDelegate.swift
func scene(_ scene: UIScene, openURLContexts URLContexts: Set<UIOpenURLContext>) {    guard let urlContext = URLContexts.first else { return }
    let components = URLComponents(url: urlContext.url, resolvingAgainstBaseURL: false)    let page = components?.host    var promotionId: String?
    guard page == "promotion" else {        return    }
    let items = components?.queryItems ?? []
    for item in items {        if item.name == "id" {            promotionId = item.value        }    }
    //show PromoPageViewController}
- (void)scene:(UIWindowScene *)scene openURLContexts:(NSSet<UIOpenURLContext *> *)URLContexts { UIOpenURLContext *urlContext = URLContexts.anyObject; if (!urlContext) { return; }
NSURLComponents *components = [NSURLComponents componentsWithURL:urlContext.URL resolvingAgainstBaseURL:NO]; NSString *page = components.host; NSString *promotionId = nil;
if (![page isEqualToString:@"promotion"]) { return; }
for (NSURLQueryItem *item in components.queryItems) { if ([item.name isEqualToString:@"id"]) { promotionId = item.value; } }
//show PromoPageViewController}유니버설 링크
Anchor link to유니버설 링크를 사용하면 사용자가 웹사이트 링크를 탭할 때 앱을 직접 열 수 있습니다. 사용자 정의 URL 스킴과 달리 유니버설 링크는 표준 https:// URL을 사용하며 더 원활한 사용자 경험을 제공합니다.
작동 방식
Anchor link to푸시 알림에 https:// URL(“url” 또는 “l” 매개변수)이 포함된 경우 SDK는 다음을 수행합니다:
- URL로
NSUserActivity를 생성합니다 - 앱의 유니버설 링크 핸들러(
scene:continueUserActivity:또는application:continueUserActivity:restorationHandler:)를 호출합니다 - 앱이 URL을 처리하지 않으면 대체 수단으로 Safari에서 열립니다
- Xcode에서 Associated Domains 구성
앱에 Associated Domains 기능을 추가하고 도메인을 추가합니다:
applinks:yourdomain.com- Apple App Site Association 파일 호스팅
웹 서버의 https://yourdomain.com/.well-known/apple-app-site-association에 apple-app-site-association 파일을 생성합니다:
{ "applinks": { "apps": [], "details": [ { "appID": "TEAM_ID.com.your.bundleid", "paths": ["/path/*", "/promotion/*"] } ] }}TEAM_ID를 Apple 개발자 팀 ID로, com.your.bundleid를 앱의 번들 식별자로 교체합니다.
- 유니버설 링크 핸들러 구현
SceneDelegate.swift (iOS 13+)
func scene(_ scene: UIScene, continue userActivity: NSUserActivity) {    guard userActivity.activityType == NSUserActivityTypeBrowsingWeb,          let url = userActivity.webpageURL else {        return    }
    // Handle the Universal Link URL    let components = URLComponents(url: url, resolvingAgainstBaseURL: false)    let path = components?.path
    if path?.starts(with: "/promotion") == true {        // Navigate to promotion screen        let promotionId = components?.queryItems?.first(where: { $0.name == "id" })?.value        // Show promotion with promotionId    }}
- (void)scene:(UIScene *)scene continueUserActivity:(NSUserActivity *)userActivity { if (![userActivity.activityType isEqualToString:NSUserActivityTypeBrowsingWeb]) { return; }
NSURL *url = userActivity.webpageURL; if (!url) { return; }
// Handle the Universal Link URL NSURLComponents *components = [NSURLComponents componentsWithURL:url resolvingAgainstBaseURL:NO]; NSString *path = components.path;
if ([path hasPrefix:@"/promotion"]) { // Navigate to promotion screen NSString *promotionId = nil; for (NSURLQueryItem *item in components.queryItems) { if ([item.name isEqualToString:@"id"]) { promotionId = item.value; break; } } // Show promotion with promotionId }}AppDelegate.swift (iOS 12 및 이전 버전, 또는 대체 수단으로)
func application(_ application: UIApplication,                 continue userActivity: NSUserActivity,                 restorationHandler: @escaping ([UIUserActivityRestoring]?) -> Void) -> Bool {    guard userActivity.activityType == NSUserActivityTypeBrowsingWeb,          let url = userActivity.webpageURL else {        return false    }
    // Handle the Universal Link URL    let components = URLComponents(url: url, resolvingAgainstBaseURL: false)    let path = components?.path
    if path?.starts(with: "/promotion") == true {        // Navigate to promotion screen        return true    }
    return false}
- (BOOL)application:(UIApplication *)application continueUserActivity:(NSUserActivity *)userActivity restorationHandler:(void (^)(NSArray<id<UIUserActivityRestoring>> *restorableObjects))restorationHandler {
if (![userActivity.activityType isEqualToString:NSUserActivityTypeBrowsingWeb]) { return NO; }
NSURL *url = userActivity.webpageURL; if (!url) { return NO; }
// Handle the Universal Link URL NSURLComponents *components = [NSURLComponents componentsWithURL:url resolvingAgainstBaseURL:NO]; NSString *path = components.path;
if ([path hasPrefix:@"/promotion"]) { // Navigate to promotion screen return YES; }
return NO;}유니버설 링크로 푸시 보내기
Anchor link to푸시 알림을 생성할 때 Action 필드에 웹사이트 URL을 사용합니다:
https://yourdomain.com/promotion?id=123SDK는 이 URL을 유니버설 링크 핸들러로 자동으로 라우팅하여 사용자를 앱의 적절한 화면으로 이동시킬 수 있습니다.
인앱 구매 추적
Anchor link to기본적으로 인앱 구매 추적은 비활성화되어 있습니다. Customer Journeys를 구성할 때 인앱 구매를 추적하려면 info.plist 파일에서 Pushwoosh_PURCHASE_TRACKING_ENABLED 플래그를 _true_로 설정합니다. 사용 가능한 플래그 목록은 표에서 찾을 수 있습니다.
인앱 구매를 수동으로 추적하려면 아래 코드를 사용할 수 있습니다.
paymentQueue:updatedTransactions: delegate 메서드에서 PushManager의 sendSKPaymentTransactions 메서드를 호출합니다
func paymentQueue(_ queue: SKPaymentQueue, updatedTransactions transactions: [SKPaymentTransaction]) { // In-Apps Tracking Pushwoosh code here Pushwoosh.sharedInstance().sendSKPaymentTransactions(transactions) // the rest of the code, consume transactions, etc }- (void)paymentQueue:(SKPaymentQueue *)queue updatedTransactions:(NSArray *)transactions {
[[PushNotificationManager pushManager] sendSKPaymentTransactions:transactions];
//the rest of the code, consume transactions, etc}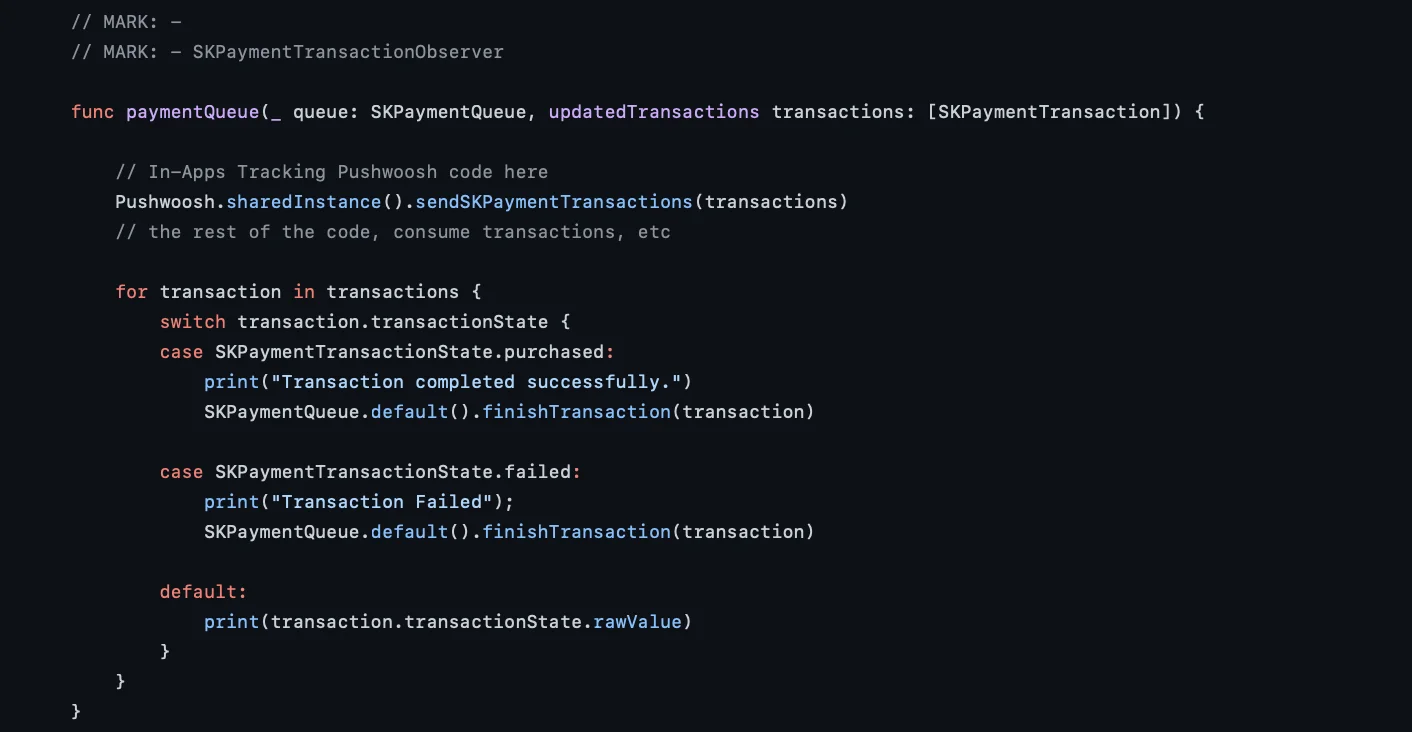
지오존 푸시 알림
Anchor link to지오존 푸시 알림은 별도의 프레임워크인 PushwooshGeozones에 캡슐화되어 있습니다.
- 프로젝트에 PushwooshGeozones.framework 추가
종속성 관리자를 사용하여 프로젝트에 PushwooshGeozones.framework를 추가하려면 podfile 또는 cartfile에 다음 줄을 추가합니다:
pod 'PushwooshXCFramework/Geozones'github "Pushwoosh/pushwoosh-ios-sdk"PushwooshGeozones.xcframework를 사용하려면 다음 패키지 URL을 입력합니다:
PushwooshGeozones-XCFramework
또는 프레임워크를 프로젝트의 Build Phases에 있는 Link Binaries With Libraries로 간단히 드래그 앤 드롭할 수 있습니다.
- Info.plist에 다음 키를 추가합니다:
- NSLocationWhenInUseUsageDescription – (필수) 앱이 포그라운드에서 실행 중일 때만 지오존을 추적합니다.
- NSLocationAlwaysAndWhenInUseUsageDescription – (필수) 앱이 포그라운드 및 백그라운드 모두에서 지오존을 추적하고 권한 요청 대화 상자 팝업을 표시합니다.
- NSLocationAlwaysUsageDescription – (선택 사항) 앱이 항상 지오존을 추적합니다. 앱이 iOS 10 및 이전 버전을 대상으로 하는 경우 사용해야 합니다.
<key>NSLocationAlwaysAndWhenInUseUsageDescription</key><string>for app to track Geozones in both conditions and to show a permission request dialog</string><key>NSLocationWhenInUseUsageDescription</key><string>for app to track Geozones only while running in the foreground</string>- 프레임워크 가져오기
import PushwooshGeozones#import <PushwooshGeozones/PWGeozonesManager.h>- 지오존 추적 시작
PWGeozonesManager.shared()?.startLocationTracking()[[PWGeozonesManager sharedManager] startLocationTracking];override func viewDidLoad() { super.viewDidLoad()
// Start Geozones tracking when needed PWGeozonesManager.shared().startLocationTracking()}- (void)viewDidLoad { [super viewDidLoad]; // Do any additional setup after loading the view.
// Start Geozones tracking when needed [[PWGeozonesManager sharedManager] startLocationTracking];}리치 미디어 큐 생성
Anchor link to동시에 표시할 여러 리치 미디어 페이지가 있는 경우(예: 둘 이상의 인앱에 대한 트리거 이벤트가 한 번에 발생하거나 다른 트리거 이벤트가 발생할 때 이미 리치 미디어 페이지가 표시되고 있는 경우), 리치 미디어 페이지 표시를 위한 큐를 설정할 수 있습니다. 큐를 생성하려면 아래 설명된 단계를 따릅니다.
- PWRichMediaPresentingDelegate를 구현하는 클래스를 생성합니다:
@interface ChainedRichMediaPresentingDelegate () <PWRichMediaPresentingDelegate>
@property (nonatomic) NSMutableArray *queue;
@property (nonatomic) BOOL inAppIsPresenting;
@end

@implementation ChainedRichMediaPresentingDelegate
- (instancetype)init {    self = [super init];
    if (self) {        _queue = [NSMutableArray new];    }
    return self;}
- (BOOL)richMediaManager:(PWRichMediaManager *)richMediaManager shouldPresentRichMedia:(PWRichMedia *)richMedia {    [_queue addObject:richMedia];    return !_inAppIsPresenting;}
- (void)richMediaManager:(PWRichMediaManager *)richMediaManager didPresentRichMedia:(PWRichMedia *)richMedia {    _inAppIsPresenting = YES;}
- (void)richMediaManager:(PWRichMediaManager *)richMediaManager didCloseRichMedia:(PWRichMedia *)richMedia {    _inAppIsPresenting = NO;
    [_queue removeObject:richMedia];
    if (_queue.count) {        [[PWRichMediaManager sharedManager] presentRichMedia:_queue.firstObject];    }}
- (void)richMediaManager:(PWRichMediaManager *)richMediaManager presentingDidFailForRichMedia:(PWRichMedia *)richMedia withError:(NSError *)error {    [self richMediaManager:richMediaManager didCloseRichMedia:richMedia];}
@end
2. 델리게이트를 설정합니다:
[PWRichMediaManager sharedManager].delegate = [ChainedRichMediaPresentingDelegate new];포스 터치로 리치 알림에 전송된 비디오 자동 재생
Anchor link to리치 알림 첨부 파일로 전송된 비디오가 사용자 상호 작용 없이 알림이 확장될 때 자동 재생되도록 하려면 아래 단계를 따릅니다:
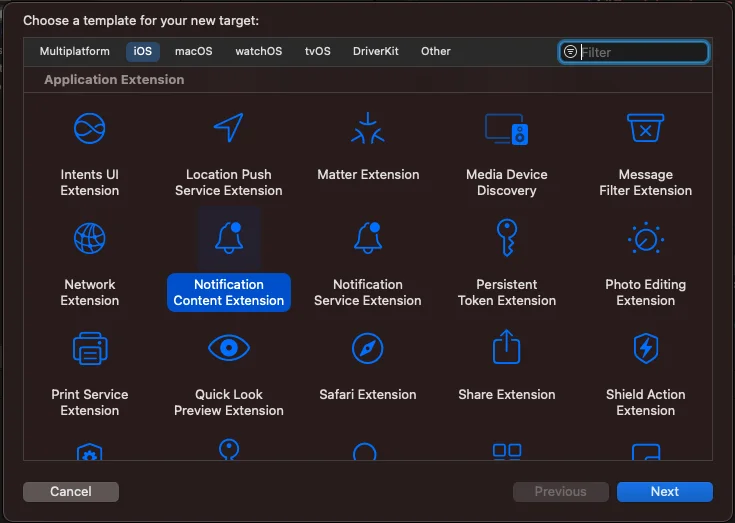
- 프로젝트에 Notification Content Extension을 추가합니다:
- Xcode에서 File > New > Target을 선택합니다.
- Notification Content Extension을 선택합니다.
- 이름을 지정하고 설정을 완료합니다.
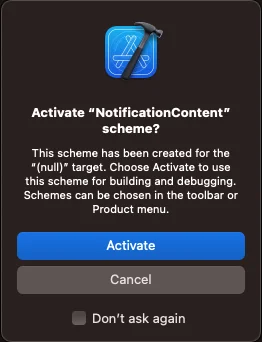
“Activate scheme” 메시지가 표시되면 Cancel을 선택합니다.
- Content Extension의 속성과 메서드를 다음과 같이 조정합니다:
import UIKitimport UserNotificationsimport UserNotificationsUIimport AVKit

class NotificationViewController: UIViewController, UNNotificationContentExtension {    var playerController: AVPlayerViewController!    @IBOutlet weak var playerBackgroundView: UIView!
    override func viewDidLoad() {        super.viewDidLoad()        // Do any required interface initialization here.    }
    func didReceive(_ notification: UNNotification) {        let attachment = notification.request.content.attachments.first
        playerController = AVPlayerViewController()        // Set height programmatically        // preferredContentSize.height = 250
        if let url = attachment?.url {            setupVideoPlayer(url: url)        } else {            print("No valid URL...")        }    }
private func setupVideoPlayer(url: URL) { guard let playerController = self.playerController else { return } let player = AVPlayer(url: url) playerController.player = player playerController.view.frame = self.playerBackgroundView.bounds playerBackgroundView.addSubview(playerController.view) addChild(playerController) playerController.didMove(toParent: self) player.play() }- MainInterface.storyboard에 UIView를 통합합니다:
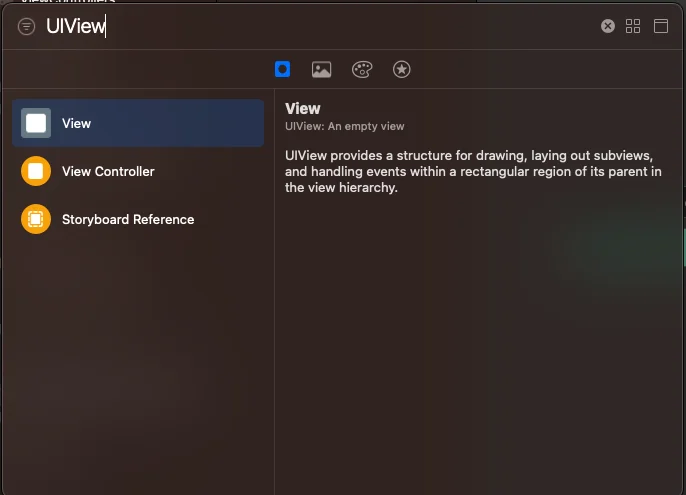
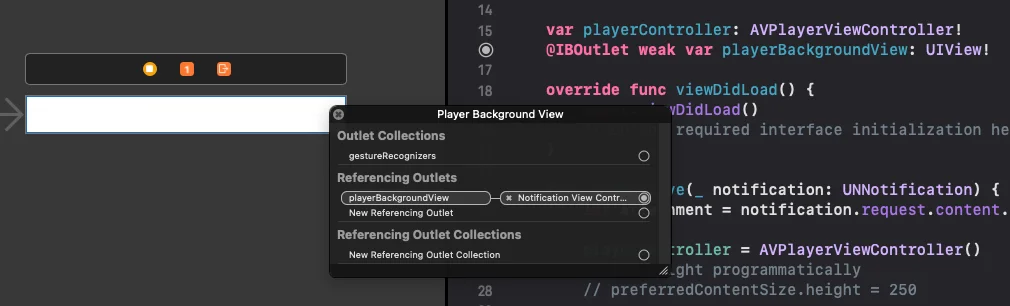
- playerBackgroundView IBOutlet을 방금 추가한 UIView와 연결합니다:
- info.plist 파일을 다음 항목으로 업데이트합니다:
UNNotificationExtensionUserInteractionEnabled = true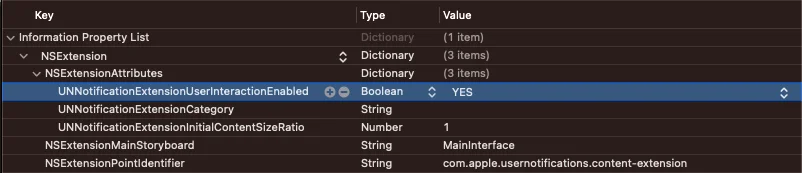
알림에 비디오를 첨부하려면 Control Panel의 Media Attachment 필드에 비디오 URL을 입력합니다:
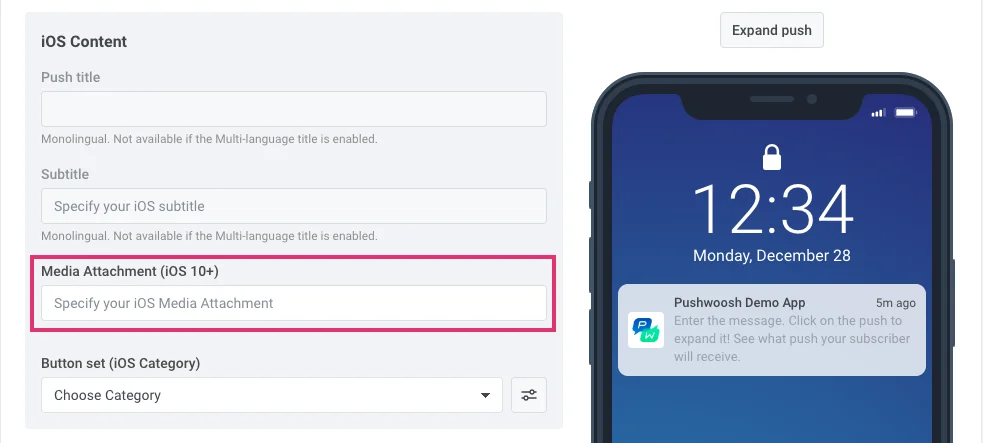
API /createMessage 요청을 통해 알림을 보낼 때 “ios_attachment” 매개변수에 URL을 포함하고 “mutable-content” 플래그가 `1`로 설정되었는지 확인합니다.
사용자 정의 푸시 사운드
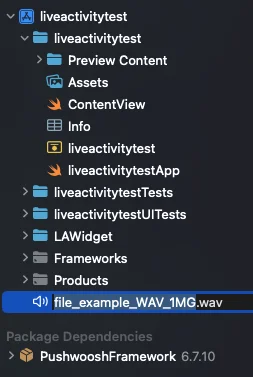
Anchor link to푸시 알림 수신 시 사용자 정의 사운드를 재생하려면 먼저 오디오 파일을 프로젝트의 루트 폴더에 넣습니다.
그런 다음 푸시 매개변수에서 사운드 파일 이름을 지정합니다. 메시지의 iOS 관련 설정의 Sound 필드를 채우거나 createMessage API 요청의 “ios_sound” 매개변수 값으로 파일 이름을 지정합니다.
사용자 정의 iOS 사운드용 오디오 파일은 .aif, .caf, .wav 형식 중 하나여야 합니다. 파일 이름에 형식을 지정해야 합니다. 그렇지 않으면 Pushwoosh iOS SDK에서 무시됩니다.
iOS 임시 푸시
Anchor link to작동 방식
Anchor link to임시 푸시 알림은 사용자의 알림 센터에 조용히 표시되지만 잠금 화면에는 표시되지 않습니다. 이 유형의 푸시는 사용자가 명시적으로 허용할 필요가 없습니다. 사용자가 앱을 설치하고 실행하는 즉시 전송을 시작할 수 있습니다.
그러나 사용자는 여전히 눈에 띄는 푸시 알림을 구독할 수 있습니다. 임시 푸시를 열 때 두 가지 옵션으로 경험을 선택할 수 있습니다. 알림 및 소리 없이 알림 센터에 푸시를 유지하거나, 잠금 화면에 표시되도록 눈에 띄게 푸시를 보낼 수 있도록 허용하는 것입니다.
임시 푸시는 사용자가 앱에서 알림을 받을지 여부에 대해 정보에 입각한 결정을 내릴 수 있도록 설계되었습니다. APN 네이티브 구독 요청은 사용자에게 한 번만 표시되며 나중에 구독하려면 휴대폰의 시스템 설정으로 이동해야 하므로 일부 사용자는 푸시로 어떤 가치를 얻는지 알지 못해 구독하지 않을 수 있습니다. 임시 푸시는 사용자에게 이러한 이해를 제공합니다. 사용자는 푸시 알림으로 전달되는 콘텐츠를 보고 이 콘텐츠에 대해 눈에 띄게 알림을 받아야 할지 결정할 수 있습니다.
구현 방법
Anchor link to1. 가이드에 따라 Pushwoosh iOS SDK를 통합합니다.
2. registerForPushNotifications() 메서드를 호출하기 전에 프로젝트의 AppDelegate에 다음 문자열을 추가합니다:
if #available(iOS 12.0, *) { Pushwoosh.sharedInstance().additionalAuthorizationOptions = UNAuthorizationOptions.provisional}if (@available(iOS 12.0, *)) { [Pushwoosh sharedInstance].additionalAuthorizationOptions = UNAuthorizationOptionProvisional;}이것으로 끝입니다! 앱 사용자는 앱을 설치하면 알림 센터로 직접 메시지를 받게 됩니다.
피드백을 공유해 주세요
Anchor link to귀하의 피드백은 더 나은 경험을 만드는 데 도움이 됩니다. SDK 통합 과정에서 문제가 발생하면 언제든지 의견을 들려주세요. 어려움이 있으시면 주저하지 마시고 이 양식을 통해 의견을 공유해 주세요.