Comment envoyer une campagne déclenchée
Pushwoosh vous permet d’envoyer un message aux utilisateurs dès qu’ils effectuent une action spécifique, comme une inscription ou un achat, au lieu d’attendre un envoi programmé. Cas d’usage :
- Souhaiter la bienvenue à un nouvel utilisateur juste après son inscription.
- Remercier un utilisateur après un achat.
- Envoyer un rappel à un utilisateur lorsqu’un événement personnalisé se déclenche dans votre application ou sur votre site.
Contrairement à une campagne segmentée, une campagne déclenchée ne cible pas une audience pré-construite. Elle démarre individuellement pour chaque utilisateur, dès que son événement se produit. Découvrez comment les campagnes segmentées et déclenchées se comparent.
Ce guide présente un chemin simple : Entrée basée sur un déclencheur → un message → Launch. Si vous devez attendre et n’envoyer un message que lorsque l’utilisateur ne réalise pas une action ultérieure (par exemple, un panier abandonné avant l’achat), ajoutez une étape Attendre le déclencheur après l’entrée, ou suivez Comment configurer une campagne de panier abandonné.
Pour les parcours démarrés par votre backend plutôt que par un événement in-app, utilisez l’Entrée basée sur l’API.
Avant de créer
Anchor link toÉvénement
Anchor link toVotre application ou votre backend doit envoyer l’événement (SDK ou /postEvent). Choisissez ensuite l’une des approches suivantes :
- Événement par défaut : utilisez un événement déjà suivi par le SDK Pushwoosh, comme
PW_InAppPurchase. - Événement personnalisé, créé automatiquement : envoyez l’événement sous un nouveau nom. Pushwoosh crée l’événement et ses attributs dès le premier appel et déduit les types d’attributs à partir des valeurs.
- Événement personnalisé, défini au préalable : allez dans Audience > Events, ajoutez l’événement et les types d’attributs, puis faites en sorte que votre application ou votre backend l’envoie. Utilisez cette approche lorsque vous avez besoin de contrôler les types d’attributs plutôt que de les laisser être déduits automatiquement.
Preset
Anchor link toVous avez besoin d’un contenu de message pour le canal que vous allez utiliser. Vous pouvez :
- Créer ou réutiliser un preset dans Content avant de créer la campagne : Push, Email, In-app, SMS, ou WhatsApp.
- Ou créer le contenu directement depuis l’étape du canal dans le parcours : ouvrez l’élément Push (ou un autre canal) et utilisez Create content. Pour le push, voir Sélectionner ou créer un contenu push.
Comment créer une campagne déclenchée par un événement utilisateur
Anchor link to- Allez dans Campaigns > Customer Journey Builder.
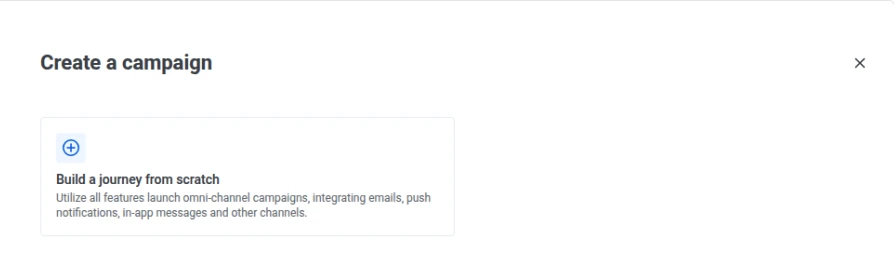
- Cliquez sur Create campaign.
- Cliquez sur Build a journey from scratch.
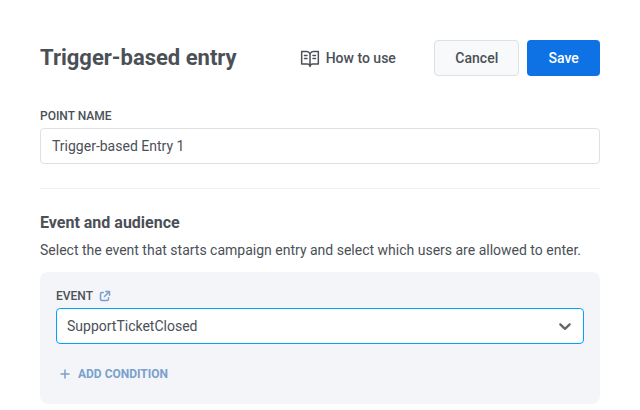
- Une Trigger-based Entry est déjà présente sur le canevas lorsque vous créez la campagne. Double-cliquez dessus.
- Choisissez l’Event qui doit déclencher la campagne. Dans cet exemple, nous utilisons
SupportTicketClosed, un événement personnalisé que nous avons défini au préalable dans Audience > Events (voir Avant de créer). - Si votre événement ne figure pas encore dans la liste, cliquez sur l’icône de lien à côté de EVENT pour ouvrir Audience > Events, créez l’événement (ou attendez que le suivi l’ait créé automatiquement), puis revenez ici et sélectionnez-le. Votre application ou votre backend doit tout de même envoyer l’événement pour que les utilisateurs puissent entrer.
- Cliquez sur Save.
- Cliquez sur Connect this sur l’entrée, puis choisissez Push comme canal de messagerie. L’élément Push apparaît sur le canevas, connecté à l’entrée.
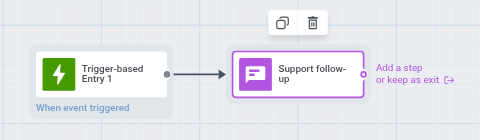
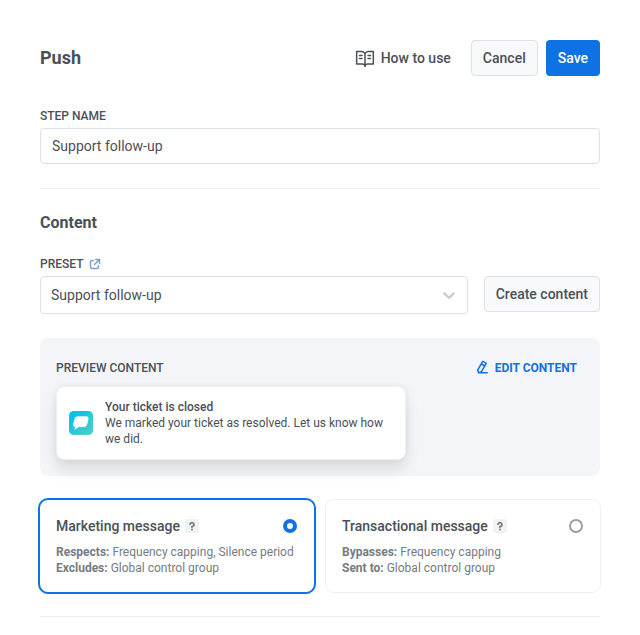
- Double-cliquez sur l’élément Push.
- Sélectionnez un preset, ou cliquez sur Create content pour en créer un à cette étape. En savoir plus sur la création de presets push.
- Cliquez sur Save.
-
Pour une campagne à un seul message, laissez le message sans étape supplémentaire, ou cliquez sur le point de connexion du message et choisissez Exit. Dans les deux cas, l’utilisateur quitte le parcours après ce message.
-
Facultatif : cliquez sur les trois points en haut à gauche, puis sur Rename, et nommez la campagne.
-
Cliquez sur Launch.
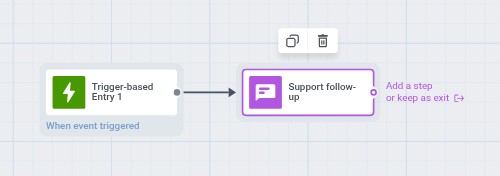
Ce parcours illustre le schéma événement → un message. Ce n’est pas le flux complet de récupération de panier abandonné.
Comment se comporte une campagne déclenchée une fois lancée
Anchor link to- Entrée : chaque utilisateur entre lorsque son propre événement se déclenche, et non selon une planification.
- Sortie : chaque utilisateur termine son propre parcours dans la campagne au fur et à mesure qu’il complète les étapes. La campagne entière ne se termine pas pour tout le monde en même temps.
- Statistiques : les ouvertures, clics et conversions se mettent à jour au fur et à mesure que les utilisateurs progressent dans la campagne, plutôt que seulement une fois que tout le monde en est sorti.
Si personne n’entre après le lancement, il se peut que l’événement ne se déclenche pas, que les conditions d’entrée soient trop restrictives, ou que l’utilisateur n’ait aucun appareil enregistré. Vérifiez les paramètres de la Trigger-based Entry et consultez Entrée basée sur un déclencheur.
Types courants de campagnes déclenchées
Anchor link to- Bienvenue et onboarding : Comment intégrer les utilisateurs avec Pushwoosh
- Panier abandonné (attendre l’achat, puis envoyer un message) : Comment configurer une campagne de panier abandonné
- Messages transactionnels (confirmations de commande, réinitialisations de mot de passe) : Comment envoyer des messages transactionnels
- Réengagement et rappels : Comment créer une campagne de réengagement dans Pushwoosh