Comment émettre un pass Wallet à l'inscription
Émettez un pass Apple ou Google Wallet quand un membre du programme de fidélité rejoint, puis envoyez le lien d’installation par email. Ce guide construit ce parcours avec l’élément Émettre un pass wallet.
Créer une campagne Wallet Pass
Anchor link toL’élément Émettre un pass wallet ne peut émettre des passes qu’à partir d’une campagne existante, il faut donc en créer une d’abord. La plateforme d’une campagne est permanente, donc si vous prenez en charge à la fois Apple Wallet et Google Wallet, répétez cette section une fois par plateforme.
- Allez dans Campaigns → Wallet Passes → Campaigns et cliquez sur Create campaign.
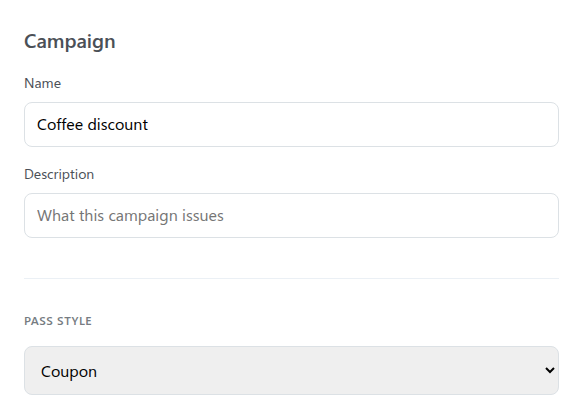
- Choisissez Apple Wallet ou Google Wallet comme Platform, saisissez un Name pour votre propre référence, par exemple
Coffee discount(ce libellé identifie la campagne dans Pushwoosh, il n’apparaît pas sur le pass), et choisissez un style de pass, par exemple Coupon (Apple) ou Loyalty card (Google).
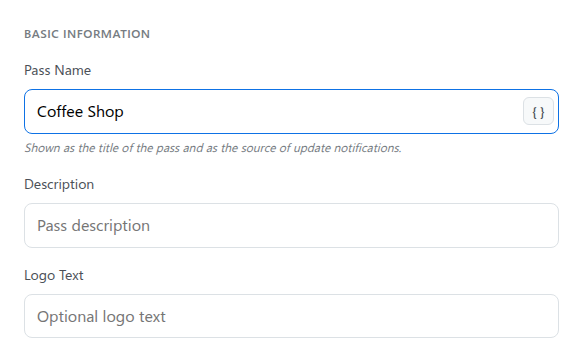
- Sous Basic Information, définissez Pass Name sur ce qui s’affiche sur le pass lui-même, par exemple
Coffee Shop.
-
Ajoutez un champ pour porter l’offre.
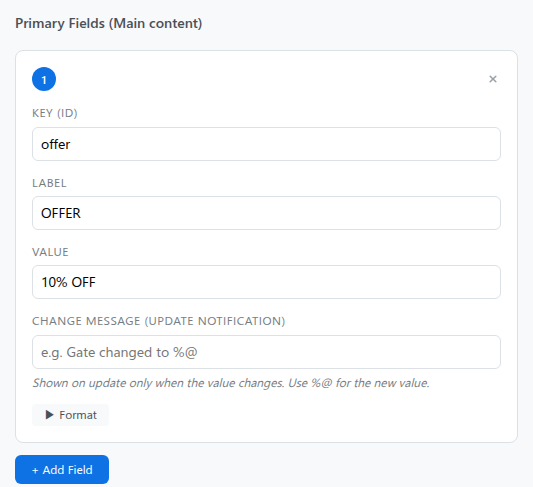
- Sur Apple Wallet, sous Pass Fields, cliquez sur Add Field sous Primary Fields.
- Définissez son Key (ID) sur
offer. - Définissez son Label sur
OFFER.
Les styles de pass de Google Wallet utilisent leurs propres champs nommés plutôt que des champs libres.
Voir Champs du pass Apple Wallet ou Champs et détails Google Wallet pour les noms de champs exacts qu’offre votre style de pass.
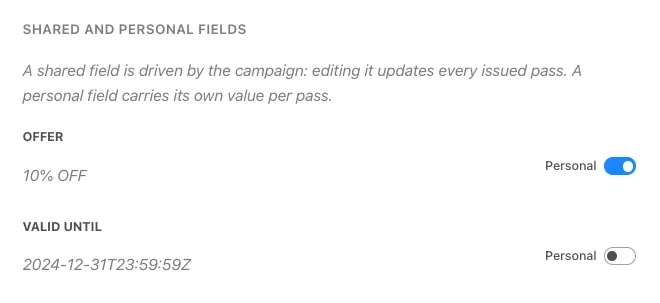
- Dans Shared and personal fields, ce champ apparaît maintenant sous son Label. Marquez-le Personal. Plus tard, Émettre un pass wallet le liste par sa Key (ID), affichée en majuscules (
OFFER), et le remplit avec leoffer_codepropre à chaque membre.
- Prévisualisez et créez la campagne.
Procédure détaillée champ par champ : Créer une campagne Wallet Pass.
Créer l’événement d’inscription
Anchor link to- Allez dans Audience → Events, cliquez sur Create event, et choisissez Custom Event (pas Default Event).

- Nommez-le
CoffeeClubJoinedet ajoutez un attribut pour l’offre de bienvenue, par exempleoffer_code.
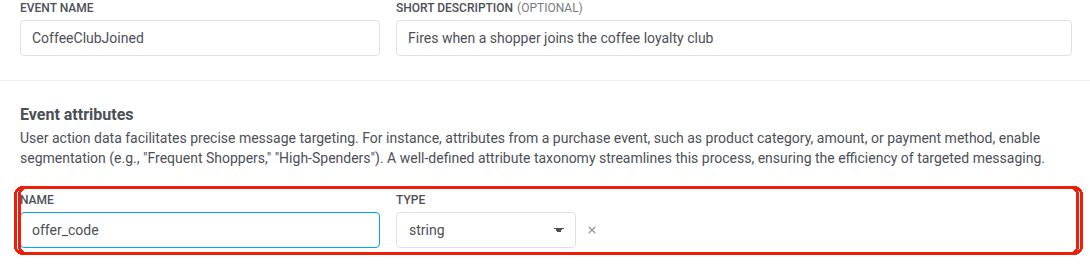
- Demandez à l’équipe de développement d’envoyer cet événement quand un membre rejoint le programme, avec le User ID du membre et
offer_code. Le pass est émis pour ce User ID, envoyez donc l’événement une fois que le User ID du membre est défini. En savoir plus sur la création d’événements
Construire le parcours
Anchor link toAllez dans Campaigns → Customer Journey Builder, cliquez sur Create campaign, et construisez tout ce qui suit sur un seul canevas.
Définir l’entrée
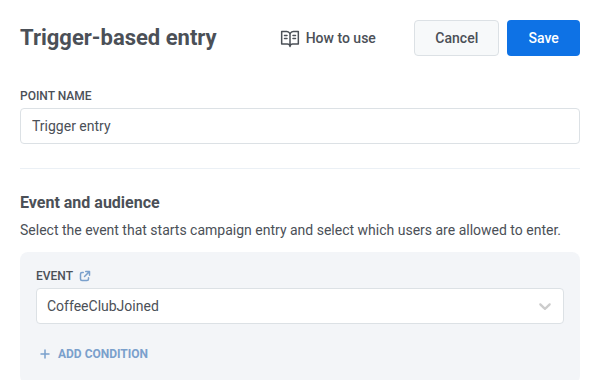
Anchor link to- Ajoutez un élément Trigger-based entry sur le canevas.
- Sélectionnez
CoffeeClubJoinedcomme Event, pour que chaque nouveau membre entre dès qu’il rejoint le programme.
Émettre le pass Wallet
Anchor link to- Ajoutez un élément Émettre un pass wallet après l’entrée.
- Nommez-le
Loyalty card.

- Dans Apple Wallet campaign, sélectionnez la campagne que vous avez créée pour Apple. Dans Google Wallet campaign, sélectionnez la campagne que vous avez créée pour Google, si vous prenez en charge Android. Chaque menu déroulant ne liste que les campagnes de sa propre plateforme.

- Sous Personal fields on the pass, la liste affiche le ou les champs personnels de la ou des campagnes sélectionnées. Définissez OFFER (ou le champ que vous avez ajouté sur Google Wallet, si vous le prenez en charge) sur l’événement d’entrée du déclencheur et choisissez
offer_codecomme Attribute, pour que le pass de chaque membre porte sa propre offre de bienvenue.

Envoyer le pass par email
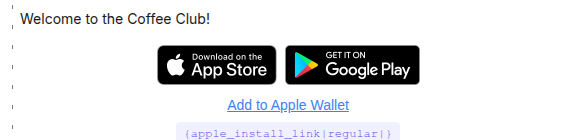
Anchor link to- Ajoutez un élément E-mail juste après Émettre un pass wallet et nommez-le
Welcome email. - Dans le corps du message, insérez le lien d’installation avec des barres verticales, par exemple
{apple_install_link|regular|}(ou{google_save_link|regular|}). N’utilisez pas un simple{apple_install_link}.
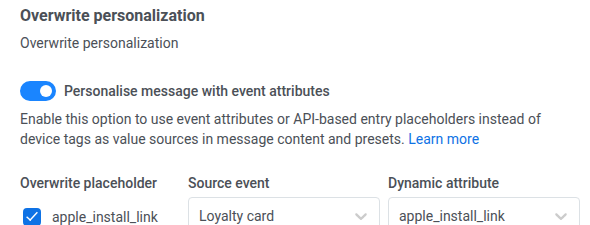
- Activez Personalise message with event attributes.
- Cochez Overwrite placeholder, définissez Source event sur le Step Name de votre Émettre un pass wallet (
Loyalty card), et définissez Dynamic attribute pour correspondre au placeholder. Parcours détaillé complet : Send the pass link to the user.
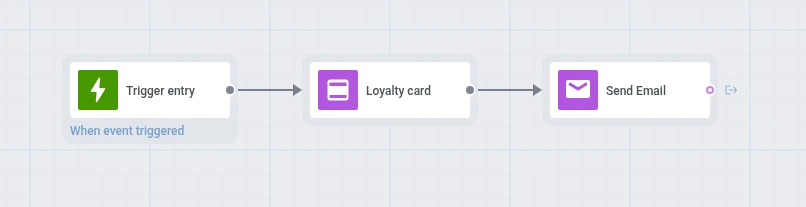
Quand CoffeeClubJoined se déclenche, le membre entre dans le parcours, Émettre un pass wallet émet son pass avec le offer_code de cet événement, et Welcome email envoie le message de bienvenue avec le lien pour l’ajouter.
Lancer et vérifier
Anchor link to- Lancez le parcours quand le canevas est prêt.
- Après un événement d’inscription de test, vérifiez les entrées et les abandons sur Émettre un pass wallet et les statistiques sur Welcome email.