How to send WhatsApp order confirmations and delivery updates
এই বিষয়বস্তু এখনও আপনার ভাষায় উপলব্ধ নয়।
When a customer places an order, your backend sends an event to Pushwoosh, and a journey replies on WhatsApp with an approved Meta template filled with the order number, the item, and the delivery date. When the order ships, a second event and a second journey send the tracking link the same way.
Prerequisites
Anchor link to- WhatsApp is connected to your Pushwoosh project. Learn more
- Customers’ WhatsApp numbers are registered under their User IDs. Pushwoosh sends the message to the WhatsApp number registered under the User ID the event comes with. Learn more
- Two templates are approved in WhatsApp Manager. Only approved templates appear in Pushwoosh. Learn more about templates
This guide uses the following templates:
| Template | Body | Button |
|---|---|---|
order_confirmation | Hi! We've received your order {{1}}: {{2}}. Estimated delivery: {{3}}. | None |
order_shipped | Your order {{1}} is on its way. | Track order with the URL https://yourshop.com/track/{{1}} |
Step 1. Create the order events
Anchor link toCreate two custom events that carry the order data:
- Go to Audience > Events.
- Click Create event and select Custom Event.
- Create the events with the attributes below, all of type string. Learn more about creating events
| Event | Attributes |
|---|---|
OrderPlaced | order_id, item_name, delivery_date |
OrderShipped | order_id, tracking_id |
Your backend sends each event with postEvent when the order status changes. Pass the customer’s User ID in userId and the order data in attributes.
Step 2. Build the order confirmation journey
Anchor link toSet up the entry so that every order starts its own session:
- Go to Campaigns > Customer Journey Builder and click Create campaign.
- Add a Trigger-based entry to the canvas.
- Select the
OrderPlacedevent. - Under How many sessions can user have at once in campaign?, select Multiple active sessions per user.
- In Session identifier attribute, select
order_id. Learn more about sessions
Then add the message:
- Add a WhatsApp element after the entry.
- In Content, select the
order_confirmationtemplate. Each template language is a separate item, for exampleorder_confirmation:en. The Message preview marks each variable with a placeholder and shows Please specify all variables until you fill them in. - Click the first placeholder.
- Set Variable type to Event property.
- Select the
OrderPlacedevent and theorder_idattribute, then click Insert. - Repeat for the other variables:
{{2}}isitem_name,{{3}}isdelivery_date. - Select Transactional as the message type, so that frequency capping doesn’t hold back an order confirmation. Learn more
- (Optional) Turn on Branch when the provider rejects the message and connect the Rejected by provider branch to an SMS or email element with the same order details. Learn more
- Click Apply.
- End the branch with an Exit element and click Launch.
Selecting a template turns on Split flow based on message read status with a one-day wait. Leave it on to follow up with customers who haven’t read the message, or turn it off if the confirmation is the only step.
Step 3. Build the delivery update journey
Anchor link toCreate a second journey for shipping updates. Repeat step 2 with these values:
- In the Trigger-based entry, select the
OrderShippedevent, Multiple active sessions per user, andorder_idas the session identifier. - In the WhatsApp element, select the
order_shippedtemplate. Its Track order button shows a placeholder in the URL.
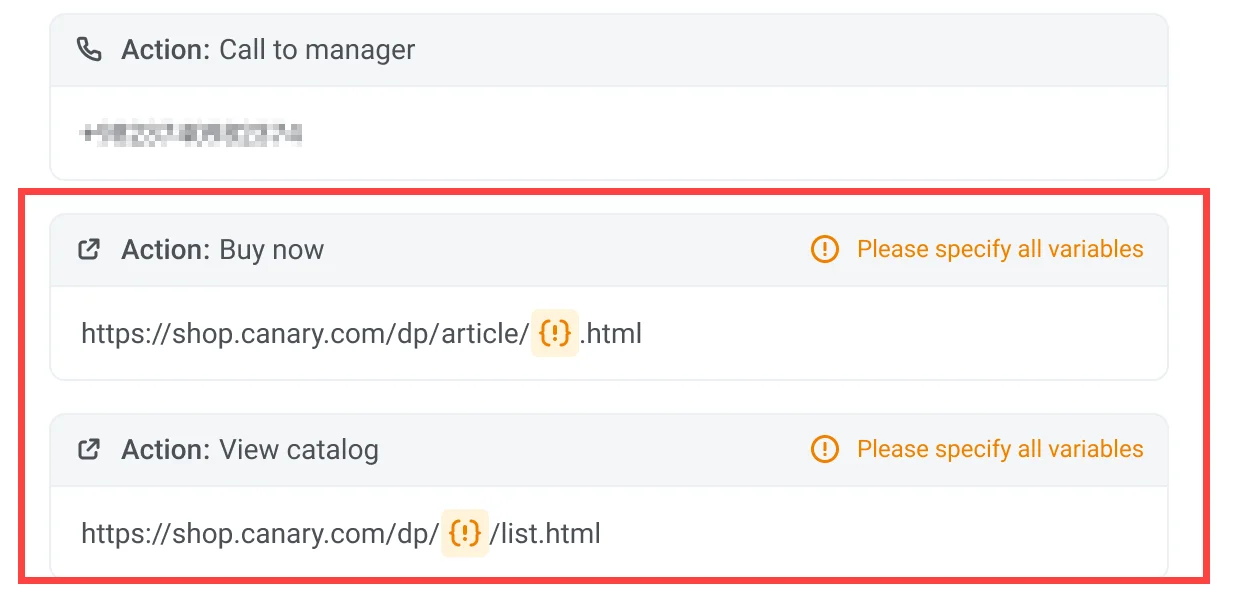
- Map the body variable
{{1}}to theorder_idattribute ofOrderShipped, as an Event property. - Click the placeholder in the Track order URL and map it to the
tracking_idattribute the same way. - Select Transactional as the message type and click Apply.
- End the branch with an Exit element and click Launch.
Check the results
Anchor link toSend a test OrderPlaced event for your own User ID, then open the journey statistics. The WhatsApp panel includes Sent, Delivered, Read, and Delivery issues. Learn more
If a customer has no registered WhatsApp number, the WhatsApp element skips them and they continue along the journey.