iOS 인터랙티브 푸시 생성
iOS 8에서는 사용자가 알림 배너에서 직접 작업을 수행할 수 있는 인터랙티브 알림을 도입했습니다. Pushwoosh는 이제 iOS 카테고리를 제공하여 Pushwoosh Control Panel 내에서 사용자 지정 버튼을 만들 수 있습니다. 더 알아보기
애플리케이션이 registerDevice를 호출하면 Pushwoosh API는 사용 가능한 카테고리 목록과 각 버튼의 ID 및 세부 정보가 포함된 응답을 다음과 같이 반환합니다:
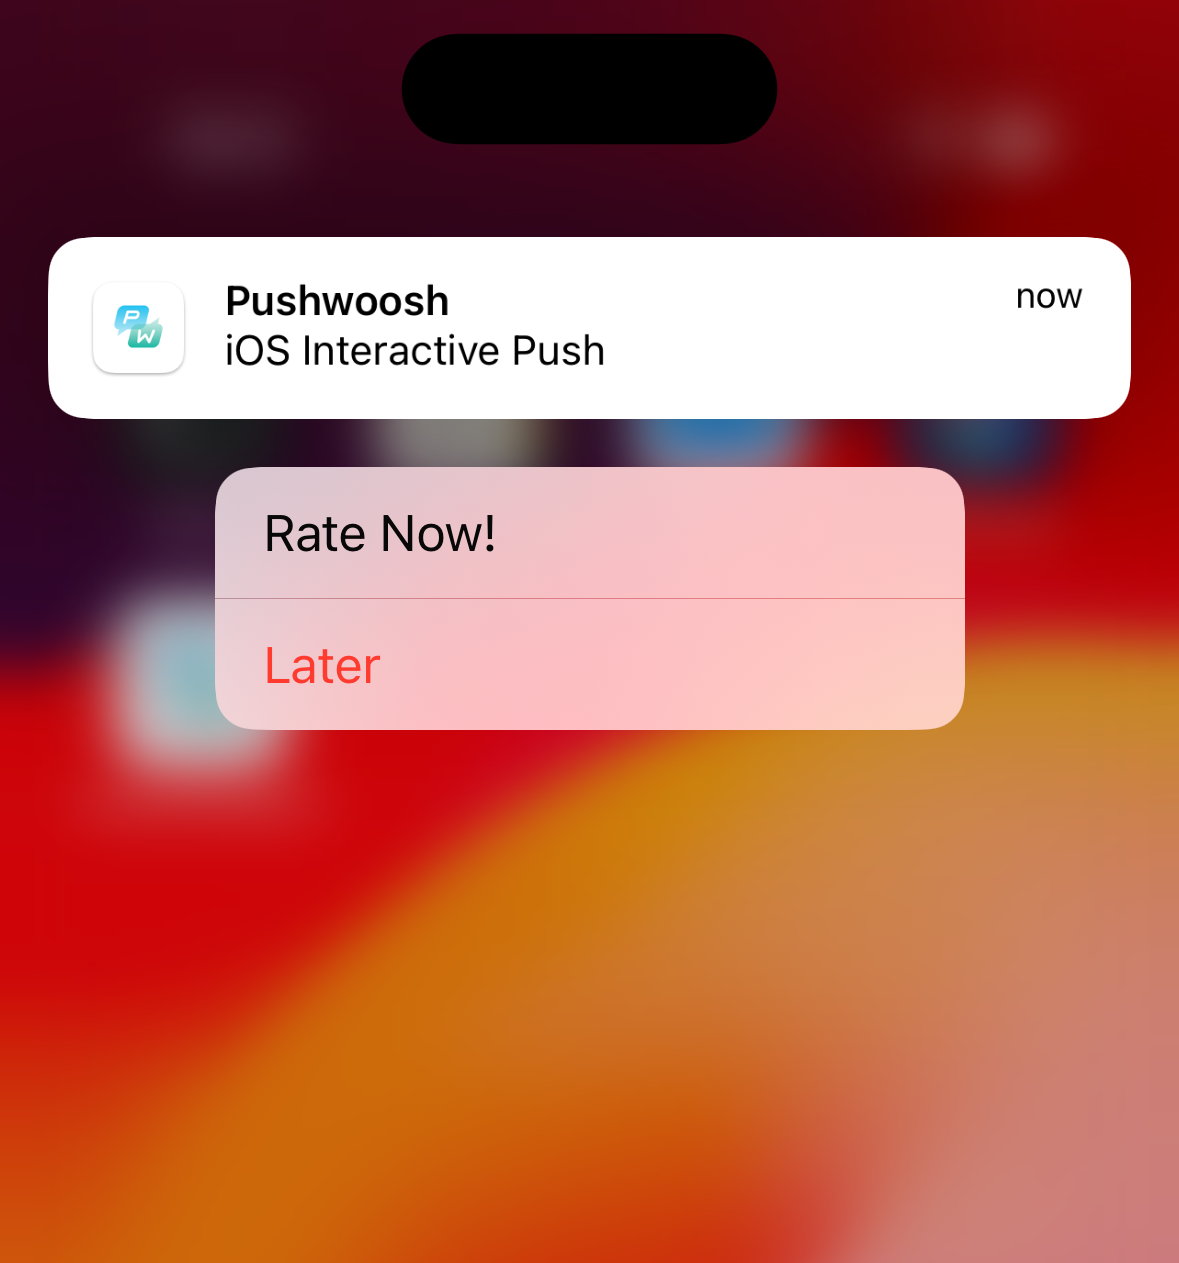
{ "status_code": 200, "status_message": "OK", "response": { "iosCategories": [ { "categoryId": 65, "buttons": [ { "id": 0, "label": "Rate", "type": "1", "startApplication": 1 }, { "id": 1, "label": "Later", "type": "0", "startApplication": 0 } ] } ] }}이러한 카테고리는 이제 기기에서 사용할 수 있으므로, 메시지가 도착하고 애플리케이션이 포그라운드에서 실행되고 있지 않을 때 제대로 표시될 수 있습니다.
Pushwoosh Journey에서 카테고리와 함께 푸시를 보내려면 메시지를 작성하는 동안 iOS 플랫폼 설정에서 해당 카테고리를 선택하기만 하면 됩니다. Pushwoosh API를 통해 원격으로 푸시를 보내는 경우, createMessage 요청에서 ios_category 파라미터에 해당하는 카테고리 ID를 값으로 사용해야 합니다:
{ "categoryId": 65 // Optional. String value. iOS8 category ID from Pushwoosh}카테고리 ID가 포함된 푸시 메시지가 도착하면 Pushwoosh SDK는 이 카테고리에 포함된 버튼 세트와 함께 알림을 표시합니다.
Pushwoosh iOS SDK의 버튼 및 액션
Anchor link to앱을 열 때 다양한 작업을 수행하려면 사용자 지정 UNUserNotificationCenterDelegate 구현을 만들고 didReceiveNotificationResponse 메서드를 재정의해야 합니다:
CustomDelegate
Anchor link toclass CustomDelegate: NSObject, UNUserNotificationCenterDelegate { func userNotificationCenter(_ center: UNUserNotificationCenter, didReceive response: UNNotificationResponse, withCompletionHandler completionHandler: @escaping () -> Void) { let identifier = response.actionIdentifier let category = response.notification.request.content.categoryIdentifier
if category == "10212" { if identifier == "1" { // DO SOMETHING } else { // DO SOMETHING ELSE } }
completionHandler() }}여기서 identifier는 버튼 ID이고, category는 알림 페이로드에서 파생됩니다.
그런 다음 이 클래스의 인스턴스를 만들고 프록시 메서드를 사용하여 Pushwoosh SDK에 전달합니다:
AppDelegate
Anchor link tofunc application(_ application: UIApplication, didFinishLaunchingWithOptions launchOptions: [UIApplication.LaunchOptionsKey: Any]?) -> Bool { Pushwoosh.sharedInstance().registerForPushNotifications()
let customDelegate = CustomDelegate() Pushwoosh.sharedInstance().notificationCenterDelegateProxy?.add(customDelegate)
return true}