কাস্টম ডেটা পাঠান
এই গাইডটি আপনাকে পুশ নোটিফিকেশন পেলোডে আপনার অ্যাপে কাস্টম ডেটা কীভাবে পাস করতে হয় তা আরও ভালভাবে বুঝতে সাহায্য করবে, যাতে আপনার অ্যাপ এই ধরনের পুশগুলিতে প্রতিক্রিয়া জানাতে পারে এবং সেই অনুযায়ী বিভিন্ন ক্রিয়া সম্পাদন করতে পারে।
আপনি যেভাবে কাস্টম ডেটা পরিচালনা করেন তা আপনার ব্যবসার উদ্দেশ্য অনুযায়ী ভিন্ন হতে পারে। এই নিবন্ধে আমরা কাস্টম ডেটা পার্সিং এবং সহজ ক্রিয়া সম্পাদনের কিছু প্রাথমিক উদাহরণ দেখাব:
- অ্যাপের ব্যাকগ্রাউন্ডের রঙ পরিবর্তন করা;
- আপনার অ্যাপে একটি কাস্টম পেজ খোলা।
পূর্বশর্ত
Anchor link toএই গাইডটি iOS নেটিভ ডেভেলপমেন্ট কভার করে। এটি ধরে নেওয়া হয়েছে যে আপনার একটি iOS স্যাম্পল অ্যাপ্লিকেশন কনফিগার করা আছে এবং iOS গেটিং স্টার্টেড গাইড অনুযায়ী পুশ নোটিফিকেশন পাচ্ছেন।
AppDelegate-এর didFinishLaunchingWithOptions ফাংশনে, আমরা পুশ নোটিফিকেশন প্রক্রিয়াকরণের জন্য self.viewController-কে ডেলিগেট হিসেবে ব্যবহার করব:
func application(_ application: UIApplication, didFinishLaunchingWithOptions launchOptions: [UIApplication.LaunchOptionsKey: Any]?) -> Bool {   Pushwoosh.sharedInstance().delegate = self.viewController   Pushwoosh.sharedInstance().registerForPushNotifications()
   if let launchOptions = launchOptions {       Pushwoosh.sharedInstance().handlePushReceived(launchOptions)   }   return true}
আমাদের ViewController PWMessagingDelegate প্রোটোকল ইমপ্লিমেন্ট করে:
extension ViewController: PWMessagingDelegateএবং তাই প্রাপ্ত পুশ নোটিফিকেশনগুলি পরিচালনা করার জন্য onMessageOpened ফাংশন রয়েছে:
// ব্যবহারকারী পুশ নোটিফিকেশনে প্রেস করেছেনfunc pushwoosh(_ pushwoosh: Pushwoosh, onMessageOpened message: PWMessage) {}অন্য ViewController খোলা এবং ব্যাকগ্রাউন্ডের রঙ পরিবর্তন করা
Anchor link toএখন আমরা পুশ পেলোড থেকে customData পাচ্ছি। উদাহরণস্বরূপ, আসুন ভিউ-এর ব্যাকগ্রাউন্ডের রঙ এবং ডিসকাউন্ট শতাংশ পরিবর্তন করি। আমরা ধরে নিচ্ছি যে কাস্টম ডেটাতে “r”, “g”, “b”, এবং "d" আইটেমগুলি JSON অবজেক্ট ফরম্যাটে নিম্নলিখিতভাবে থাকবে:
guard let customDataJson = message.customData, let redString = customDataJson["r"] as? String, let greenString = customDataJson["g"] as? String, let blueString = customDataJson["b"] as? String, let discount = customDataJson["d"] as? String else { return}setViewBackgroundColor(red: redString, green: greenString, blue: blueString, discount: discount)আমরা একটি নতুন ViewController খুলতে এবং ব্যাকগ্রাউন্ডের রঙ ও ডিসকাউন্ট শতাংশ সেট করতে নিম্নলিখিত ফাংশনটি ব্যবহার করব:
func setViewBackgroundColor(red: String, green: String, blue: String, discount: String) {    let red = CGFloat((red as NSString).floatValue)    let green = CGFloat((green as NSString).floatValue)    let blue = CGFloat((blue as NSString).floatValue)
    let color = UIColor(red: red / 255.0, green: green / 255.0, blue: blue / 255.0, alpha: 1)
    if let topController = UIApplication.shared.topMostController() {        let storyboard = UIStoryboard(name: "Main", bundle: nil)        if let customViewController = storyboard.instantiateViewController(withIdentifier: "custom_page") as? CustomPageViewController {            customViewController.discount = discount            customViewController.bgColor = color            topController.present(customViewController, animated: true, completion: nil)        }    }}
চলুন আমাদের উদাহরণটি পরীক্ষা করি। Pushwoosh Journey-তে নেভিগেট করুন এবং ক্যানভাসে একটি পুশ এলিমেন্ট যোগ করুন। এরপর, নতুন কন্টেন্ট তৈরি করুন-এ ক্লিক করুন। যে পুশ কন্টেন্ট ফর্মটি খুলবে, সেখানে যেকোনো পুশ নোটিফিকেশন টেক্সট লিখুন।
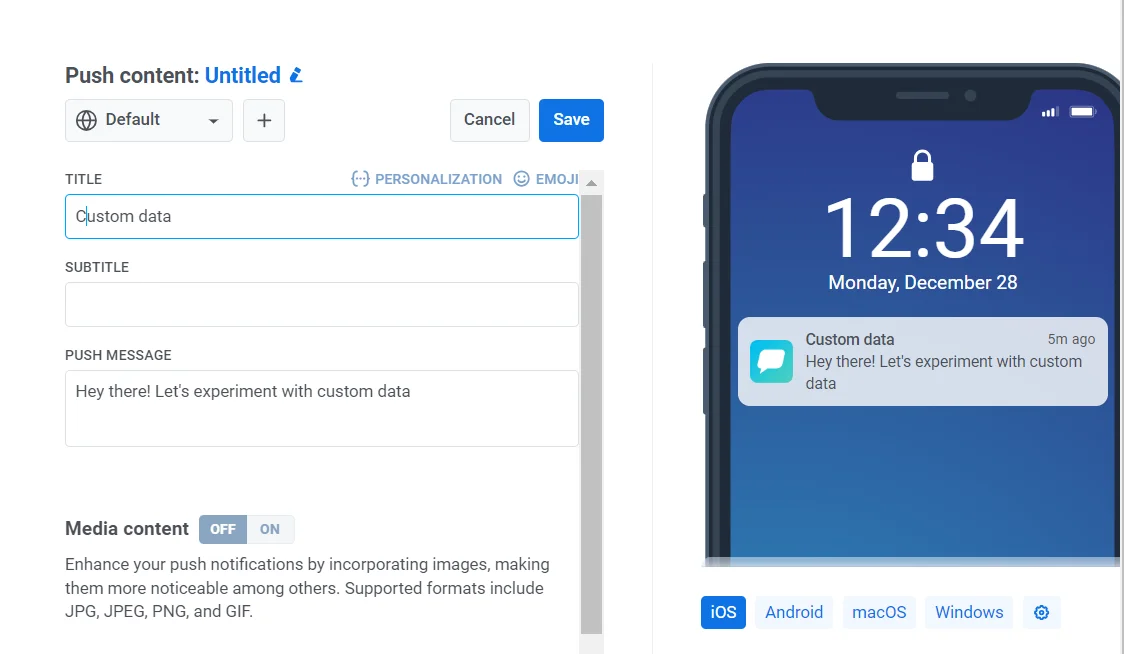
তারপর Send custom data টগল অন করুন। কাস্টম ডেটা ফিল্ডে JSON প্রবেশ করান।
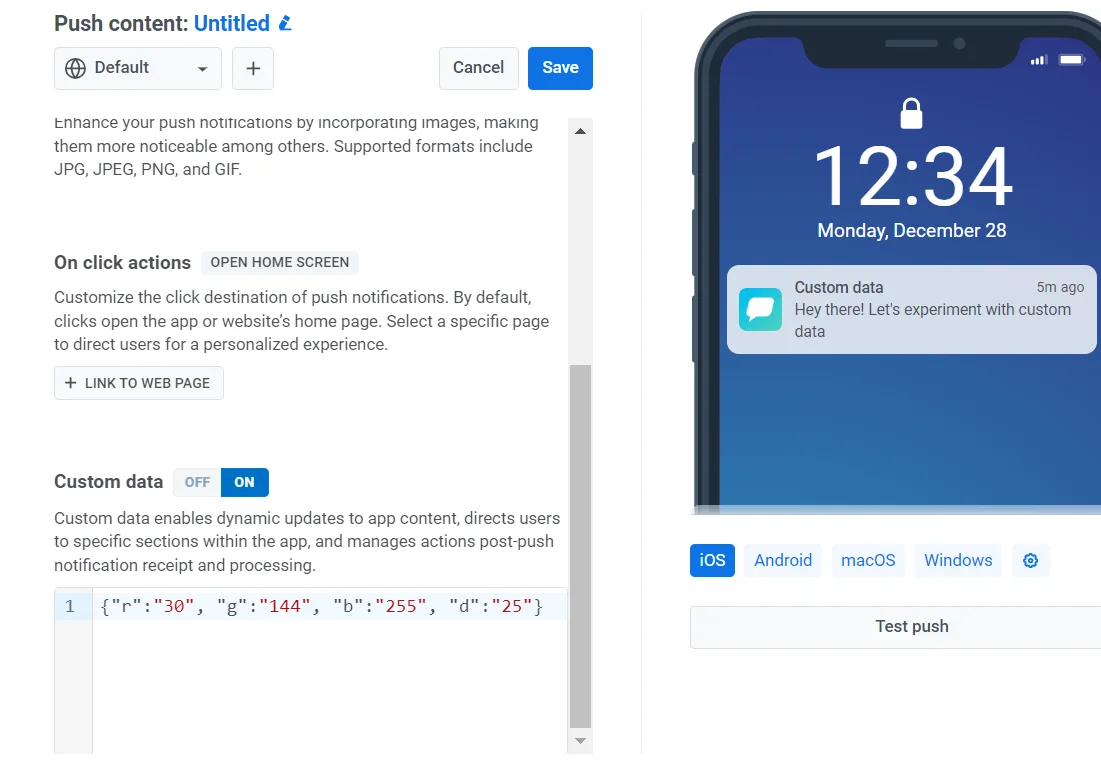
যেহেতু আমরা সিদ্ধান্ত নিয়েছি যে আমাদের কাস্টম ডেটা ফরম্যাটটি “r”, “g”, “b” মান সহ একটি JSON অবজেক্ট হবে, তাই আমাদের কন্ট্রোল প্যানেলে “custom data” ফিল্ডটি ব্যবহার করতে হবে এবং এটিকে {"r":"30", "g":"144", "b":"255", "d":"25"} JSON অবজেক্ট দিয়ে পূরণ করতে হবে:
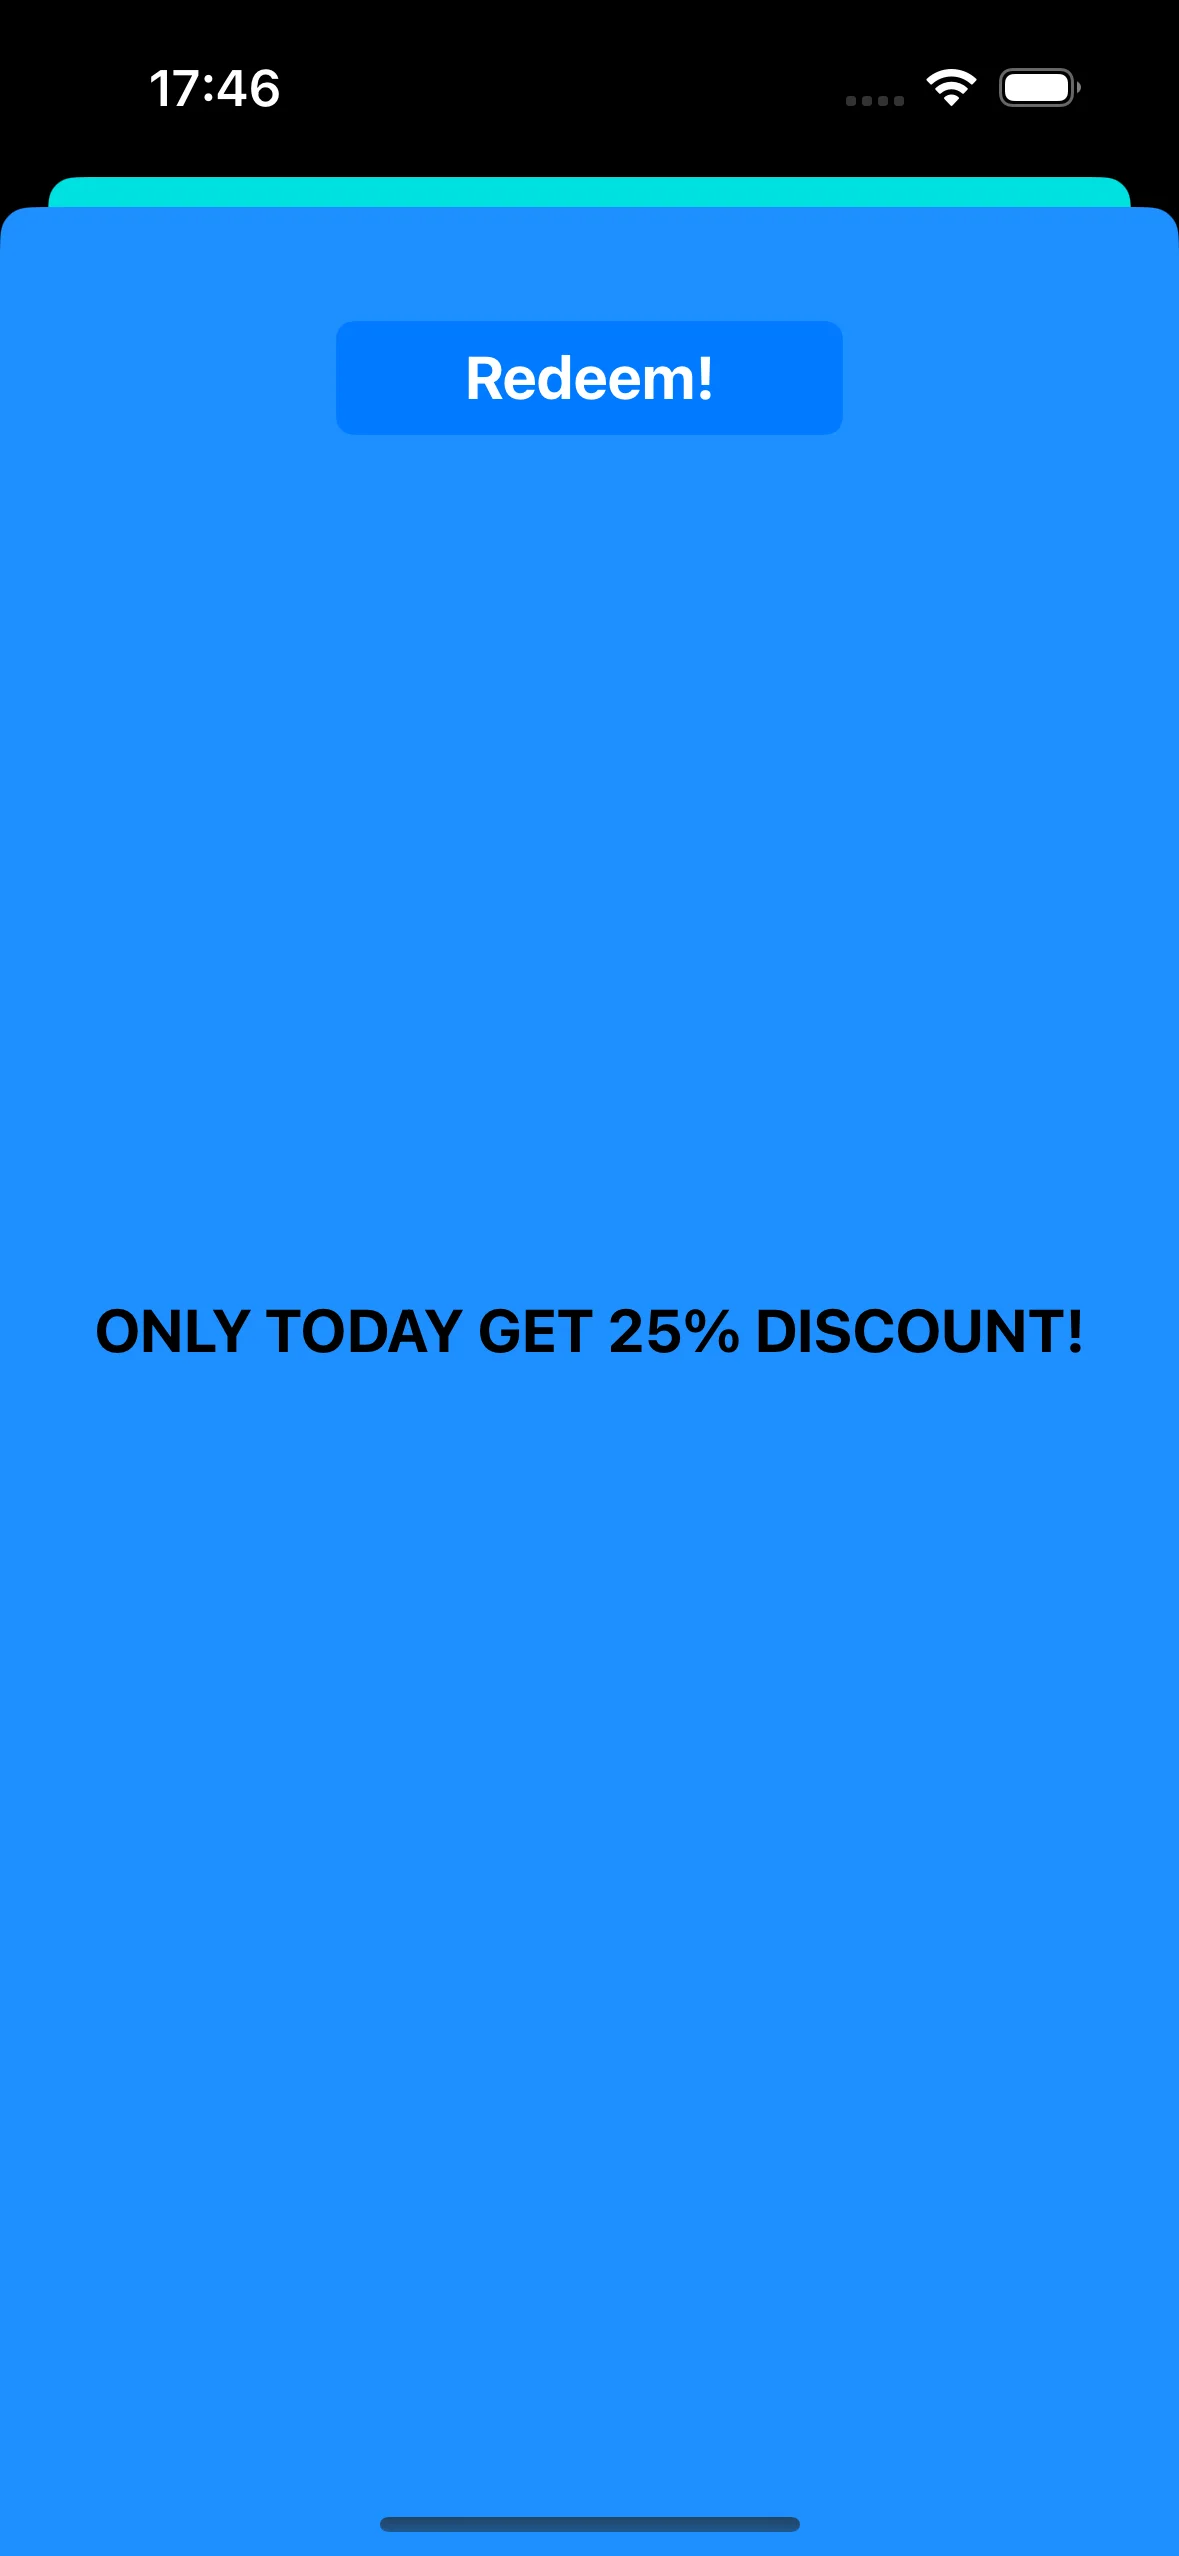
পুশ নোটিফিকেশনে ট্যাপ করার পরে, CustomPageViewController খোলে, ব্যাকগ্রাউন্ডের রঙ সেট হয় এবং ডিসকাউন্ট প্রয়োগ করা হয়:
CustomPageViewController কোড:
class CustomPageViewController: UIViewController {
    var bgColor: UIColor?    var discount: String?
    @IBOutlet weak var titleLabel: UILabel!
    override func viewDidLoad() {        super.viewDidLoad()
        self.view.backgroundColor = self.bgColor
        if self.discount != nil {            self.titleLabel?.text = "ONLY TODAY GET \(self.discount!)% DISCOUNT!"        }    }
    func showPromoPage(discount: String) {        let vc = CustomPageViewController()        vc.bgColor = self.view.backgroundColor        vc.discount = discount        vc.modalTransitionStyle = UIModalTransitionStyle.crossDissolve
        if self.presentedViewController != nil {            self.dismiss(animated: true, completion: {                self.present(vc, animated: true, completion: nil)            })        } else {            self.present(vc, animated: true, completion: nil)        }    }
    @IBAction func closeButtonAction(_ sender: Any) {        self.dismiss(animated: true)    }}
আমরা ধরে নিচ্ছি যে ডিসকাউন্ট মানটি পুশ নোটিফিকেশন পেলোডের JSON-এ "d" প্যারামিটার হিসেবে আসবে। যেহেতু পুশ নোটিফিকেশন পেলোডের আকার সীমিত, তাই প্যারামিটারের জন্য ছোট নাম ব্যবহার করাই ভালো।
guard let customDataJson = message.customData, let redString = customDataJson["r"] as? String, let greenString = customDataJson["g"] as? String, let blueString = customDataJson["b"] as? String, let discount = customDataJson["d"] as? String else { return}পুশ নোটিফিকেশন পেলোডে আপনি যে প্যারামিটারগুলি পাস করেন তার উপর নির্ভর করে বিভিন্ন View Controller ইনিশিয়ালাইজ এবং খোলার জন্য আপনি কোড লিখতে পারেন।
A/B টেস্টিং ভিউ কন্ট্রোলার খোলা
Anchor link toআসুন পুশ নোটিফিকেশনে কাস্টম ডেটার আরেকটি ব্যবহারের ক্ষেত্র বিবেচনা করি। উদাহরণস্বরূপ, আমাদের একটি ব্যবহারকারী সেগমেন্টের জন্য একটি ভিউ কন্ট্রোলার এবং অন্য একটি ব্যবহারকারী সেগমেন্টের জন্য আরেকটি ভিউ কন্ট্রোলার খুলতে হবে। সহজ কথায়, আমরা আপনার অ্যাপ্লিকেশনে A/B টেস্টিংয়ের জন্য কাস্টম ডেটা ব্যবহার করতে পারি।
আসুন দুটি ভিউ কন্ট্রোলার তৈরি করি। একটি কন্ট্রোলার (A) একটি ডিসকাউন্ট মান দিয়ে খুলবে, এবং দ্বিতীয় কন্ট্রোলার (B) একটি ভিন্ন ডিসকাউন্ট প্যারামিটার দিয়ে খুলবে।
এখন আসুন এমন কোড লিখি যা পুশ নোটিফিকেশন পেলোডের উপর ভিত্তি করে উপযুক্ত ভিউ কন্ট্রোলার খুলবে:
func pushwoosh(_ pushwoosh: Pushwoosh, onMessageOpened message: PWMessage) {    // MARK: - A/B Testing via Custom Data    guard let customDataJson = message.customData,          let viewController = customDataJson["vc"] as? String else {        return    }
    if viewController == "A" {        setControllerA()    } else if viewController == "B" {        setControllerB()    }}
func setControllerA() {    if let topController = UIApplication.shared.topMostController() {        let storyboard = UIStoryboard(name: "Main", bundle: nil)        if let customViewController = storyboard.instantiateViewController(withIdentifier: "a_vc") as? AViewController {            customViewController.discountA = "50"            topController.present(customViewController, animated: true, completion: nil)        }    }}
func setControllerB() {    if let topController = UIApplication.shared.topMostController() {        let storyboard = UIStoryboard(name: "Main", bundle: nil)        if let customViewController = storyboard.instantiateViewController(withIdentifier: "b_vc") as? BViewController {            customViewController.discountB = "100"            topController.present(customViewController, animated: true, completion: nil)        }    }}
আপনার JSON কাস্টম ডেটা ফিল্ডে যোগ করুন।
{  "vc": "A"}
// আপনার কাস্টম ডেটা (A বা B) বেছে নিন
{  "vc": "B"}
পুশ পেলোডে আপনি যে কাস্টম ডেটা পাঠিয়েছেন তার উপর নির্ভর করে, হয় 'vc': 'A' অথবা 'vc': 'B', ব্যবহারকারীদের একটি অংশ একটি কন্ট্রোলার খুলবে, যখন অন্য অংশ একটি ভিন্ন কন্ট্রোলার খুলবে।
ভিউ কন্ট্রোলার “A”
Anchor link to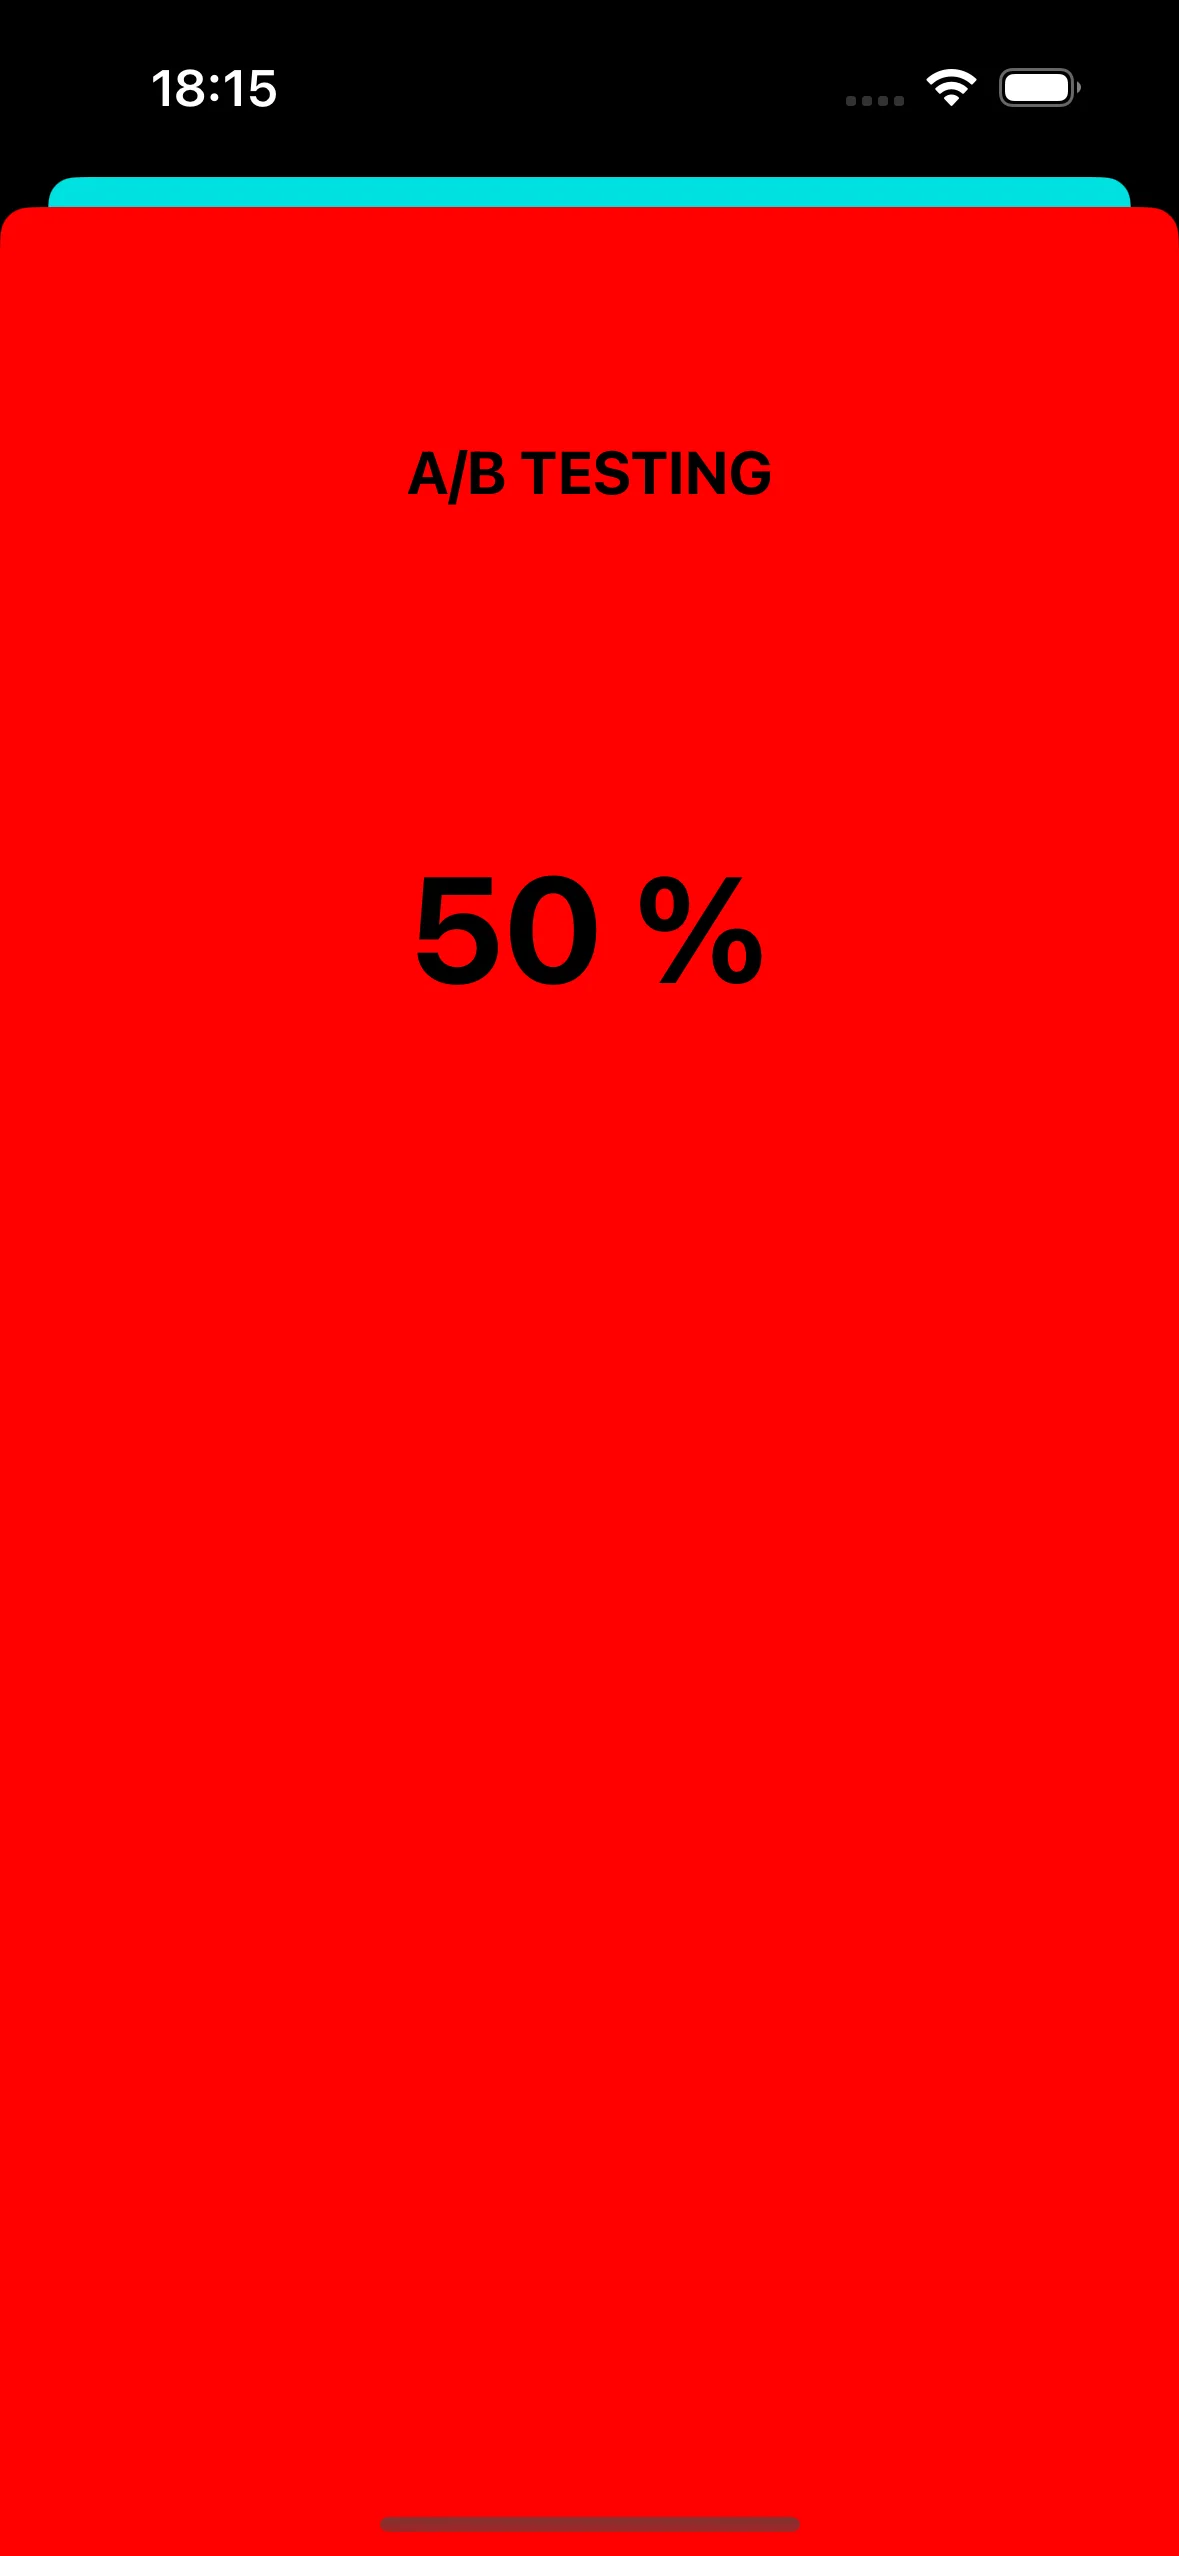
ভিউ কন্ট্রোলার “B”
Anchor link to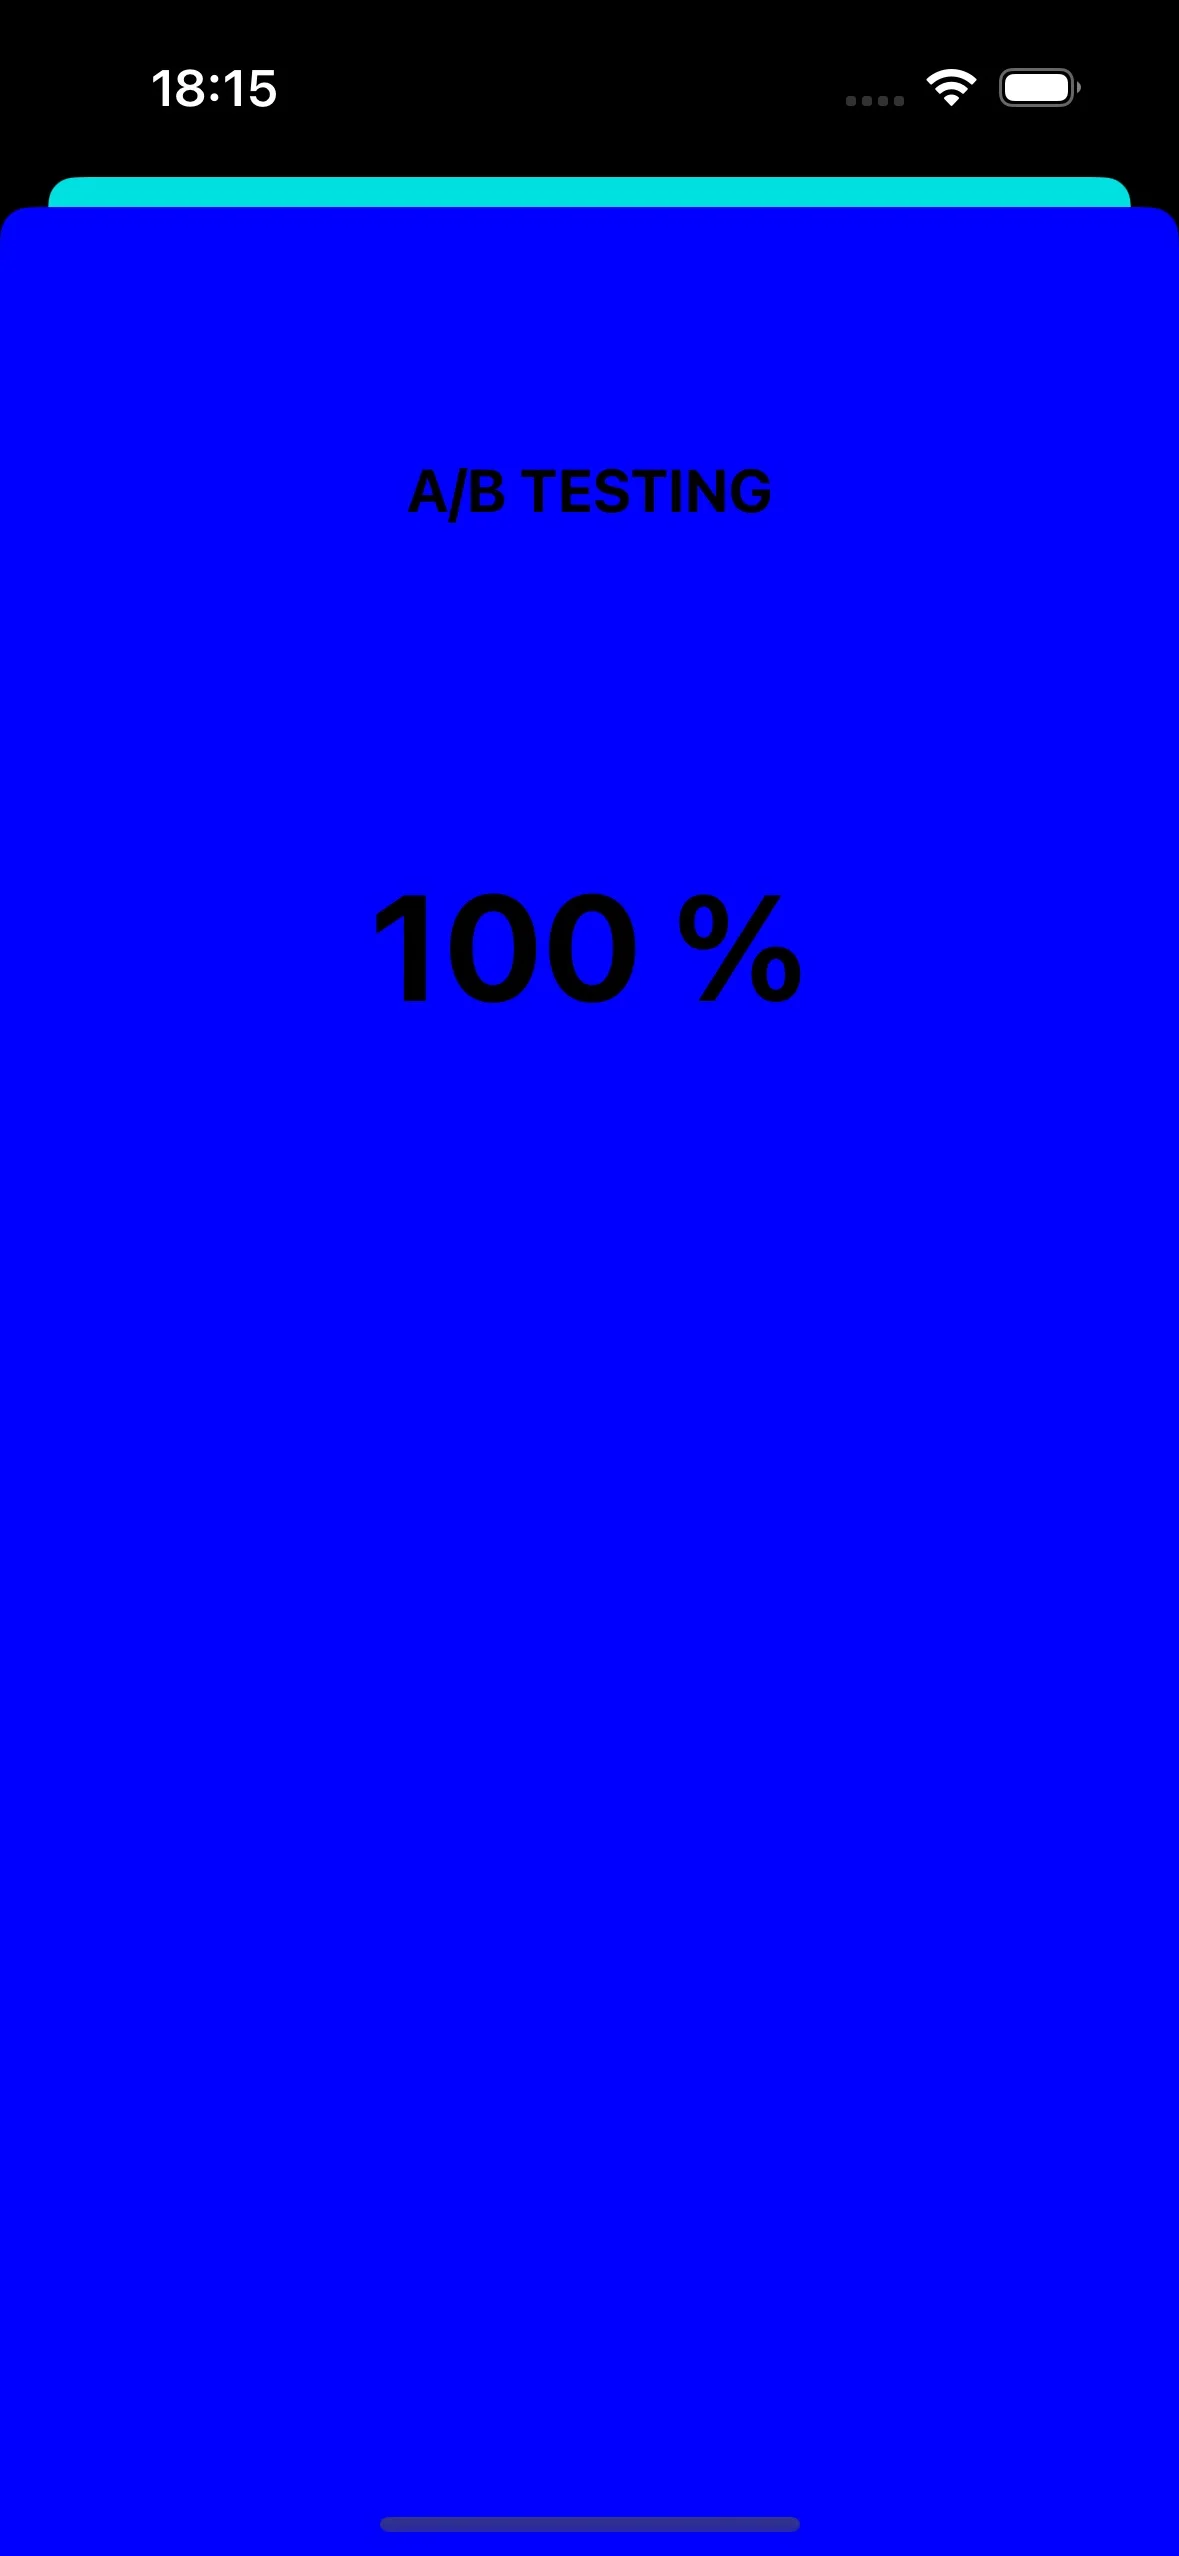
পুশ নোটিফিকেশনের মাধ্যমে অ্যাপ আইকন পরিবর্তন করা
Anchor link toiOS-এ আমরা কীভাবে পুশ নোটিফিকেশন ব্যবহার করতে পারি তার আরেকটি উদাহরণ হল অ্যাপ আইকন পরিবর্তন করা।
প্রথমে, আসুন অ্যাসেটে তিনটি ভিন্ন আইকন যোগ করি। একটি ডিফল্ট অ্যাপ আইকন হিসেবে ব্যবহৃত হবে, আর অন্য দুটি পুশ নোটিফিকেশনের কাস্টম ডেটার উপর ভিত্তি করে পরিবর্তিত হবে।

আপনার iOS অ্যাপ্লিকেশনে বিকল্প অ্যাপ আইকন সক্রিয় করতে, আপনাকে Info.plist ফাইলে প্রয়োজনীয় কনফিগারেশন যোগ করতে হবে। এটি করার জন্য এখানে ধাপগুলি দেওয়া হল:
<key>CFBundleIcons</key><dict> <key>CFBundleAlternateIcons</key> <dict> <key>AppIcon-2</key> <dict> <key>CFBundleIconFiles</key> <array> <string>Icon-2</string> </array> <key>UIPrerenderedIcon</key> <true/> </dict> <key>AppIcon-3</key> <dict> <key>CFBundleIconFiles</key> <array> <string>Icon-3</string> </array> <key>UIPrerenderedIcon</key> <true/> </dict> </dict> <key>CFBundlePrimaryIcon</key> <dict> <key>CFBundleIconFiles</key> <array> <string>Icon-1</string> </array> <key>UIPrerenderedIcon</key> <true/> </dict></dict>pushwoosh(_ pushwoosh: Pushwoosh, onMessageOpened message: PWMessage) কলব্যাকে, আপনি পুশ নোটিফিকেশনে প্রাপ্ত কাস্টম ডেটার উপর ভিত্তি করে অ্যাপ আইকন পরিবর্তন করার জন্য কোড যোগ করতে পারেন। এখানে আপনি এটি কীভাবে ইমপ্লিমেন্ট করতে পারেন তা দেখানো হলো:
func pushwoosh(_ pushwoosh: Pushwoosh, onMessageOpened message: PWMessage) {    // MARK: - অ্যাপ আইকন ডাইনামিকভাবে পরিবর্তন করুন    guard let customDataJson = message.customData,          let appIcon = customDataJson["i"] as? String else {              return          }
    UIApplication.shared.setAlternateIconName(appIcon) { error in        if let error = error {            print(error.localizedDescription)        } else {            print("Success!")        }    }}
JSON কোড যোগ করুন:
{ "i": "AppIcon-2"}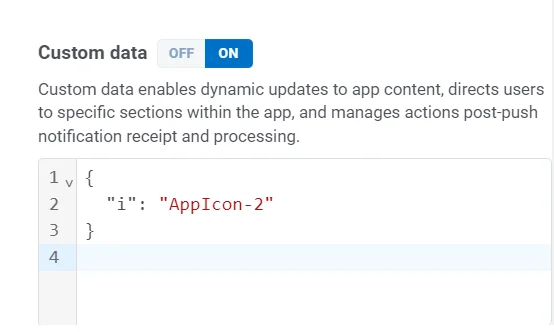
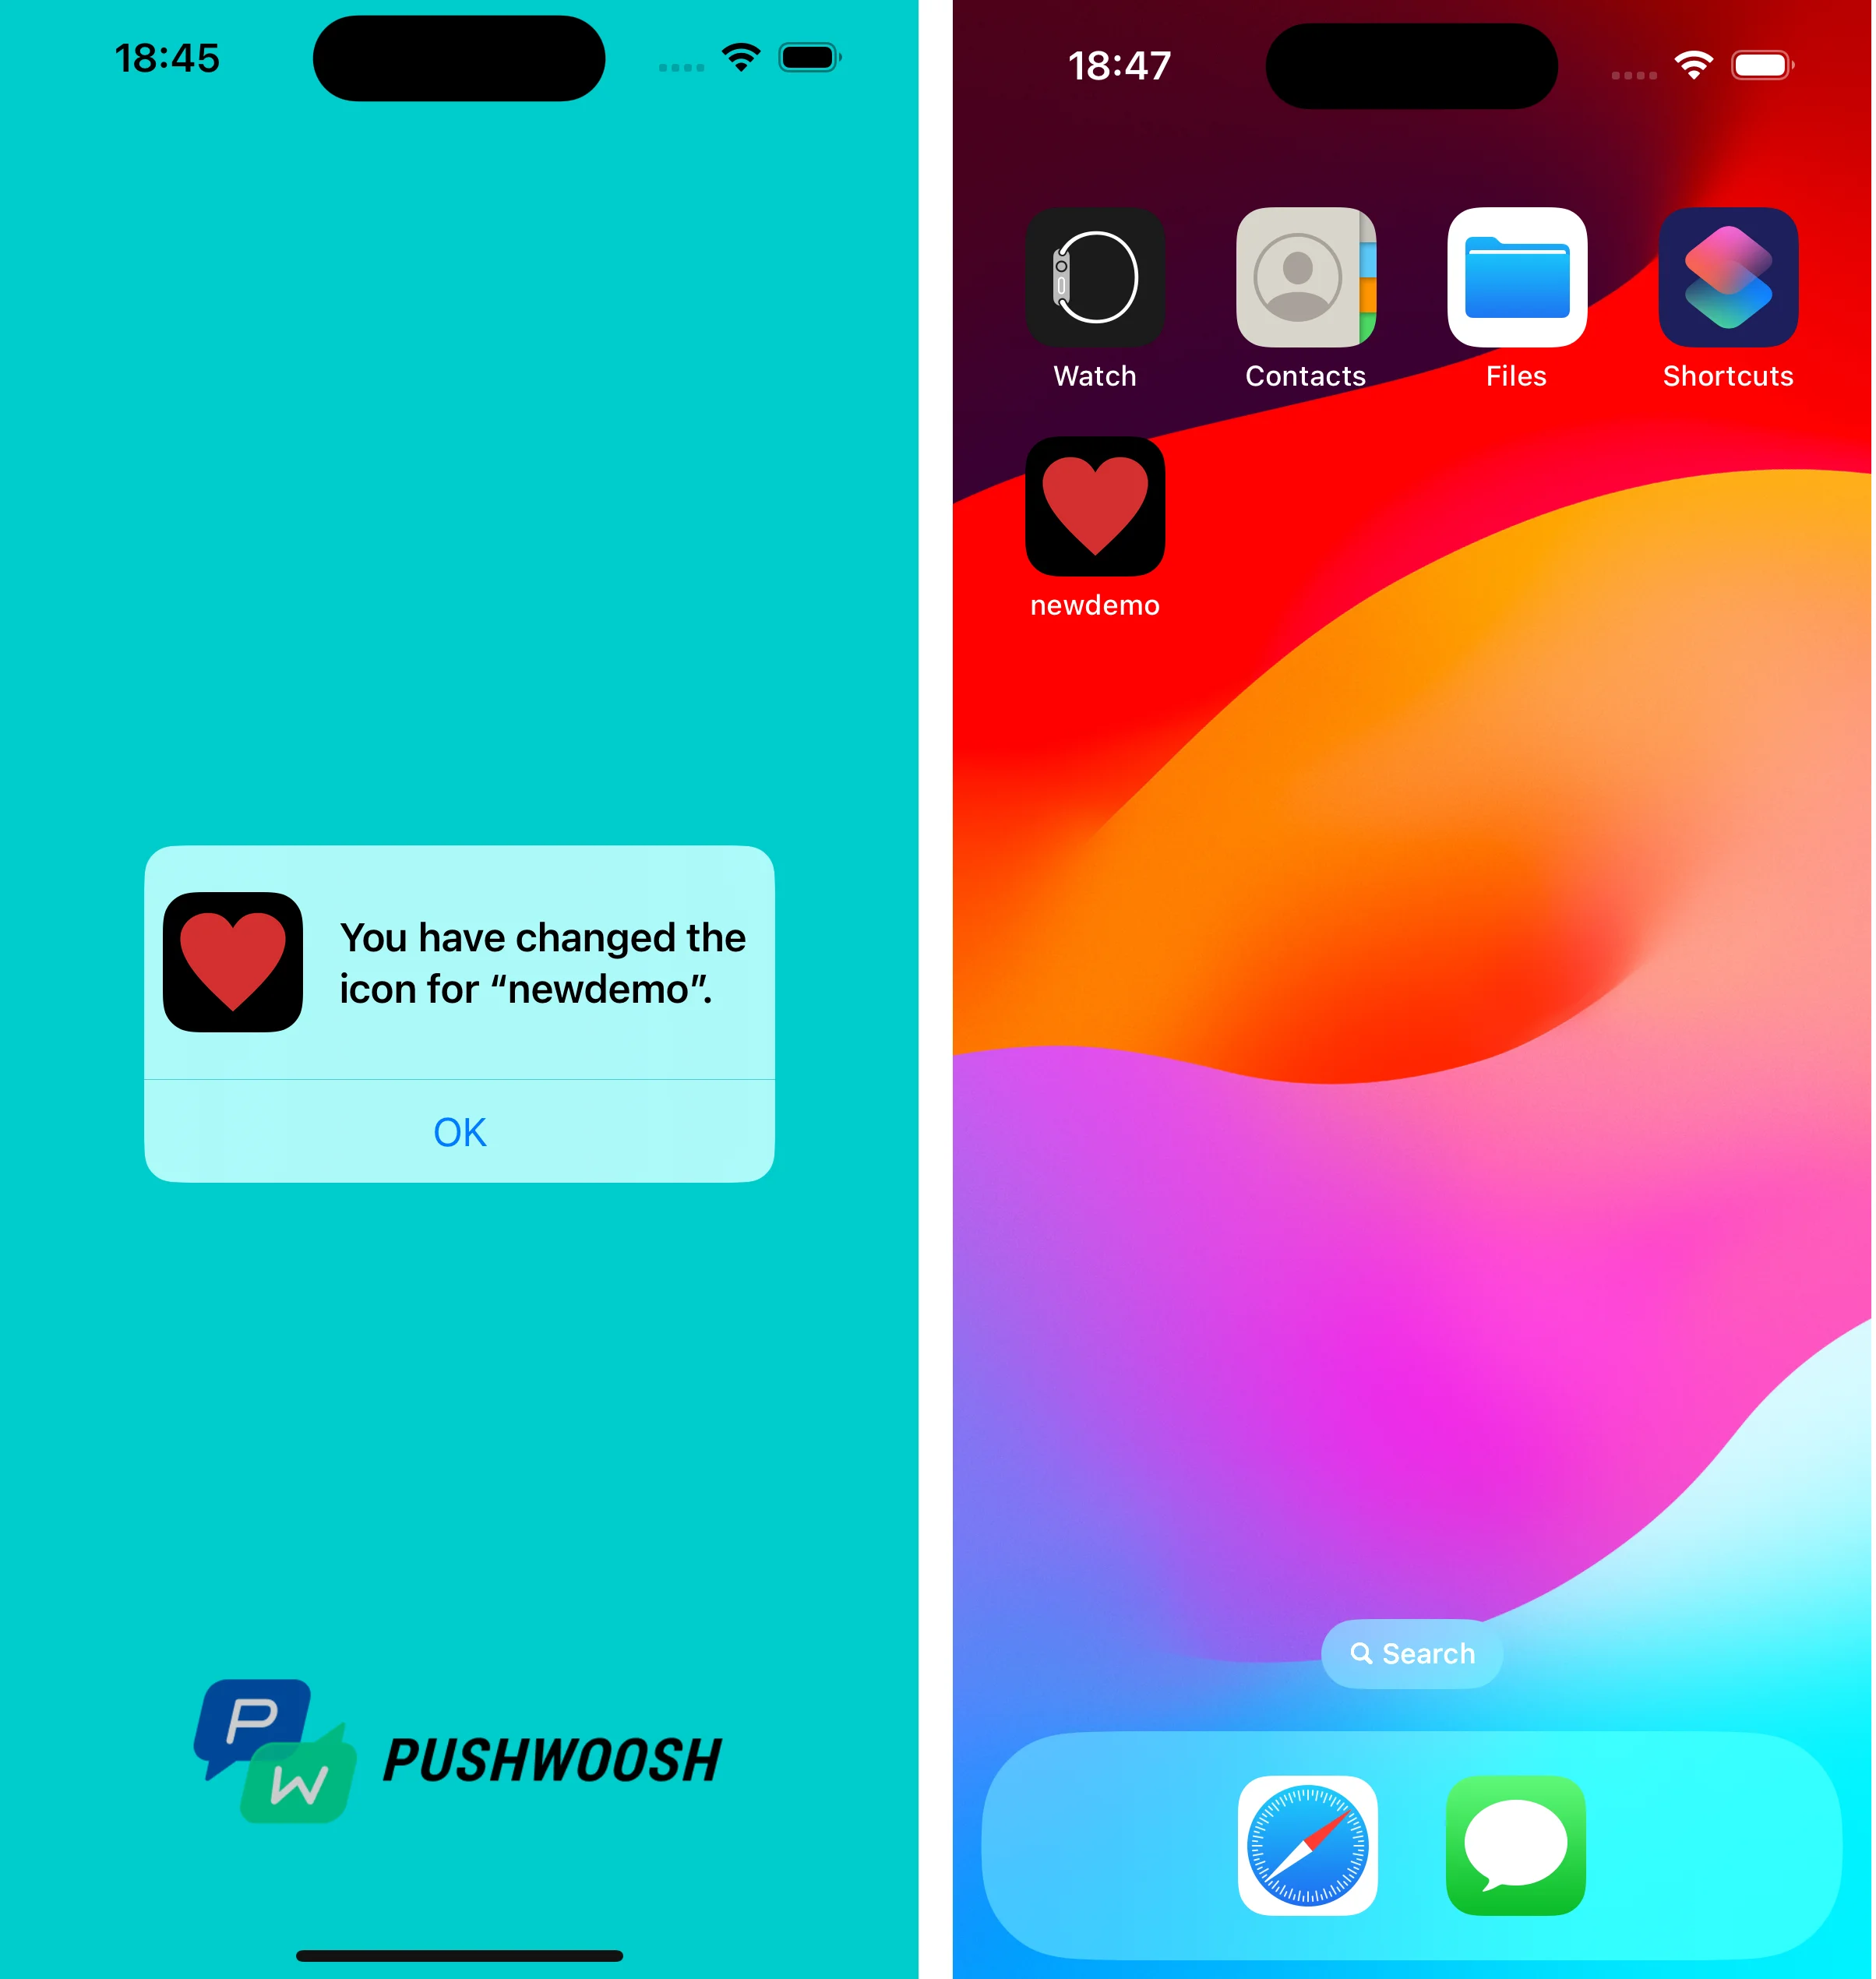
পুশ নোটিফিকেশনে ট্যাপ করার সময়, সিস্টেম আপনাকে ডিভাইসে অ্যাপ আইকন পরিবর্তন করার জন্য অনুরোধ করবে।
আপনি GitHub-এ কাস্টম ডেটা ব্যবহারকারী প্রকল্পটি খুঁজে পেতে পারেন।